Webhooks
Webhooks can be used to notify your own application of deployment status changes and alerts. They are configured per project.
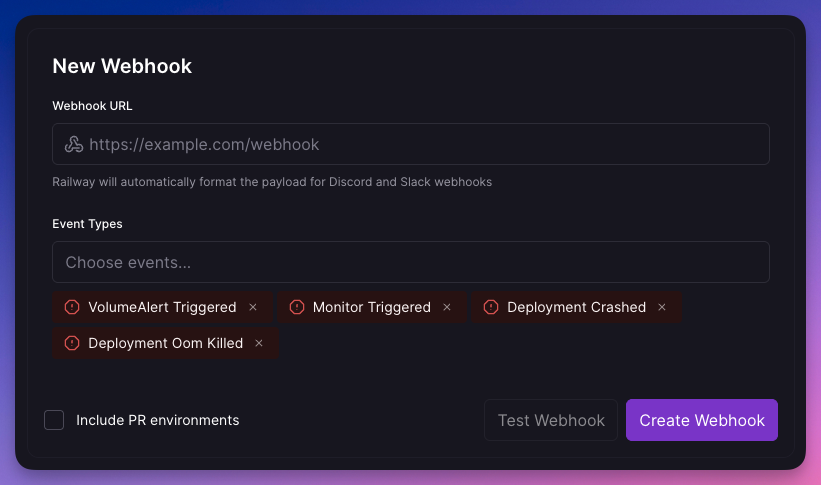
Setup a webhook
Complete the following steps to setup a webhook:
- Open an existing Project on Railway.
- Click on the
Settingsbutton in the top right-hand corner. - Navigate to the Webhooks tab.
- Input your desired webhook URL.
- Optional: add custom headers (a name and a value per row) that Railway sends with every request, for example an
Authorizationtoken. See Custom headers. - Optional: specify which events to receive notifications for.
- Click
Save Webhook.
The URL you provide will receive a webhook payload when any service's deployment status changes or an alert is triggered. This will be executed across all environments in the project.
Platform events
Webhooks can be used to receive notifications for a variety of events on the platform:
- Deployment status changes - Available deployment states can be found in the Deployments reference.
- Volume usage alerts - Notifications when volumes approach capacity.
- CPU/RAM monitor alerts - Notifications when resource usage exceeds thresholds.
Webhook payload
When an event occurs, Railway sends a JSON payload to your configured webhook URL.
Example payload
{
  "type": "Deployment.failed",
  "details": {
    "id": "8107edff-4b8e-44fc-b43a-04566e847a2a",
    "source": "GitHub",
    "status": "SUCCESS",
    "branch": "...",
    "commitHash": "...",
    "commitAuthor": "...",
    "commitMessage": "...",
  },
  "resource": {
    "workspace": { "id": "<workspace id>", "name": "<workspace name>" },
    "project": { "id": "<project id>", "name": "<project name>" },
    "environment": { "id": "<environment id>", "name": "<environment name>", "isEphemeral": false },
    "service": { "id": "<service id>", "name": "<service name>" },
    "deployment": { "id": "<deployment id>" }
  },
  "severity": "WARNING",
  "timestamp": "2025-11-21T23:48:42.311Z"
}
Delivery
Railway delivers each event as an HTTP POST to your webhook URL:
- Timeout - each delivery attempt has a 30-second timeout.
- Retries - a failed delivery is retried up to 3 times with exponential backoff. A delivery counts as successful on any
2xxor3xxresponse; any other status, a timeout, or a connection error is treated as a failure. - Best-effort - delivery is not guaranteed and events are not ordered. Treat a webhook as a prompt to act, not a source of truth. When you need certainty, reconcile against the public API.
- Persistent failures - if a URL fails repeatedly (currently 100 failures within a 6-hour window), Railway temporarily stops sending to it for 24 hours to avoid wasting retries on a dead endpoint.
Verifying the sender
Webhook payloads are not cryptographically signed. To confirm a request came from Railway, add a custom header with a secret value — for example Authorization: Bearer <token> or an X-Webhook-Secret header — and reject any request that does not carry it. If your receiver cannot read headers, a hard-to-guess path segment or query parameter in the webhook URL works too, but URLs tend to end up in access logs.
Custom headers
A webhook can carry up to 20 custom HTTP headers. Railway sends them with every delivery and with Test Webhook. Use them for whatever your receiver needs to trust or route the request: a bearer token, an API key, a shared secret, or a header your gateway routes on.
Add them in the Custom headers section of the webhook form, one name and one value per row. Header values are stored encrypted and are never shown again: after you save, a row shows its name with an Unchanged placeholder in the value field. Leaving that field empty keeps the stored value on the next save; typing a new value replaces it. Remove a row to stop sending that header. The list of webhooks shows header names only.
Header names use the usual HTTP token characters (letters, digits, - and _) and can be up to 128 characters; values can be up to 4096 characters and cannot contain line breaks. A few names are refused because Railway sets them itself: Host, Content-Type, Content-Length, the hop-by-hop headers (Transfer-Encoding, Connection, Keep-Alive, Upgrade, TE, Trailer, Expect), and anything starting with Proxy- or X-Railway-. Two names that differ only in case count as a duplicate. The form flags a bad row as you type and keeps Save and Test Webhook disabled until it is fixed.
The same headers can be set through the MCP server with the create-webhook, update-webhook and test-webhook tools, and through the public API on the webhook channel config of notificationRuleCreate and notificationRuleUpdate. Header values are write-only there as well: reads return the names, and passing null as a value on update keeps the stored one.
Testing webhooks
The Test Webhook button sends a sample payload to the URL in the form and shows the HTTP status your endpoint answered with. The request is sent by Railway, not from your browser, and includes the custom headers in the form: rows you typed a value into use that value, and rows left unchanged use the stored value. The test times out after 10 seconds, and a connection error or timeout shows up as a failed test.
Muxers: provider-specific webhooks
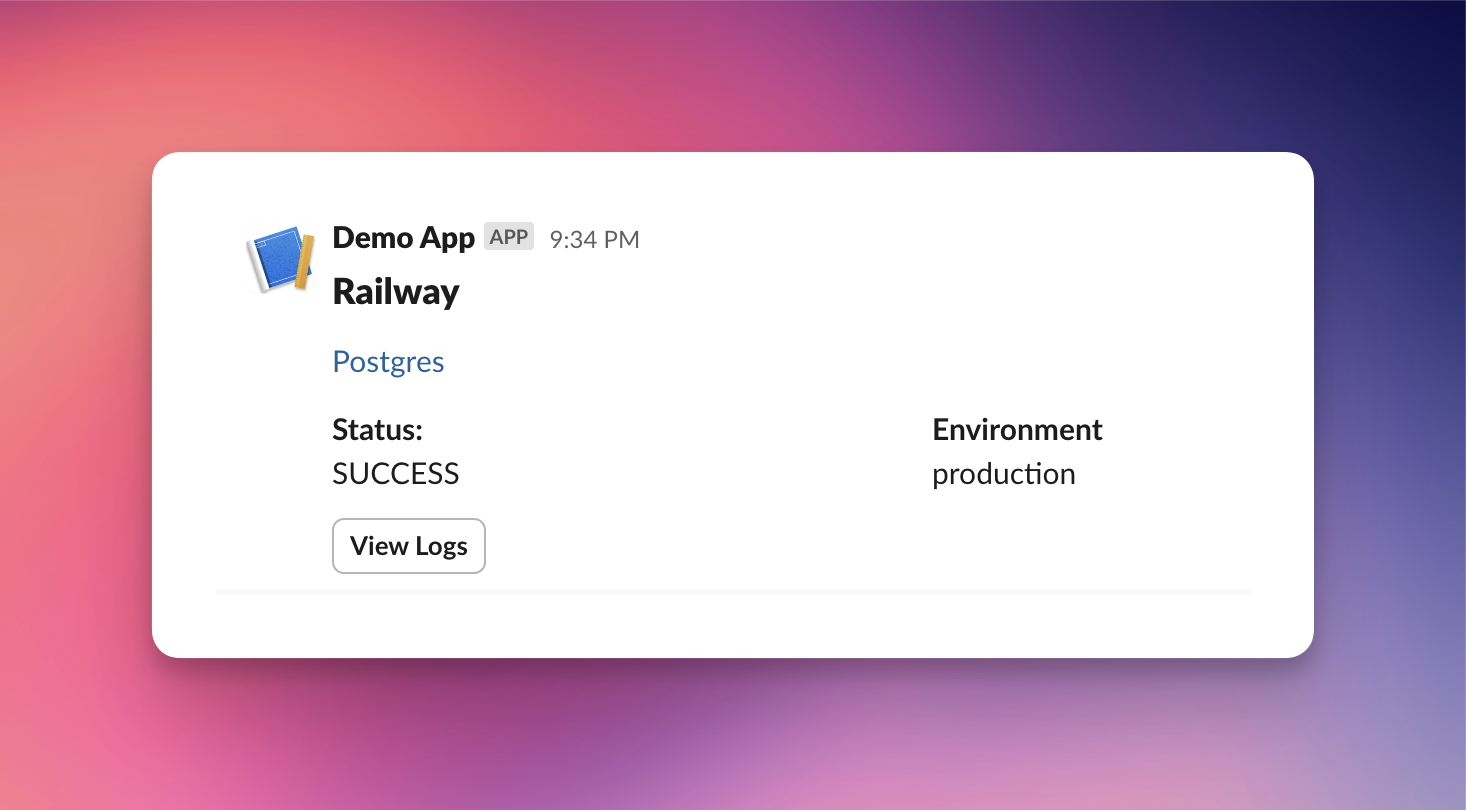
For certain webhook URLs, Railway will automatically transform the payload to match the destination (we call these Muxers). This makes it easy to use webhooks without having to write your own middleware to format the request body.
Currently supported providers:
- Discord
- Slack
Setting up a webhook for discord
Discord supports integrating directly with webhooks. To enable this on a server you will need to be an admin or otherwise have the appropriate permissions.
- On Discord, open the settings for a server text channel. This menu can be accessed via the cogwheel/gear icon where the channel is listed on the server.
- Click on the integrations tab.
- Click on the webhooks option.
- You will see an option to create a new webhook, click this button and fill out your preferred bot name and channel.
- Once created, you will have the option to copy the new webhook URL. Copy that URL.
- Back in Railway, open the project you wish to integrate with.
- Click on the project's deployments menu.
- Navigate to the settings tab.
- Input the copied webhook URL into the input under "Build and Deploy Webhooks".
- Click the checkmark to the right of the input to save.
At this point, the Discord Muxer will identify the URL and change the payload to accommodate the Discord integration. You can see this if you expand the payload preview panel.
You are now done! When your project deploys again, that Discord channel will get updates on the deployment!
Setting up a webhook for slack
Slack supports integrating directly with webhooks.
- Enable incoming webhooks for your Slack instance (Tutorial here)
- Generate a
hooks.slack.comwebhook URL for your channel (Tutorial here) - Open up Railway, navigate to your project's Webhook tab.
- Paste the url from slack
Troubleshooting
Having issues with webhooks? Check out the Troubleshooting guide or reach out on Central Station.