---
title: Deploy a Spring Boot App
description: Learn how to deploy a Spring Boot app to Railway with this step-by-step guide. It covers quick setup, one-click deploys, Dockerfile and other deployment strategies.
---
[Spring Boot](https://spring.io/projects/spring-boot) is a Java framework designed to simplify the creation of stand-alone, production-ready Spring applications that are easy to run right out of the box.
This guide covers how to deploy a Spring Boot app to Railway in four ways:
1. [One-click deploy from a template](#one-click-deploy-from-a-template).
2. [From a GitHub repository](#deploy-from-a-github-repo).
3. [Using the CLI](#deploy-from-the-cli).
4. [Using a Dockerfile](#use-a-dockerfile).
Now, let's create a Spring Boot app!
## Create a Spring Boot app
**Note:** If you already have a Spring Boot app locally or on GitHub, you can skip this step and go straight to the [Deploy Spring Boot App to Railway](#deploy-the-spring-boot-app-to-railway).
To create a new Spring Boot app, ensure that you have [JDK](https://www.oracle.com/java/technologies/downloads/) installed on your machine.
Go to [start.spring.io](https://start.spring.io) to initialize a new Spring Boot app. Select the options below to customize and generate your starter app.
- Project: Maven
- Language: Java
- Spring Boot: 3.3.4
- Project Metadata:
- Group: com.railwayguide
- Artifact: helloworld
- Name: helloworld
- Description: Demo project for Railway Guide
- Package name: com.railwayguide.helloworld
- Packaging: jar
- Java: 17
- Dependencies:
- Click the **Add Dependencies** button and search for **Spring Web**. Select it.
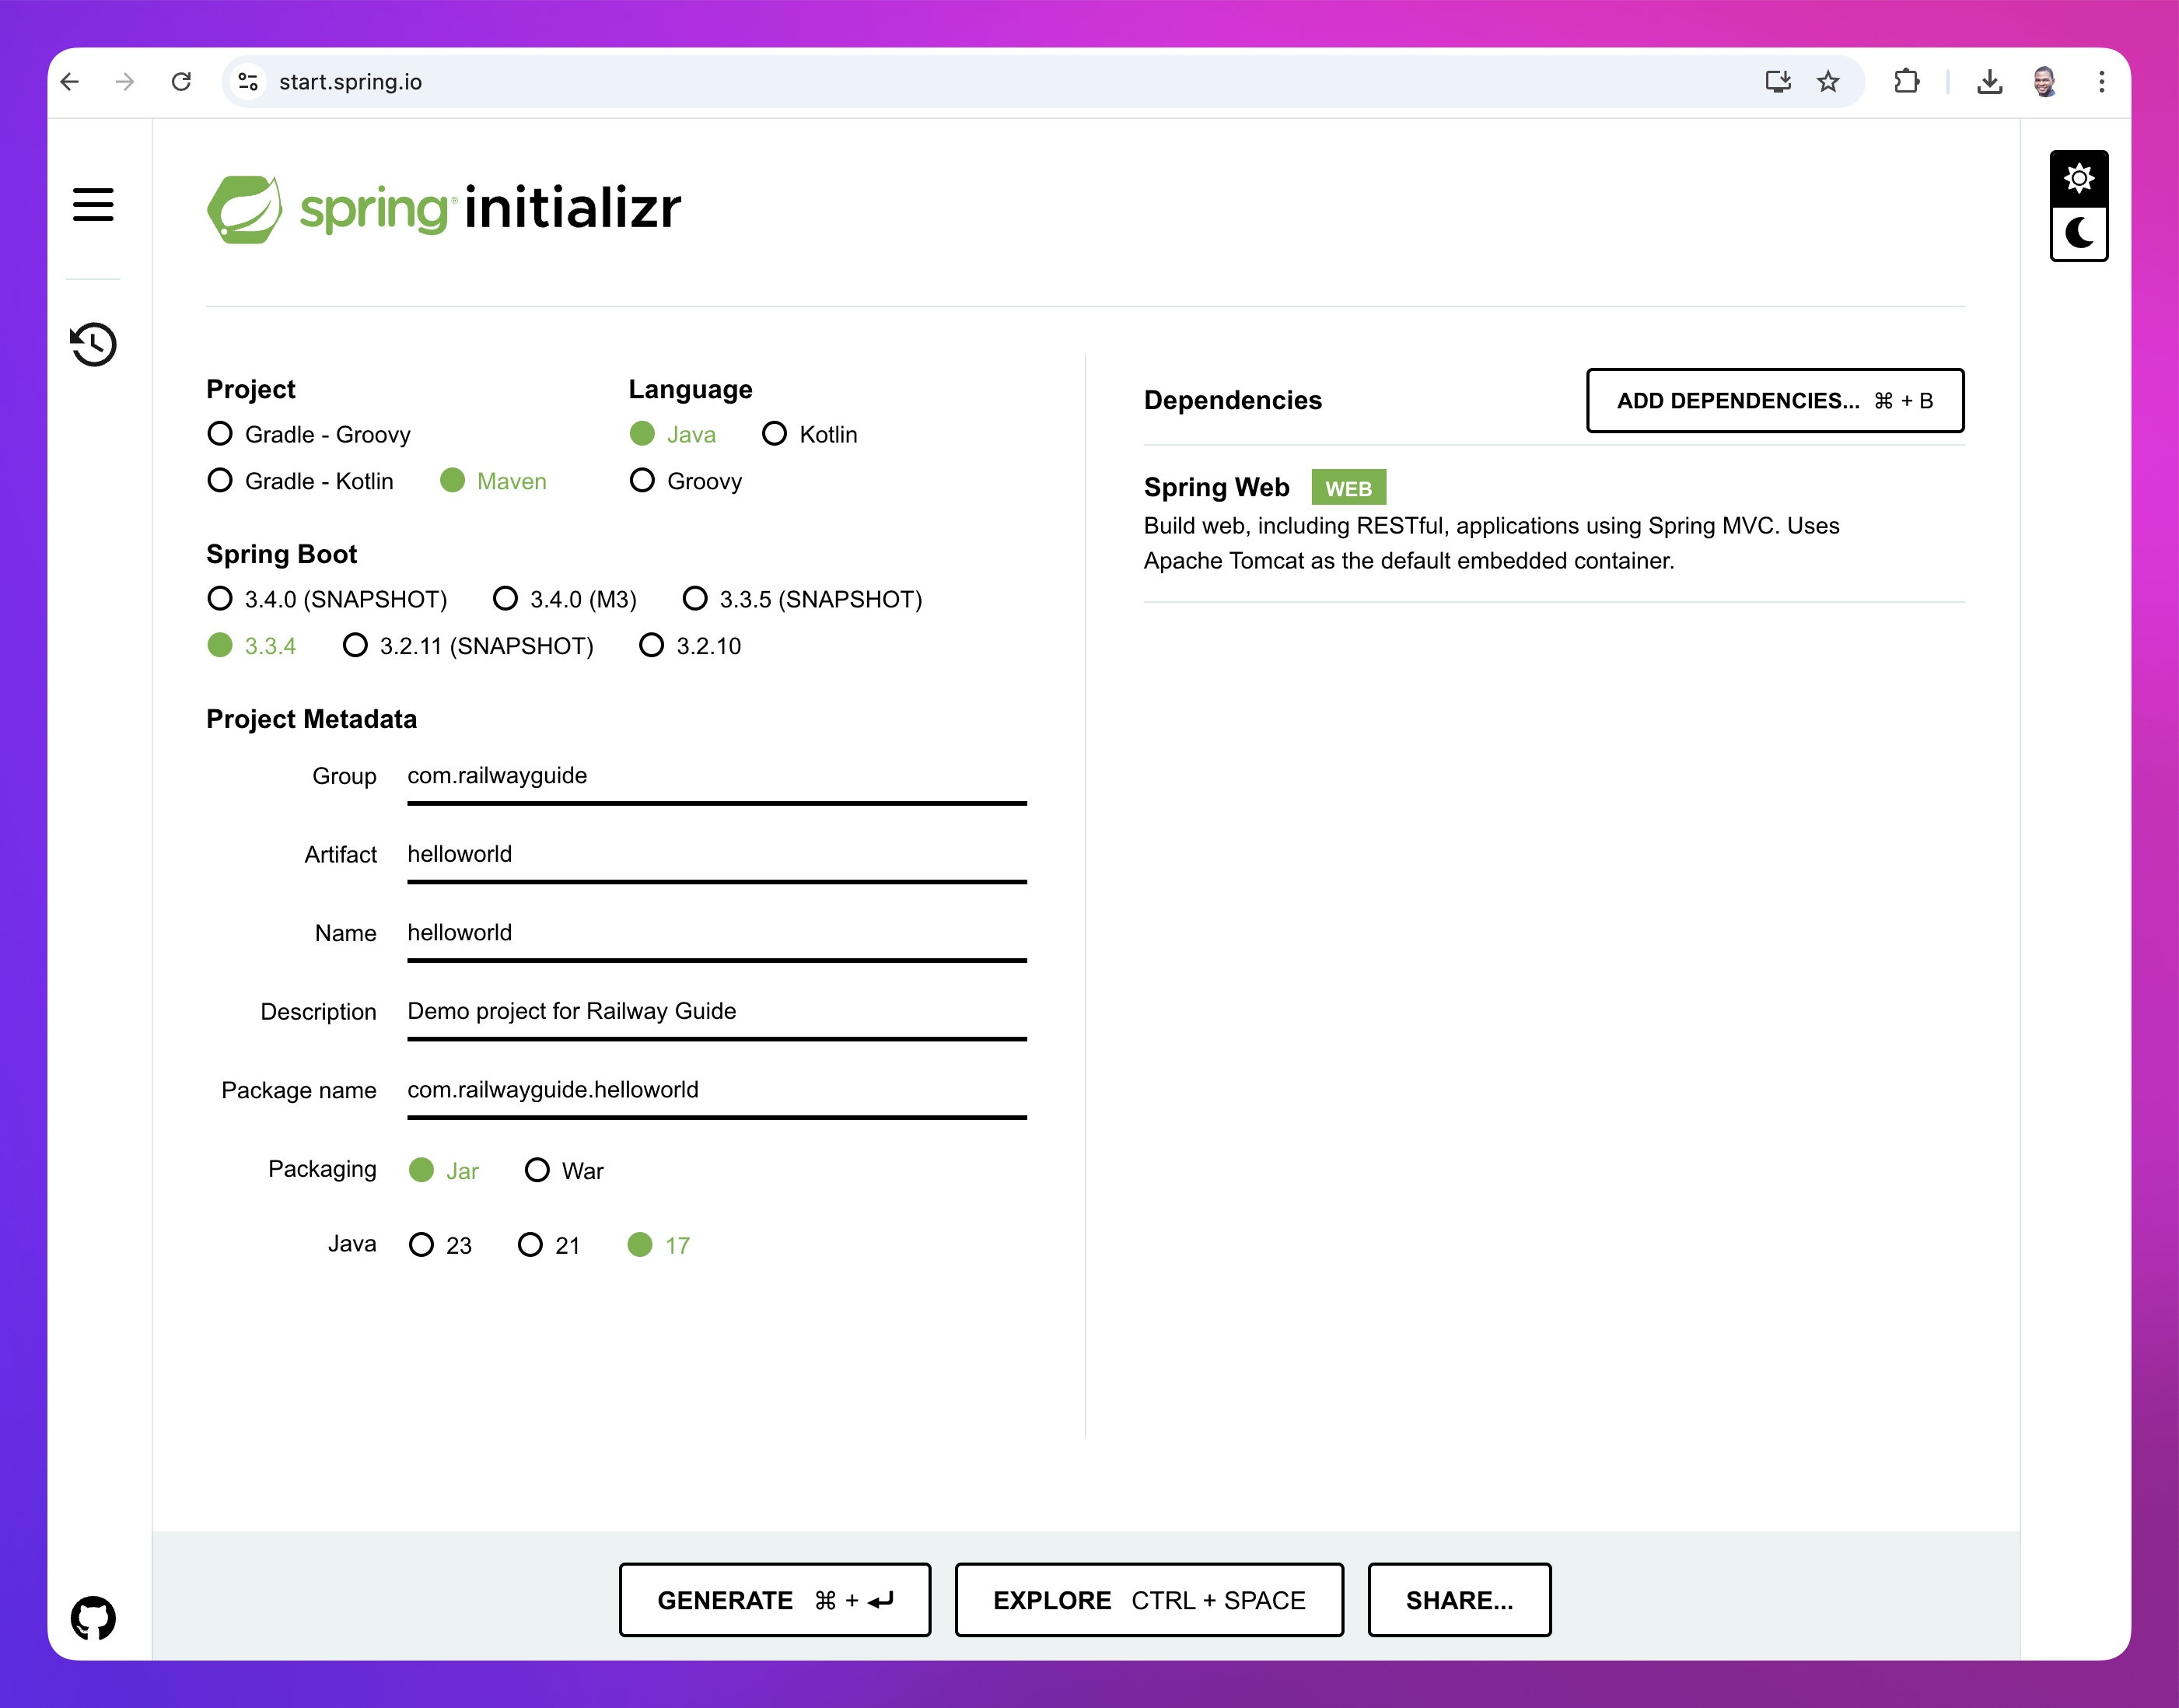
_Config to initialize your new app_
Now, click on the **Generate** button, download the zipped file and unpack it into a folder on your machine.
### Modify the application file
Next, open the app in your IDE and navigate to the `src/main/java/com/railwayguide/helloworld/HelloWorldApplication.java` file.
Replace the content with the code below:
```java
package com.railwayguide.helloworld;
import org.springframework.boot.SpringApplication;
import org.springframework.boot.autoconfigure.SpringBootApplication;
import org.springframework.web.bind.annotation.GetMapping;
import org.springframework.web.bind.annotation.RestController;
@SpringBootApplication
@RestController
public class HelloworldApplication {
public static void main(String[] args) {
SpringApplication.run(HelloworldApplication.class, args);
}
@GetMapping("/")
public String hello() {
return String.format("Hello world from Java Spring Boot!");
}
}
```
A `hello()` method was added that returns the response: `Hello world from Java Spring Boot!`.
The `@RestController` annotation designates this class as a web controller, while `@GetMapping("/")` maps the `hello()` method to handle requests sent to the root URL, `/`.
### Run the Spring Boot app locally
Next, `cd` into the `helloworld` directory via the terminal and run the following Maven command:
```bash
./mvnw spring-boot:run
```
**Note:** This is a Maven wrapper for Linux and macOS, which uses a bundled version of Maven from **.mvn/wrapper/maven-wrapper.jar** instead of relying on the system-installed version.
Open your browser and go to `http://localhost:8080` to see your app.
## Deploy the Spring Boot app to Railway
Railway offers multiple ways to deploy your Spring Boot app, depending on your setup and preference.
### One-click deploy from a template
If you’re looking for the fastest way to get started, the one-click deploy option is ideal.
Click the button below to begin:
[](https://railway.com/new/template/-NFGrr)
It is highly recommended that [you eject from the template after deployment](/templates/deploy#eject-from-template-repository) to create a copy of the repo on your GitHub account.
**Note:** You can also choose from a variety of Spring Boot app templates created by the community.
### Deploy from the CLI
1. **Install the Railway CLI**:
- Install the CLI and authenticate it using your Railway account.
2. **Initialize a Railway Project**:
- Run the command below in your Spring Boot app directory.
```bash
railway init
```
- Follow the prompts to name your project.
- After the project is created, click the provided link to view it in your browser.
3. **Deploy the Application**:
- Use the command below to deploy your app:
```bash
railway up
```
- This command will scan, compress and upload your app's files to Railway. You’ll see real-time deployment logs in your terminal.
- Once the deployment completes, go to **View logs** to check if the service is running successfully.
4. **Set Up a Public URL**:
- Navigate to the **Networking** section under the [Settings](/overview/the-basics#service-settings) tab of your new service.
- Click [Generate Domain](/networking/public-networking#railway-provided-domain) to create a public URL for your app.
### Deploy from a GitHub repo
To deploy a Spring Boot app to Railway directly from GitHub, follow the steps below:
1. **Create a New Project on Railway**:
- Go to Railway to create a new project.
2. **Deploy from GitHub**:
- Select **Deploy from GitHub repo** and choose your repository.
- If your Railway account isn’t linked to GitHub yet, you’ll be prompted to do so.
3. **Deploy the App**:
- Click **Deploy** to start the deployment process.
- Once the deployed, a Railway [service](/services) will be created for your app, but it won’t be publicly accessible by default.
4. **Verify the Deployment**:
- Once the deployment completes, go to **View logs** to check if the server is running successfully.
**Note:** During the deployment process, Railway will automatically [detect that it’s a Java app](https://railpack.com/languages/java).
5. **Set Up a Public URL**:
- Navigate to the **Networking** section under the [Settings](/overview/the-basics#service-settings) tab of your new service.
- Click [Generate Domain](/networking/public-networking#railway-provided-domain) to create a public URL for your app.
### Use a Dockerfile
1. Create a `Dockerfile` in the `helloworld` or Spring Boot app's root directory.
2. Add the content below to the `Dockerfile`:
```bash
# Use the Eclipse temurin alpine official image
# https://hub.docker.com/_/eclipse-temurin
FROM eclipse-temurin:21-jdk-alpine
# Create and change to the app directory.
WORKDIR /app
# Copy local code to the container image.
COPY . ./
# Build the app.
RUN ./mvnw -DoutputFile=target/mvn-dependency-list.log -B -DskipTests clean dependency:list install
# Run the app by dynamically finding the JAR file in the target directory
CMD ["sh", "-c", "java -jar target/*.jar"]
```
3. Either deploy via the CLI or from GitHub.
Railway automatically detects the `Dockerfile`, [and uses it to build and deploy the app.](/builds/dockerfiles)
**Note:** Railway supports also deployment from public and private Docker images.
This guide covers the main deployment options on Railway. Choose the approach that suits your setup, and start deploying your Spring Boot apps seamlessly!
## Next steps
Explore these resources to learn how you can maximize your experience with Railway:
- [Add a Database Service](/databases/build-a-database-service)
- [Monitor your app](/observability)