Migrate from Render to Railway
This guide walks you through the steps needed to seamlessly migrate your app and data from Render to Railway.
With features like instant deployments, CI/CD integrations, private networking, observability, and effortless scaling, Railway helps developers focus on building rather than managing infrastructure.
Railway boasts of a superior and intuitive user experience that makes deploying complex workloads easy to configure and manage.
Railway offers:
- Broad Language and Framework Support: Deploy apps in any language or framework.
- Flexible Deployment Options: Use GitHub, Dockerfiles, Docker images from supported registries (Docker Hub, GitHub, RedHat, GitLab, Microsoft), or local deployments via the Railway CLI.
- Integrated Tools: Simplify environment variable management, CI/CD, observability, and service scaling.
- Networking Features: Public and private networking.
- Best in Class Support: Very active community on Discord and our Central Station.
..and so much more. Want to see for yourself? Try Railway for a spin today!
Migration Steps
In this guide, we will migrate a Go (Beego) app with a Postgres database from Render to Railway.
Here’s the link to the app. A simple chat app that have the options of Long polling and Web socket — https://github.com/unicodeveloper/beego-WebIM
1. Set Up a Railway Project
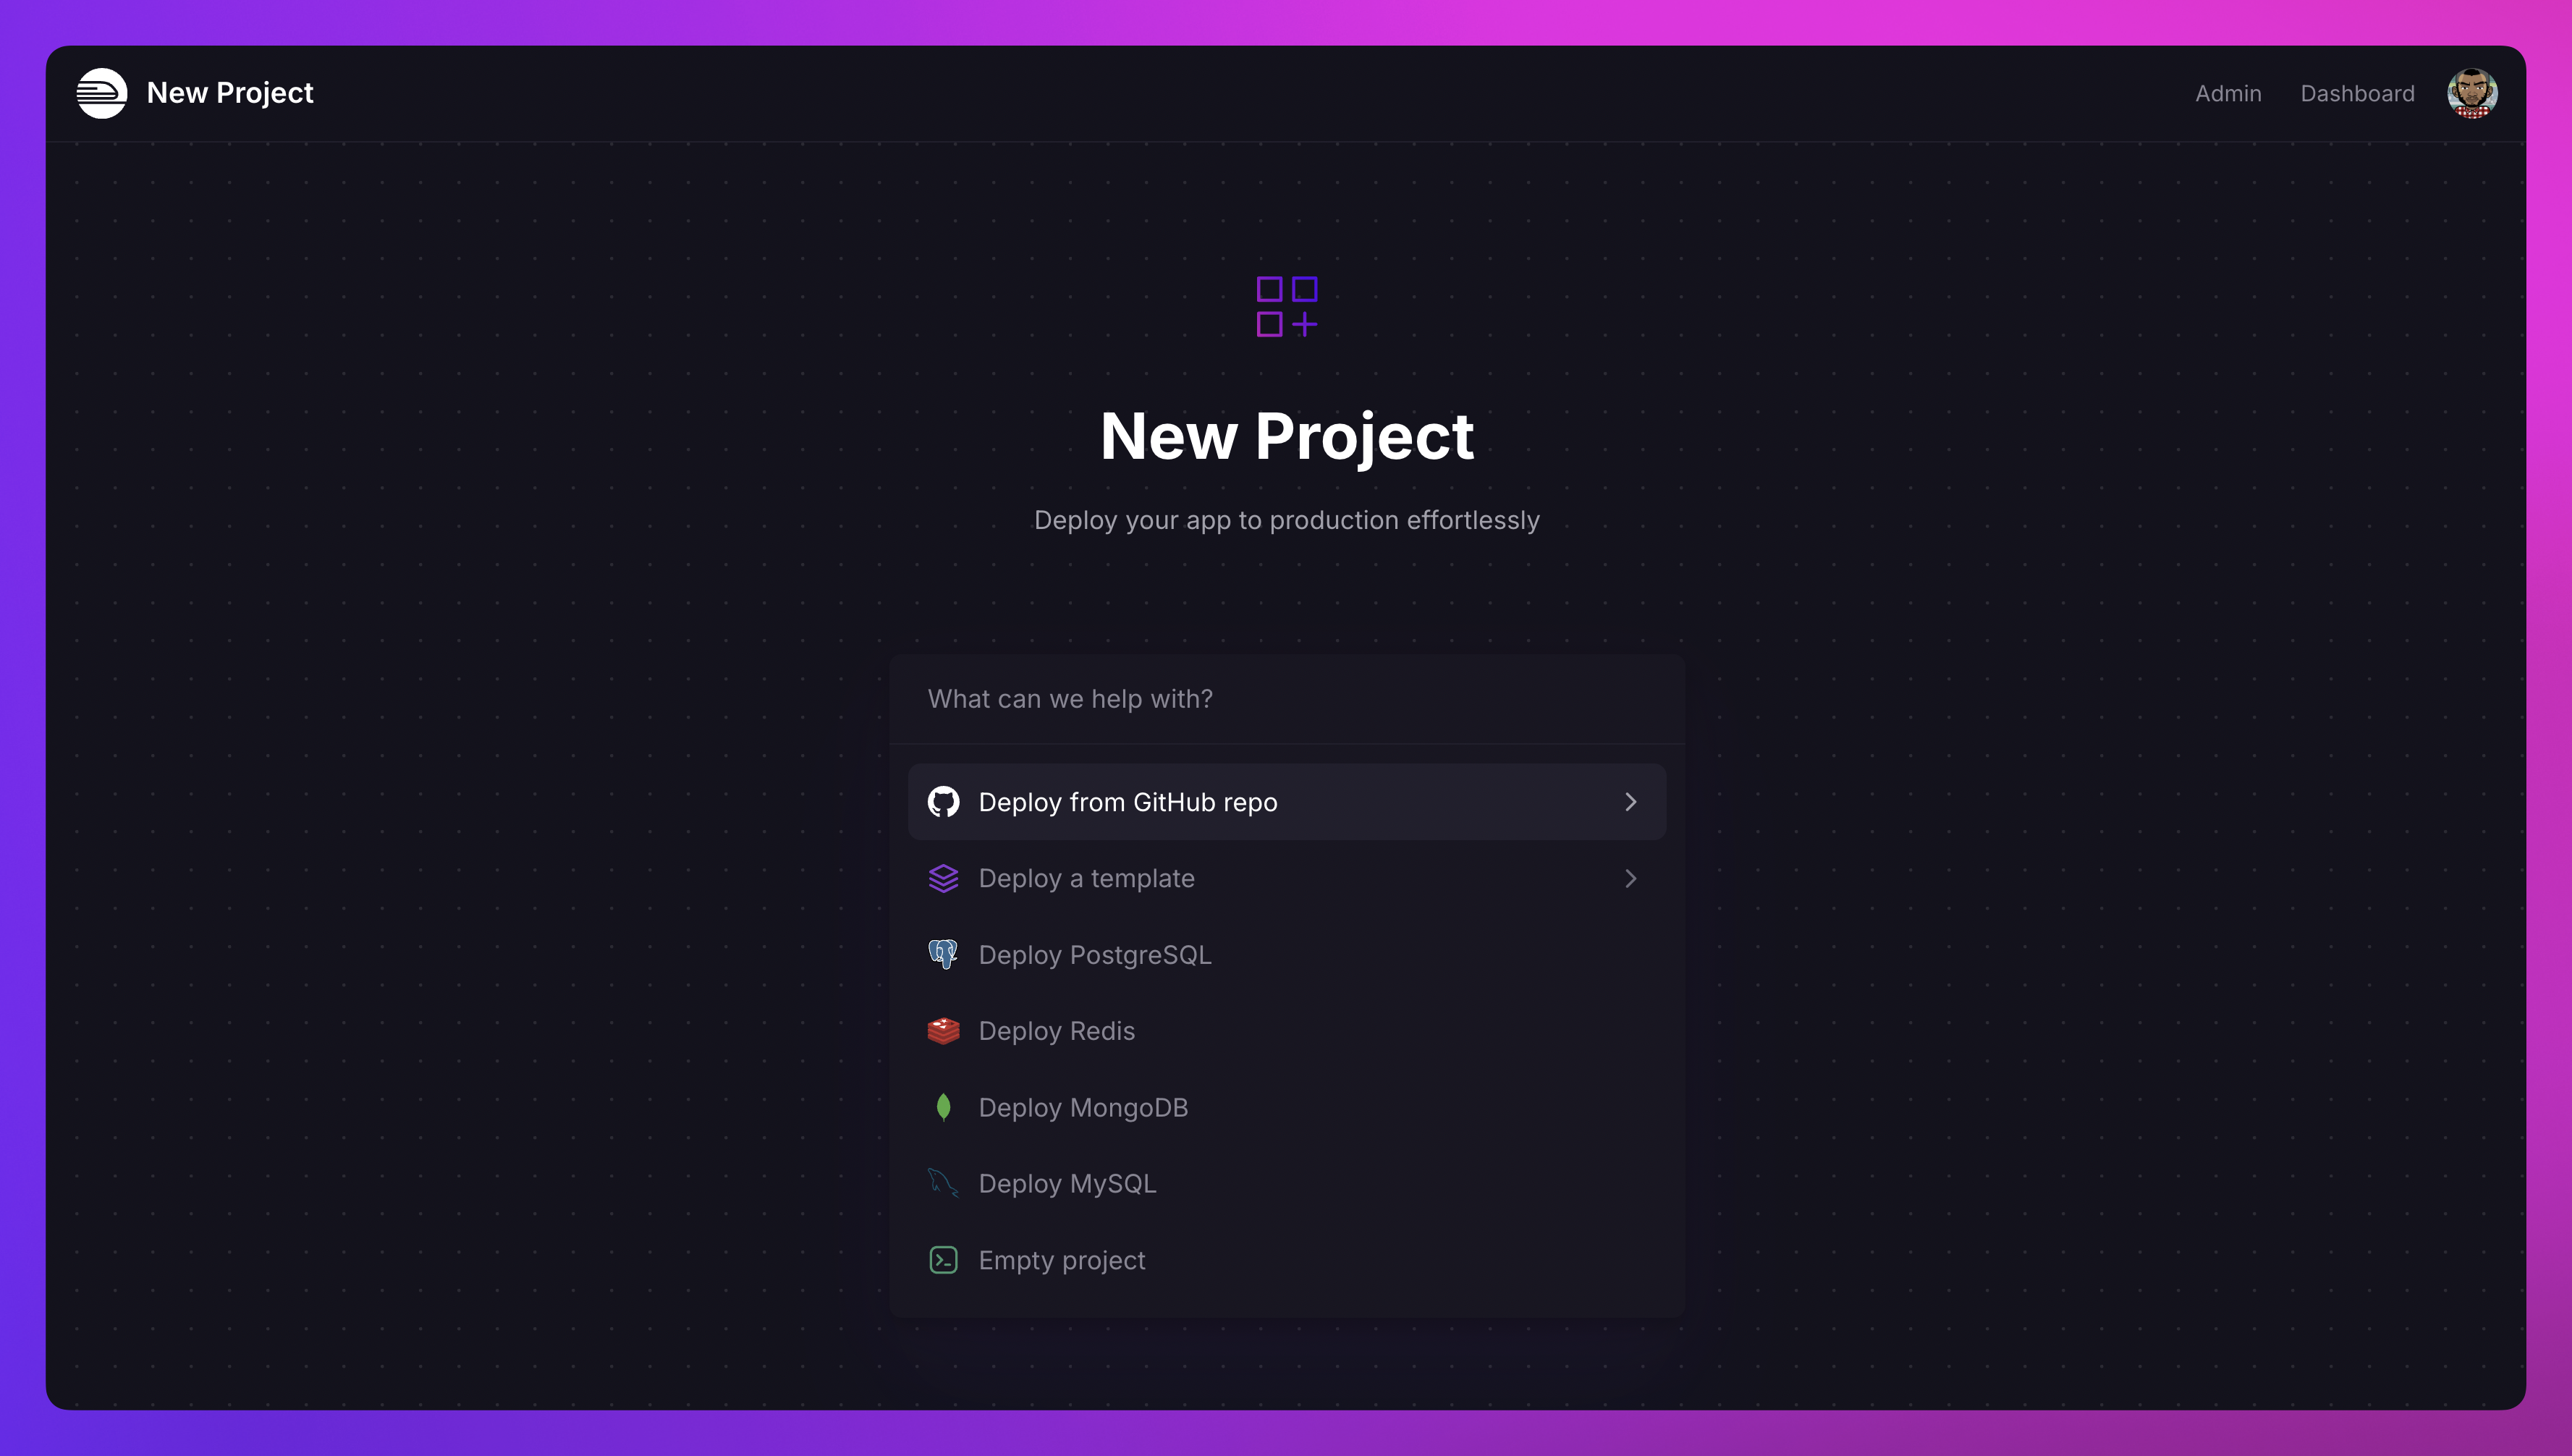
Navigate to Railway's Project Creation Page.
Select the Deploy from GitHub Repo option and connect your repository. If your Railway account isn’t linked to GitHub yet, you’ll be prompted to do so.

2. Deploy the App
Railway automatically detects a render.yaml file in your repository and provisions the corresponding services, including databases, web (both public and private), crons, and workers.
If environment variables are defined in your render.yaml, Railway will import them automatically to the appropriate services. If they are not defined, you can manually migrate them by following these steps:
On Render:
- Go to the Environment Variables page of your service.
- Copy all the variables and their values.
On Railway:
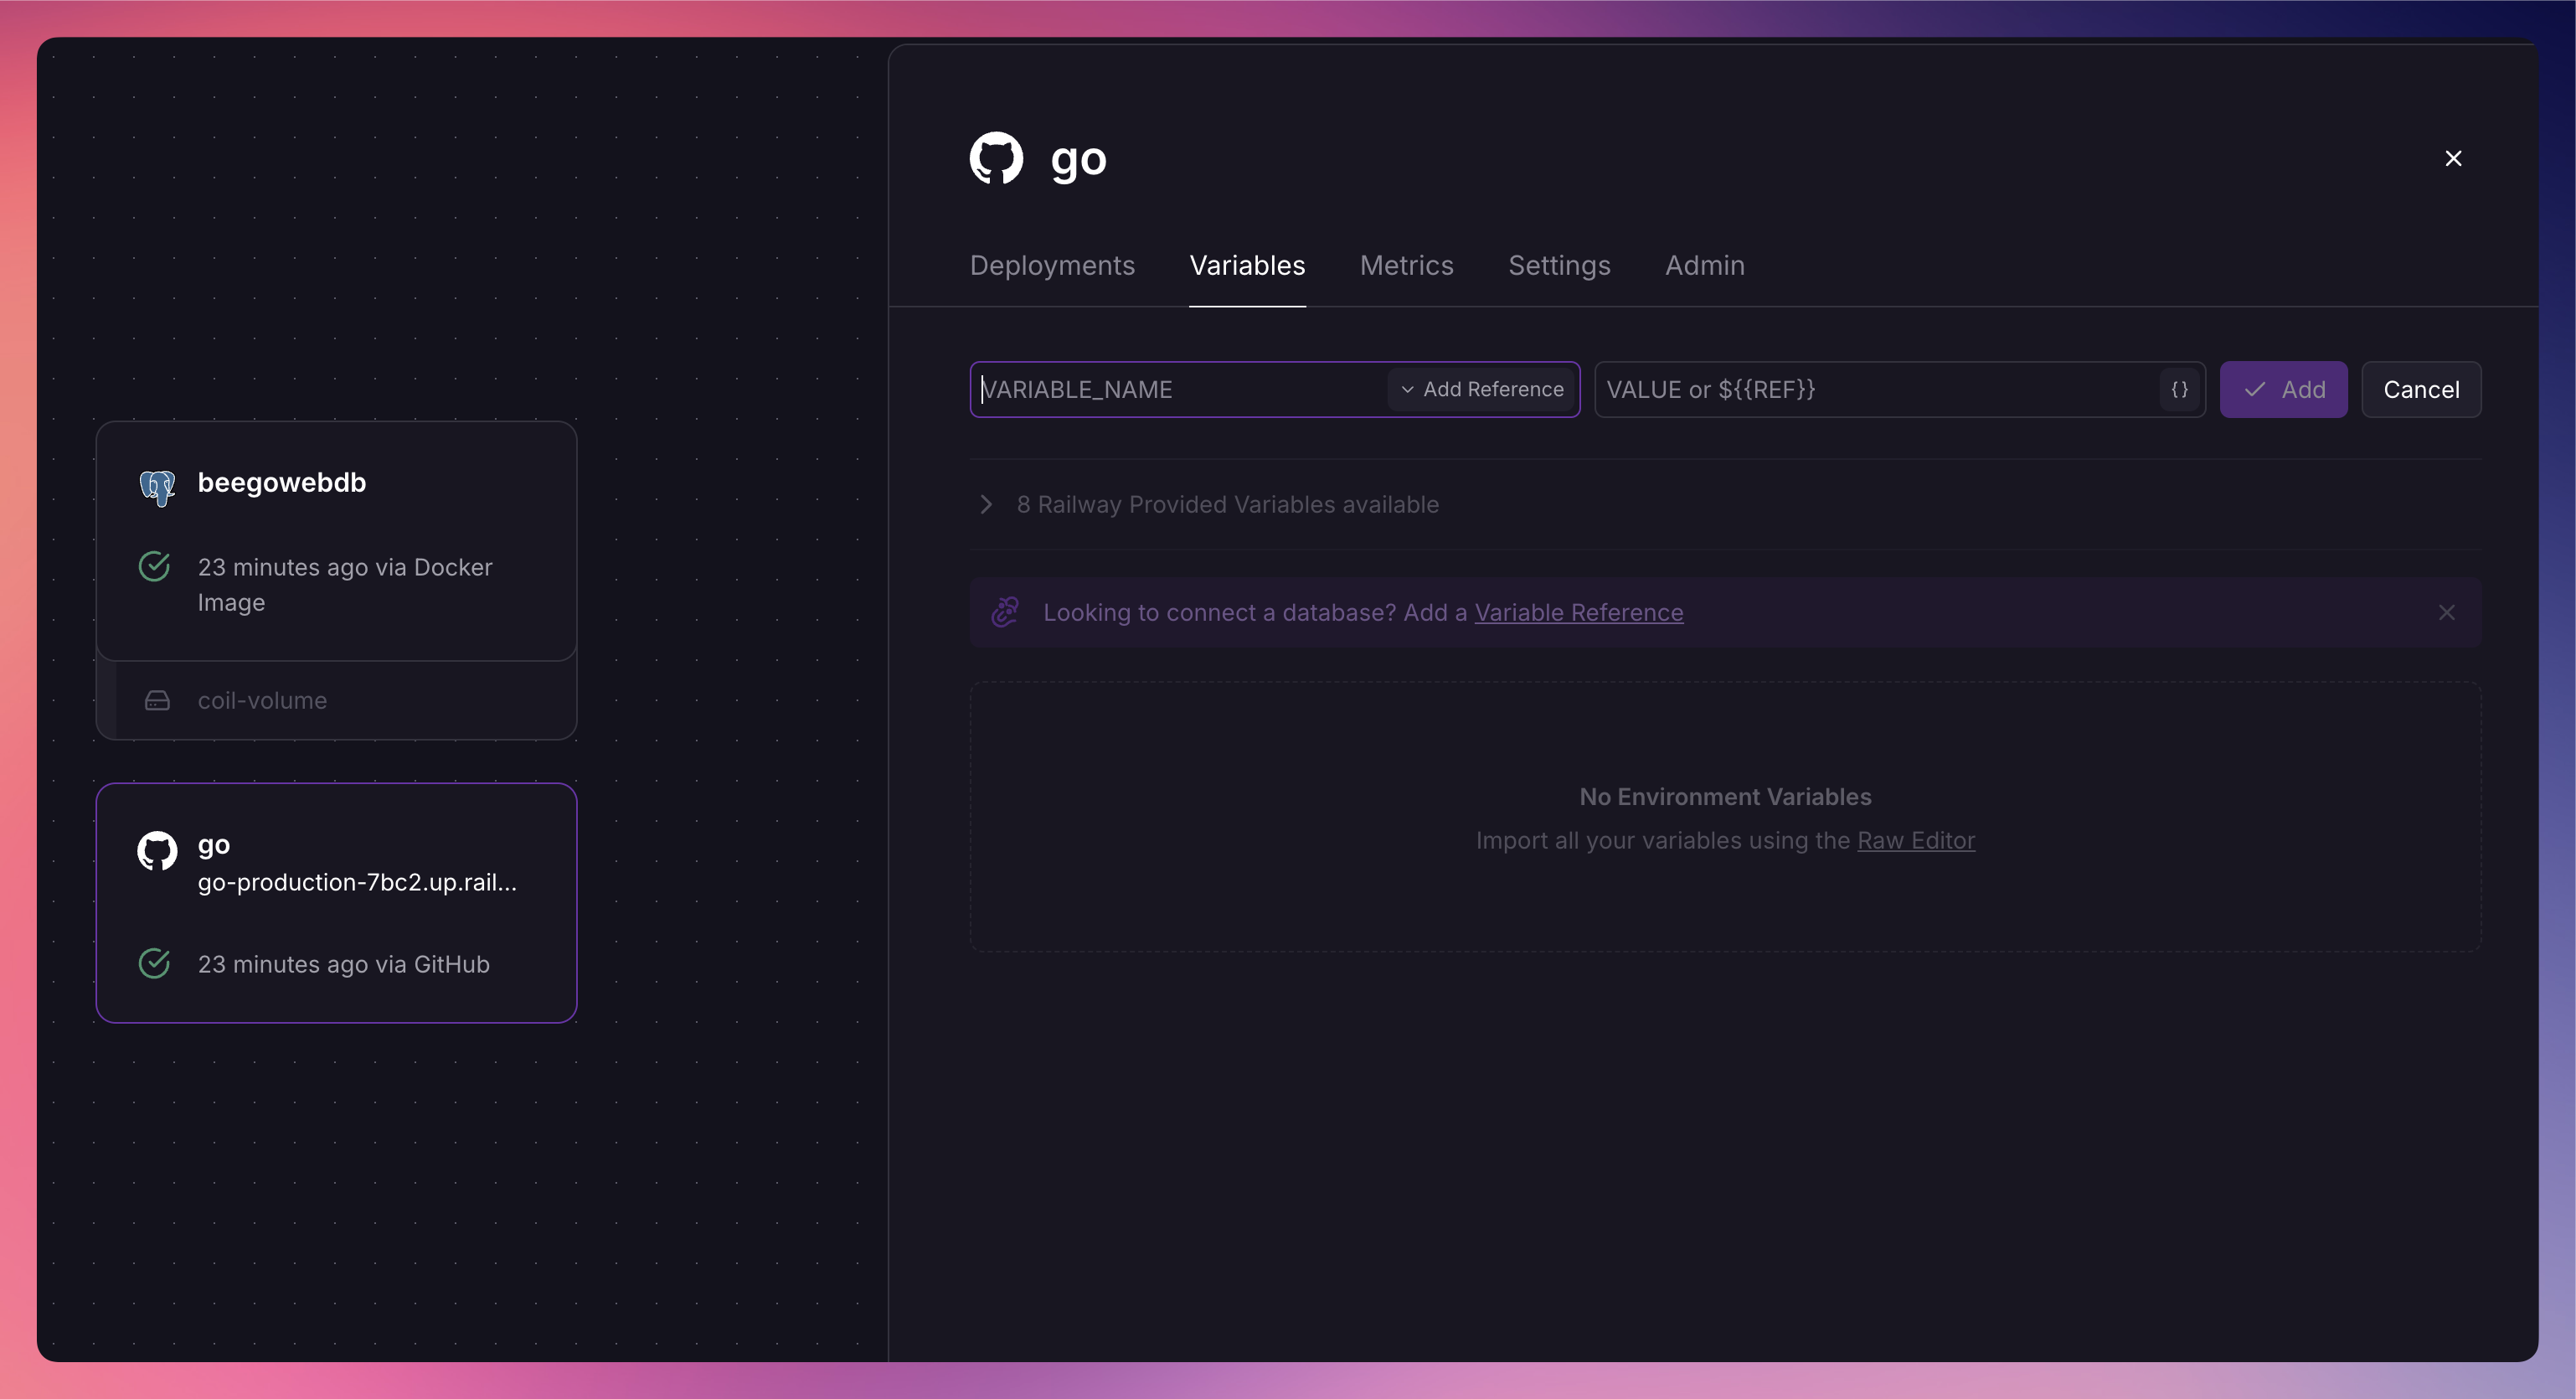
- Open the Variables section for the relevant service.
- Switch to the Raw Editor and paste the copied environment variables.
- Deploy the changes to apply the configuration.

Railway will deploy both the Go app as a service and the database, as shown in the image above. You can monitor the service building and deploying in the Project Canvas.
3. Database Migration
Railway supports a variety of databases, including PostgreSQL, MongoDB, MySQL, and Redis, allowing you to deploy the one that best fits your application needs.
When a render.yaml file includes a databases section, Railway will automatically provision a PostgreSQL database for your app. If you're migrating data to Railway, you can follow these steps:
- Export your database from Render using tools like
pg_dump. - Import the data into Railway using
psql.
For detailed instructions, check out this comprehensive tutorial on migrating PostgreSQL data between services.
Once the migration is complete, update the DATABASE_URL environment variable in your Railway app to point to the new PostgreSQL database.
4. Multi-region deployments
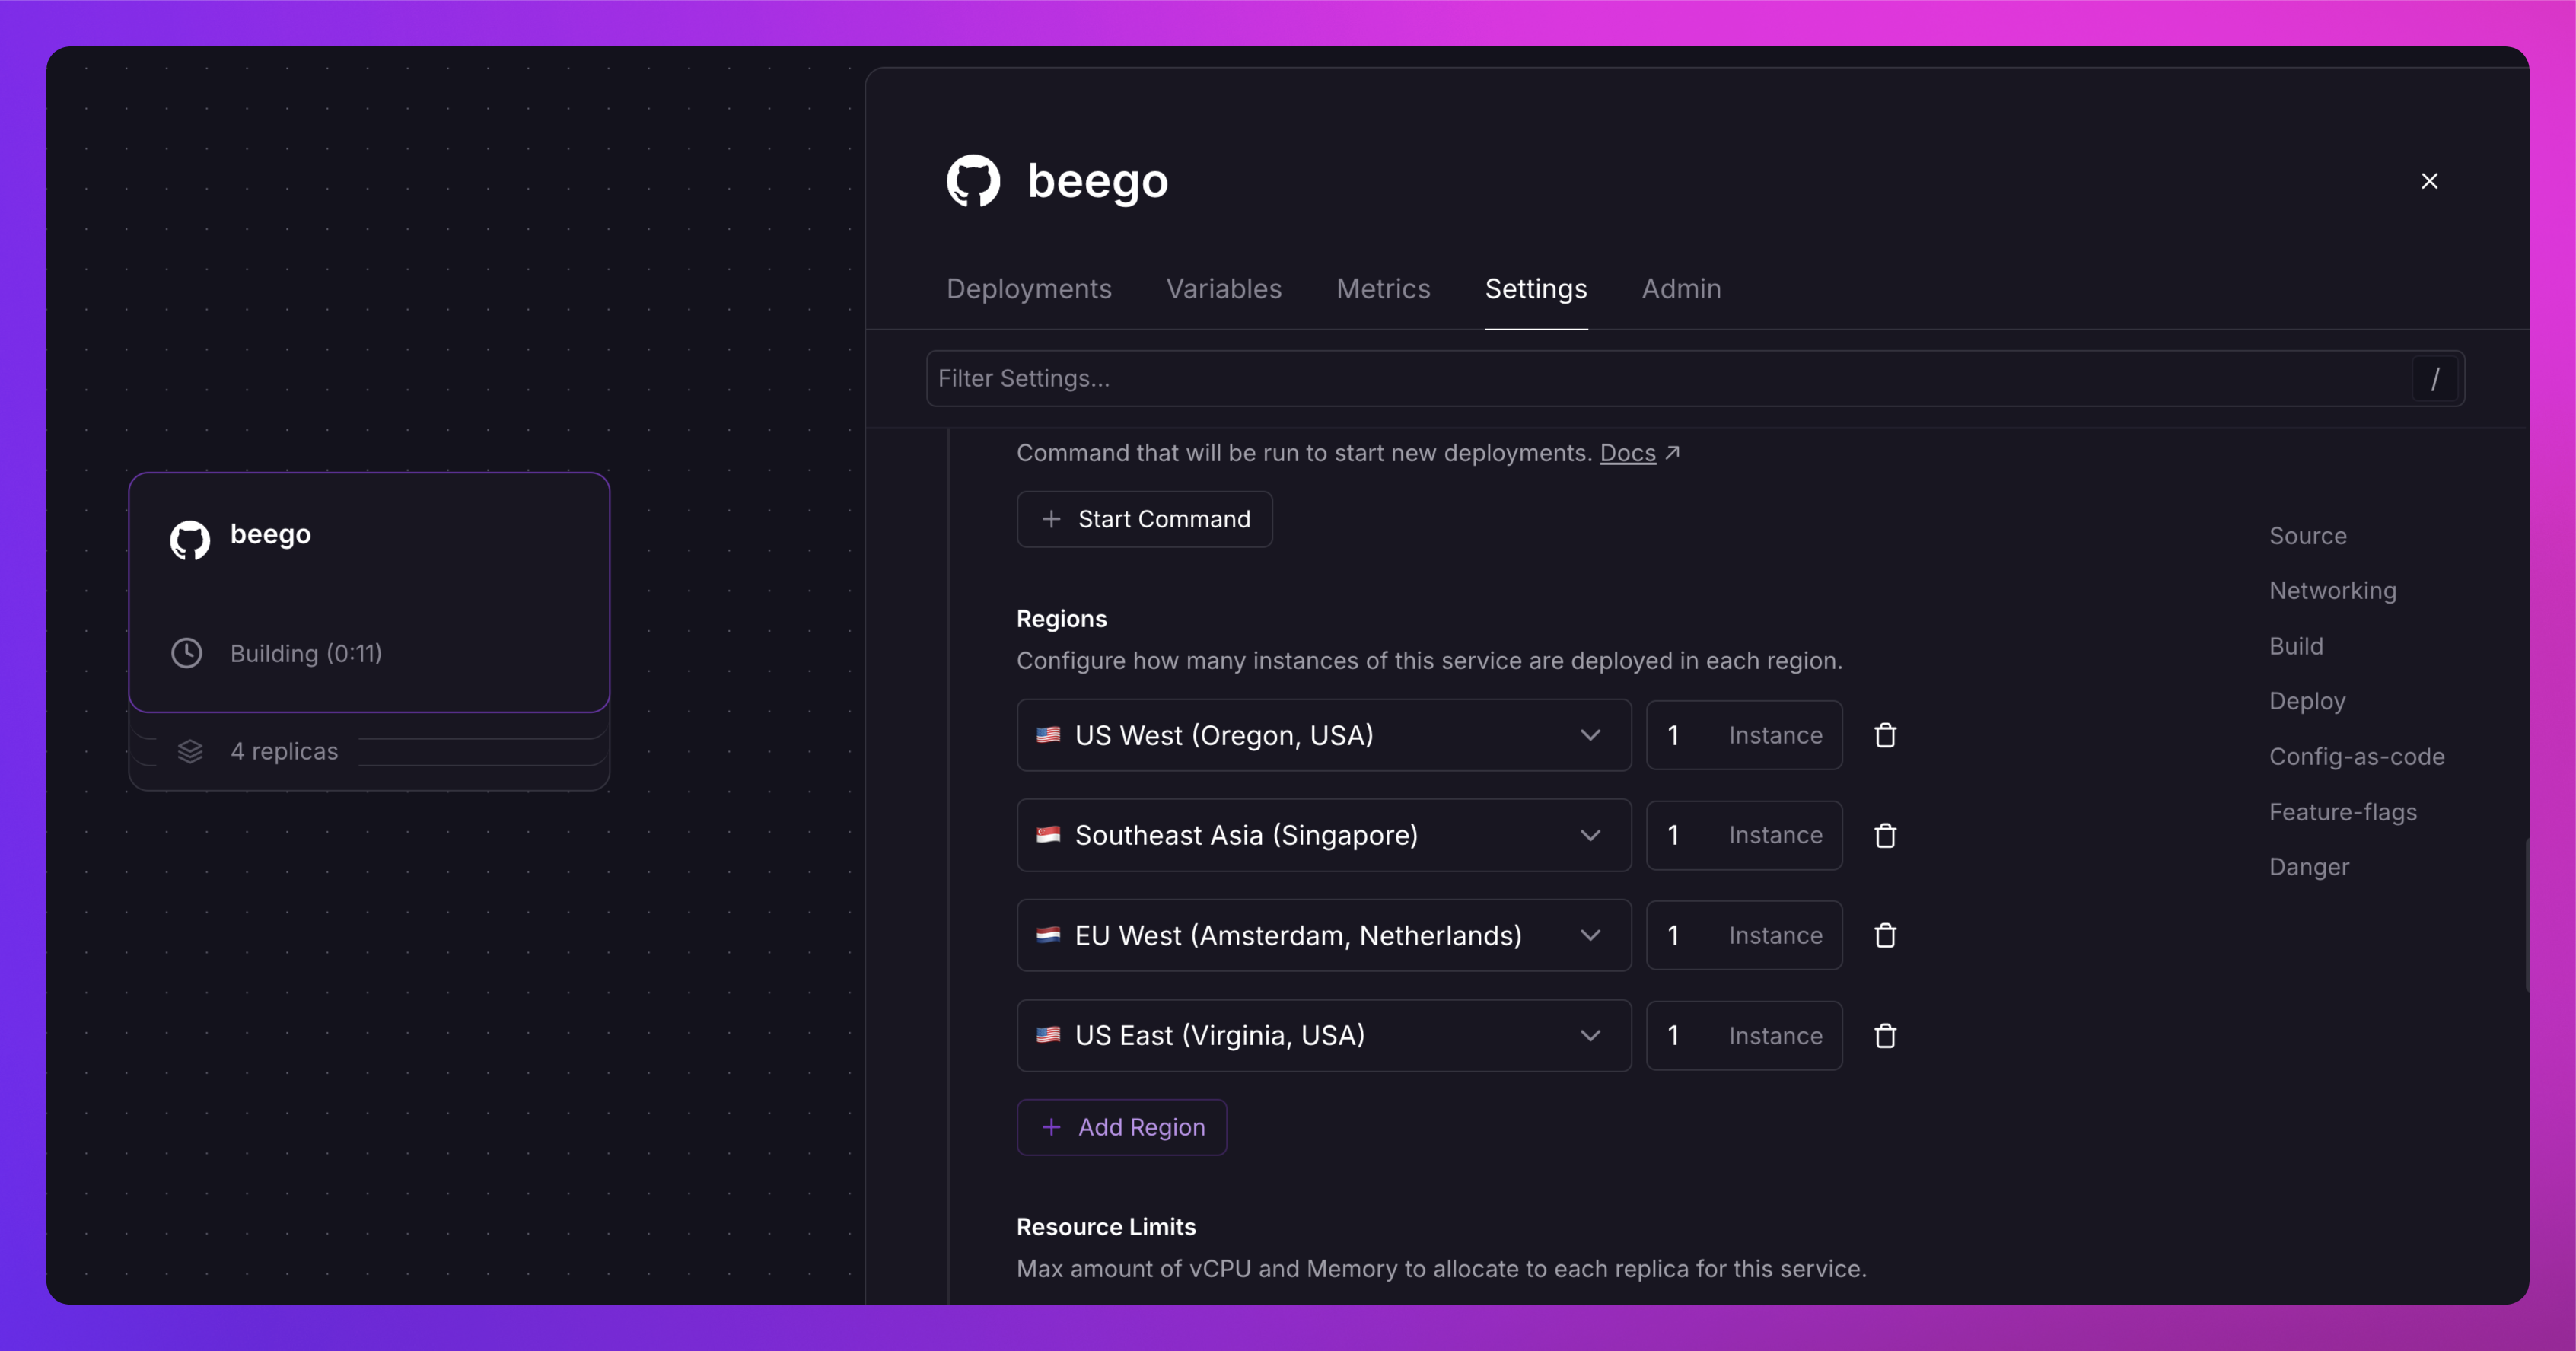
If your app needs to use multi-region deployments, you can leverage Railway’s multi-region replicas.
Enable this in the Settings section of your Railway service to keep your app close to users worldwide.
Note: Multi-region replicas is currently available to Pro users.

And that’s it. That’s all you need to migrate your app from Render to Railway.