Quick Start Tutorial
Railway is a deployment platform that lets you provision infrastructure, develop locally with that infrastructure, and deploy to the cloud or simply run ready-made software from the template marketplace.
This guide covers two different topics to get you quickly started with the platform -
-
Deploying your project - Bring your code and let Railway handle the rest.
Option 1 - Deploying from GitHub.
Option 2 - Deploying with the CLI.
Option 3 - Deploying from a Docker Image.
-
Deploying a template - Ideal for deploying pre-configured software with minimal effort.
To demonstrate deploying directly from a GitHub repository through Railway's dashboard, this guide uses a basic NextJS app that was prepared for this guide.
For the template deployment, this guide uses the Umami template from the template marketplace.
Deploying your project - from GitHub
If this is your first time deploying code on Railway, it is recommended to forking the previously mentioned NextJS app's repository so that you can follow along.
To get started deploying your NextJS app, first make a new project.
-
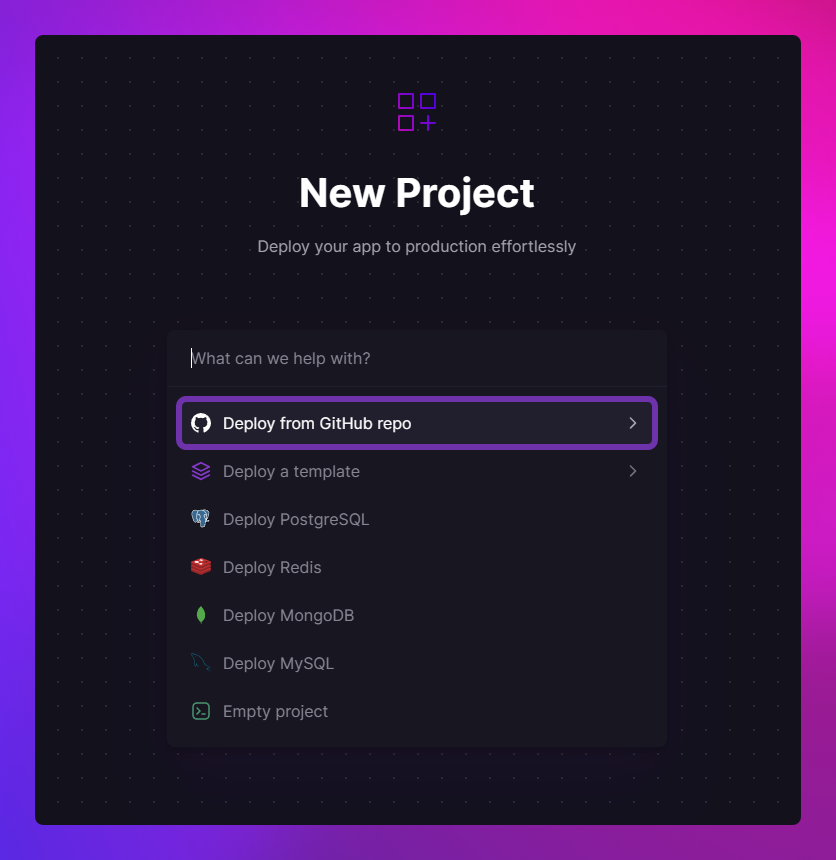
Open up the dashboard → Click New Project.
-
Choose the GitHub repo option.
Railway requires a valid GitHub account to be linked. If your Railway account isn't associated with one, you will be prompted to link it.
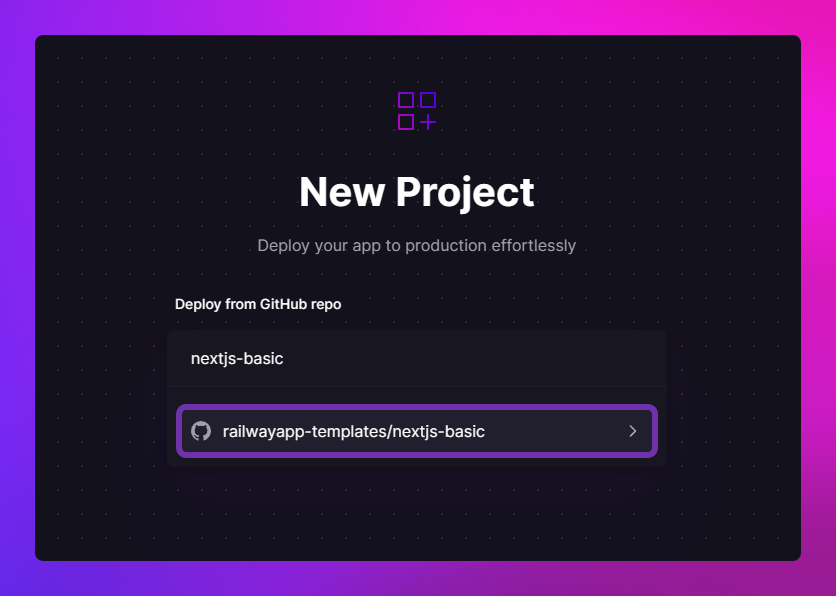
- Search for your GitHub project and click on it.
-
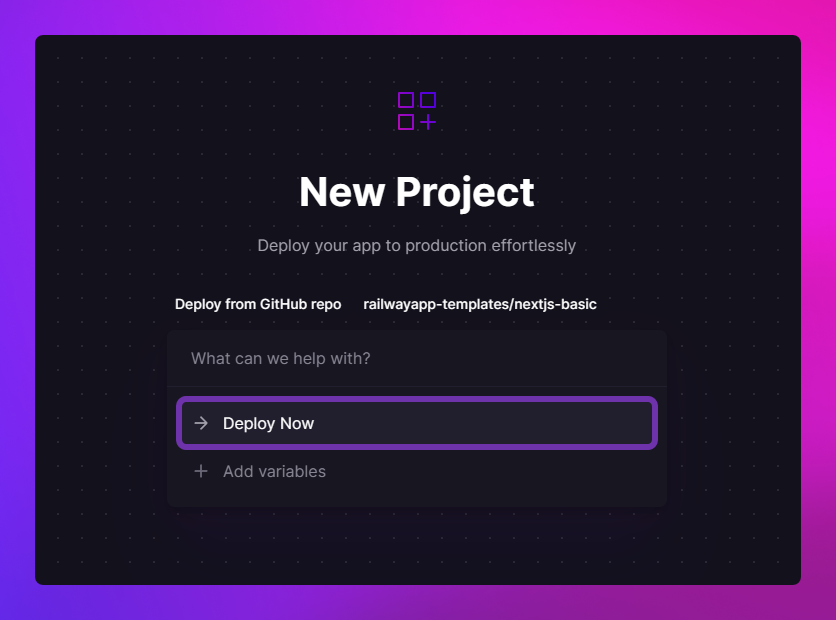
Choose either Deploy Now or Add variables.
Deploy Now will immediately start to build and deploy your selected repo.
Add Variables will bring you to your service and ask you to add variables, when done you will need to click the Deploy button at the top of your canvas to initiate the first deployment.
For brevity, choose Deploy Now.
When you click Deploy Now, Railway will create a new project for you and kick off an initial deploy after the project is created.
Once the project is created you will land on your Project Canvas.
Deploying your project - with the CLI
As with the Deploy from GitHub guide, if you're deploying code with the CLI for the first time, it's recommended to fork the NextJS app's repository to follow along. Since you'll be deploying local code, you'll also need to clone the forked repository.
The CLI can create a new project entirely from the command line, use it to scaffold your project.
-
Open up a command prompt inside your local project.
-
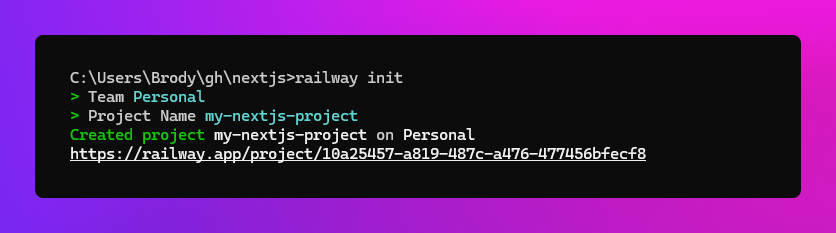
Run
railway initThis will create a new empty project with the name provided, which will be used for any subsequent commands.
Deploying your code is now only a single command away.
-
Run
railway upThe CLI will now scan your project files, compress them, and upload them to Railway's backend for deployment.

You can now run railway open and you will taken to your Project Canvas.
Deploying your project - from a Docker image
Railway supports deploying pre-built Docker images from the following registries:
To get started deploying a Docker image, first make a new project.
-
Open up the dashboard → Click New Project.
-
Choose the Empty project option.

After the project is created, you will land on the Project Canvas. A panel will appear prompting you to Add a Service.

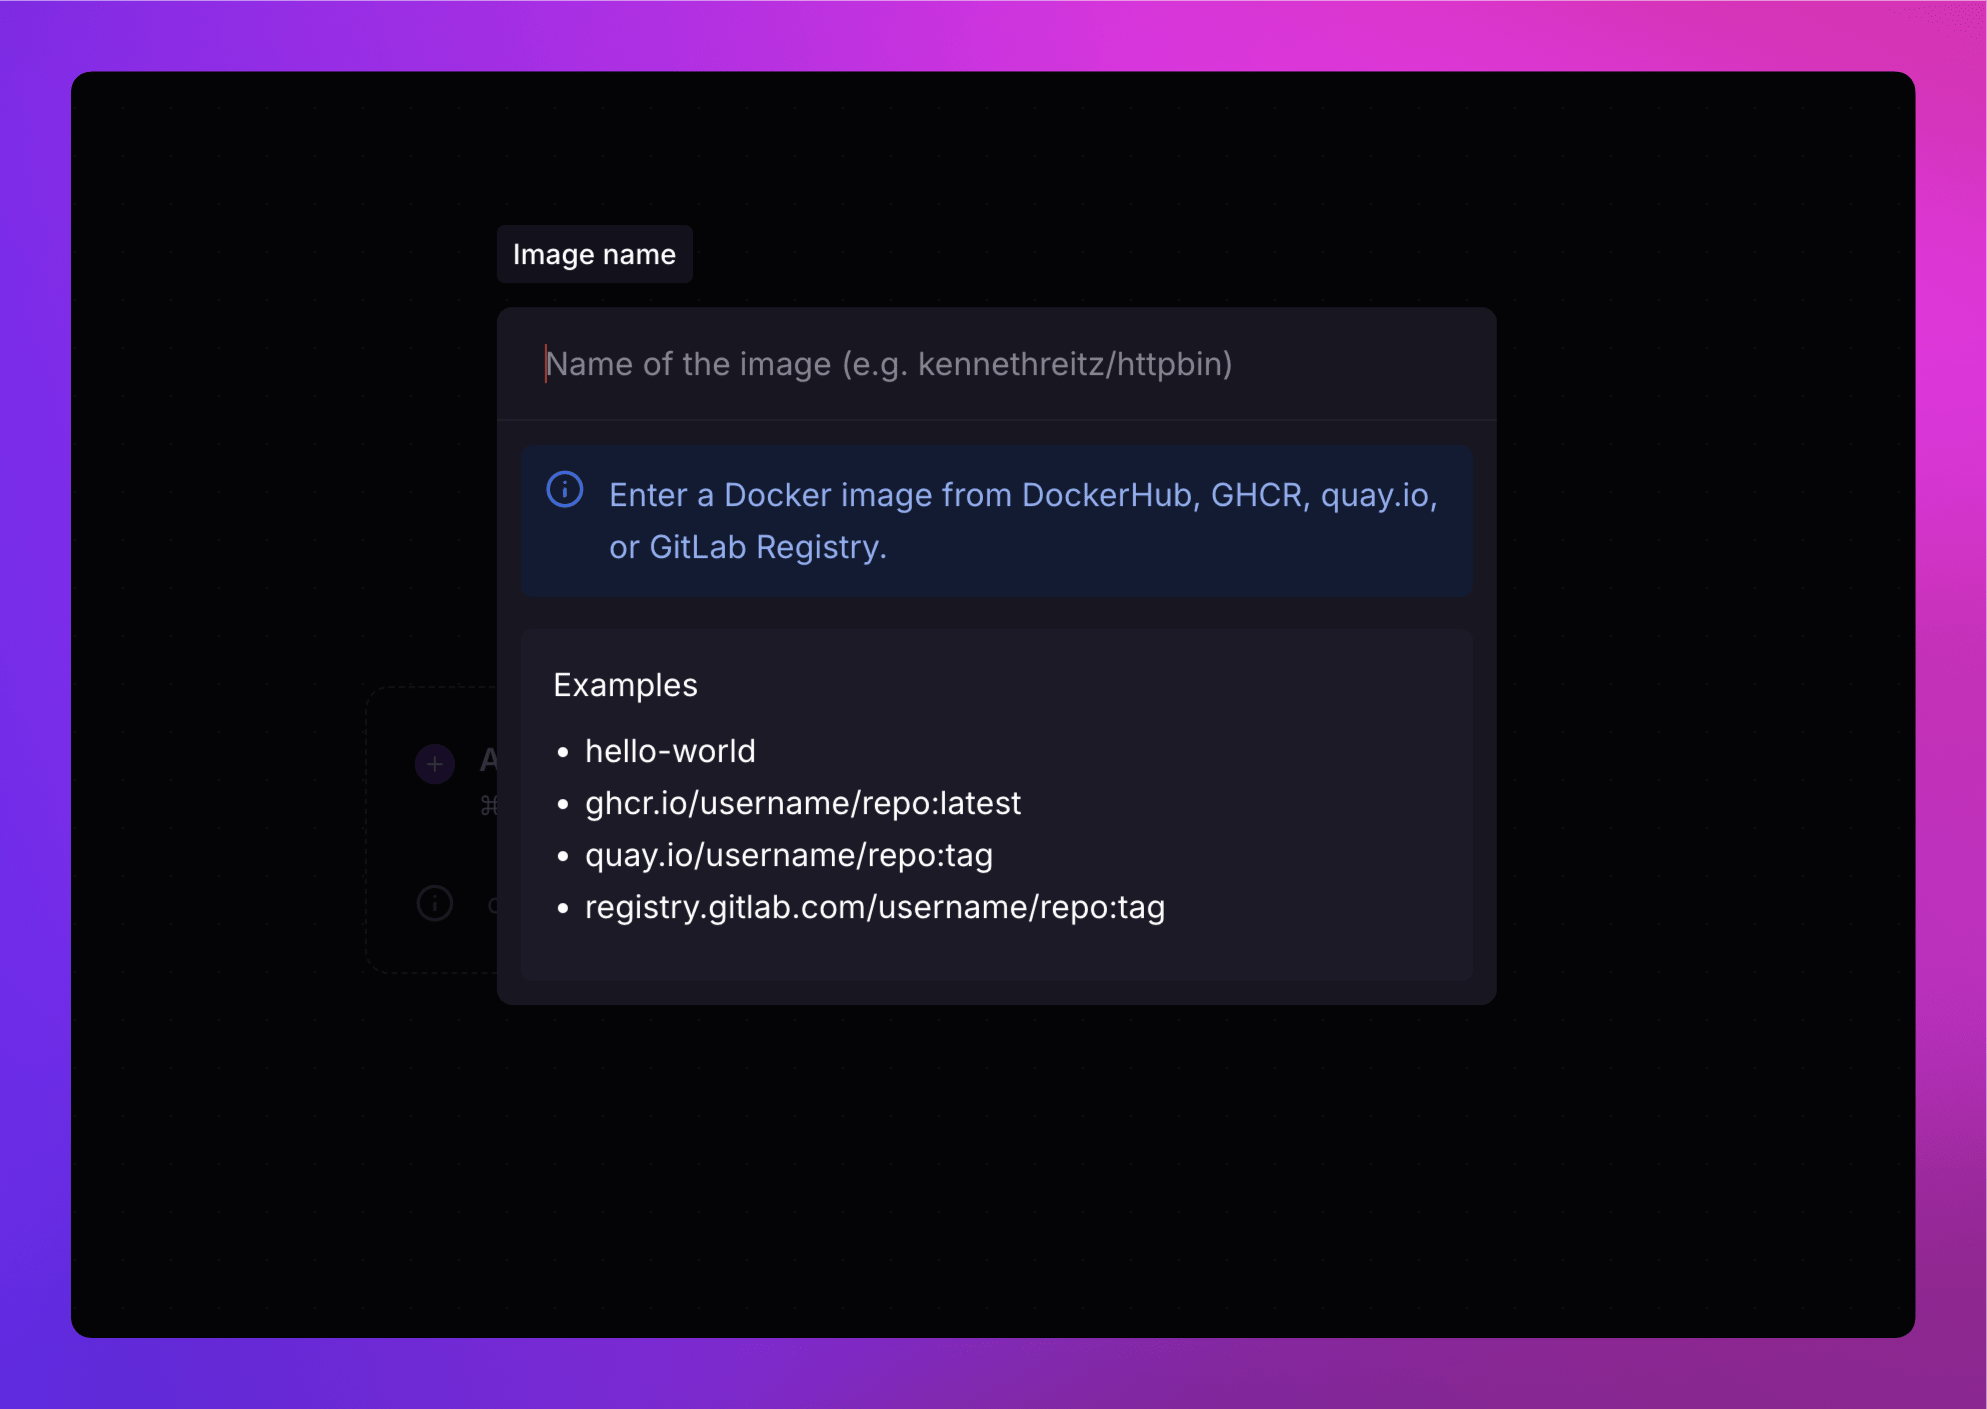
- Click Add a Service and select the Docker Image option from the modal that pops up.

- In the Image name field, enter the name of the Docker image, e.g,
blueriver/nextjsand press Enter.

If you're using a registry other than Docker Hub (such as GitHub, GitLab, Quay), you need to provide the full Docker image URL from the respective registry.
- Press Enter and click Deploy.
Railway will now provision a new service for your project based on the specified Docker image.
And that's it! 🎉 Your project is now ready for use.
Private Docker registry deployments require the Pro plan.
The canvas
Whether you deploy your project through the dashboard with GitHub or locally using the CLI, you'll ultimately arrive at your project canvas.
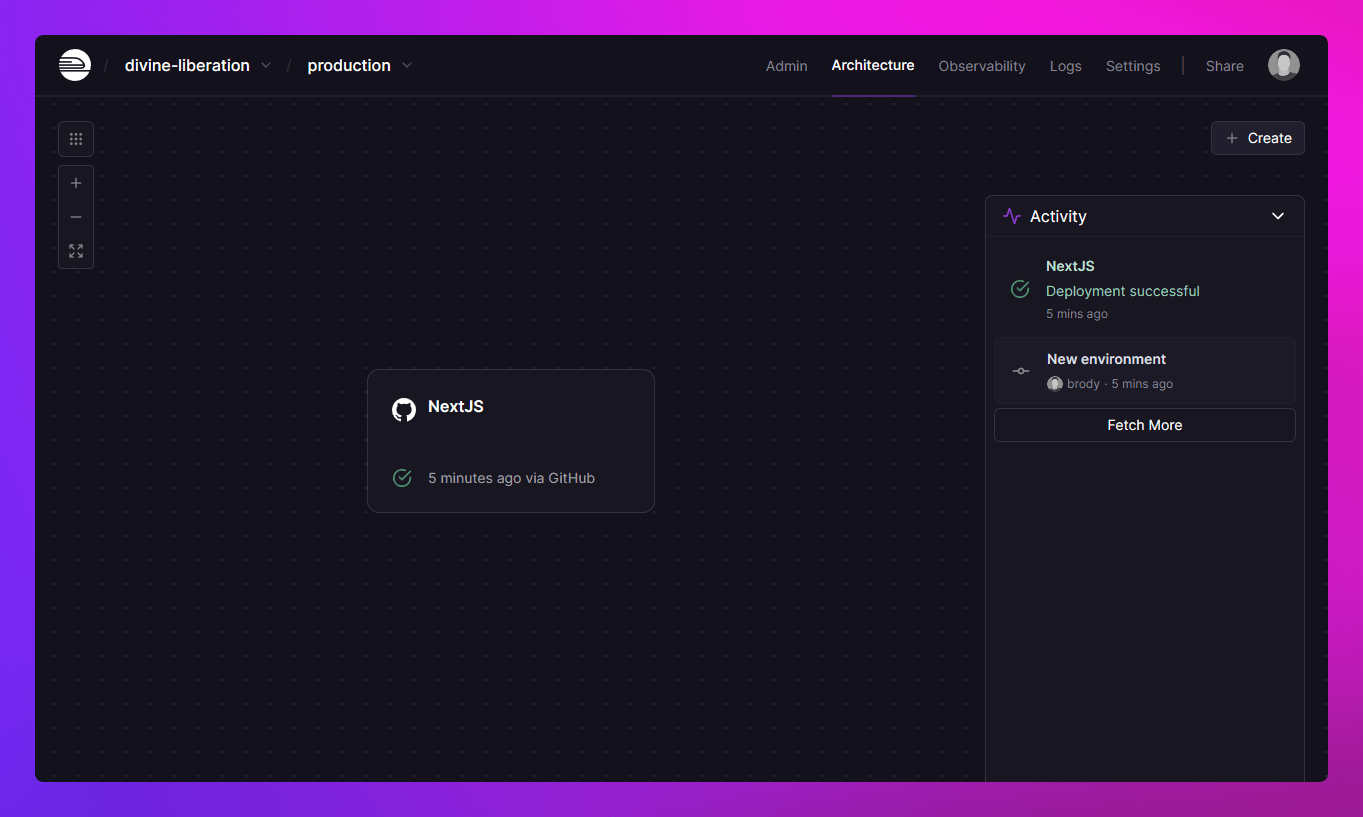
This is your mission control. Your project's infrastructure, environments, and deployments are all controlled from here.
Once the initial deployment is complete, your app is ready to go. If applicable, generate a domain by clicking Generate Domain within the service settings panel.
Additional Information -
If anything fails during this time, you can explore your build or deploy logs for clues. A helpful tip is to scroll through the entire log; important details are often missed, and the actual error is rarely at the bottom!
If you're stuck don't hesitate to open a Help Thread.
Deploying a template
Railway's template marketplace offers over 650+ unique templates that have been created both by the community and Railway!
Deploying a template is not too dissimilar to deploying a GitHub repo -
-
Open up the dashboard → Click New Project.
-
Choose Deploy a template.

-
Search for your desired template.
Hint: If your desired template isn't found feel free to reach out to the community.
-
Click on the template you want to deploy.

Hint: Generally it's best to choose the template with a combined higher deployment and success count.
-
Fill out any needed information that the template may require.
In the case of the Umami template, you don't need to provide any extra information.

- Click Deploy.
Railway will now provision a new project with all services and configurations that were defined in the template.
That's it, deploying a template is as easy as a few clicks!

Closing
Railway aims to be the simplest way to develop, deploy, and diagnose issues with your application.
As your Project scales, Railway scales with you by supporting multiple Teams, vertical scaling, and horizontal scaling; leaving you to focus on what matters: your code.
Happy Building!
What to explore next
-
Environments - Railway lets you create parallel, identical environments for PRs/testing.
-
Observability Dashboard - Railway's built-in observability dashboard offers a customizable view of metrics, logs, and usage in one place.
-
Project Members - Adding members to your projects is as easy as sending them an invite link.
-
Staged Changes - When you make changes to your Railway project, such as adding or removing components and configurations, these updates will be gathered into a changeset for you to review and apply.
Join the community
Chat with Railway members, ask questions, and get help on Central Station! We'd love to have you!