# Railway Documentation
> Railway is an all-in-one intelligent cloud provider that makes it easy to provision infrastructure, develop locally, and deploy to the cloud. This file contains the full text of the Railway documentation, intended for LLM consumption.
### Quick start
Source: https://docs.railway.com/quick-start.md
Get started with Railway in minutes! This Quick Start tutorial walks you through deploying your first app via GitHub, the CLI, a Docker image, or a template.
Railway is a deployment platform that lets you provision infrastructure, develop locally with that infrastructure, and deploy to the cloud or simply run ready-made software from the template marketplace.
**This guide covers two different topics to get you quickly started with the platform -**
1. **Deploying your project** - Bring your code and let Railway handle the rest.
**[Option 1](/quick-start#deploying-your-project---from-github)** - Deploying from **GitHub**.
**[Option 2](/quick-start#deploying-your-project---with-the-cli)** - Deploying with the **[CLI](/cli)**.
**[Option 3](/quick-start#deploying-your-project---from-a-docker-image)** - Deploying from a **Docker Image**.
2. **Deploying a template** - Ideal for deploying pre-configured software with minimal effort.
To demonstrate deploying directly from a GitHub repository through Railway's dashboard, this guide uses a basic NextJS app that was prepared for this guide.
For the template deployment, this guide uses the Umami template from the template marketplace.
#### Deploying your project - from GitHub
If this is your first time deploying code on Railway, it is recommended to forking the previously mentioned NextJS app's repository so that you can follow along.
To get started deploying your NextJS app, first make a new project.
- Open up the dashboard → Click **New Project**.
- Choose the **GitHub repo** option.
_Railway requires a valid GitHub account to be linked. If your Railway account isn't associated with one, you will be prompted to link it._
- Search for your GitHub project and click on it.
- Choose either **Deploy Now** or **Add variables**.
**Deploy Now** will immediately start to build and deploy your selected repo.
**Add Variables** will bring you to your service and ask you to add variables, when done you will need to click the **Deploy** button at the top of your canvas to initiate the first deployment.
_For brevity, choose **Deploy Now**._
When you click **Deploy Now**, Railway will create a new project for you and kick off an initial deploy after the project is created.
**Once the project is created you will land on your Project Canvas**.
#### Deploying your project - with the CLI
As with the [Deploy from GitHub guide](/quick-start#deploying-your-project---from-github), if you're deploying code with the CLI for the first time, it's recommended to fork the NextJS app's repository to follow along. Since you'll be deploying local code, you'll also need to clone the forked repository.
The CLI can create a new project entirely from the command line, use it to scaffold your project.
- Open up a command prompt inside your local project.
- Run `railway init`
This will create a new empty project with the name provided, which will be used for any subsequent commands.
Deploying your code is now only a single command away.
- Run `railway up`
The CLI will now scan your project files, compress them, and upload them to Railway's backend for deployment.
**You can now run `railway open` and you will taken to your [Project Canvas](/quick-start#the-canvas)**.
#### Deploying your project - from a Docker image
Railway supports deploying pre-built Docker images from the following registries:
- Docker Hub
- GitHub Container Registry
- RedHat Container Registry
- GitLab Container Registry
To get started deploying a Docker image, first make a new project.
- Open up the dashboard → Click **New Project**.
- Choose the **Empty project** option.
After the project is created, you will land on the Project Canvas. A panel will appear prompting you to Add a Service.
- Click **Add a Service** and select the **Docker Image** option from the modal that pops up.
- In the **Image name** field, enter the name of the Docker image, e.g, `blueriver/nextjs` and press Enter.
If you're using a registry other than Docker Hub (such as GitHub, GitLab, Quay), you need to provide the full Docker image URL from the respective registry.
- Press Enter and click **Deploy**.
Railway will now provision a new service for your project based on the specified Docker image.
And that's it! 🎉 Your project is now ready for use.
Private Docker registry deployments require the [Pro plan](/services#deploying-a-private-docker-image).
#### The canvas
Whether you deploy your project through the dashboard with GitHub or locally using the CLI, you'll ultimately arrive at your project canvas.
This is your _mission control_. Your project's infrastructure, environments, and deployments are all
controlled from here.
Once the initial deployment is complete, your app is ready to go. If applicable, generate a domain by clicking Generate Domain within the service settings panel.
**Additional Information -**
If anything fails during this time, you can explore your build or deploy logs for clues. A helpful tip is to scroll through the entire log; important details are often missed, and the actual error is rarely at the bottom!
If you're stuck don't hesitate to open a Help Thread.
#### Deploying a template
Railway's template marketplace offers over 650+ unique templates that have been created both by the community and Railway!
Deploying a template is not too dissimilar to deploying a GitHub repo -
- Open up the dashboard → Click **New Project**.
- Choose **Deploy a template**.
- Search for your desired template.
_Hint: If your desired template isn't found feel free to reach out to the community._
- Click on the template you want to deploy.
_Hint: Generally it's best to choose the template with a combined higher deployment and success count._
- Fill out any needed information that the template may require.
In the case of the Umami template, you don't need to provide any extra information.
- Click **Deploy**.
Railway will now provision a new project with all services and configurations that were defined in the template.
That's it, deploying a template is as easy as a few clicks!
#### Closing
Railway aims to be the simplest way to develop, deploy, and diagnose issues with your application.
As your Project scales, Railway scales with you by supporting multiple Teams, vertical scaling, and horizontal scaling; leaving you to focus on what matters: your code.
Happy Building!
##### What to explore next
- **[Environments](/environments)** - Railway lets you create parallel, identical environments for PRs/testing.
- **[Observability Dashboard](/observability)** - Railway's built-in observability dashboard offers a customizable view of metrics, logs, and usage in one place.
- **[Project Members](/projects/project-members)** - Adding members to your projects is as easy as sending them an invite link.
- **[Staged Changes](/deployments/staged-changes)** - When you make changes to your Railway project, such as adding or removing components and configurations, these updates will be gathered into a changeset for you to review and apply.
##### Join the community
Chat with Railway members, ask questions, and get help on [Central Station](https://station.railway.com)! We'd love to have you!
### The basics
Source: https://docs.railway.com/overview/the-basics.md
Learn about the core concepts of Railway.
This document outlines the core concepts of Railway, providing foundational knowledge of the basic building blocks you'll work with in the platform.
#### In a nutshell
- **[Dashboard](#dashboard--projects)** - Main entrypoint for all projects under your account.
- **[Project](#project--project-canvas)** - A collection of services under the same network.
- **[Project Settings](#project-settings)** - Contains all project-level settings.
- **[Service](#services)** - A target for a deployment source (e.g. Web Application).
- **[Service Variables](#service-variables)** - A collection of configurations and secrets.
- **[Backups](#backups)** - A collection of backups for a service.
- **[Service Metrics](#service-metrics)** - Rundown of metrics for a service.
- **[Service Settings](#service-settings)** - Contains all service-level settings.
- **[Deployment](#deployments)** - Built and deliverable unit of a service.
- **[Volumes](#volumes)** - Persistent storage solution for services.
- **[Volume Metrics](#volume-metrics)** - Rundown of metrics for volumes (e.g. disk usage over time).
- **[Volume Settings](#volume-settings)** - Contains all volume-level settings.
#### Dashboard / projects
Your main entrypoint to Railway where all your [projects](/overview/the-basics#project--project-canvas) are shown in the order they were last opened.
Projects contain your [services](/overview/the-basics#services) and [environments](/environments).
#### Project / project canvas
A project represents a capsule for composing infrastructure in Railway. You can think of a project as an application stack, a service group, or even a collection of service groups.
Services within a project are automatically joined to a [private network](/networking/private-networking) scoped to that project.
##### Project settings
This page contains all the project level settings.
Some of the most commonly used project settings are -
- [Transfer Project](/projects/workspaces#transferring-projects) - Transfer your project between workspaces.
- [Environments](/environments) - Manage various settings regarding environments.
- [Members](/projects/project-members) - Add or remove members to collaborate on your project.
- Danger - Remove individual [services](/overview/the-basics#services) or delete the entire project.
#### Services
A Railway service is a deployment target for your deployment source. Deployment sources can be [code repositories](https://docs.github.com/en/repositories/creating-and-managing-repositories/about-repositories) or [Docker Images](https://docs.docker.com/guides/docker-concepts/the-basics/what-is-an-image/). Once you create a service and choose a source, Railway will analyze the source, build a Docker image (if the source is a code repository), and deploy it to the service.
Out of the box, your service is deployed with a set of default configurations which can be overridden as needed.
##### Service variables
Service [Variables](/variables) provide a powerful way to manage configuration and secrets across services in Railway.
You can configure variables scoped to services. These variables are specific to each service and are not shared across the project by default.
If you want to access variables from this service in another service within the same project, you need to utilize a [Reference Variable](/variables/reference#reference-variables).
##### Backups
If your service has a [volume](/overview/the-basics#volumes) attached, this is where you can manage backups.
Backups are incremental and Copy-on-Write, we only charge for the data exclusive to them, that aren't from other snapshots or the volume itself.
From here you can perform the following actions -
- Create a backup - Manually create a backup of the volume with a press of a button.
- Delete a backup - Remove a backup from the list via the backup's 3-dot menu.
- Lock a backup - Prevent a backup from being deleted via the backup's 3-dot menu.
- [Restore a backup](/volumes/backups#how-to-restore-a-backup) - Click the `Restore` button on the backup.
- Modify the backup schedule - Click the `Edit schedule` button on the header to make changes to the schedule.
##### Service metrics
Service [Metrics](/observability/metrics) provide an essential overview of CPU, memory, and network usage for a given service.
##### Service settings
This tab contains all the service level settings.
Some of the most commonly used service settings are -
- [Source](/services#service-source) - Here you can configure the deployment source, which can be either a GitHub repository with a specific branch or an image with optional credentials.
- [Networking](/networking/public-networking#railway-provided-domain) - Generate a Railway-provided domain or add your own custom one.
- Custom Build Command - Here you can configure a custom build command if you need to overwrite the default.
- Custom Start Command - Here, you can configure a custom start command if you need to overwrite the default.
#### Deployments
[Deployments](/deployments) involve building and delivering your [Service](/overview/the-basics#services).
#### Volumes
[Volumes](/volumes) are a feature that allows services on Railway to [maintain persistent data](/volumes).
##### Volume metrics
Volume Metrics show the amount of data stored in the volume and its maximum capacity.
##### Volume settings
This tab contains all the volume centric settings.
Some of the most commonly used volume settings are -
- Mount path - The absolute path where the volume will be mounted within the deployed service.
- Volume Size - Displays the current volume capacity and offers the option to expand it if your plan permits.
- Wipe Volume - This action wipes all data in the volume and then redeploys the connected service.
#### What next?
If you've read enough for now and are ready to get started, check out either of these two resources next -
- [Quick Start guide](/quick-start) to deploy a To Do app from a [template](/templates).
- [Guides section](/overview/the-basics) to dive into how things work.
If you want to go deeper, click the Next button below to head to the next section - [Advanced Concepts](/overview/advanced-concepts).
### Railway for Agents
Source: https://docs.railway.com/agents.md
Set up Railway for AI coding agents — install the CLI, configure MCP, and add agent skills in one step.
Railway exposes a CLI, a local MCP server, a hosted remote MCP server, and an open agent skills format. AI coding agents can use any of them to deploy services, manage environments, and operate Railway on behalf of a user.
#### Get set up
Install the Railway CLI and configure agent support — skills, MCP, and authentication — in one command. Toggle the options to tailor the command to what you want set up:
If you already have the Railway CLI installed:
```bash
railway setup agent
```
#### Choose your integration
#### When to use each
- **Railway MCP (Local)** — preferred for agent-native operations on a logged-in machine: project and service discovery, deployment status, bounded logs, variables, domains, templates, metrics, and scoped mutations.
- **Railway MCP (Remote)** — preferred when the user wants hosted OAuth MCP, or when local CLI configuration is unavailable. Also exposes the powerful `railway-agent` tool for multi-step operations.
- **Railway CLI** — preferred when the task depends on local machine state: current-directory deploys, `railway up`, `railway run`, SSH, and local linking.
- **Agent Skills** — install alongside any of the above so agents arrive with Railway-specific procedural knowledge instead of guessing.
### Mobile app
Source: https://docs.railway.com/mobile-app.md
Install the Railway mobile app on iOS and sign in to check on your projects from your phone.
The Railway mobile app lets you monitor your projects, deployments, and logs from your phone. This guide covers the two things you need to get going: installing the app and signing in.
#### Install
The app is available for iPhone on the App Store and requires iOS 16.4 or later.
Download Railway from the App Store →
Android isn't available yet. [Join the waitlist on Railway Station](https://station.railway.com/feedback/railway-mobile-app-for-androi-aca54c32) to be notified when it ships.
#### Sign in
You'll need a Railway account to sign in. If you don't have one, sign up at railway.com first.
When you open the app for the first time, you'll land on the sign-in screen with three ways to get in:
- **Sign in with Apple** is the fastest option on iPhone. Authenticate with Face ID or Touch ID. You can link an existing Railway account or create a new one from your Apple ID.
- **Scan QR Code** signs you in using a Railway session you already have open in a browser. See the steps below.
- **Login with Browser** signs you in through an in-app browser window, the same way you sign in on the web.
##### Sign in by scanning a QR code
On a computer where you're already signed in to Railway, go to railway.com/mobile/login. A QR code will appear.
On the sign-in screen, tap **Scan QR Code** and allow camera access when prompted.
Point your phone at the QR code on screen. You'll be signed in automatically and dropped into your dashboard.
If the code stops working, refresh the page on your computer to reveal a new one, then scan again.
That's it. You're signed in. 🚂
### Best practices
Source: https://docs.railway.com/overview/best-practices.md
Learn the best practices to maximize performance, efficiency, and scalability of your apps on Railway.
{/*
To keep consistency we want each topic to follow the same convention -
- What?
- When?
- Do X.
- Why?
- Image.
*/}
Railway is a highly versatile platform, offering various ways to use it, though some may be less optimal than others for most use cases. These topics aim to help you maximize both your potential and the platform's capabilities.
#### Use private networking when possible
[Private networking](/networking/private-networking) allows services within a [project](/overview/the-basics#project--project-canvas) to communicate internally without the need to expose them [publicly](/networking/public-networking), while also providing faster communication and increased throughput.
When configuring environment variables in your service to reference domains or URLs of other services, ensure you use the private versions of these variables, such as `RAILWAY_PRIVATE_DOMAIN` or `DATABASE_URL`.
Using the private network enables communication between services within the same project without incurring service-to-service egress costs, which is particularly beneficial when interacting with databases or other internal services.
Screenshot showing the use of the `RAILWAY_PRIVATE_DOMAIN` [variable](/variables/reference#railway-provided-variables) being used via [referencing](/variables#reference-variables).
#### Deploying related services into the same project
In Railway, a [project](/overview/the-basics#project--project-canvas) serves as a container for organizing infrastructure. It can encompass an application stack, a group of [services](/overview/the-basics#services), or even multiple service groups.
If you're about to head back to the [dashboard](/overview/the-basics#dashboard--projects) to deploy another service like a database, there's a quicker way - look for the `Create` button at the top right of the Project canvas. This shortcut allows you to add new services directly to your current project.
There are a few key advantages of keeping related services within the same project -
- **Private networking** - The private network is scoped to a single environment within a project, having all related services within a single project will allow you to use private networking for faster networking along with no egress fees for service-to-service communication.
- **Project clutter** - Deploying a new service or database as an entire project will quickly become overwhelming and clutter your dashboard.
- **Variable management** - Variables can be referenced between services within a project, reducing redundancy and making it easier to manage instead of having to manually copy variables between services.
Screenshot showing related services within a project and their connection links.
#### Use reference variables where applicable
[Reference variables](/variables#reference-variables) allow you to dynamically reference another variable, either from a variable set on the current [service](/overview/the-basics#services) or from another service in the same [project](/overview/the-basics#project--project-canvas).
Rather than manually copying, pasting, and hard-coding variables like a public domain or those from another service, you can use reference variables to build them dynamically. Example `VITE_BACKEND_HOST=${{Backend.RAILWAY_PUBLIC_DOMAIN}}`
This approach is better than hard-coding variables, as it keeps your variable values in sync. Change your [public domain](/networking/domains)? The variable updates. Change your [TCP proxy](/networking/tcp-proxy)? The variable updates.
Screenshot showing a reference variable used to reference the Backend's domain.
### Advanced concepts
Source: https://docs.railway.com/overview/advanced-concepts.md
A guide that outlines the advanced concepts of Railway.
There are a lot of advanced concepts of Railway that can help you build your applications better. This document will cover some of these concepts like build and deploy options, networking, observability, and other integrations.
#### Build and deploy options
Railway applies many defaults to your build and deploy configurations that work fine for most scenarios. Changing these defaults could help tune Railway better to your use-case and make it easier on your team.
##### Build options
Under the hood, Railway uses Railpack to package your code into a container image that we then deploy to Railway's infrastructure, with zero configuration for most workloads. For advanced projects, you might need to configure some of these defaults. You can do this by going to your Service > Settings > Build, and underneath that, Deploy. Here are three things you might want to configure:
- **Custom Build Command**: This is the command that will be ran to build your final application. Railpack will find the best command for this, usually `npm run build` for JS-based projects, `cargo build --release` for Rust projects, and more. If your application needs to trigger something else to build your project, customize that command here.
- [**Pre-Deploy Command**](/deployments/pre-deploy-command): These are one or more commands that will be ran before running the main start command. A common use for this is database migrations. If your application needs to run a command before starting your main application, put that in a Pre-Deploy Command.
- **Custom Start Command**: This is the command that will actually run your application. Defaulted as `npm run start` for JS-based applications. If you need to start your application in a way that's different than expected, change that here.
##### Deploy options
Some default options are applied when your application is deployed on Railway. They can change where your deployments are ran, how they are ran, and what happens to them while they're running. Here are some things you can change:
- [**Replicas**](/deployments/scaling#horizontal-scaling-with-replicas): By default, your deployment will go out with a single instance in your [preferred region](/deployments/optimize-performance#set-a-preferred-region). With replicas, you can deploy multiple instances of your application in one or more regions. The Railway network will load balance incoming requests between the available replicas and serve the ones closest to your users.
- **Deployment Region**: If you haven't configured any Replicas, your services will be deployed to the [preferred region](/deployments/optimize-performance#set-a-preferred-region) configured in your workspace. To change an individual service's region, go to Settings > Scale > Regions.
- **Scheduled Executions**: If your deployment isn't a long-running service, like most web or backend services are, your deployment will be run once then exit. If the service is intended to be a repeated task, you can create a cron schedule under Settings > Deploy that will re-run your deployment according to the schedule. Each time it runs and exits successfully, it'll be marked as Completed.
- [**Serverless Deployments**](/deployments/serverless): By default, services are long-running and will continue to run unless they error. You can configure your services to pause if no traffic is going to them, and start it back up once a request comes in. Sleeping services don't incur resource usage. While your service is starting back up, the requests will be queued and delivered to the service once its fully up and running.
- [**Healthchecks**](/deployments/healthchecks): By default, as soon as your deployment is launched, it's considered "healthy". You can configure an endpoint path under Deploy > Healthcheck Path that Railway will fetch once it deploys your service to ensure that your service actually started up before it removes the previous deployment. This lets Railway know when your services are fully healthy and ready to receive traffic, so it doesn't start serving requests to a service that hasn't fully started yet.
#### Networking
Constructing efficient networking setups yourself can be tricky and time-consuming to get right. Included in the Railway experience is fast networking that just works and can help you build more modular services.
##### Private networking
[Private Networking](/networking/private-networking) is a feature that lets your services communicate to other running services within your project simply by its service name. Under Settings > Networking, you can configure the specific domain that is given to your service. You can provide this private networking domain name to your services with [Reference Variables](/variables#reference-variables).
Private Networking domains are available with [Railway-provided Variables](/variables#railway-provided-variables) that you can [provide to your other services](/variables#referencing-a-shared-variable), elimiating the need to hard-code their values.
Under the hood, Railway connects your services together with a WireGuard mesh and a DNS resolver that is scoped to your project and environment. Services running inside of one project or environment aren't able to reach the services running in a different project. This also applies to environments within a project being unable to reach other environments.
##### Railway-provided domains
Railway provides a [customizable, Railway-branded domain](/networking/public-networking#railway-provided-domain) for your service that you can connect to a port running on your service and instantly make it available to the public internet. These domains require no DNS configuration on your end, and are perfect if you don't have a custom domain of your own just yet but still want to access your application.
##### Custom domains
If you have a [custom domain](/networking/public-networking#custom-domains) that you've bought from a domain registrar, you can connect this to your Railway service to serve your application under. Railway will walk you through the configuration of the required DNS records, alert you if the configuration is wrong, and automatically provision SSL certificates for you so you can serve your application with `https://`.
#### Integrations
Integrations let you interact with your Railway workspace outside of the Railway dashboard.
##### CLI
The Railway CLI lets you interact with your Railway project from your local machine on the command line, allowing you to do things like:
- Triggering deployments programmatically
- Run your services locally using configured environment variables from your Railway project
- Launch new Railway projects from the terminal
- Deploy templates
##### Public API
The Railway public API is built with GraphQL and is the same API that powers the Railway dashboard. Similar to the CLI, you can interact with your Railway project programmatically by communicating with the API.
##### Webhooks
Projects can also configure [Webhook URLs](/observability/webhooks) that can receive a number of events that are triggered by your services and other things inside your project. Using these in tandem with the Railway API can make some powerful workflows that respond to the rest of your project. They can also be used to deliver critical alerts to your team's Slack workspaces.
#### Environments
Railway environments are isolated instances of the services running in your production environment that let you iterate on your workspace without affecting your production workloads. You can:
- Have development environments for each team member that mirror your production environment
- Have separate staging and production environments
Within a service and environment, you can specify which branch of your GitHub repository to deploy to that environment when a commit is pushed.
#### Observability
Railway services and deployments will likely output logs to describe how they are being built, what they are doing while running, or errors during either of these.
These logs, when sent to the standard output or standard error (like when using `console.log()`, `print()`, and `console.error()`) will be shown in the [Build and Deploy tabs](/observability/logs#build--deploy-panel) (depending on where they originated) of each service and can be viewed in the [Observability](/observability/logs#log-explorer) page of your project, from which you can view logs from all your services.
### Production readiness checklist
Source: https://docs.railway.com/overview/production-readiness-checklist.md
Ensure your app is production-ready with this comprehensive Railway checklist.
_Is your application ready for production?_
In this page, this section explores key areas for production readiness, suggesting actions to take to address each one:
- [Performance and Reliability](#performance-and-reliability)
- [Observability and Monitoring](#observability-and-monitoring)
- [Quality Assurance](#quality-assurance)
- [Security](#security)
- [Disaster Recovery](#disaster-recovery)
---
#### Performance and reliability
Ensuring your application is performant and reliable under changing conditions like load and external latency is critical for production-readiness. Consider taking the following actions to ensure your application is performant and reliable -
**✓ Serve your application from the right region**
- Deploying your application as close to your users as possible minimizes the number of network hops, reducing latency and improving performance.
Railway offers multiple [deployment regions](/deployments/regions) around the globe.
You may also enable Railway's [built-in CDN](/networking/cdn) to cache responses on its edge network.
**✓ Use private networking between services**
- When communicating between services over the public network, latency is introduced by the network hops that requests must make to reach their destination.
To reduce latency, ensure communication between services in the same project and environment happens over the [private network](/networking/private-networking).
**✓ Configure a restart policy**
- Services can crash for different reasons, frequently due to unhandled exceptions in code, and it is important to implement a strategy to mitigate performance degradation and user impact.
Ensure that you have properly configured your services [restart policy](/deployments/restart-policy).
**✓ Configure at least 2 replicas**
- If a service crashes or becomes unavailable due to a long-running request, your application could experience downtime or degraded performance.
Increase the [number of replicas](/deployments/optimize-performance#configure-horizontal-scaling) to at least 2, so if one instance of your service crashes or becomes unavailable, there is another to continue handling requests.
**✓ Confirm your compute capacity**
- The vCPU and memory capacity of your services greatly impacts their ability to perform efficiently.
The compute allocation for your services is handled automatically by Railway, and the limits are determined by your chosen subscription [plan](/pricing/plans#plans). You should review your plan limits and consider if upgrading is necessary to achieve the desired compute.
**✓ Consider deploying a database cluster or replica set**
- Data is critical to most applications, and you should ensure that the data layer in your stack is highly available and fault tolerant.
Consider implementing a cluster or replica set, similar to the Redis HA with Sentinel template, to ensure that your data remains available even if one node becomes unstable.
---
#### Observability and monitoring
Observability and monitoring refers to tracking the health and performance of your application. Consider taking the following actions to ensure you are able to track your application health -
**✓ Get familiar with the log explorer**
- When researching an application issue across multiple services, it can be disruptive and time-consuming to move between log views for each service individually.
Familiarize yourself with the [Log Explorer](/observability/logs#log-explorer) so you can query logs across all of your services in one place.
**✓ Setup webhooks, email, and in-app notifications**
- Ensure you are alerted if the [deployment status](/deployments/reference#deployment-states) of your services change.
Enable email and in-app notifications in you Account Settings to receive these alerts via email.
Setup [webhooks](/deployments/reference#deployment-states) to have the alerts sent to another system, like Slack or Discord.
---
#### Quality assurance
Quality assurance involves following practices to ensure changes to your application code meet quality standards before they are deployed to production. Consider the following actions to ensure you're set up for success -
**✓ Implement check suites**
- Common practice is to run a suite of tests, scans, or other automated jobs against your code before it is merged into production. You may want to configure your deployments to wait until those jobs have completed successfully before triggering a build.
Enable [check suites](/deployments/github-autodeploys#check-suites) to have Railway wait for your GitHub workflows to complete successfully before triggering a deployment.
**✓ Use environments**
- Maintaining separate environments for production and development is good practice for controlling changes in a production environment.
Consider setting up [environments](/environments) to properly test changes before merging to production.
Additionally, [PR environments](/environments#enable-pr-environments) can be enabled to create environments when PRs are opened on your production branch.
**✓ Use config as code**
- Along with your source code, you can maintain your Railway configuration in a `json` or `toml` file, enabling you to keep track of changes, just as you do with your source code.
Take advantage of [config as code](/config-as-code) to control and track changes to your Railway configuration.
**✓ Understand the deployment rollback feature**
- Introducing breaking changes to your application code is sometimes unavoidable, and it can be a headache reverting to previous commits.
Be sure to check out the [deployment rollback feature](/deployments/deployment-actions#rollback), in case you need to rollback to a previous deployment.
---
#### Security
Protecting your application and user data from malicious threats and vulnerabilities is mission-critical in production applications. Consider the following for peace of mind -
**✓ Use private networking**
- The easiest way to protect your services from malicious threats, is to keep them unexposed to the public network.
Secure communication between services in the same project and environment by using the [private network](/networking/private-networking).
**✓ Implement a security layer**
- While Railway does have protections in place at the platform level, we do not currently offer a configurable service for users' applications.
Consider using a service like Cloudflare that offers both WAF and DDoS mitigation, to protect your services against web threats and ensure availability and performance.
---
#### Disaster recovery
Being prepared for major and unexpected issues helps minimize downtime and data loss. Consider taking the following actions to ensure you are prepared -
**✓ Set up an instance of your application in two regions**
- In the event of a major disaster, an entire region may become unavailable.
Using [deployment regions](/deployments/regions), you can deploy an entire instance of your application in another region.
To save on cost of running a separate instance of your application, use [App Sleep](/deployments/serverless) to turn down resource usage on the inactive services.
**✓ Regularly back up your data**
- Data is critical to preserve in many applications. You should ensure you have a backup strategy in place for your data.
Enable and configure [backups](/volumes/backups) for your services with volumes to ensure you can restore your data in case of any data loss.
---
#### Conclusion
Using a mix of native features and external tools, we hope you can feel confident that your applications on Railway meet the highest standards of performance, reliability, and security.
Remember, the Railway team is always here to assist you with solutions. Reach out on [Central Station](https://station.railway.com) or over email at [team@railway.com](mailto:team@railway.com) for assistance.
### Guides
Source: https://docs.railway.com/guides.md
### Keyboard shortcuts
Source: https://docs.railway.com/overview/keyboard-shortcuts.md
A reference of keyboard shortcuts available in the Railway dashboard, canvas, and data views.
The Railway dashboard supports keyboard shortcuts for common actions. This page lists the shortcuts you can use, grouped by context.
Shortcuts that include `Cmd` work with `Ctrl` on Windows and Linux. For example, `Cmd+K` is `Ctrl+K` on Windows.
#### Global
These shortcuts work anywhere in the dashboard.
| Shortcut | Action |
|----------|--------|
| `Cmd+K` | Open the command palette |
| `Escape` | Go back, close a modal, or deselect |
#### Command palette
Once the command palette is open, you can navigate it without leaving the keyboard.
| Shortcut | Action |
|----------|--------|
| `Arrow Up` / `Arrow Down` | Move through results |
| `Enter` | Run the highlighted command |
| `Arrow Right` | Open a subcommand |
| `Backspace` | Go back to the previous menu |
| `Shift+Enter` | Report a missing command |
| `Escape` | Close the palette |
#### Dashboard
| Shortcut | Action |
|----------|--------|
| `Cmd+/` | Create a new project |
#### Project canvas
These shortcuts work while you have a project canvas open.
| Shortcut | Action |
|----------|--------|
| `.` | Create a new function on the canvas |
| `Cmd+Z` | Undo the last canvas change |
| `Cmd+Shift+Z` | Redo |
#### Service view
Press these from anywhere inside a service to jump to one of its tabs.
| Shortcut | Action |
|----------|--------|
| `G` then `D` | Go to Deployments |
| `G` then `V` | Go to Variables |
| `G` then `M` | Go to Metrics |
| `G` then `S` | Go to service Settings |
| `Escape` | Close the service view and return to the project canvas |
#### Staged changes
Staged changes group infrastructure edits into a single commit before they apply to your environment.
| Shortcut | Action |
|----------|--------|
| `Shift+Enter` | Commit staged changes |
| `Alt+Shift+Enter` | Commit staged changes without triggering deploys |
| `Cmd+Enter` | Commit the current patch (inside the patch modal) |
#### Logs
| Shortcut | Action |
|----------|--------|
| `/` | Focus the filter input |
| `Enter` | Apply the filter |
| `Escape` | Close the date or filter popover |
#### Service settings
| Shortcut | Action |
|----------|--------|
| `/` | Focus the settings filter |
## Platform
### Philosophy
Source: https://docs.railway.com/platform/philosophy.md
Explore Railway’s core philosophy and the principles that drive the Railway platform.
Railway is a deployment platform that helps developers deliver their software through the entire application life-cycle through git native tooling, composable infrastructure, and built-in instrumentation.
We design and develop Railway's product features to serve what we consider to be the three primary stages of software development:
- Development
- Deployment
- Diagnosis
Most developer-oriented products attempt to target one or more stages within the software development cycle. Railway provides solutions for developers for all of these stages, whereas some vendors focus on specific stages.
Railway is a company staffed with people who know developers would prefer to use tools they are familiar with. We believe software should be "take what you need, and leave what you don't." As a result, we are comfortable recommending additional vendors if they might acutely meet their needs. Railway's goal is for your unique need to be served so you can focus on delivering for your customers.
Companies should be as upfront as possible about their product and offerings to help you decide what is best for your team and users.
Let's talk about the number one use case: delivering apps to users in a Production environment. Railway, the company, is sustainable, building Railway's product, team, and company to last as long as your projects.
#### Objective
The goal of this section is to describe the processes, internal and external that companies have requested in Railway's years of operation to help them build confidence to determine if Railway is a good fit for their company. Railway maintains a policy to be forthcoming and frank at all times. We would rather have a developer make the correct choice for their company than to adopt Railway and then come to regret that decision.
If you have any additional questions or if you require any additional disclosure you can contact us to set up a call at [team@railway.com](mailto:team@railway.com).
#### Product philosophy
Railway is focused on building an amazing developer experience. Railway's goal is to enable developers to deploy their code and see their work in action, without thinking about CI/CD, deployments, networking, and so forth, until they need to.
##### Take what you need
To achieve this goal, we've designed Railway to "just work", with all the necessary magic built in to achieve that. Railway at a high level reads your code repo, makes a best guess effort to build it into an [OCI compliant image](https://opencontainers.org/), and runs the image with a start command.
- Have a code repository but have yet to think about deployment? We got you. Connect your code repository and let Railway take care of the rest.
- Already built the perfect Dockerfile? Bring it. If you have a Dockerfile in your repo, we'll find it and use that to build your image.
If you've outgrown the "magic" built into deployment platforms, or are suspicious of things that are just too magical, we are happy to provide a high level overview of Railway's architecture.
##### Leave what you don't
Streamlined deployment workflows and sane defaults are inherited by every project in Railway out of the box; but as a team of engineers, we at Railway are very aware that what works for one project does not always work for another. Or sometimes, you just need to be in control - maybe you already have a workflow you like, or maybe you need to layer Railway into existing infrastructure, and abstractions only get in your way.
That's why we've designed the platform for flexibility, wherever you need it.
On Railway, you can use the default pattern for deployment or opt to use vendor. In fact, we will even support you in your effort to integrate Railway in a unique way. Here are a couple of use cases we've helped customers take advantage of -
- Deploying to Railway from GitLab CI/CD
- Supporting the development of a Terraform provider
- Region based routing to workloads via Cloudflare
We love working with Railway's customers to solve interesting use cases. If you're not seeing a track for you, get in touch at [team@railway.com](mailto:team@railway.com) and we'll find it!
#### High-level architecture
As mentioned before, Railway at a high level takes your code, builds it, and throws it on running infrastructure on GCP. At a granular level Railway relies on a few systems to maintain workloads.
- Build Layer
- Where archived folders of code or a Dockerfile (via GitHub or `railway up`) is sent to be built into an image
- [Railpack](https://railpack.com): Railway's build system that analyzes your code and generates optimized container images
- Image Registry: either via Dockerhub/GitHub packages, or a previously built image from Railway's Build servers
- Deployment Layer
- Where images are ran in containers, images are pulled from the Build Layer
- Databases on Railway are images + volumes mounted on a machine
- Cron services are containers ran on a defined schedule
- Routing Layer
- This is the system that Railway maintains that routes requests into your running containers and provides private networks to suites of containers.
- Logging Layer
- A suite of machines networked running Clickhouse that store container logs. This is accessed when you open the service logs pane.
- Dashboard Layer
- Infrastructure and code that is used to manage the above layers.
- This also includes any monitors that Railway uses to maintain the state of the Deployment Layer to maintain application state. (ex. Removing a deployment.)
Your code will either be in some, or all steps depending on the amount of Railway that you choose to adopt.
##### Operational procedures
Railway uses a suite of alerting vendors, additional internal tools, and PagerDuty to ensure uptime of Railway's services described above. You can see Railway's uptime on our in-house [status page](https://status.railway.com/). Operational incident management reports and RCAs are available by request for those on an Enterprise plan.
##### Do I have to change how I write Code?
No, Railway is a deployment platform that works with your existing code. We don't require you to change how you write code or use any specific frameworks. We support all languages and frameworks that can be run in a Docker container or via Railpack.
##### Is Railway serverless?
No, services on Railway are deployed in stateful Docker containers. The old deployments are removed on every new deploy.
We do have a feature, [App Sleeping](/deployments/serverless), that allows you to configure your service to "sleep" when it is inactive, and therefore will stop it from incurring usage cost while not in use.
#### Book a demo
If you're looking to adopt Railway for your business, we'd love to chat and ensure your questions are answered. [Click here to book some time with us](https://cal.com/team/railway/work-with-railway?duration=30).
### Use cases
Source: https://docs.railway.com/platform/use-cases.md
Explore real-world use cases for deploying and managing applications on Railway.
Railway is suited for a variety of use-cases. This page will walk-through what the platform is perfect for today and Railway's recommendations for apps of all sizes.
As mentioned in the philosophy document. Railway will make a best effort to provide all the information a developer needs to make the best choice for their workload.
#### Is Railway production ready?
Many of Railway's customers use Railway to reliably deploy their applications to customers at scale. With that said, Production standards are going to be different depending on what your users expect. We have companies that use Railway in a variety of different verticals such as:
- Enterprise SaaS
- Consumer Social
- Education
- E-Commerce
- Crypto
- ML/AI
- Agencies
Companies on Railway range from hobby projects, to extremely fast growing startups, to publicly traded companies. Railway has been incrementally adopted from using the platform as a developer's scratchpad before writing Terraform to hand off to an Ops. team or being implemented end to end.
Railway's been in operation for now for more than three years and we have served billions of requests, with 100s of millions of deploys serving millions of end-users simultaneously.
#### Railway scale
All of these verticals deploy workloads that may require high bandwidth operations or intensive compute.
However, service scale on the platform is not unbounded. As a foundational infrastructure company, we understand that customers may outpace Railway's pace of improvement for the platform. Even though 24 vCPU and 24 GB of memory sounds like a lot (with up to 42 replicas) on the Pro plan, when faced with hyper-growth: throwing more resources at the issue might be your best bet until long term optimizations can be made by your team.
Railway will gladly bump up your service limits within your tier of service to meet your needs. Even so, we will be frank and honest if you may need to seek elsewhere to augment your workloads with extra compute. If your compute needs outpace the Pro offering, consider the Enterprise plans where we offer even greater limits and capacity planning, [email us to learn more](mailto:team@railway.com), or [click here](https://cal.com/team/railway/work-with-railway?duration=30) to schedule some time to chat.
##### Databases
We have customers using Railway's databases for their production environment with no issue. Railway's databases are optimized for a batteries included development experience. They are good for applications that are prioritizing velocity and iteration speed over scale.
Railway's databases are provided with no SLAs, are not highly available, and scale only to the limits of your plan. We don't think they are suitable for anything mission-critical, like if you wanted to start a bank.
We advise developers to:
- [Configure backups](/volumes/backups)
- Run-book and restore their backups
- Configure secondaries to connect to in-case of a disaster situation
As mentioned before: we don't believe in vendor lock-in here at Railway, if your needs outpace us, consider other vendors like PlanetScale (for MySQL) or Cockroach (for Postgres).
##### Metrics
Railway provides up to 7 days worth of data on service information such as:
- CPU
- Memory
- Disk Usage
- Network
We also overlay commit and deployment behavior to correlate issues with application health to deployments. This is on top of the service logs that are continually delivered to users viewing a particular deployment of a service.
For service logs, we store logs for up to 90 days for Pro plan workspaces.
It is common for teams who wish to have additional observability to use an additional monitoring tool that maintains a longer time horizon of data such as New Relic, Sentry, or Datadog. Within projects, deploying a Datadog Agent is as easy as deploying the template and providing your Datadog API Keys.
##### Networking
Railway doesn't have a hard bandwidth limit to the broader internet.
We may throttle your outbound bandwidth and reach out to you when it exceeds 100GB/month to ensure the legitimacy of your workloads. If you need to control where your traffic is allowed to come from such as setting up firewall rules, we recommend setting up Cloudflare or an external load balancer/L7 application firewall to handle it.
Private networking bandwidth is un-metered.
##### Service level objectives
Railway does meet SLOs for companies who have greater need for incident, support, and business planning responsiveness. We provide this via Business Class, offered as an add-on to Pro plans and included in all Enterprise plans. [More info.](/platform/support#business-class)
##### Will Railway exist in 10 years?
A common question we get in conversations with (rightly) skeptical developers is the above question. Most documentation pages don't address the meta question of a company's existence but how we run _our_ business affects yours.
The short and simple answer is: **Yes**.
Railway aims to exist for a very long time. Railway has presence on existing public clouds, while also building out presence on co-location providers. As a company, we have been structured sustainably with a first principles approach to every expense while growing sustainably.
##### Unsupported use-cases
Unfortunately, the Railway platform isn't yet well-equipped to handle the following verticals that require extensive Gov't certification or GPU compute:
- Government
- Traditional Banking
- Machine Learning Compute
#### General recommendations
A document like this can only go so far. We have a standing invitation for any team who needs an extended scale use-case to reach out to us directly by e-mailing [team@railway.com](mailto:team@railway.com), or on [Central Station](https://station.railway.com). You can also schedule some time with us directly by clicking [here](https://cal.com/team/railway/work-with-railway?duration=30).
We would be happy to answer any additional questions you may have.
### Support
Source: https://docs.railway.com/platform/support.md
Learn about Railway's support channels.
Railway provides support tailored to customer needs across different
subscription tiers. Support tier and prioritization is determined by
your plan level.
#### Support tiers
##### Trial, free, hobby
Users on Trial, Free, and Hobby plans receive community support through
[Central Station](#central-station). While Railway
employees may participate in community discussions, responses are not
guaranteed for these tiers.
##### Pro
Pro plan users get direct help from Railway via
[Central Station](#central-station), usually within 72 hours. This excludes
SLOs and [application-level support](#application-level-support).
##### Enterprise & business class
For organizations requiring SLOs and enhanced support, please refer to
[Business Class](#business-class) support.
#### How to ask for help
When you reach out for help, it's important that you help us help you. Please
include as much information as you can, including but not limited to:
- Description of the issue you're facing
- IDs (Project ID, Service Name/ID, Deployment ID, etc.)
- Railway environment of your service/deployment
- Error messages and descriptions
- Logs (build and/or deploy)
- Link to GitHub repo/code or template you're using, if applicable
#### Application-level support
Railway does not provide application-level support. We are unable to debug
your code or fix bugs in your application. We may provide these services on a
case-by-case basis for [Business Class](#business-class) or Enterprise
customers.
For application-level support, connect with the Railway community on
[Central Station](https://station.railway.com).
#### Email support
Railway does not provide support via email. All support requests should be
directed to [Central Station](#central-station). Email
communication is reserved for the following specific purposes:
- Sales inquiries: [team@railway.com](mailto:team@railway.com)
- Security reports: [bugbounty@railway.com](mailto:bugbounty@railway.com)
- Abuse reports: [abuse@railway.com](mailto:abuse@railway.com)
- Privacy inquiries: [privacy@railway.com](mailto:privacy@railway.com)
Emails outside these categories may not receive a response.
#### Central station
Railway conducts its support over the
[Central Station](https://station.railway.com) platform.
It hosts the Railway community of 1,800,000+ users and developers. It is where you can
find answers to common questions, ask questions, and get in touch with the
Railway team.
Please ensure that you've searched for your issue before creating a new
thread, follow the guidelines in
[How To Ask For Help](#how-to-ask-for-help), and abide by the
[Code of Conduct](https://station.railway.com/community-code-of-conduct).
##### Private threads
Pro users may create a **Private Thread** on
[Central Station](https://station.railway.com/support). Private Threads are
only visible to the creator and Railway employees.
Private Threads have a slower response time because only Railway employees can
see them.
Railway may make the thread public for community involvement if we determine
that there is no sensitive information in your thread, or if you are asking
for [application-level support](#application-level-support).
#### Slack
Railway offers Slack Connect channels to Enterprise plan customers with a
minimum committed spend of $2,000/month. Customers can raise issues, coordinate
their migration over to Railway, and provide feedback within a Slack Connect
channel.
Additionally, the solutions team at Railway may provide a shared Slack Connect
channel to facilitate better communication and support.
Enterprise teams with $2,000/month committed spend can create a Slack Connect
channel within the Workspace settings page:
Users in a Slack Connect channel can invite their team members using the Slack
interface or by pressing the `Join Slack` button again to initiate new invites.
#### Business class
For companies who need dedicated support, we offer Business Class.
Business Class is support and success designed for those who need the full
attention of Railway. Business Class support is a dedicated support channel
with SLOs for your company. Workspaces become eligible for Business Class
support after $5,000/mo in spend.
Reach out to us at [team@railway.com](mailto:team@railway.com) to enable your SLO.
##### Business class SLOs
We prioritize Business Class customers over all other support requests.
| Severity | Acknowledgement Time |
| ------------------------------------ | -------------------- |
| P1 (Outages, Escalations) | One hour - 24/7 |
| P2 (Bugs) | Same Business Day |
| P3 (Integrations, General Questions) | Two Business Days |
For Enterprise customers with $5,000/month committed spend who have a shared
Slack Connect channel with us, you have access to "Critical" urgency level
support requests:
This feature is also available on [Central Station](#central-station) for
Business Class customers:
Opening a Critical ticket allows you to page Railway's support on-call directly for
an immediate response. Please only use this for production outages or critical
platform issues preventing your team from using Railway.
##### Definition of priorities
| Priority | Surface Areas |
| -------- | ---------------------------------------------------------------------------------------------------------------------------------------------------------------------------------------------------------------------------------------------------------------------------------------------------------------------------------------------------------------------------------------------------------------------------------------------- |
| 1 | **Outages that impact production**. This covers the following components: incidents declared on status.railway.com including and especially incidents with end-customer impact (e.g. inability to login to the Dashboard), customer workload-impacting issues due to high load requiring intervention from Railway (e.g. requiring additional resources beyond your current limits). |
| 2 | **Issues related to Railway features**. This covers features offered by Railway, including but not limited to the Dashboard, CLI, and platform-level features such as Deployments, Environments, Private Networking, Volumes. |
| 3 | **Integration work and general questions related to Railway**. This covers customer-related requests involving integrating Railway with other services (e.g. fronting your Railway workload with a DDoS protection service), leveraging tools to use Railway the way you like (e.g. IaC provisioning/Terraform), or questions about Railway features or its platform. |
##### Business class response hours
We offer support during business hours, and prioritize requests from Business
Class customers:
- Business hours are Monday through Friday, 9am to 9pm Pacific Time
- Exceptions apply to Railway's business hours during P1 outages where the team will
be on-call 24/7
- The team may reply outside of business hours, but we do not guarantee a
response outside of business hours
##### Business class resource limits
For Business Class customers, Railway increases resource limits beyond the
standard limits on a need-based basis. Contact the team through your dedicated
communication channel to increase limits.
##### Uptime calculation
As part of this offering, we agree to provide a monthly summary on the uptime
of the components of Railway. Customers are provided an RCA to any outages on
the Routing Layer.
##### Compliance & audits
Security audits can be provided by request. For most customers, we can provide
Railway's security and compliance documentation can be accessed via Railway's Trust
Center at [trust.railway.com](https://trust.railway.com). Please sign in with
your Railway account's email address to access Trust Center.
#### Enterprise
For enterprises, we offer everything in [Business Class](#business-class)
along with custom support tailored to your needs. Railway can enter into a
contractual SLA under Railway's negotiated pricing offering. Reach out to us at
[team@railway.com](mailto:team@railway.com) for more information.
### Incident management
Source: https://docs.railway.com/platform/incident-management.md
Learn how Railway handles incident management.
#### Introduction
Railway understands the importance of effective incident management procedures. We do what we can to minimize downtime, mitigate the impact of incidents, and ensure the smooth operation of Railway's systems. In the interest of transparency, we publish as much of Railway's procedure to keep Railway's customers in the know on how we handle and learn from incidents.
#### Monitoring + reporting
Railway has a robust monitoring system in place to proactively detect and address any potential incidents. We continuously monitor Railway's infrastructure, including servers, networks, and applications, to ensure their smooth operation. By monitoring key metrics and performance indicators, we can identify any anomalies or potential issues before they escalate into full-blown incidents.
However, it's important to note that while we strive to stay ahead of incidents, there may be situations where unforeseen issues arise. In such cases, we rely on qualitative customer feedback to help us identify and address any issues promptly. We encourage Railway's customers to report any problems they encounter through the [Railway Help Station](https://station.railway.com) or [Slack](/platform/support#slack).
#### Status page + uptime
Railway's uptime and incident retrospective can be accessed on the Railway status page at https://status.railway.com/. On this page, you can view the historical uptime of Railway's systems and services. Additionally, you can find detailed information about past incidents, including retrospectives that provide insights into how incidents were handled and what measures were taken to prevent similar issues in the future.
The status page is built and hosted in-house. If you'd like to consume its data programmatically, it's backed by two simple JSON endpoints:
- `https://api.railwaystatus.com/status` — current status of Railway's systems and services. Its response schema is published at `https://api.railwaystatus.com/status/schema.json`.
- `https://railway.com/.railway/pops` — Railway's CDN points of presence (POPs) and their status. These are edge POPs, not [deployment regions](/deployments/regions).
These endpoints are provided as-is, without any support, and their response format may change without notice.
For Enterprise customers, we offer SLOs and guarantees of service that may not be represented on the uptime dashboard.
#### Incident severity
Railway catalogues incident's in the following buckets.
- **High**: the incident is potentially catastrophic to Railway Corporation and/or disrupts
Railway Corporation’s day-to-day operations; violation of contractual requirements is likely. Ex. Any business level impact to 25 percent of Railway's customers for one hour or more. All incidents within this severity get public communications.
- **Medium**: the incident will cause harm to one or more business units within Railway
Corporation and/or will cause delays to a customer business unit’s activities.
- **Low**: the incident is a clear failure of a component, but will not substantively impact the business. Railway still performs retrospectives within this severity.
##### Responsible disclosure
Enterprise customers get Root Cause Analysis, and we attempt to publish event retrospectives on [https://blog.railway.com/engineering](https://blog.railway.com/engineering)
### Railway Metal
Source: https://docs.railway.com/platform/railway-metal.md
Railway Metal is Railway’s own cloud infrastructure, built for high-performance, scalable, and cost-efficient app deployments. Learn how it works.
Railway Metal is the next generation of Railway's underlying infrastructure.
It is built on hardware that we own and operate in datacenters around the world.
Learn more about how we built it in the blog post [So You Want to Build Your Own Data Center](https://blog.railway.com/p/data-center-build-part-one).
#### Why?
We are making this move as part of Railway's commitment to providing best-in-class
infrastructure for Railway's users. This change enables us to improve the Railway platform's
performance, unlock additional features, increase reliability, and make
Railway more cost-effective for all users.
With Railway Metal, you can expect the following benefits:
- **Regions for Trial & Hobby plan users**: Railway Metal will be available to
all users, including Trial & Hobby Plan users. Trial & Hobby plan users will
be able to deploy services on all fRailway Metal regions in the US,
Europe, and Southeast Asia.
- **Cheaper Pricing**: Running Railway's own hardware lets us reduce prices. Once
Railway Metal is Generally Available, all users can expect to pay up to 50%
less for Network Egress, and up to 40% less for Disk Usage.
- **Improved Performance**: Services on Railway will run faster. Railway's new CPUs
are more powerful with higher core count and better performance per-core.
Volume read/write performance will also be significantly faster as all
of Railway's disks are NVMe SSDs, which are faster than the disks we could offer
before.
- **Enhanced Reliability**: With Railway Metal, we are able to manage the
hardware, software, and networking stack end-to-end. This allows us to move
faster and fix problems more quickly. (For instance, before Railway Metal,
incidents such as [a single host failure](https://status.railway.com/cm44jp6qh00jydhwlyxsix3vl) would often take us ~60 minutes to bring the host back up. With Railway's own
hardware, we can bring the host back up significantly faster.)
- **Improved Networking**: We connect directly to major internet providers and
other cloud platforms worldwide, giving you faster connections in and out
of Railway.
- **Higher Available Resources**: Railway Metal has greater capacity that we
will be increasing over time, allowing us to offer you more computing
resources on-demand.
- **Unlocks More Features**: With Railway's own hardware and networking stack, we
can power more advanced features that were not possible before, such as
Static Inbound IPs, Anycast Edge Network, High-Availability Volumes, etc.
#### Metal edge network
Railway routes traffic through its own anycast Metal Edge network.
You can check if its enabled for your service in the Public Network section in the service settings tab.
Screenshot showing a domain with the Metal Edge Network enabled
Benefits include better routing, less latency, and underlying infrastructure improvements.
#### Regions & availability
Railway Metal is available to all users, including Trial & Hobby Plan users.
Each Railway Metal region is located in a datacenter that was chosen
strategically to provide the best possible performance and reliability.
We are in the process of expanding Railway Metal regions, and we expect to
have all regions available by the end of Q1'2025 (by 31 March 2025).
| Railway Metal Region | Status |
| -------------------------- | --------- |
| US West (California) | 🟢 Active |
| US East (Virginia) | 🟢 Active |
| Europe West (Amsterdam) | 🟢 Active |
| Southeast Asia (Singapore) | 🟢 Active |
#### Gradual upgrade
We will gradually move services without a [volume](/volumes)
to Railway Metal as we increase the pool of Railway's hardware and its capabilities.
When this happens, you may see a new deploy initiated by Railway in your service:
Because this is a new deploy of your latest Active deployment, the behaviour
will be the same as if you've manually issued a new deploy. As such, you may
notice that:
- There may be a brief downtime during the upgrade. To prevent this, ensure
you have [Health Checks](/deployments/healthchecks) set up for your service
- All ephemeral storage (such as `/tmp`, etc.) will be wiped. To prevent this,
use [Volume](/volumes) to store data persistently. All storage is
considered ephemeral unless they're on a Railway Volume
Note that the above generally applies to deploying a new version of
your service. The upgrade to Railway Metal is irrelevant to the behaviour
you may run into above - they are the same as if you were to manually deploy
a new version of your service.
For services in `US West (Oregon)`, Railway will not move your service to
Railway Metal if your service [references another service](/variables#referencing-another-services-variable-example) with a volume.
This is to prevent any cross-regional networking latency spikes for your
service. Refer to [this FAQ](#im-experiencing-slow-network-performance-after-switching-to-us-west-california-railway-metal-region-what-should-i-do) for more information.
##### Rollback
If you encounter any issues with your service after the upgrade, you can
rollback to the previous version by clicking `Rollback` button in the banner
above.
##### Manual rollback
To rollback manually, modify your service's `Settings -> Scale -> Regions`
and select regions without the `Metal (New)` tag.
#### Timeline
Railway's transition to Railway Metal will happen in phases. Here's what you can
expect:
| Date | What's Happening | Status |
| ---------------------------- | ------------------------------------------------------------------------------------------------------------------------------------------------------------------------- | ------ |
| Starting December 26th, 2024 | All new deploys on newly-created services without a [volume](/volumes) by Trial & Hobby users will use Railway Metal by default. | 🟢 |
| Starting January 1st, 2025 | We will be gradually upgrading services _without a [volume](/volumes)_ to Railway Metal. You can learn more about the gradual upgrade [here](#gradual-upgrade). | 🟢 |
| Starting January 31st, 2025 | All new deploys on all services _without a [volume](/volumes)_ by Trial & Hobby users will use Railway Metal by default. | 🟢 |
| Starting February 14th, 2025 | All new deploys on all services _without a [volume](/volumes)_ by Pro & Enterprise users will use Railway Metal by default. | 🟢 |
| Starting March 14th, 2025 | All new deploys on services _with a [volume](/volumes)_ by Trial & Hobby users will use Railway Metal by default. | 🟢 |
| Starting March 21st, 2025 | We will begin migrating services to Railway metal for Hobby Users | 🟢 |
| Starting March 28th, 2025 | All new deploys on services _with a [volume](/volumes)_ by Pro & Enterprise users will use Railway Metal by default. | 🟢 |
| Starting May 2nd, 2025 | We will begin migrating services to Railway metal for Pro Users | 🟢 |
| Starting June 6th, 2025 | We will begin migrating services to Railway metal for Enterprise Users | 🟠 |
The migration is aimed to be completed by the 4th of July, 2025.
#### Pricing updates
If you migrate 80 percent of your workloads to Railway Metal, you'll benefit from significantly reduced costs:
- **Egress Fees**: Reduced by 50%, from $0.10/GB to $0.05/GB.
- **Disk Storage**: Reduced from $0.25/GB to $0.15/GB.
These pricing updates are automatically applied once 80 percent of your workloads are running on Railway Metal.
#### FAQ
##### Is this a free upgrade?
Yes.
##### How do I receive the upgrade sooner?
Go to your service's `Settings -> Scale -> Regions`, and select any region
with the `Metal (New)` tag.
Refer to [Regions & Availability](#regions--availability) to see the regions
available for Railway Metal.
##### How do I know if i'm on Railway metal?
To check if your service is running on Railway Metal, go to your service's
`Settings -> Scale -> Regions`. If you are on Railway Metal, you will see a
`Metal (New)` tag next to the region.
##### Is Railway metal stable?
Yes. We have been running a growing amount of deployments on it for the past
several months. As of the time of this writing, there are ~40,000 deployments
on Railway Metal, and we have not seen any significant issues.
##### Is there downtime if I upgrade?
Upgrading to Railway Metal re-deploys your service. This may cause a brief
period of downtime as your new deploy is being set up. You can set up
[Health Checks](/deployments/healthchecks) to prevent this.
##### What is the difference between Railway metal and regions?
Railway Metal refers to Railway's own hardware and infrastructure. Regions refer to
the physical location of the datacenter where the hardware is located.
##### I'm experiencing slow network performance after switching to us west (california) Railway metal region. What should I do?
You may experience increased latency if your application is communicating with
other services (such as databases) in `US West (Oregon)`. This is caused by the
physical distance between Oregon (the current region) and California
(Railway Metal region).
We recommend switching back to the `US West (Oregon)` region if you are
experiencing increased latency after upgrading to `US West (California)`.
See [Manual rollback](#manual-rollback) for instructions.
##### Will Railway stay on gcp?
No. We are migrating completely onto Railway managed hardware.
##### Help! After migrating, why do I have increased latency?
It's likely that your database, or service with a volume, isn't migrated over to Metal. Stateful Metal is available starting March 2025. Users who migrate to a different region other than their stateful workload will see increased latency due to the additional physical distance from your service's region. Migrate when your desired region has stateful workloads available after March 2025.
##### Why did my costs increase when moving to metal?
Although not intended, Railway Metal, has a different metrics sampler than the legacy hardware. This means that metrics will be quicker to come in, this also meant that legacy was undercounting the amount of resources on the previous hardware. As a result, some metrics like CPU will increase, others, like RAM will usually decrease.
##### How do I opt-out?
There is no way to opt-out of Railway Metal. Please [reach out to us](#getting-help)
if you have any concerns.
#### Getting help
Please reach out to us [on the Railway Help Station](https://station.railway.com/feedback/feedback-railway-metal-a41f03a1) if you run into any issues. You can also reach out to us over [Slack](/platform/support#slack) if you are
a Pro or [Business Class / Enterprise](/platform/support#business-class)
customer.
### Priority boarding
Source: https://docs.railway.com/platform/priority-boarding.md
Priority Boarding is Railway's beta program for getting access early to new features. Learn how to be a part of it.
Priority Boarding is Railway's **beta program** and is available to all Railway users. The Railway team is always working on pushing new beta features out to priority boarding.
To read more about Priority Boarding, check out Priority Boarding: The Journey to Get There.
#### Enable priority boarding
Visit the Feature Flags page in your account settings and flip the "Priority Boarding" switch to enable it.
Once enabled, any new features we release to Priority Boarding will automatically be enabled for your account.
**Use Priority Boarding with caution if you have production workloads running**, as beta features may have unexpected behavior.
#### Keep us posted
From this point forward, you'll have Priority Boarding features automatically enabled for your account. We'll notify you of any new features via the [Changelog](https://railway.com/changelog).
We kindly request that you report any issues you encounter on Central Station.
That's all there is to it! Thanks for helping improve Railway, and we'll see you in Priority Boarding.
---
### Compare to Heroku
Source: https://docs.railway.com/platform/compare-to-heroku.md
Compare Railway and Heroku on infrastructure, pricing model and deployment experience, with a step-by-step migration guide.
_Last updated: June 2026_
> Looking for a pricing-focused comparison? See [railway.com/compare/heroku](https://railway.com/compare/heroku).
At a high level, both Railway and Heroku can be used to deploy your app. Both platforms share many similarities:
- You can deploy your app from a Docker image or by importing your app’s source code from GitHub.
- Services are deployed to a long-running server.
- Connect your GitHub repository for automatic builds and deployments on code pushes.
- Create isolated preview environments for every pull request.
- Support for instant rollbacks.
- Integrated metrics and logs.
- Define Infrastructure-as-Code (IaC).
- Command-line-interface (CLI) to manage resources.
- Integrated build pipeline with the ability to define pre-deploy command.
- Custom domains with fully managed TLS, including wildcard domains.
- Run arbitrary commands against deployed services (SSH).
That said, there are some differences between the platforms that might make Railway a better fit for you.
#### Scaling strategies
##### Heroku
Heroku follows a traditional, instance-based model. Each instance has a set of allocated compute resources (memory and CPU).
In the scenario where your deployed service needs more resources, you can either scale:
- Vertically: you will need to manually upgrade to a large instance size to unlock more compute resources.
- Horizontally: your workload will be distributed across multiple running instances. You can either:
- Manually specify the machine count.
- Autoscale by defining a minimum and maximum instance count. The number of running instances will increase/decrease based on a target CPU and/or memory utilization you specify.
The main drawback of this setup is that it requires manual developer intervention. Either by:
- Manually changing instance sizes/running instance count.
- Manually adjusting thresholds because you can get into situations where your service scales up for spikes but doesn’t scale down quickly enough, leaving you paying for unused resources.
Beyond scaling, there are other notable limitations. Heroku doesn’t natively support multi-region deployments. To achieve that, you must create separate instances in different regions and set up an external load balancer to route traffic appropriately.
Furthermore, services deployed to the platform do not offer persistent data storage. Any data written to the local filesystem is ephemeral and will be lost upon redeployment, meaning you'll need to integrate with external storage solutions if your application requires data durability.
##### Railway
Railway automatically manages compute resources for you. Your deployed services can scale up or down based on incoming workload without manual configuration of metrics/thresholds or picking instance sizes. Each plan includes defined CPU and memory limits that apply to your services.
You can scale horizontally by deploying multiple replicas of your service. Railway automatically distributes public traffic randomly across replicas within each region. Each replica runs with the full resource limits of your plan.
For example, if you're on the Pro plan, each replica gets 24 vCPU and 24 GB RAM. So, deploying 3 replicas gives your service a combined capacity of 72 vCPU and 72 GB RAM.
```bash
Total resources = number of replicas × maximum compute allocation per replica
```
Replicas can be placed in different geographical locations for multi-region deployments. The platform automatically routes public traffic to the nearest region, then randomly distributes requests among the available replicas within that region. No need to define compute usage thresholds.
You can also set services to start on a schedule using a crontab expression. This lets you run scripts at specific times and only pay for the time they’re running.
#### Pricing
##### Heroku
Heroku follows a traditional, instance-based pricing. You select the amount of compute resources you need from a list of instance sizes where each one has a fixed monthly price.
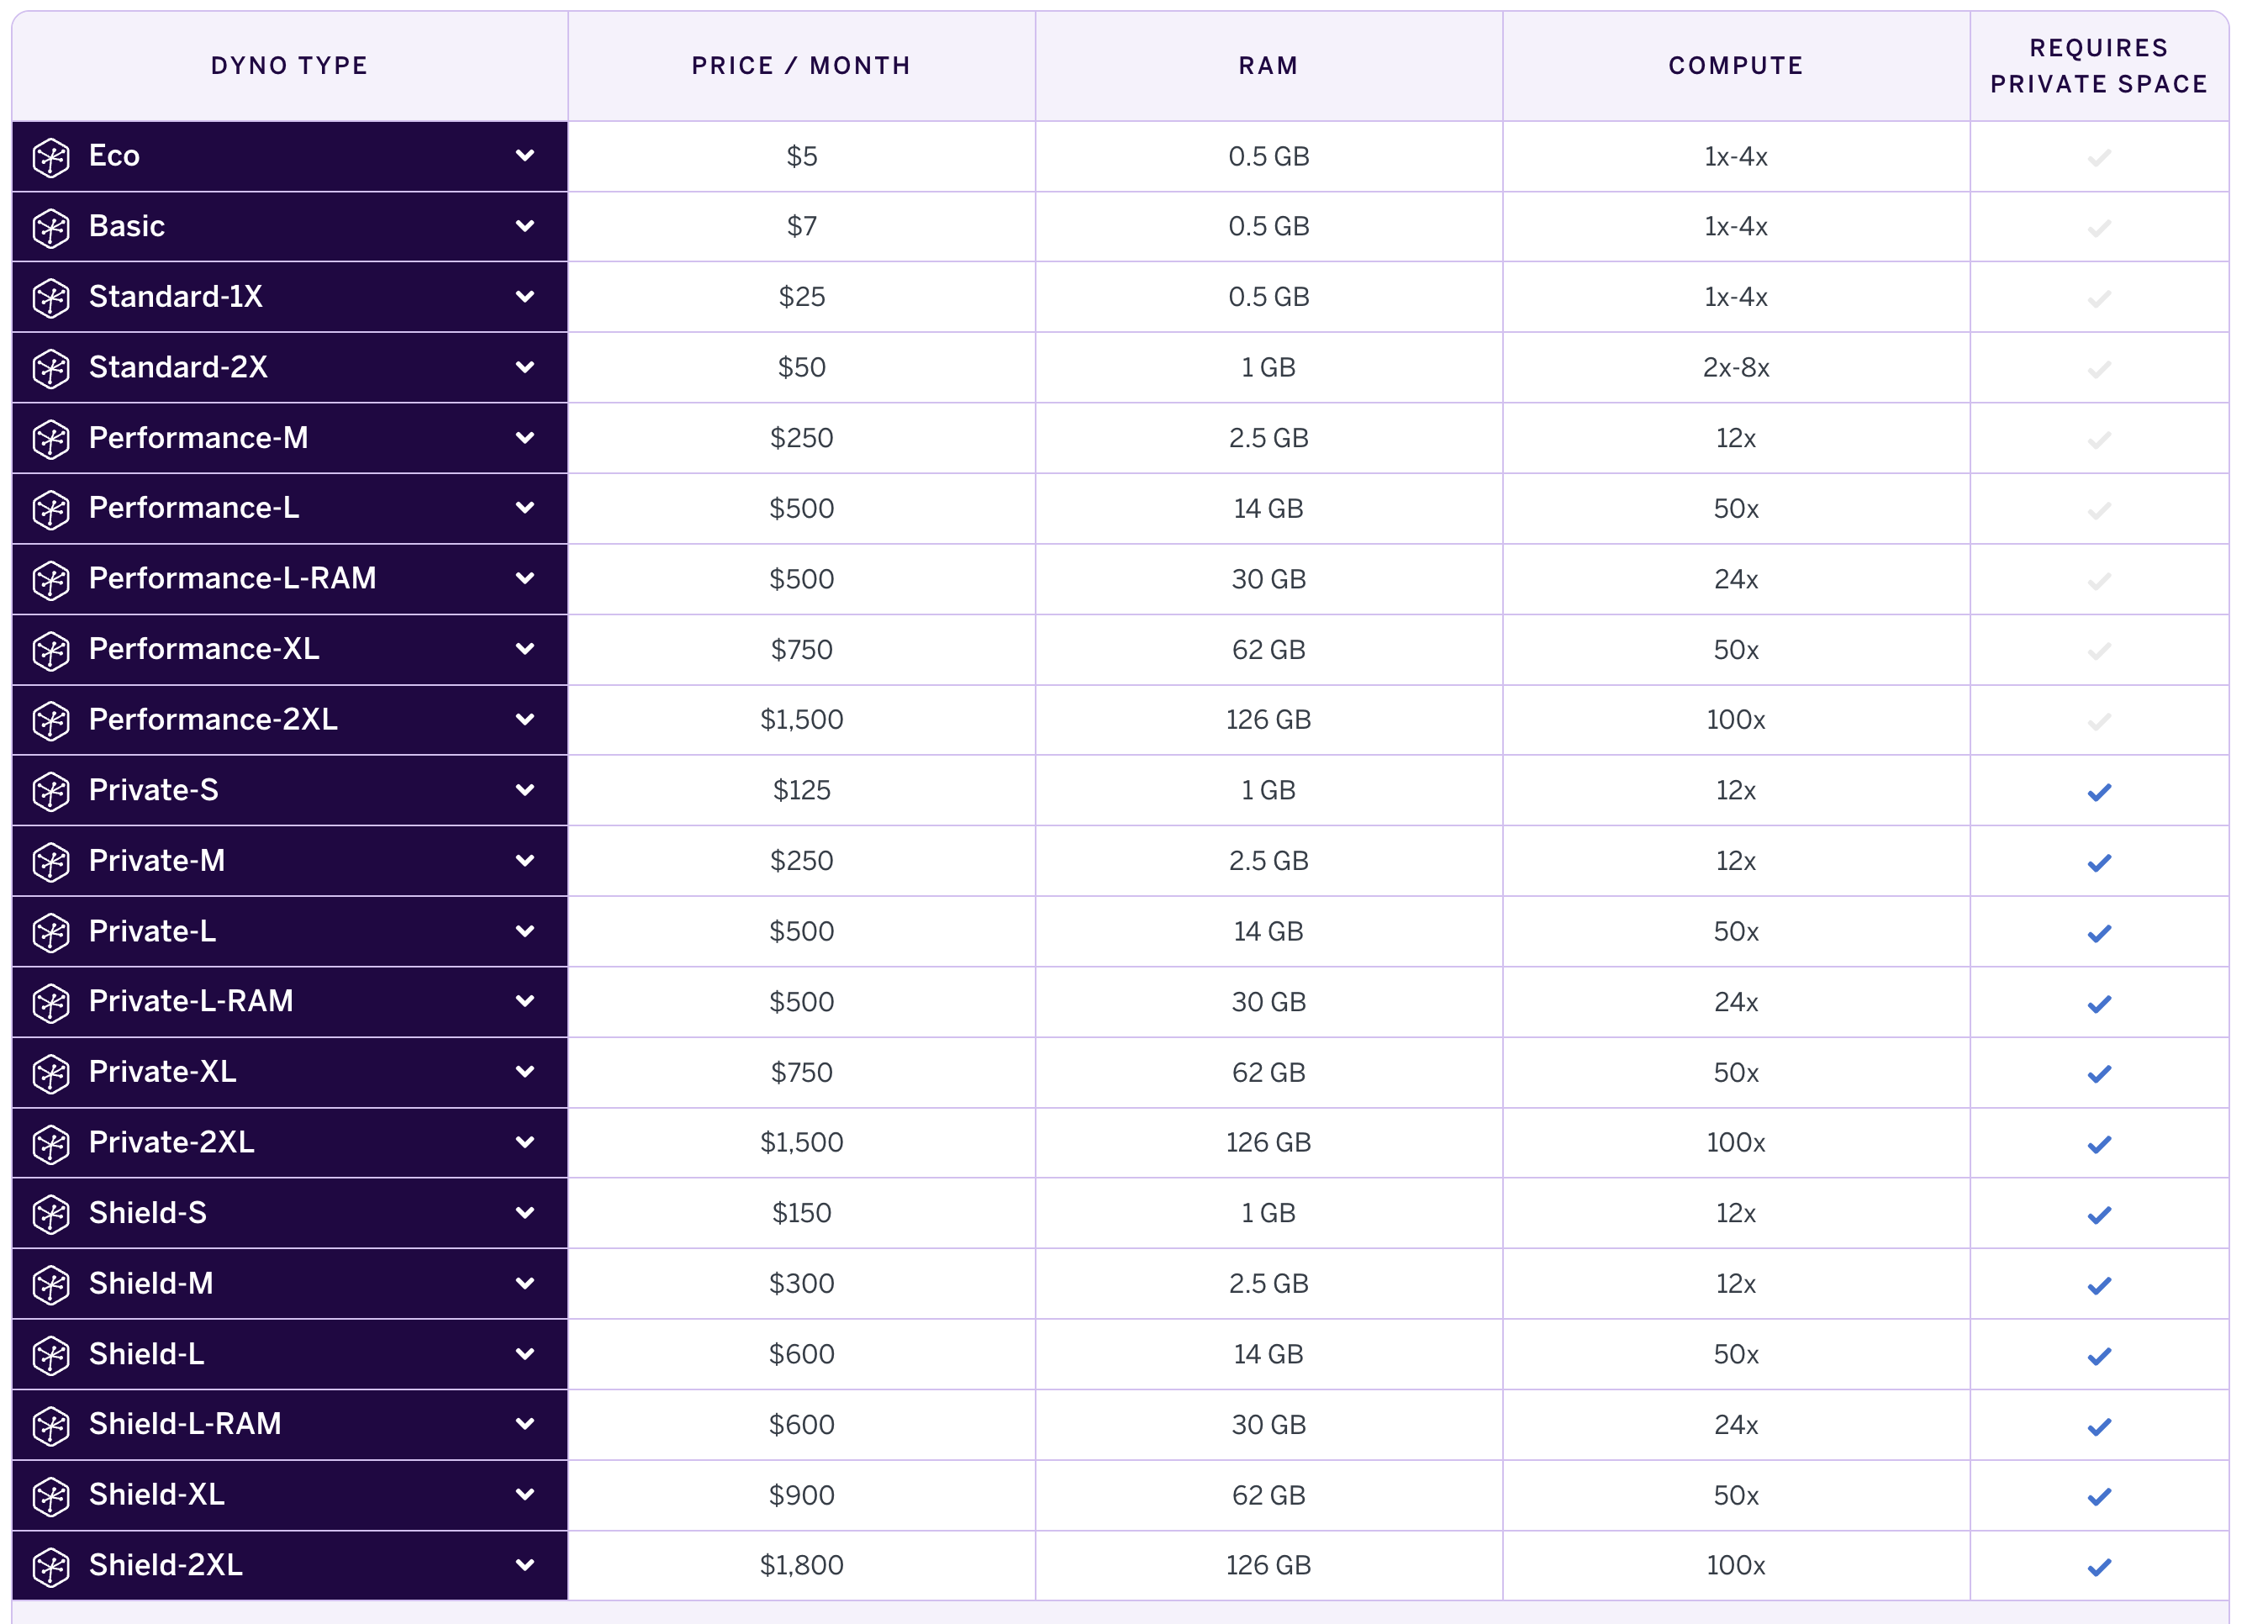
While this model gives you predictable pricing, the main drawback is you end up in one of two situations:
- Under-provisioning: your deployed service doesn’t have enough compute resources which will lead to failed requests.
- Over-provisioning: your deployed service will have extra unused resources that you’re overpaying for every month.
Enabling horizontal autoscaling can help with optimizing costs, but the trade-off will be needing to figure out the right amount of thresholds instead.
Additionally, Heroku runs on AWS, so the unit economics of the business need to be high to offset the cost of the underlying infrastructure. Those extra costs are then passed down to you as the user, so you end up paying extra for:
- Unlocking additional features (e.g. private networking is a paid enterprise add-on).
- Pay extra for resources (e.g., bandwidth, memory, CPU and storage).
##### Railway
Railway automatically scales your infrastructure up or down based on workload demands, adapting in real time without any manual intervention. This makes it possible to offer a usage-based pricing model that depends on active compute time and the amount of resources it consumes. You only pay for what your deployed services use.
```
Active compute time x compute size (memory and CPU)
```
You don’t need to think about instance sizes or manually configure them. All deployed services scale automatically.
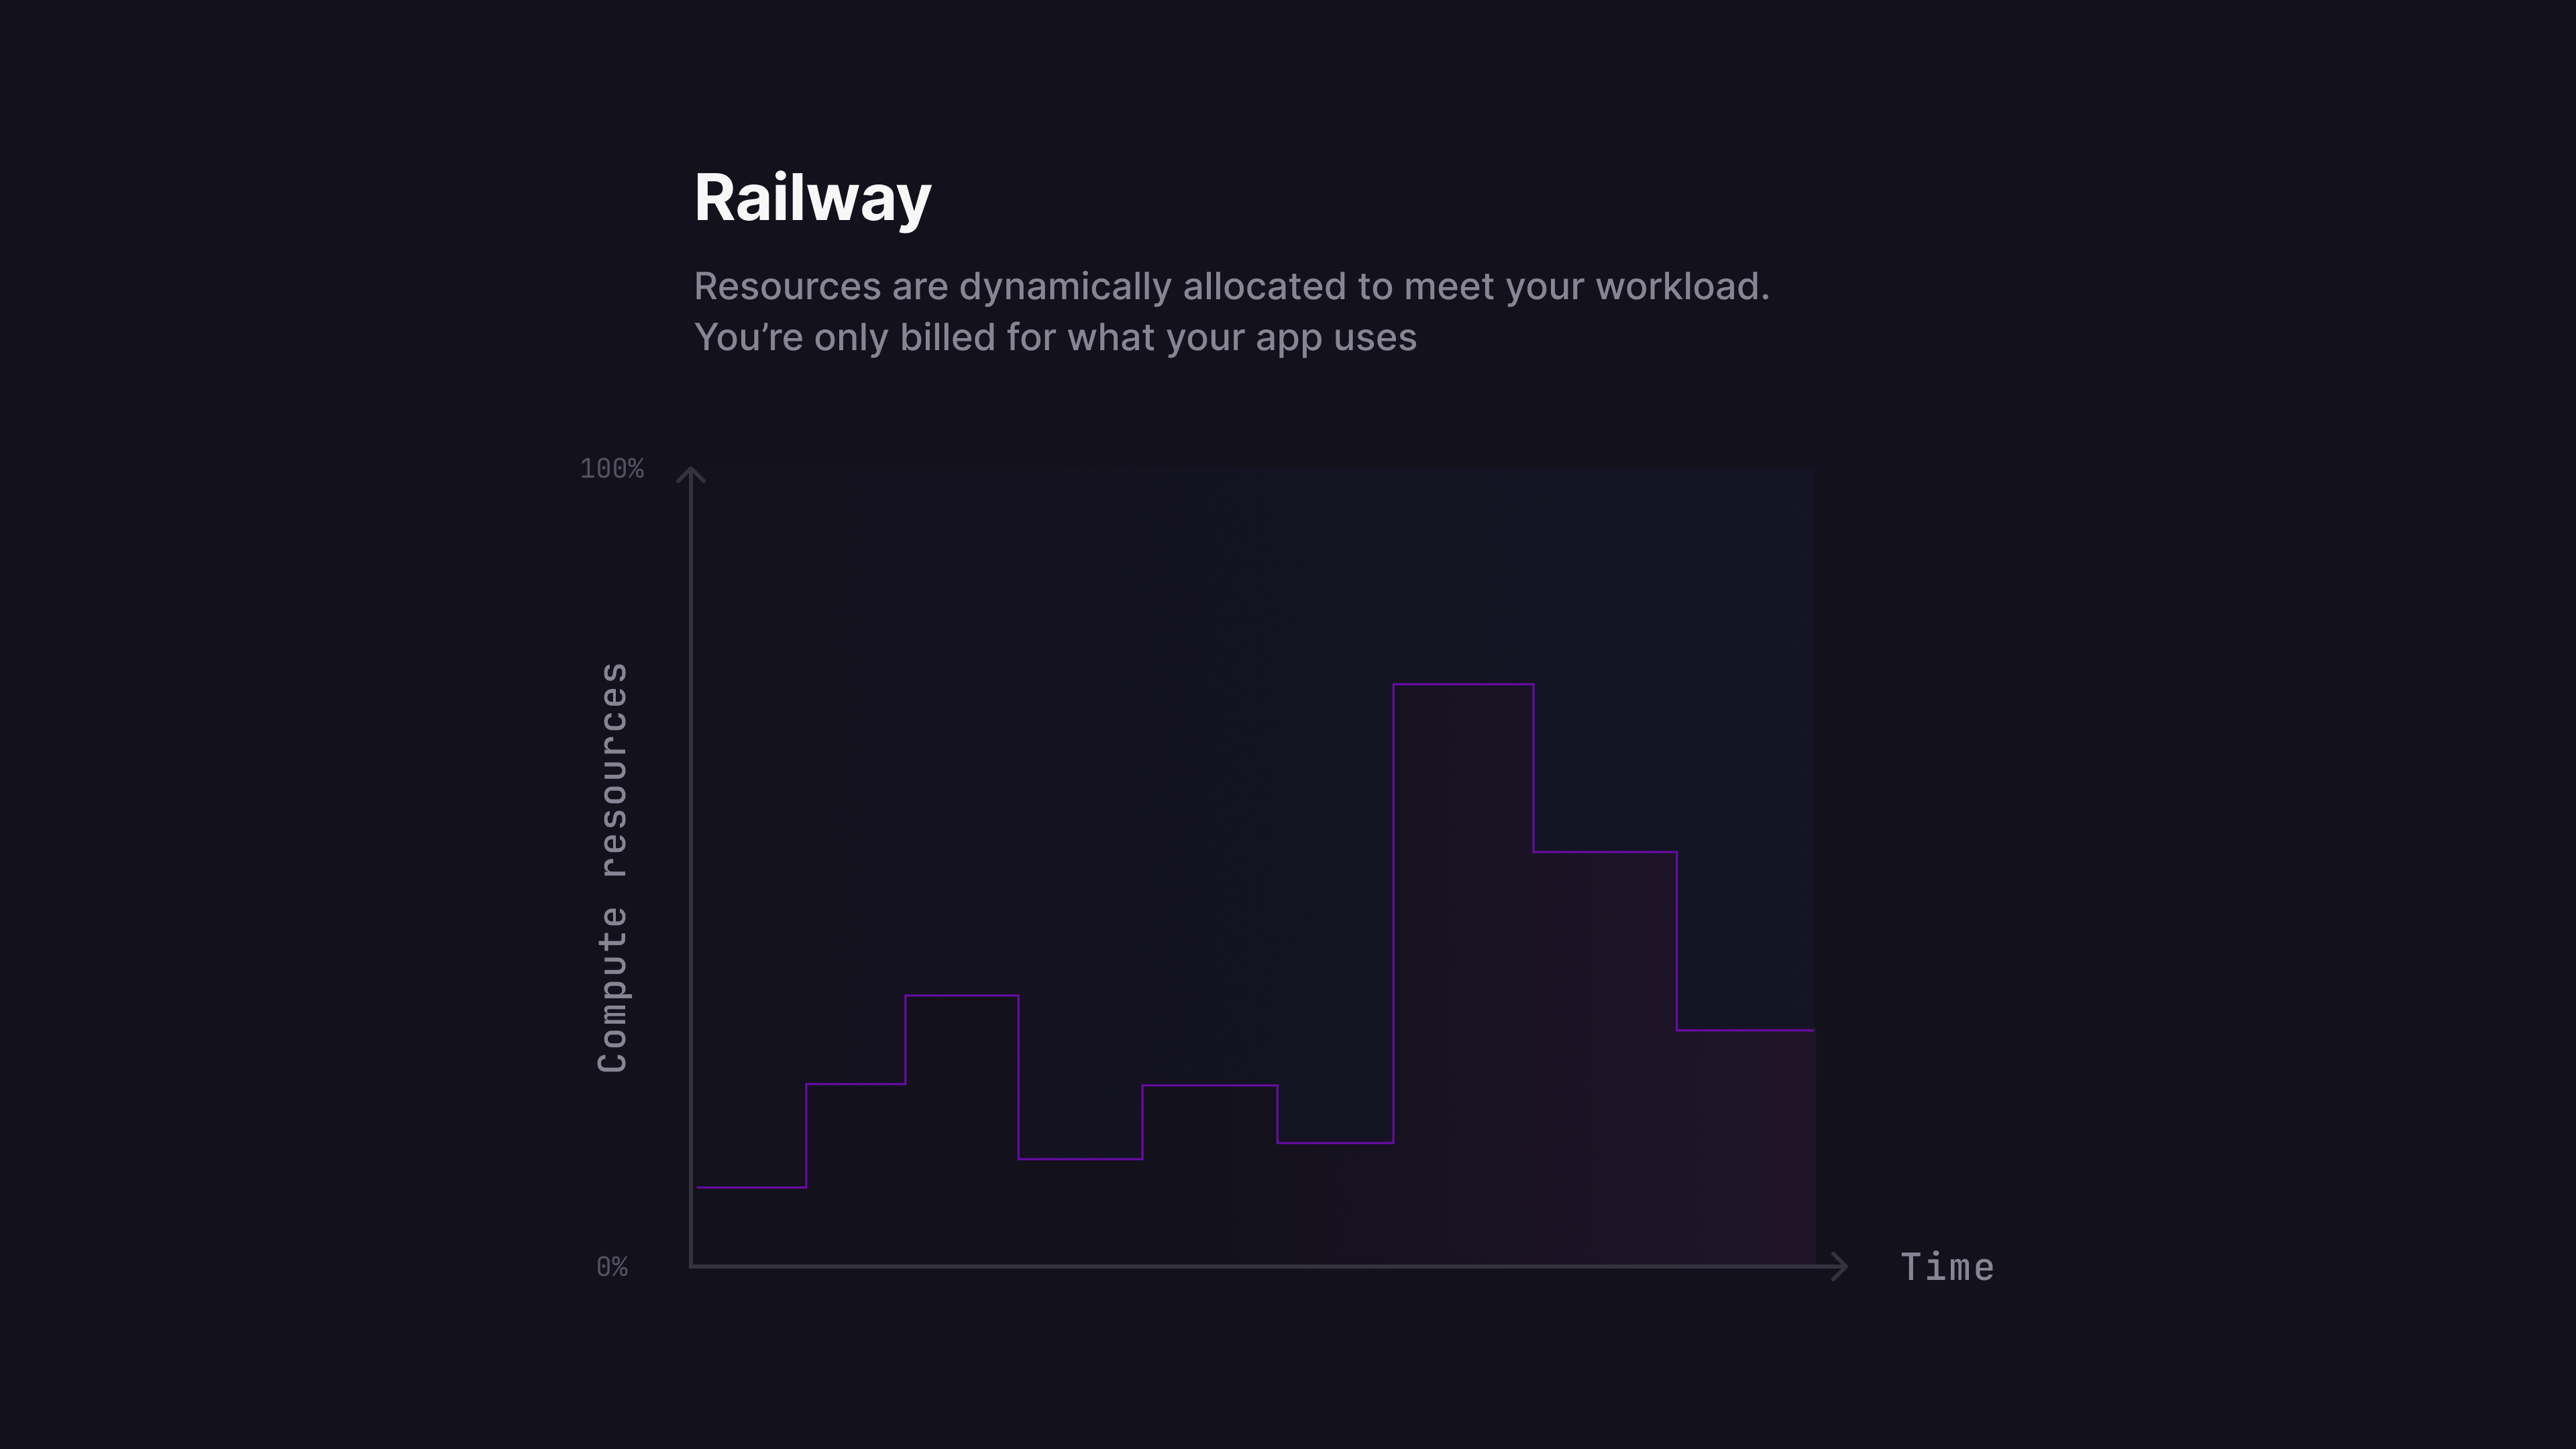
If you spin up multiple replicas for a given service, you’ll only be charged for the active compute time for each replica.
Railway also has a [serverless](/deployments/serverless) feature, which helps further reduce costs when enabled. When a service has no outbound requests for over 10 minutes, it is automatically put to sleep. While asleep, the service incurs no compute charges. It wakes up on the next incoming request, ensuring seamless reactivation without manual effort. This is ideal for workloads with sporadic or bursty traffic, so you only pay when your code is running.
Finally, Railway’s infrastructure runs on hardware that’s owned and operated in data centers across the globe. This means you’re not going to be overcharged for resources.
#### Dashboard experience
##### Heroku
Heroku’s unit of deployment is the app, and each app is deployed independently. If you have a different infrastructure components (e.g. API, frontend, background workers, etc.) they will be treated as independent entities. There is no top‑level “project” object that groups related apps.
Additionally, Heroku does not support shared environment variables across apps. Each deployed app has its own isolated set of variables, making it harder to manage secrets or config values shared across multiple services.
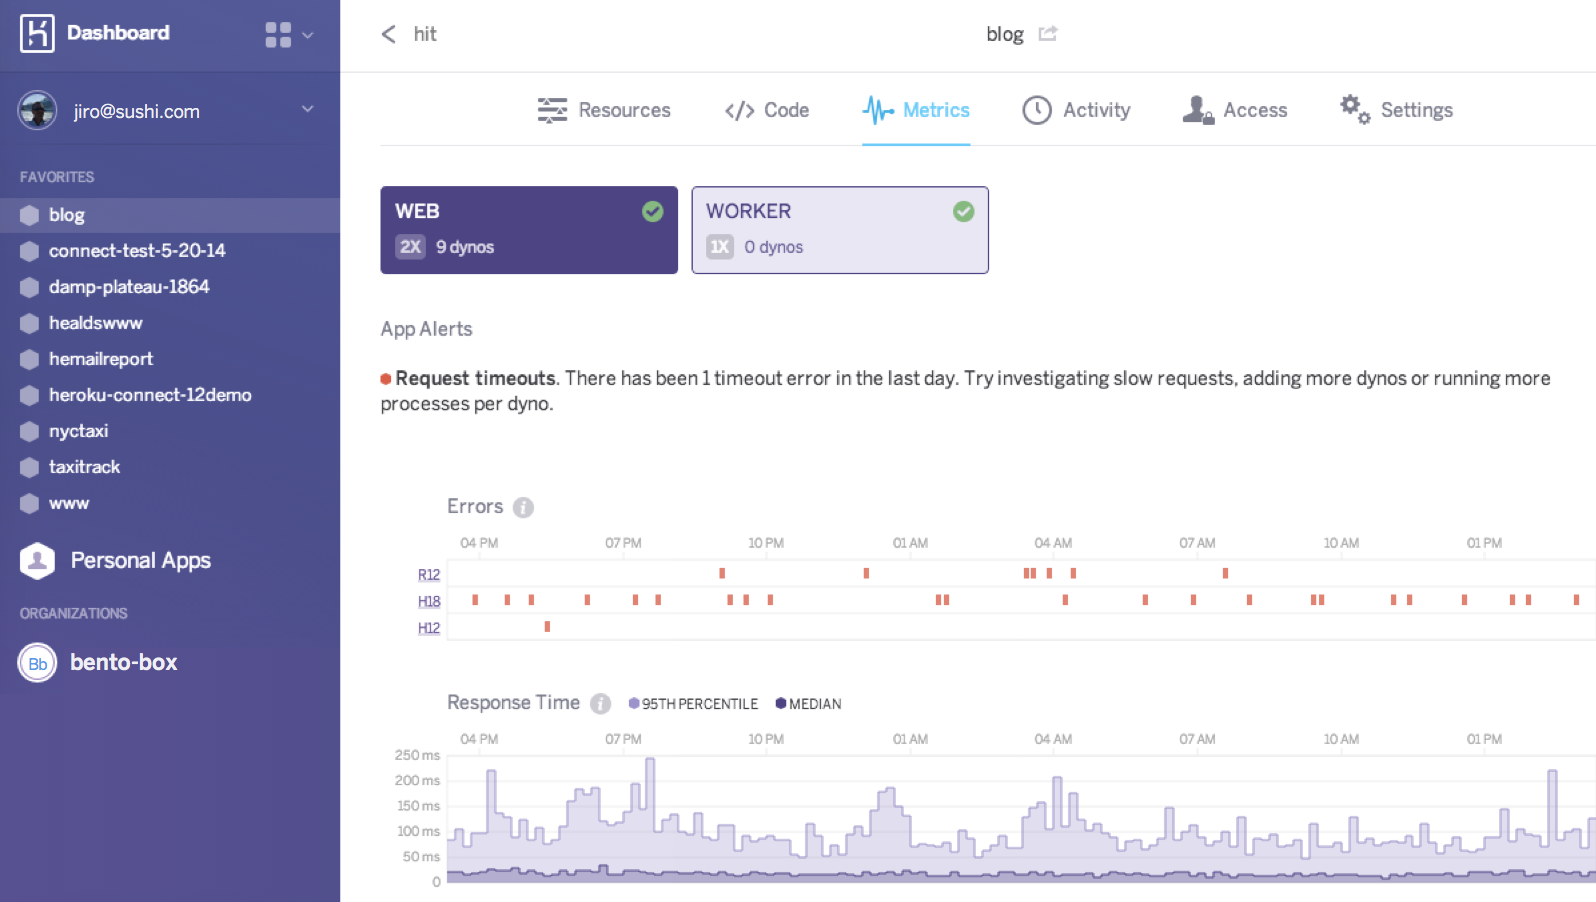
##### Railway
Railway’s dashboard offers a real-time collaborative canvas where you can view all of your running services and databases at a glance. You can group the different infrastructure components and visualize how they’re related to one other.
You can also share environment variables between services, streamlining config management across complex projects with multiple components.
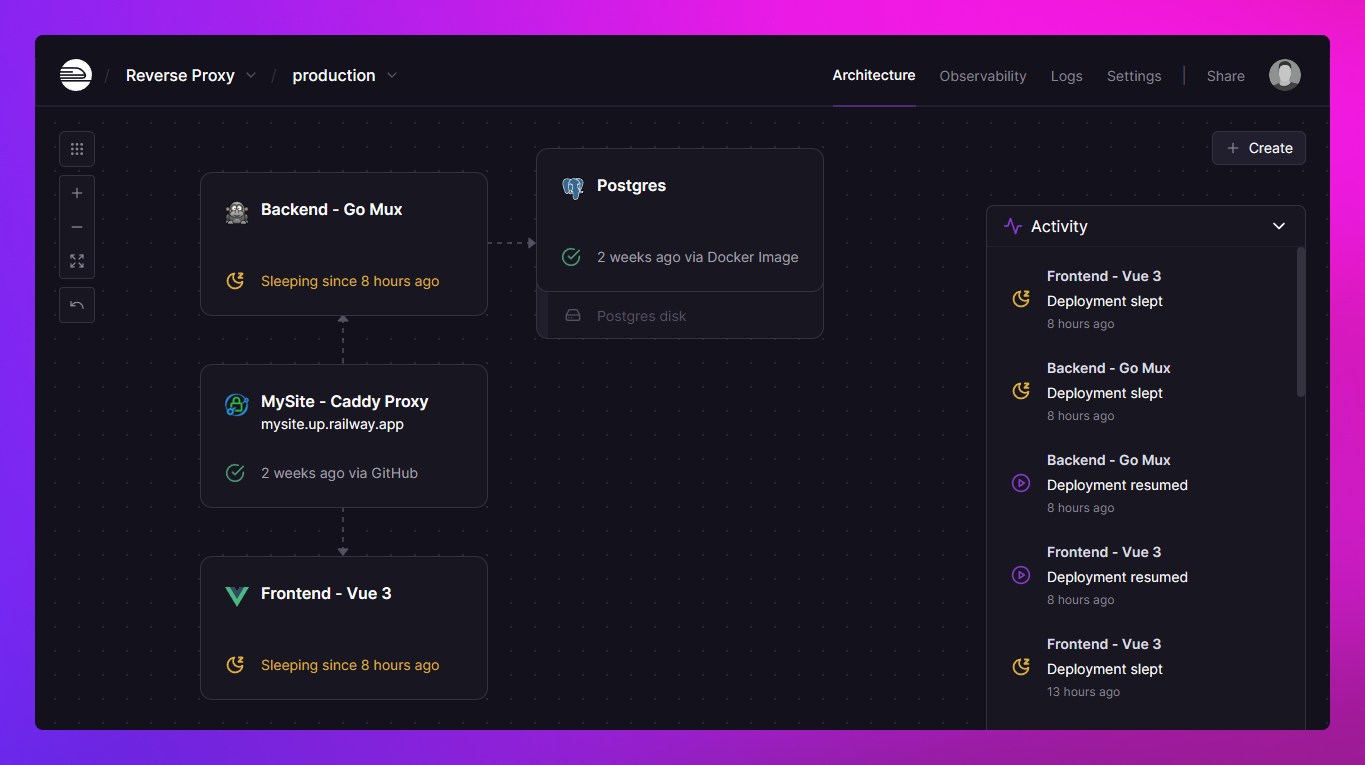
Additionally, Railway offers a template directory that makes it easy to self-host open-source projects with just a few clicks. If you publish a template and others deploy it in their projects, you’ll earn a 25% kickback of their usage costs.
Check out all templates at [railway.com/deploy](http://railway.com/deploy)
#### Summary
| **Category** | **Heroku** | **Railway** |
| --------------------------- | ------------------------------------------------------------------------------------------------ | ---------------------------------------------------------------------------------------------------------------- |
| **Scaling Model** | Instance-based | Usage-based |
| **Vertical Scaling** | Manual upgrade to larger instance sizes | Auto-scales to the plan's limits without manual intervention |
| **Horizontal Scaling** | Manual or threshold-based autoscaling; requires setting CPU/memory limits | Add replicas manually; traffic routed automatically across replicas and regions |
| **Autoscaling Flexibility** | Threshold-based, needs manual tuning | Fully automated; scales based on workload |
| **Multi-region Support** | Not natively supported; must set up separate apps + external load balancer | Built-in; auto-routes traffic to nearest region and balances load across replicas |
| **Persistent Storage** | Not supported; ephemeral file system only | Persistent volumes are supported |
| **Private Networking** | Available with paid Enterprise add-on | Included at no extra cost |
| **Pricing Model** | Dynos from $5/mo Eco (sleeps) to $1,500/mo; Standard-1X $25/mo for 0.5 GB. Manual tuning required to avoid under/over-provisioning | $20/vCPU-month, $10/GB-month RAM, billed per second of actual usage. Inherently optimized by dynamic scaling |
| **Infrastructure Provider** | AWS-based; higher base costs | Railway-owned global infrastructure; lower costs and no feature gating |
| **Dashboard UX** | Traditional app-based dashboard; each app is independent | Visual, collaborative canvas view for full projects with interlinked services |
| **Project Structure** | No concept of grouped services/projects | Groups all infra components visually under a unified project view |
| **Environment Variables** | Isolated per app | Isolated per app but can be shared across services within a project |
| **Wildcard Domains** | Not supported; manual configuration needed per subdomain | Fully supported; configure at the project level |
#### Frequently asked questions
##### Is Railway cheaper than Heroku?
For most workloads, yes. Heroku charges a fixed monthly price per dyno per app (from $5/mo for Eco dynos that sleep, with Standard-1X at $25/mo for 0.5 GB), so you pay the same whether the dyno is busy or idle, and every app, worker, and staging environment adds its own dyno fees. Railway bills per second of aggregate actual usage at $20/vCPU-month and $10/GB-month RAM with no per-service charge, so multi-service projects don't multiply fixed costs as you scale; if you prefer a fixed, predictable monthly bill, Heroku's instance pricing is simpler to forecast.
##### What is the Railway equivalent of a Heroku dyno?
A Railway service. The difference is that you don't pick an instance size: each service automatically scales up to your plan's CPU and memory limits, and you can add replicas for horizontal scaling. You're charged for the active compute time each service and replica actually uses.
##### Does Railway have an ephemeral filesystem like Heroku?
No. Heroku's filesystem is ephemeral, so any data written locally is lost on redeploy and requires external storage solutions. Railway supports persistent volumes ($0.15/GB-month), so databases and apps that write to disk can keep their data across deployments.
##### How hard is it to migrate from Heroku to Railway?
If your app deploys from a GitHub repo or Docker image, the migration is mostly connecting the repo, copying your environment variables, and configuring a domain; the steps below walk through it. You can sign up for free and receive $5 in credits to try the platform before committing.
#### Migrate from Heroku to Railway
To get started, [create an account on Railway](https://railway.com/new). You can sign up for free and receive $5 in credits to try out the platform.
##### Deploying your app
1. “Choose Deploy from GitHub repo”, connect your GitHub account, and select the repo you would like to deploy.
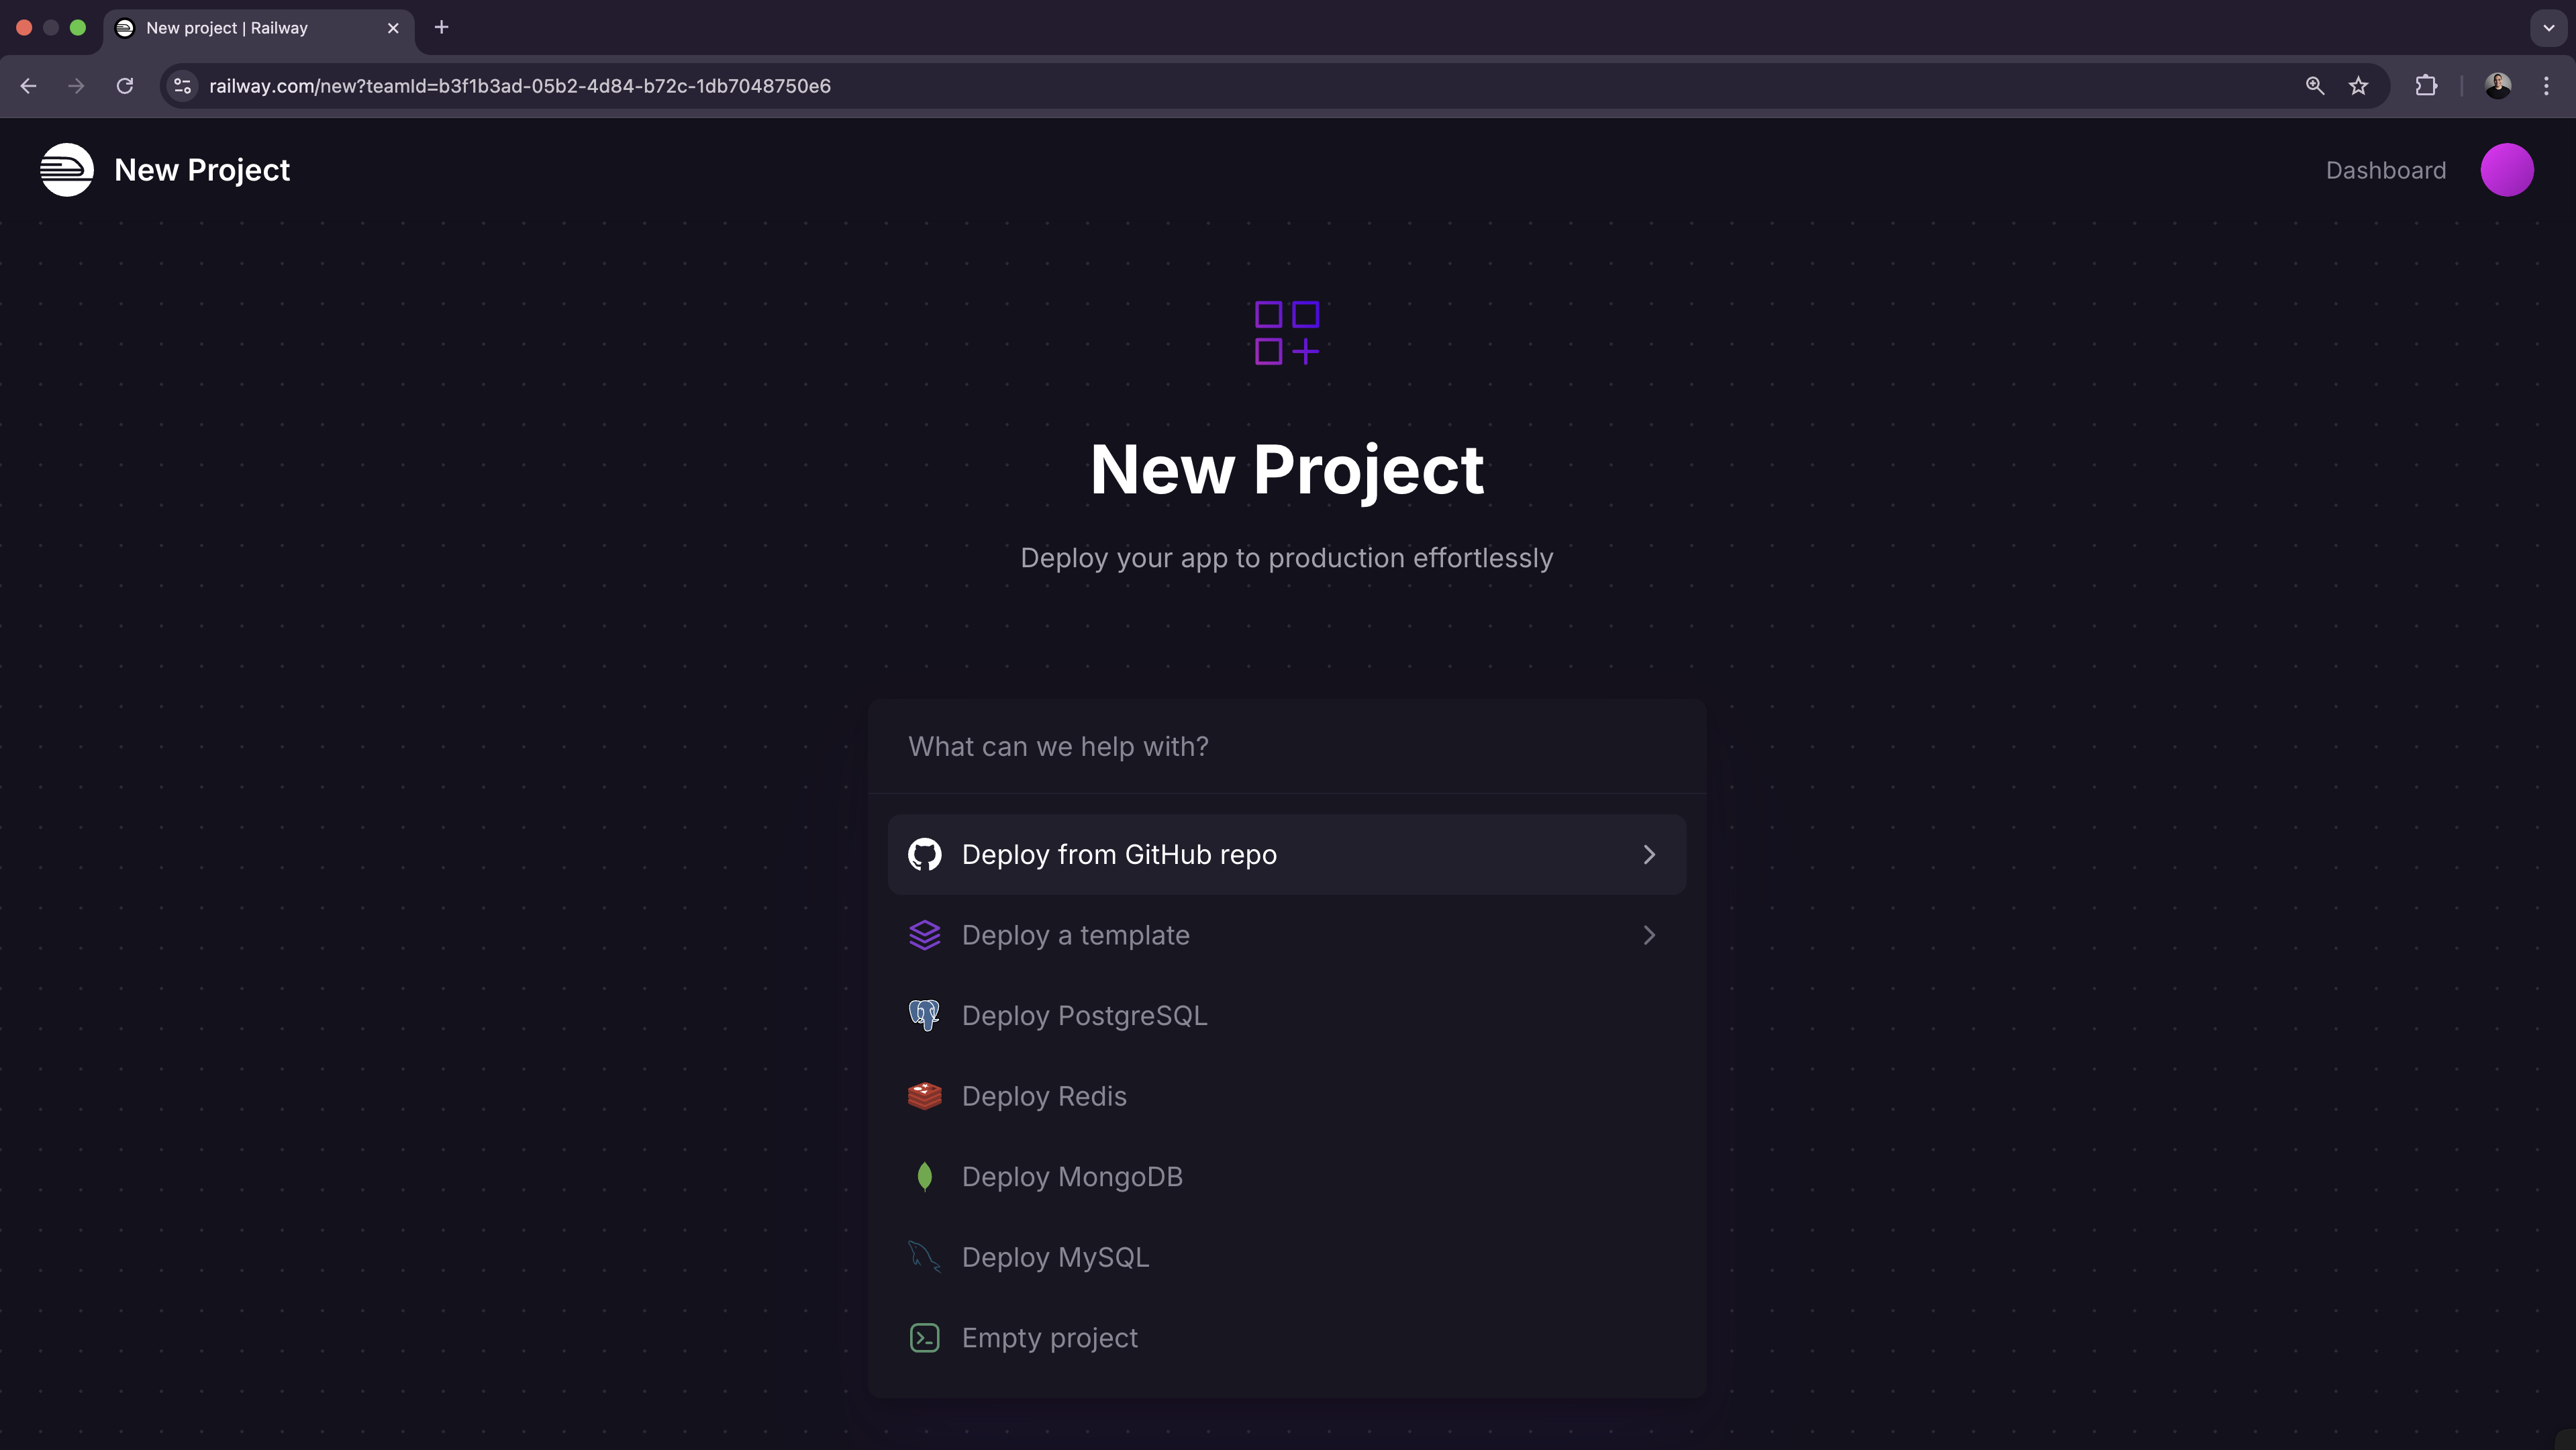
2. If your project is using any environment variables or secrets:
1. Click on the deployed service.
2. Navigate to the “Variables” tab.
3. Add a new variable by clicking the “New Variable” button. Alternatively, you can import a `.env` file by clicking “Raw Editor” and adding all variables at once.
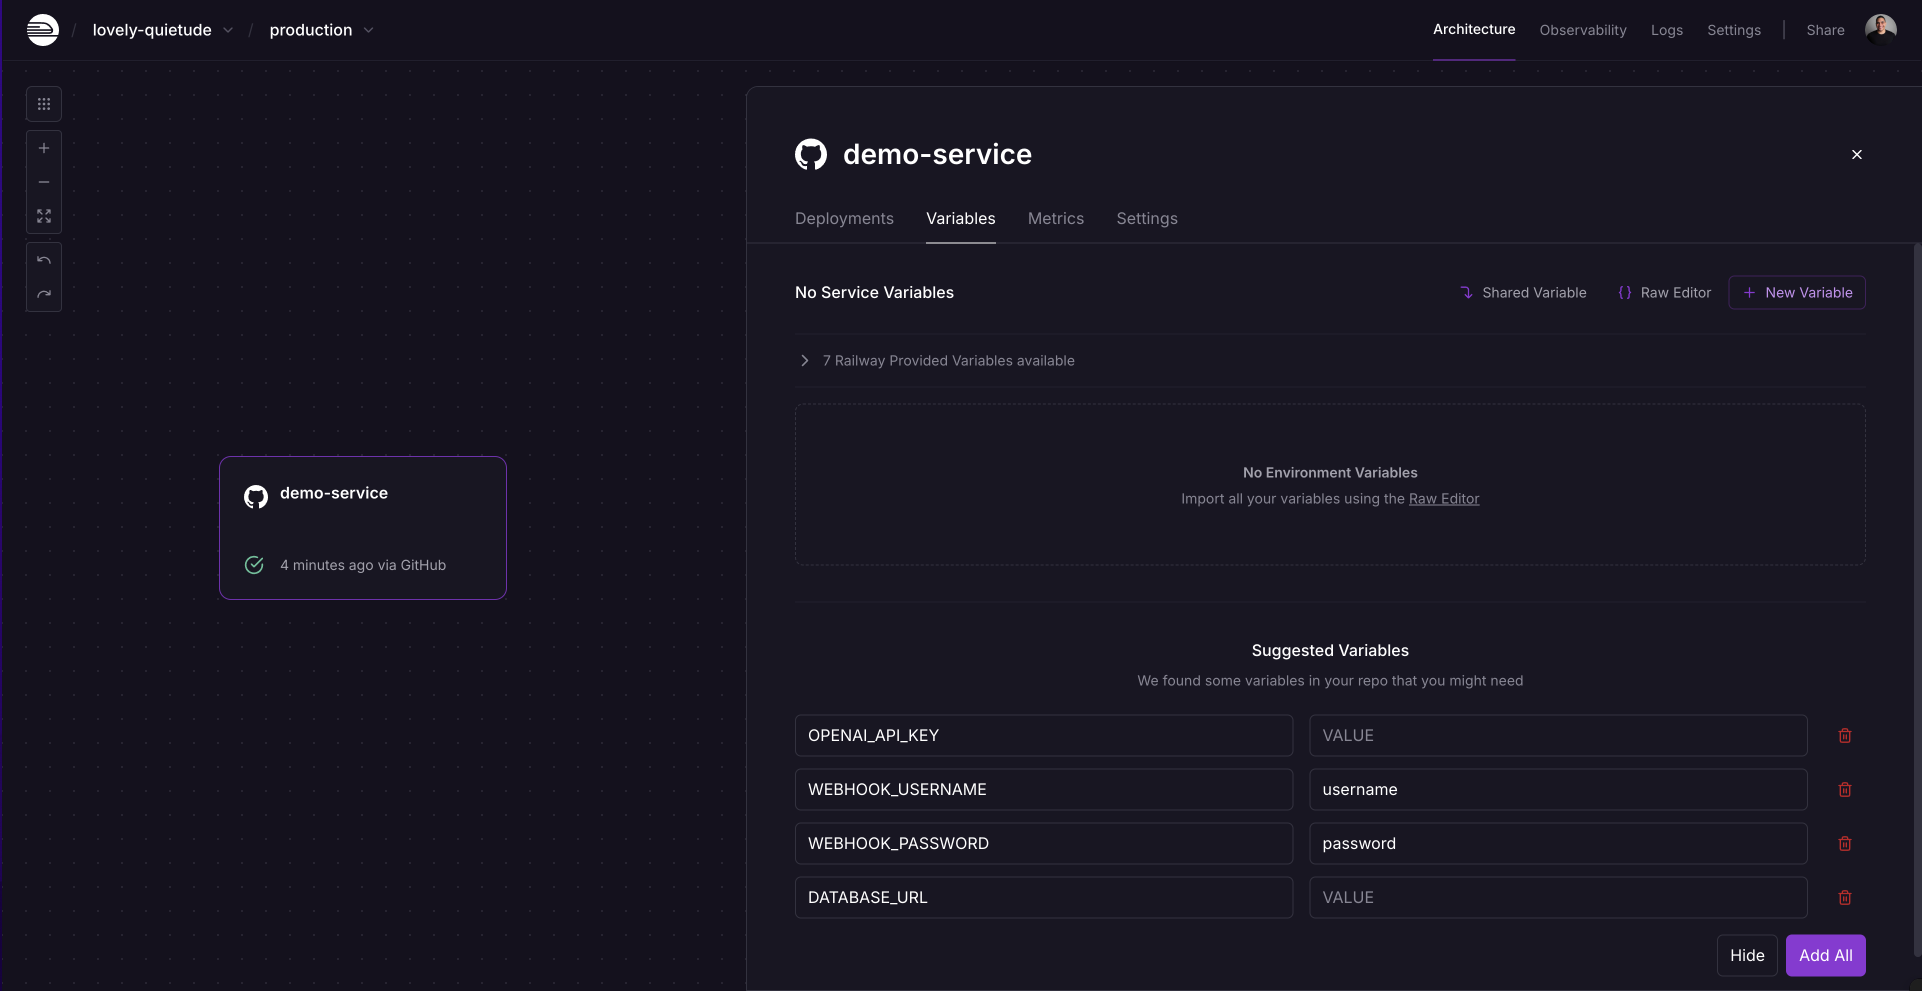
3. To make your project accessible over the internet, you will need to configure a domain:
1. From the project’s canvas, click on the service you would like to configure.
2. Navigate to the “Settings” tab.
3. Go to the “Networking” section.
4. You can either:
1. Generate a Railway service domain: this will make your app available under a `.up.railway.app` domain.
2. Add a custom domain: follow the DNS configuration steps.
#### Need help or have questions?
If you need help along the way, the [Help Station](https://station.railway.com/) is a great resource to get support from the team and community.
Working with a larger workload or have specific requirements? [Book a call with the Railway team](https://cal.com/team/railway/work-with-railway) to explore how we can best support your project.
### Compare to Render
Source: https://docs.railway.com/platform/compare-to-render.md
Compare Railway and Render on infrastructure, pricing model and dashboard experience, with a step-by-step migration guide.
_Last updated: June 2026_
> Looking for a pricing-focused comparison? See [railway.com/compare/render](https://railway.com/compare/render).
At a high level, both Railway and Render can be used to deploy your app. Both platforms share many similarities:
- You can deploy your app from a Docker image or by importing your app’s source code from GitHub.
- Multi-service architecture where you can deploy different services under one project (e.g. a frontend, APIs, databases, etc.).
- Services are deployed to a long-running server.
- Services can have persistent storage via volumes.
- Public and private networking are included out-of-the-box.
- Healthchecks are available to guarantee zero-downtime deployments.
- Connect your GitHub repository for automatic builds and deployments on code pushes.
- Create isolated preview environments for every pull request.
- Support for instant rollbacks.
- Integrated metrics and logs.
- Define Infrastructure-as-Code (IaC).
- Command-line-interface (CLI) to manage resources.
- Integrated build pipeline with the ability to define pre-deploy command.
- Support for wildcard domains.
- Custom domains with fully managed TLS.
- Schedule tasks with cron jobs.
- Run arbitrary commands against deployed services (SSH).
- Shared environment variables across services.
That said, there are some differences between the platforms that might make Railway a better fit for you.
#### Scaling strategies
##### Render
Render follows a traditional, instance-based model. Each instance has a set of allocated compute resources (memory and CPU).
In the scenario where your deployed service needs more resources, you can either scale:
- Vertically: you will need to manually upgrade to a large instance size to unlock more compute resources.
- Horizontally: your workload will be distributed across multiple running instances. You can either:
- Manually specify the machine count.
- Autoscale by defining a minimum and maximum instance count. The number of running instances will increase/decrease based on a target CPU and/or memory utilization you specify.
The main drawback of this setup is that it requires manual developer intervention. Either by:
- Manually changing instance sizes/running instance count.
- Manually adjusting thresholds because you can get into situations where your service scales up for spikes but doesn’t scale down quickly enough, leaving you paying for unused resources.
##### Railway
Railway automatically manages compute resources for you. Your deployed services can scale up or down based on incoming workload without manual configuration of metrics/thresholds or picking instance sizes. Each plan includes defined CPU and memory limits that apply to your services.
You can scale horizontally by deploying multiple replicas of your service. Railway automatically distributes public traffic randomly across replicas within each region. Each replica runs with the full resource limits of your plan.
For example, if you're on the Pro plan, each replica gets 24 vCPU and 24 GB RAM. So, deploying 3 replicas gives your service a combined capacity of 72 vCPU and 72 GB RAM.
```bash
Total resources = number of replicas × maximum compute allocation per replica
```
Replicas can be placed in different geographical locations for multi-region deployments. The platform automatically routes public traffic to the nearest region, then randomly distributes requests among the available replicas within that region. No need to define compute usage thresholds.
You can also set services to start on a schedule using a crontab expression. This lets you run scripts at specific times and only pay for the time they’re running.
#### Pricing
##### Render
Render follows a traditional, instance-based pricing. You select the amount of compute resources you need from a list of instance sizes where each one has a fixed monthly price.
While this model gives you predictable pricing, the main drawback is you end up in one of two situations:
- Under-provisioning: your deployed service doesn’t have enough compute resources which will lead to failed requests.
- Over-provisioning: your deployed service will have extra unused resources that you’re overpaying for every month.
Enabling horizontal autoscaling can help with optimizing costs, but the trade-off will be needing to figure out the right amount of thresholds instead.
Additionally, Render runs on AWS and GCP, so the unit economics of the business need to be high to offset the cost of the underlying infrastructure. Those extra costs are then passed down to you as the user, so you end up paying extra for:
- Unlocking additional features (e.g. horizontal autoscaling and environments are only available on paid plans).
- Pay extra for resources (e.g., bandwidth, memory, CPU and storage).
- Pay for seats where each team member you invite adds a fixed monthly fee regardless of your usage.
##### Railway
Railway automatically scales your infrastructure up or down based on workload demands, adapting in real time without any manual intervention. This makes it possible to offer a usage-based pricing model that depends on active compute time and the amount of resources it consumes. You only pay for what your deployed services use.
```
Active compute time x compute size (memory and CPU)
```
You don’t need to think about instance sizes or manually configure them. All deployed services scale automatically.

If you spin up multiple replicas for a given service, you’ll only be charged for the active compute time for each replica.
Railway also has a [serverless](/deployments/serverless) feature, which helps further reduce costs when enabled. When a service has no outbound requests for over 10 minutes, it is automatically put to sleep. While asleep, the service incurs no compute charges. It wakes up on the next incoming request, ensuring seamless reactivation without manual effort. This is ideal for workloads with sporadic or bursty traffic, so you only pay when your code is running.
Finally, Railway’s infrastructure runs on hardware that’s owned and operated in data centers across the globe. This means you’re not going to be overcharged for resources.
#### Dashboard experience
##### Render
Render’s dashboard offers a traditional dashboard where you can view all of your project’s resources.
##### Railway
Railway’s dashboard offers a real-time collaborative canvas where you can view all of your running services and databases at a glance. You can group the different infrastructure components and visualize how they’re related to one another.

Additionally, Railway offers a template directory that makes it easy to self-host open-source projects with just a few clicks. If you publish a template and others deploy it in their projects, you’ll earn a 25% kickback of their usage costs.
Check out all templates at [railway.com/deploy](http://railway.com/deploy)
#### Summary
| **Category** | **Render** | **Railway** |
| ------------------------ | ---------------------------------------------------------------------------------------------- | ------------------------------------------------------------------------------------------------------------------------------------------ |
| **Scaling Model** | Instance-based | Usage-based |
| **Vertical Scaling** | Manual upgrade to larger instance sizes. | Scales to plan limits automatically |
| **Horizontal Scaling** | Manually add/remove instances or autoscaling (based on CPU/memory thresholds); requires tuning | Manually add replicas, traffic is routed automatically across regions and replicas |
| **Multi-region Support** | Not supported | Built-in support; traffic routed to nearest region |
| **Pricing Model** | Instances from $7/mo (0.5 CPU, 512 MB) to $450/mo, plus workspace fee ($0-$499/mo). Seat-based pricing | $20/vCPU-month, $10/GB-month RAM, billed per second of actual usage; unlimited workspace seats included on Pro |
| **Cost Optimization** | Requires tuning to avoid over/under-provisioning | Inherently optimized. Pay only for used compute |
| **Infrastructure** | Runs on AWS and GCP; feature access and resources cost more | Railway-owned global infrastructure, lower unit costs and features aren't gated |
| **Dashboard UX** | Traditional dashboard to view project resources | Real-time collaborative canvas with visual infra relationships. Template directory for 1-click deployments |
#### Frequently asked questions
##### Is Railway cheaper than Render?
For a single always-busy instance, Render's fixed pricing (from $7/mo for 0.5 CPU and 512 MB up to $450/mo, plus a $0-$499/mo workspace fee) can be easier to forecast. As you scale, Railway tends to be more cost-effective: Render charges per instance provisioned, so every service, worker, and environment adds a fixed line item whether it's busy or idle, while Railway bills $20/vCPU-month and $10/GB-month RAM per second of aggregate actual usage with no per-service charge.
##### Does Railway charge per seat like Render?
No. Railway Pro is a $20/month usage minimum with unlimited workspace seats included, so adding team members costs nothing. Railway bills compute per second of actual usage at $20/vCPU-month and $10/GB-month RAM, so you only pay for what your services consume.
##### Does Railway support multi-region deployments?
Yes, multi-region support is built in. You can place replicas of a service in different regions and Railway routes public traffic to the nearest region automatically. Render does not support multi-region deployments.
##### How do I migrate from Render to Railway?
Since both platforms deploy from a GitHub repo or Docker image, migration is mostly connecting your repo, copying environment variables, and configuring a domain; the steps below walk through it. You can sign up for free and receive $5 in credits to try the platform first.
#### Migrate from Render to Railway
To get started, [create an account on Railway](https://railway.com/new). You can sign up for free and receive $5 in credits to try out the platform.
##### Deploying your app
1. “Choose Deploy from GitHub repo”, connect your GitHub account, and select the repo you would like to deploy.

2. If your project is using any environment variables or secrets:
1. Click on the deployed service.
2. Navigate to the “Variables” tab.
3. Add a new variable by clicking the “New Variable” button. Alternatively, you can import a `.env` file by clicking “Raw Editor” and adding all variables at once.

3. To make your project accessible over the internet, you will need to configure a domain:
1. From the project’s canvas, click on the service you would like to configure.
2. Navigate to the “Settings” tab.
3. Go to the “Networking” section.
4. You can either:
1. Generate a Railway service domain: this will make your app available under a `.up.railway.app` domain.
2. Add a custom domain: follow the DNS configuration steps.
#### Need help or have questions?
If you need help along the way, the [Help Station](https://station.railway.com/) is a great resource to get support from the team and community.
Working with a larger workload or have specific requirements? [Book a call with the Railway team](https://cal.com/team/railway/work-with-railway) to explore how we can best support your project.
### Compare to Fly
Source: https://docs.railway.com/platform/compare-to-fly.md
Compare Railway and Fly.io on deployment model, scaling, pricing and developer workflow, with a step-by-step migration guide.
_Last updated: June 2026_
> Looking for a pricing-focused comparison? See [railway.com/compare/fly](https://railway.com/compare/fly).
At a high level, both Railway and Fly.io can be used to deploy your app. Both platforms share several similarities:
- You can deploy your app from a Docker image or by importing your app’s source code from GitHub.
- Apps are deployed to a long-running server.
- Apps can have persistent storage through volumes.
- Public and private networking are included out-of-the-box.
- Multi-region deployments.
- Both platforms’ infrastructure runs on hardware that’s owned and operated in data centers across the globe.
- Healthchecks to guarantee zero-downtime deployments.
That said, there are differences between both platforms when it comes to the overall developer experience that can make Railway a better fit for you.
#### Deployment model & scaling
##### Fly
When you deploy your app to Fly, your code runs on lightweight Virtual Machines (VMs) called [Fly Machines](https://fly.io/docs/machines/). Each machine needs a defined amount of CPU and memory. You can either choose from [preset sizes](https://fly.io/docs/about/pricing/#started-fly-machines) or configure them separately, depending on your app’s needs.
Machines come with two types of virtual CPUs: `shared` and `performance`.
Shared CPUs are the more affordable option. They guarantee a small slice of CPU time (around 6%) but can burst to full power when there’s extra capacity. This makes them ideal for apps that are mostly idle but occasionally need to handle traffic, like APIs or web servers. Just keep in mind that heavy usage can lead to throttling.
Performance CPUs, by contrast, give you dedicated access to the CPU at all times. There’s no bursting or throttling, making them a better choice for workloads that require consistent, high performance.
**Scaling your app**
When scaling your app, you have one of two options:
- Scale a machine’s CPU and RAM: you will need to manually pick a larger instance. You can do this using the Fly CLI or API.
- Increase the number of running machines. There are two options:
- You can manually increase the number of running machines using the Fly CLI or API.
- Fly can automatically adjust the number of running or created Fly Machines dynamically. Two forms of autoscaling are supported.
- Autostop/autostart Machines: You create a “pool” of Machines in one or more regions and Fly’s Proxy start/suspend Machines based on incoming requests. With this option, Machines are never created or deleted, you need to specify how many machines your app will need.
- Metrics-based autoscaling: this is not supported out-of-the-box. However, you can deploy [`fly-autoscaler`](https://github.com/superfly/fly-autoscaler) which polls metrics and automatically creates/deletes or starts/stops existing Machines based on the metrics you define.
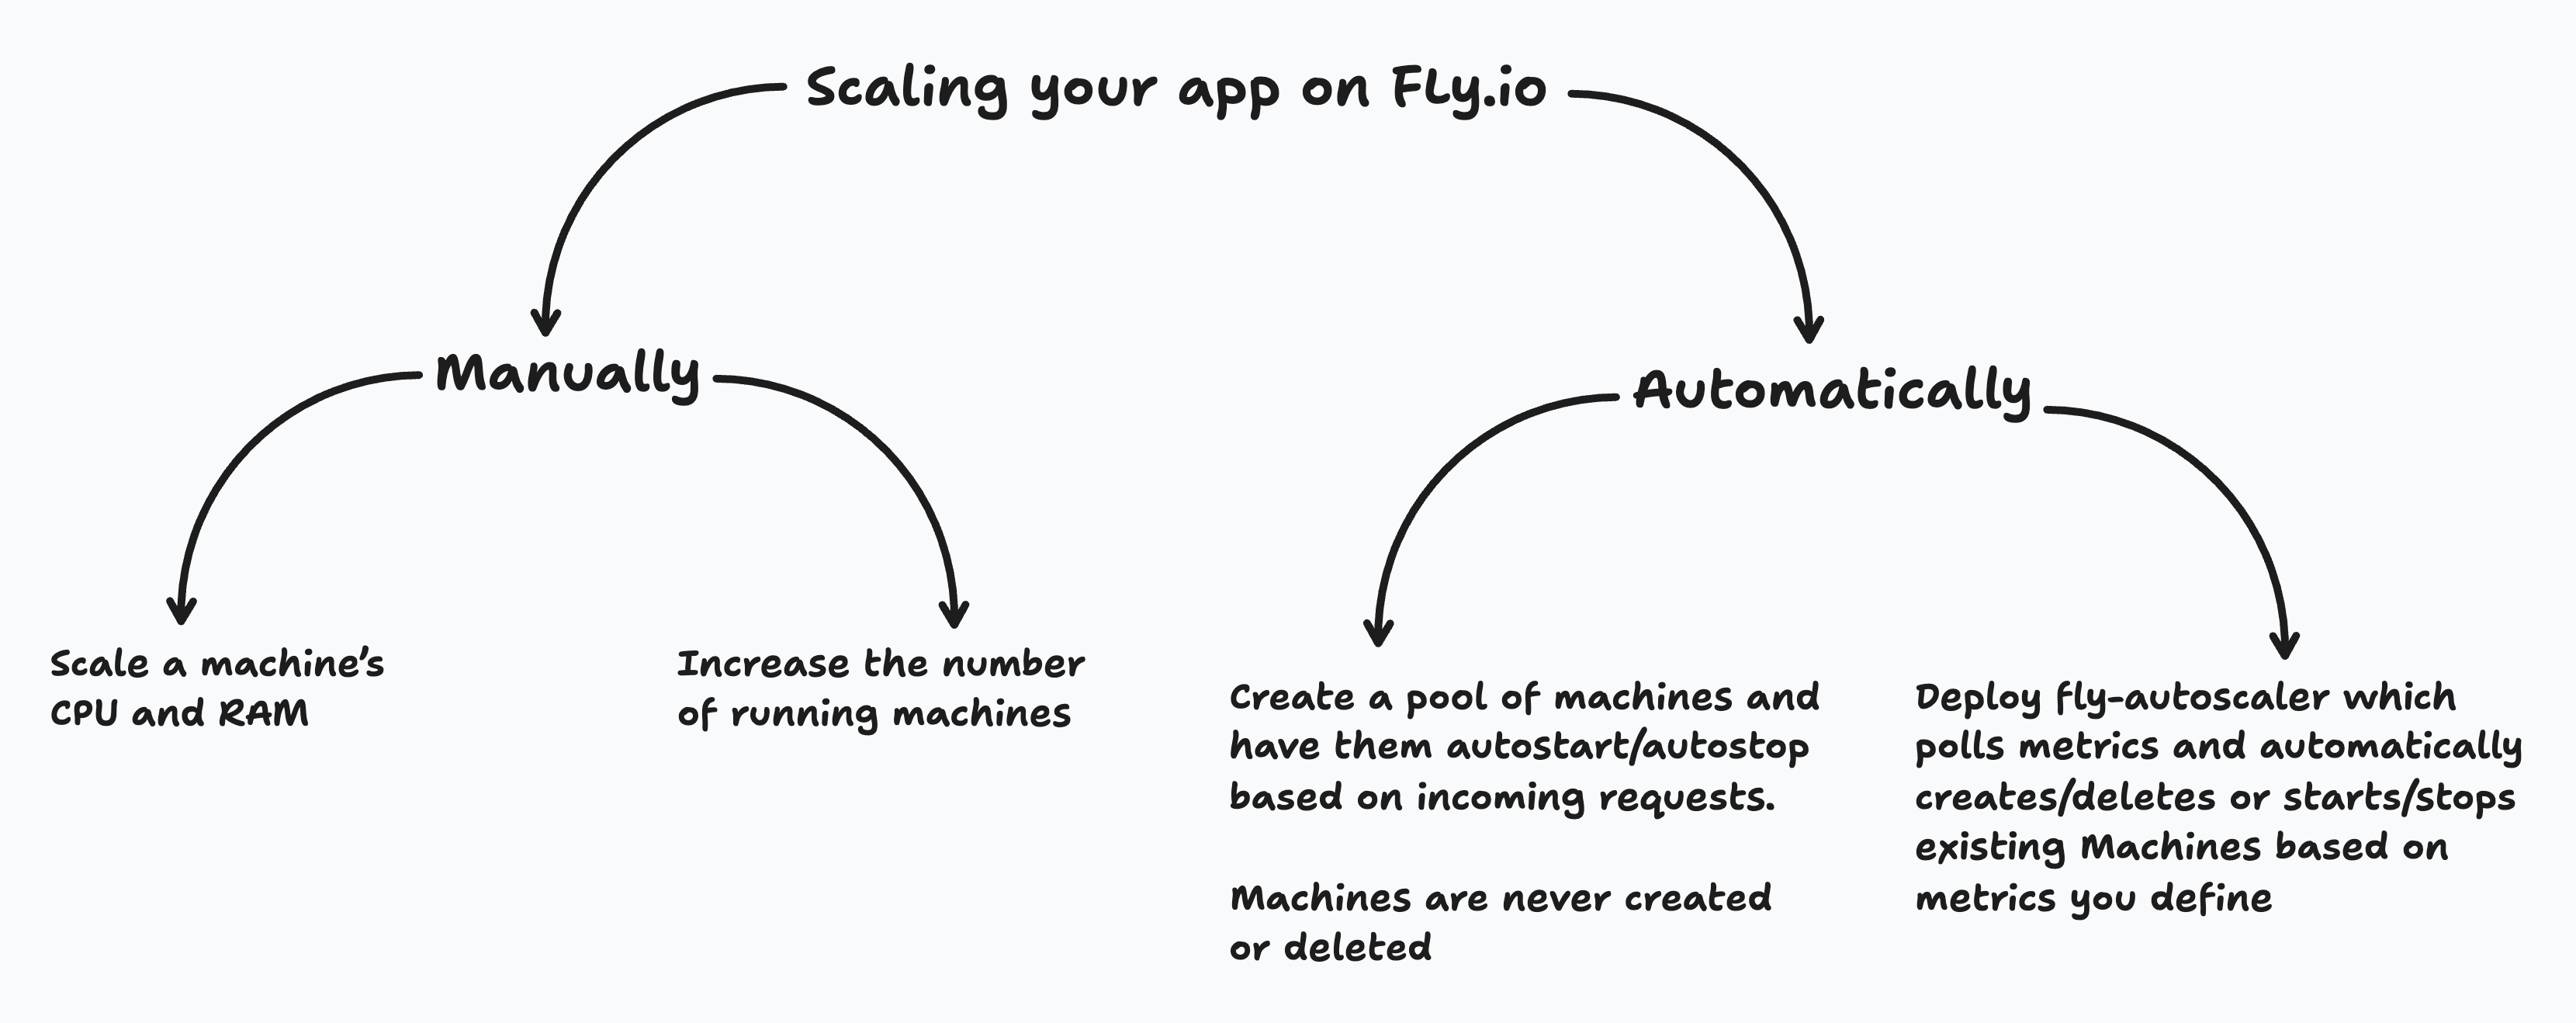
##### Railway
Railway automatically manages compute resources for you. Your deployed services can scale up or down based on incoming workload without manual configuration of metrics/thresholds or picking instance sizes. Each plan includes defined CPU and memory limits that apply to your services.
You can scale horizontally by deploying multiple replicas of your service. Railway automatically distributes public traffic randomly across replicas within each region. Each replica runs with the full resource limits of your plan.
For example, if you're [on the Pro plan](/pricing/plans), each replica gets 24 vCPU and 24 GB RAM. So, deploying 3 replicas gives your service a combined capacity of 72 vCPU and 72 GB RAM.
```text
Total resources = number of replicas × maximum compute allocation per replica
```
Replicas can be placed in different geographical locations. The platform automatically routes public traffic to the nearest region, then randomly distributes requests among the available replicas within that region.
You can also set services to start on a schedule using a crontab expression. This lets you run scripts at specific times and only pay for the time they’re running.
#### Pricing
##### Fly
Fly charges for compute based on two primary factors: machine state and CPU type (`shared` vs. `performance`).
Machine state determines the base charge structure. Started machines incur full compute charges, while stopped machines are only charged for root file system (rootfs) storage. The rootfs size depends on your OCI image plus [containerd](https://containerd.io/) optimizations applied to the underlying file system.
[Pricing for different preset sizes is available in Fly's documentation](https://fly.io/docs/about/pricing/#started-fly-machines). You can get a discount by reserving compute time blocks. This requires paying the annual amount upfront, then receiving monthly credits equal to the "per month" rate. Credits expire at month-end and do not roll over to subsequent months. The trade-off is you might end up paying for unused resources.
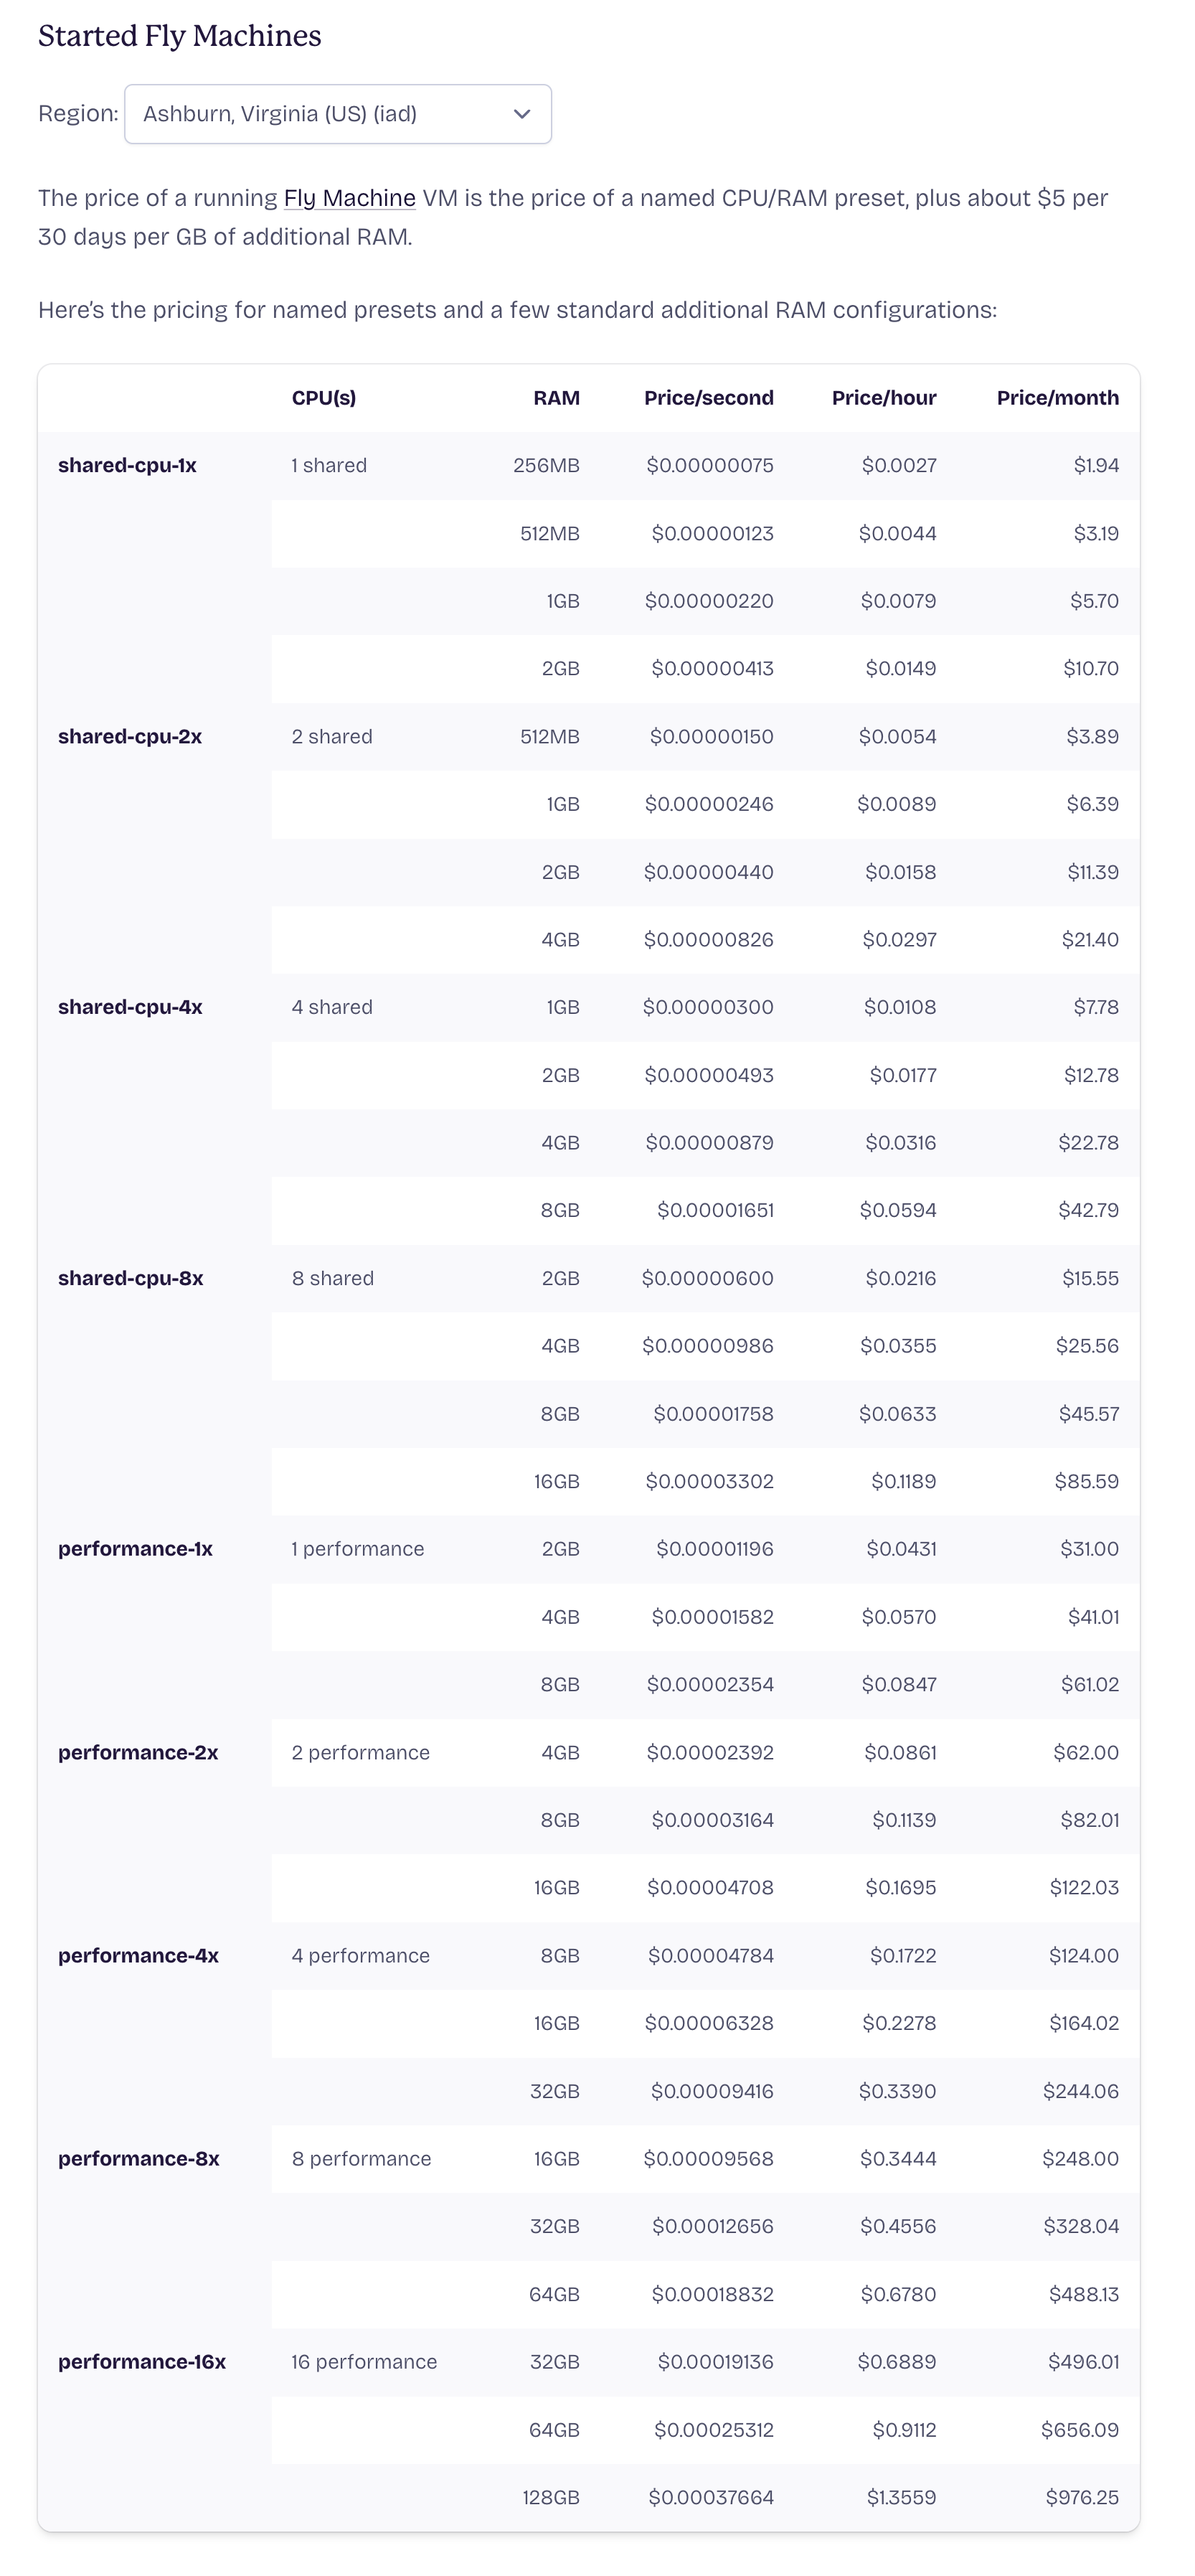
One important consideration is that Fly Machines incur cost based _on running time_. Even with zero traffic or resource utilization, you pay for the entire duration a machine remains in a running state. While machines can be stopped to reduce costs, any time spent running generates full compute charges regardless of actual usage.
##### Railway
Railway follows a usage-based pricing model that depends on how long your service runs and the amount of resources it consumes.
```text
Active compute time x compute size (memory and CPU)
```
If you spin up multiple replicas for a given service, you’ll only be charged for the active compute time for each replica.
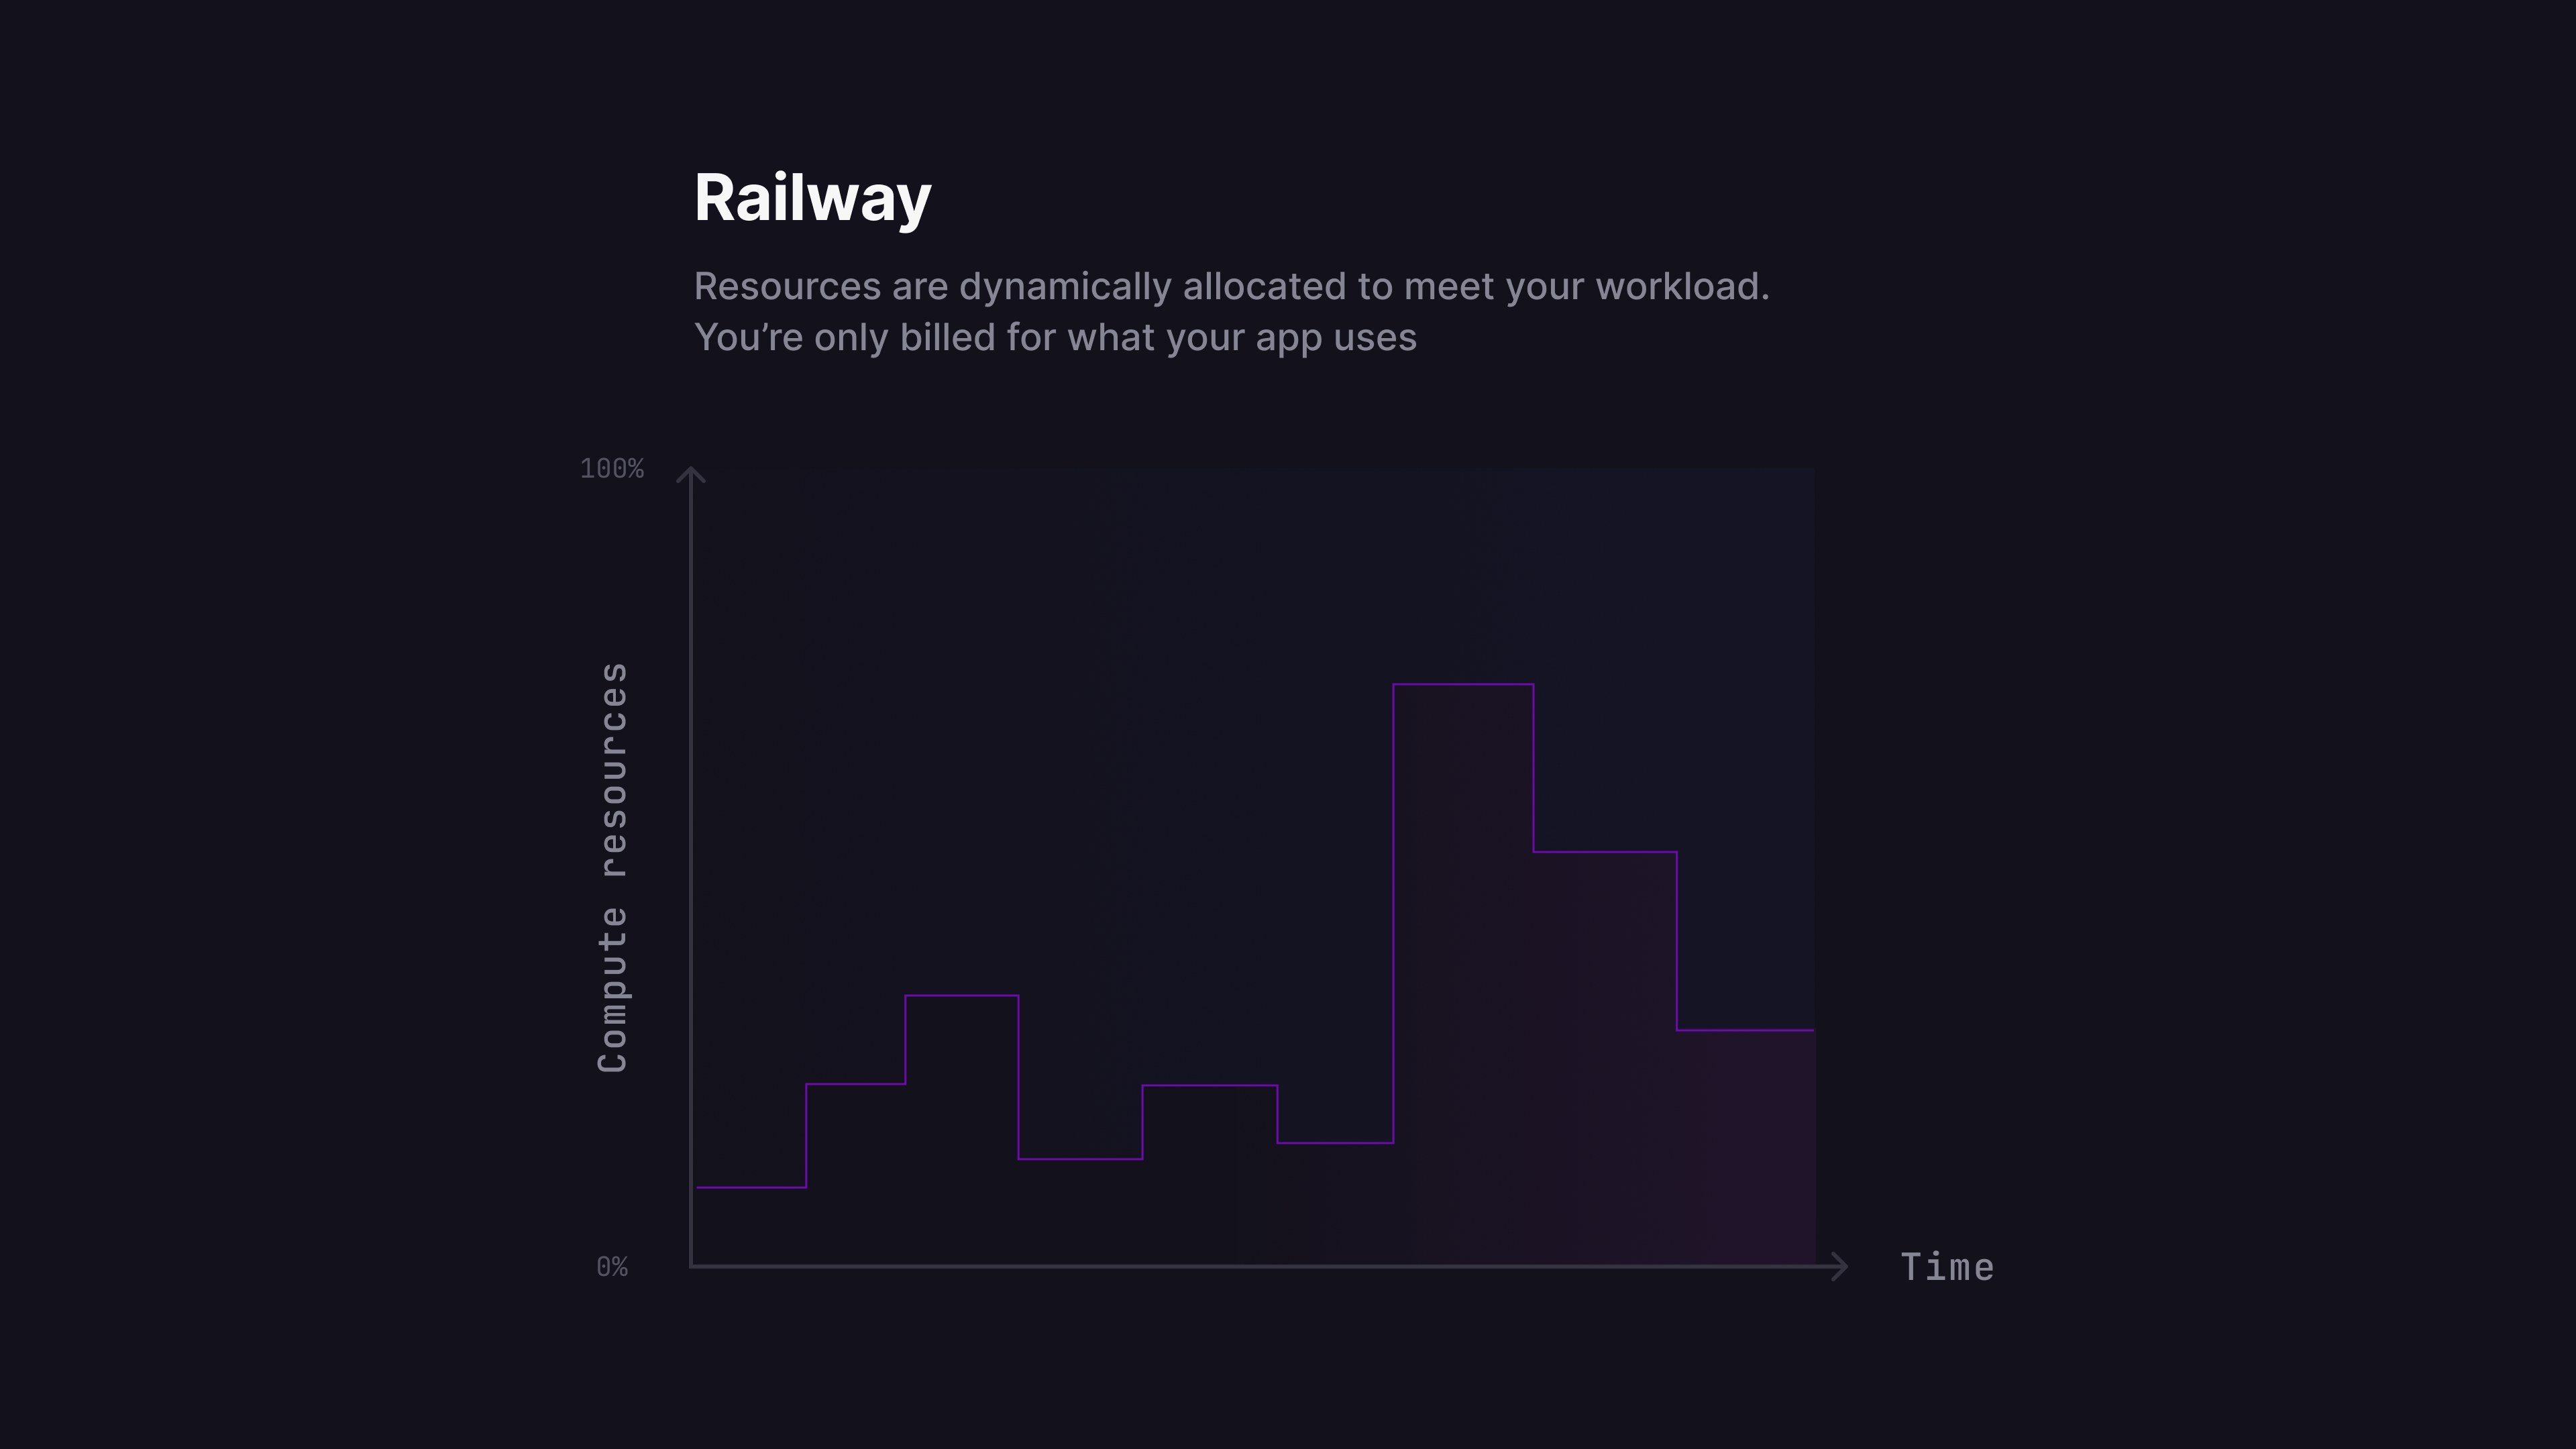
Railway also has a [serverless](/deployments/serverless) feature, which helps further reduce costs when enabled. When a service has no outbound requests for over 10 minutes, it is automatically put to sleep. While asleep, the service incurs no compute charges. It wakes up on the next incoming request, ensuring seamless reactivation without manual effort. This is ideal for workloads with sporadic or bursty traffic, so you only pay when your code is running.
#### Developer workflow & CI/CD
##### Fly
Fly provides a CLI-first experience through `flyctl`, allowing you to create and deploy apps, manage Machines and volumes, configure networking, and perform other infrastructure tasks directly from the command line.
However, Fly lacks built-in CI/CD capabilities. This means you can't:
- Create isolated preview environments for every pull request.
- Perform instant rollbacks.
To access these features, you'll need to integrate third-party CI/CD tools like [GitHub Actions.](https://github.com/features/actions)
Similarly, Fly doesn't include native environment support for development, staging, and production workflows. To achieve proper environment isolation, you must create separate organizations for each environment and link them to a parent organization for centralized billing management.
For monitoring, Fly automatically collects metrics from every application using a fully-managed Prometheus service based on VictoriaMetrics. The system scrapes metrics from all application instances and provides data on HTTP responses, TCP connections, memory usage, CPU performance, disk I/O, network traffic, and filesystem utilization.
The Fly dashboard includes a basic Metrics tab displaying this automatically collected data. Beyond the basic dashboard, Fly offers a managed Grafana instance at [fly-metrics.net](http://fly-metrics.net) with detailed dashboards and query capabilities using MetricsQL as the querying language. You can also connect external tools through the Prometheus API.
Advanced features like alerting and custom dashboards require working with multiple tools and query languages, creating a learning curve for teams wanting sophisticated monitoring capabilities.
Additionally, Fly doesn't support webhooks, making it more difficult to build integrations with external services.
##### Railway
Railway follows a dashboard-first experience, while [also providing a CLI](/cli). In Railway, you create a project for each app you’re building. A project is a collection of services and databases. This can include frontend, API, background workers, API, analytics database, queues and so much more. All in a unified deployment experience that supports real-time collaboration.

Additionally, Railway offers a template directory that makes it easy to self-host open-source projects with just a few clicks. If you publish a template and others deploy it in their projects, you’ll earn a 25% kickback of their usage costs.
Check out all templates at [railway.com/deploy](http://railway.com/deploy)
You also get:
- First-class support for environments so you can isolate production, staging, development, testing, etc.
- GitHub integration with support for provisioning isolated preview environments for every pull request.
- Ability to do instant rollbacks for your deployments.
Each Railway project includes a built-in observability dashboard that provides a customizable view into chosen metrics, logs, and data all in one place
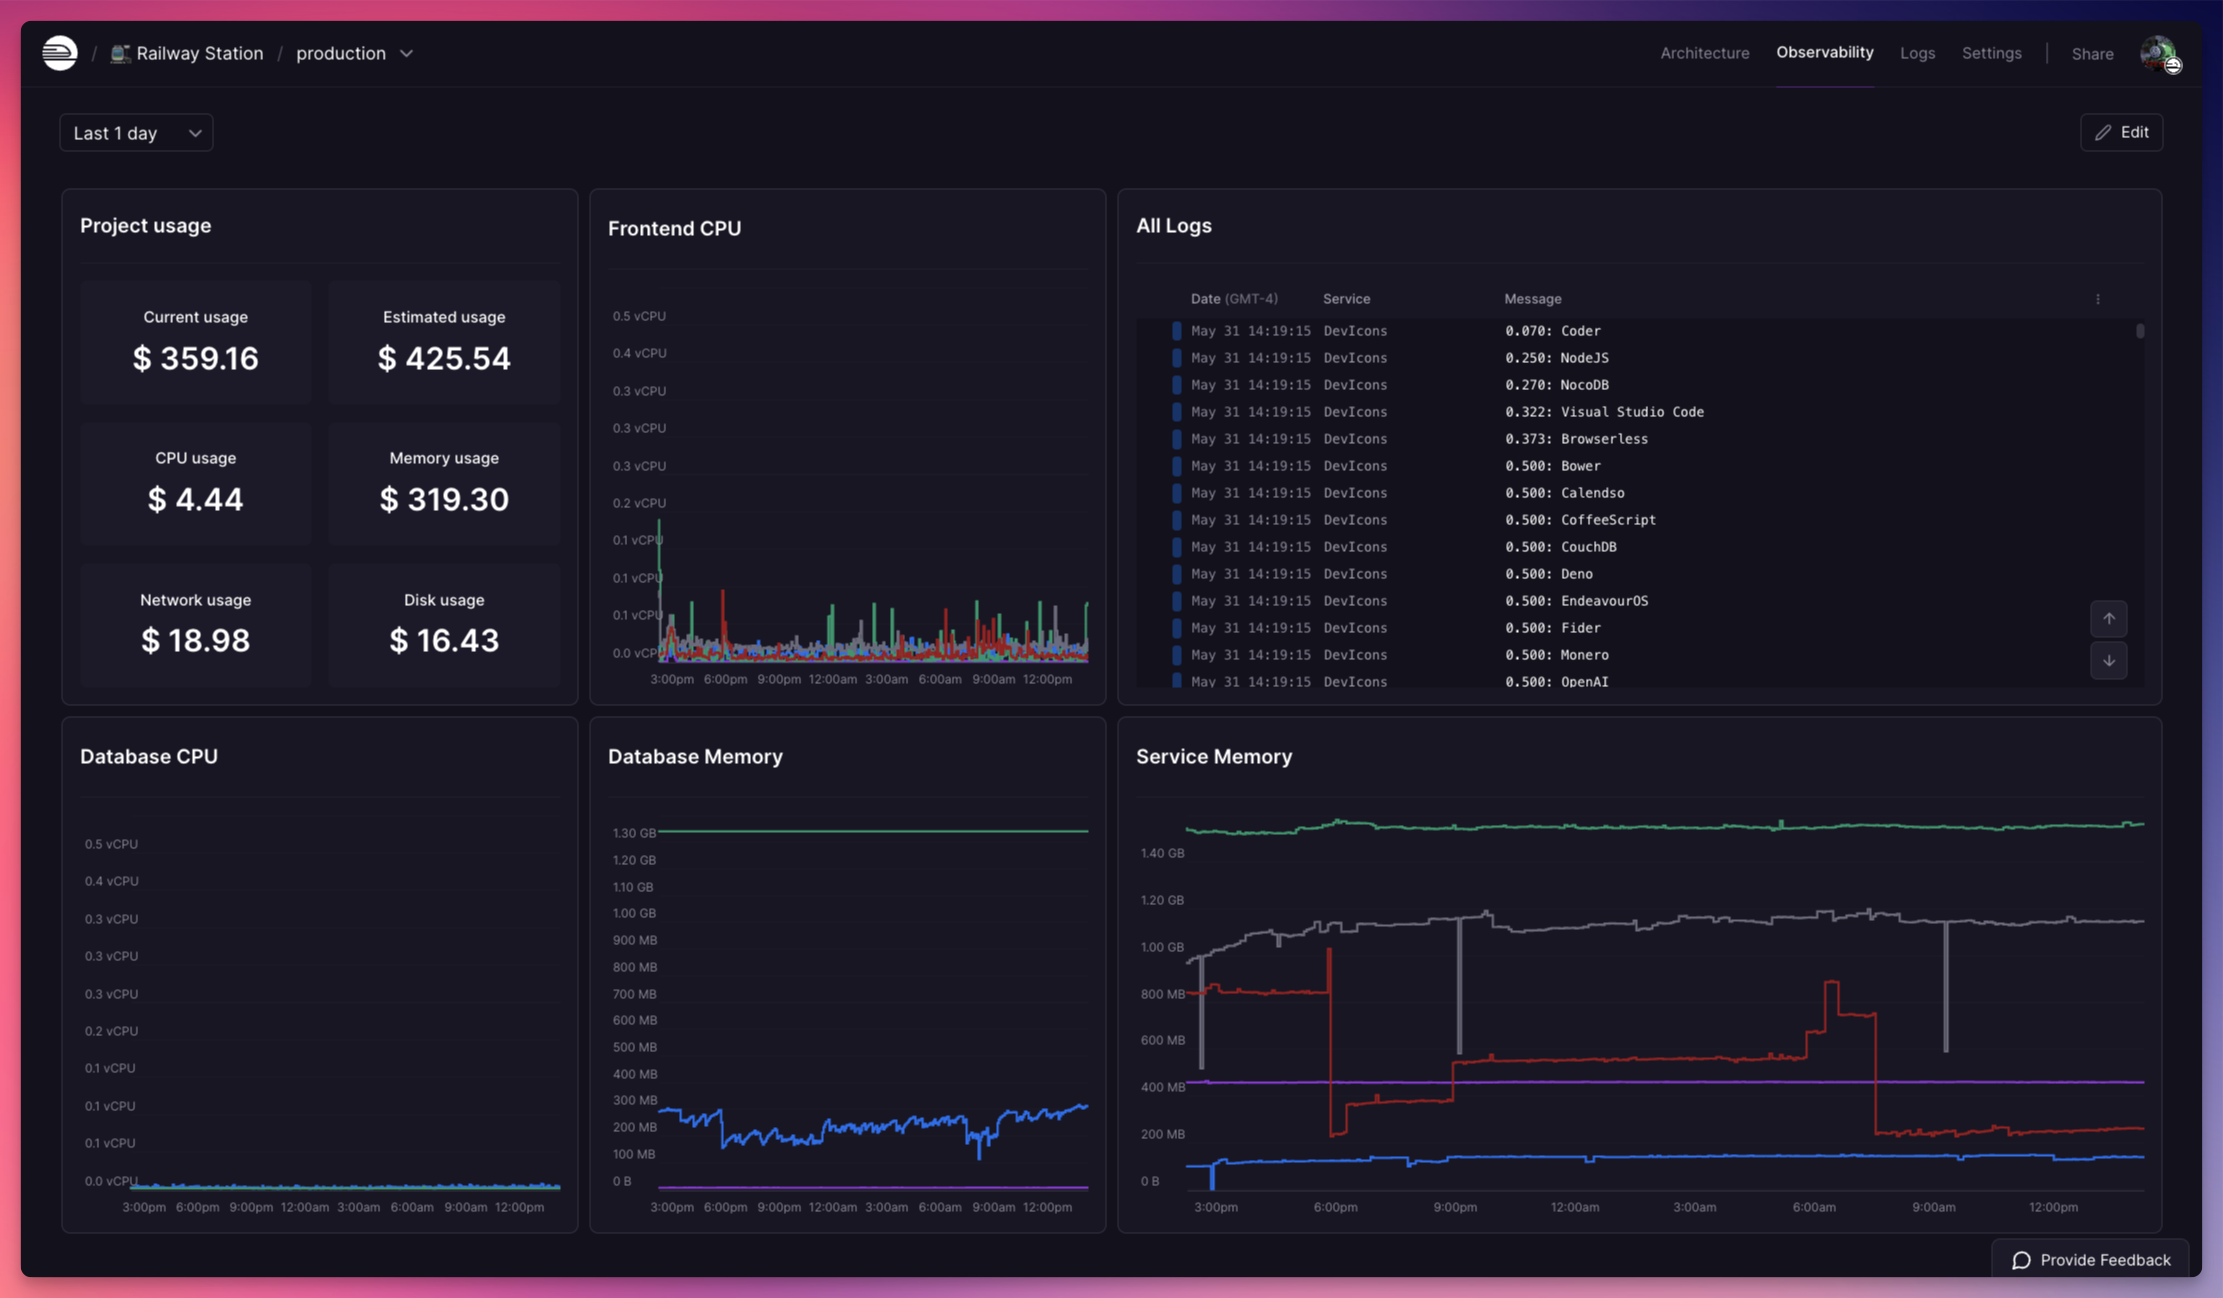
Finally, Railway supports creating webhooks which allow external services to listen to events from Railway
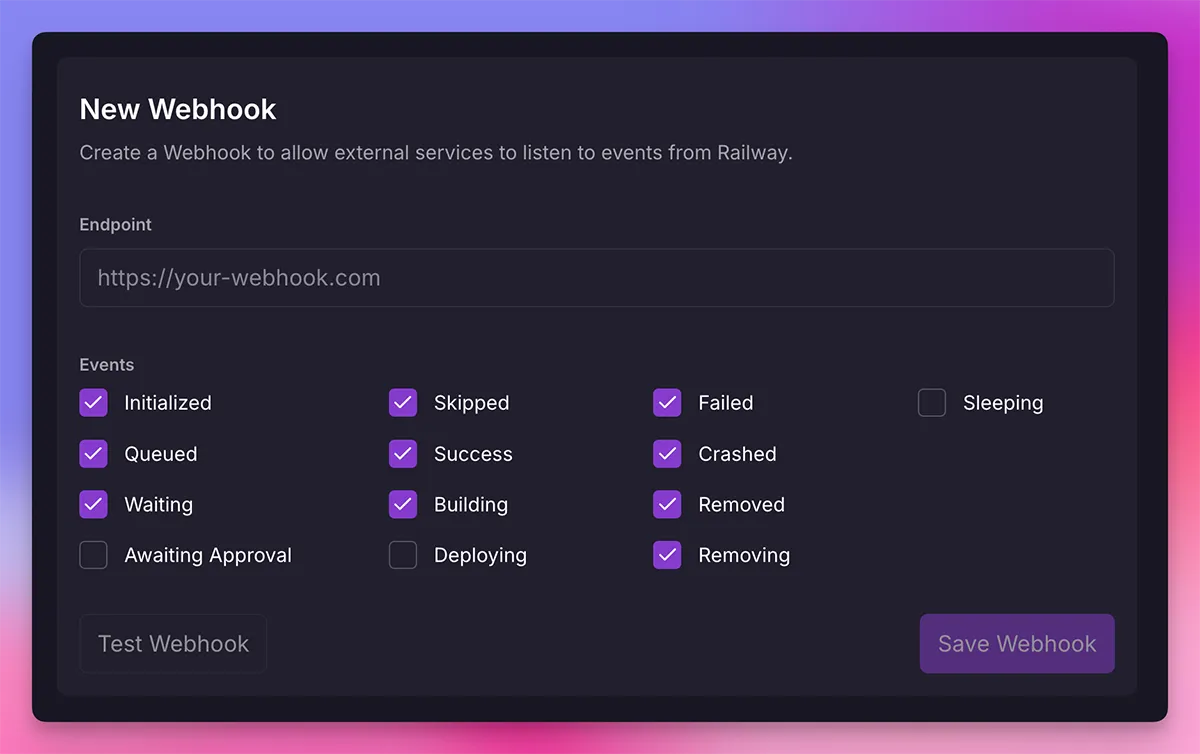
#### Summary
| Category | Railway | Fly.io |
| ------------------------ | ---------------------------------------------------------------------------------- | -------------------------------------------------------------------------------------------------------------------------------------------- |
| Scaling | Auto-scaling included (no manual config); supports horizontal scaling via replicas | Manual vertical/horizontal scaling or horizontal autoscaling (via `fly-autoscaler`); two autoscaling options (autostop/start, metrics-based) |
| Compute Pricing | $20/vCPU-month, $10/GB-month RAM, billed per second of actual usage | Machines billed per second while started; performance-1x 2 GB ≈ $32/mo provisioned. Unused uptime still billed unless stopped |
| CI/CD Integration | Built-in GitHub integration with preview environments and instant rollbacks | No built-in CI/CD; requires third-party tools like GitHub Actions |
| Environments Support | First-class support for multiple environments (dev, staging, prod, etc.) | Requires creating separate orgs per environment |
| Monitoring & Metrics | Built-in observability dashboard (metrics, logs, data all in one place) | Prometheus-based metrics + optional Grafana (`fly-metrics.net`) for deep dives |
| Webhooks & Extensibility | Webhook support for integrations | No support for outbound webhooks |
| Developer Experience | Dashboard-first, supports real-time team collaboration, CLI available | CLI-first (`flyctl`) for all management tasks |
#### Frequently asked questions
##### Is Railway cheaper than Fly.io?
For workloads that aren't busy around the clock, usually yes. Fly Machines are billed per second for the entire time they're started, even at zero traffic (a performance-1x Machine with 2 GB runs about $32/mo provisioned), while Railway bills $20/vCPU-month and $10/GB-month RAM per second of actual usage, and the serverless feature sleeps idle services so they incur no compute charges. If you keep Machines stopped aggressively or reserve compute blocks upfront, Fly's pricing can also be economical.
##### Does Railway have built-in CI/CD like Fly.io?
Railway includes CI/CD out of the box: GitHub integration, isolated preview environments for every pull request, and instant rollbacks. Fly doesn't ship built-in CI/CD, so you'd wire up third-party tools like GitHub Actions to get the same workflow.
##### When is Fly.io a better fit than Railway?
If you want a CLI-first workflow with fine-grained control over individual VMs, `flyctl` gives you direct management of Machines, volumes, and networking. Fly's Prometheus-based metrics with managed Grafana also suit teams that want to deep-dive with MetricsQL. Both platforms support multi-region deployments on their own hardware.
##### Do both Railway and Fly.io bill per second?
Yes, but they meter different things. Fly charges for the full duration a Machine is in a started state regardless of utilization, while Railway charges for active compute time and resource size, and sleeping services cost nothing. That difference matters most for services that sit idle between bursts of traffic.
#### Migrate from Fly.io to Railway
To get started, [create an account on Railway](https://railway.com/new). You can sign up for free and receive $5 in credits to try out the platform.
1. “Choose Deploy from GitHub repo”, connect your GitHub account, and select the repo you would like to deploy.
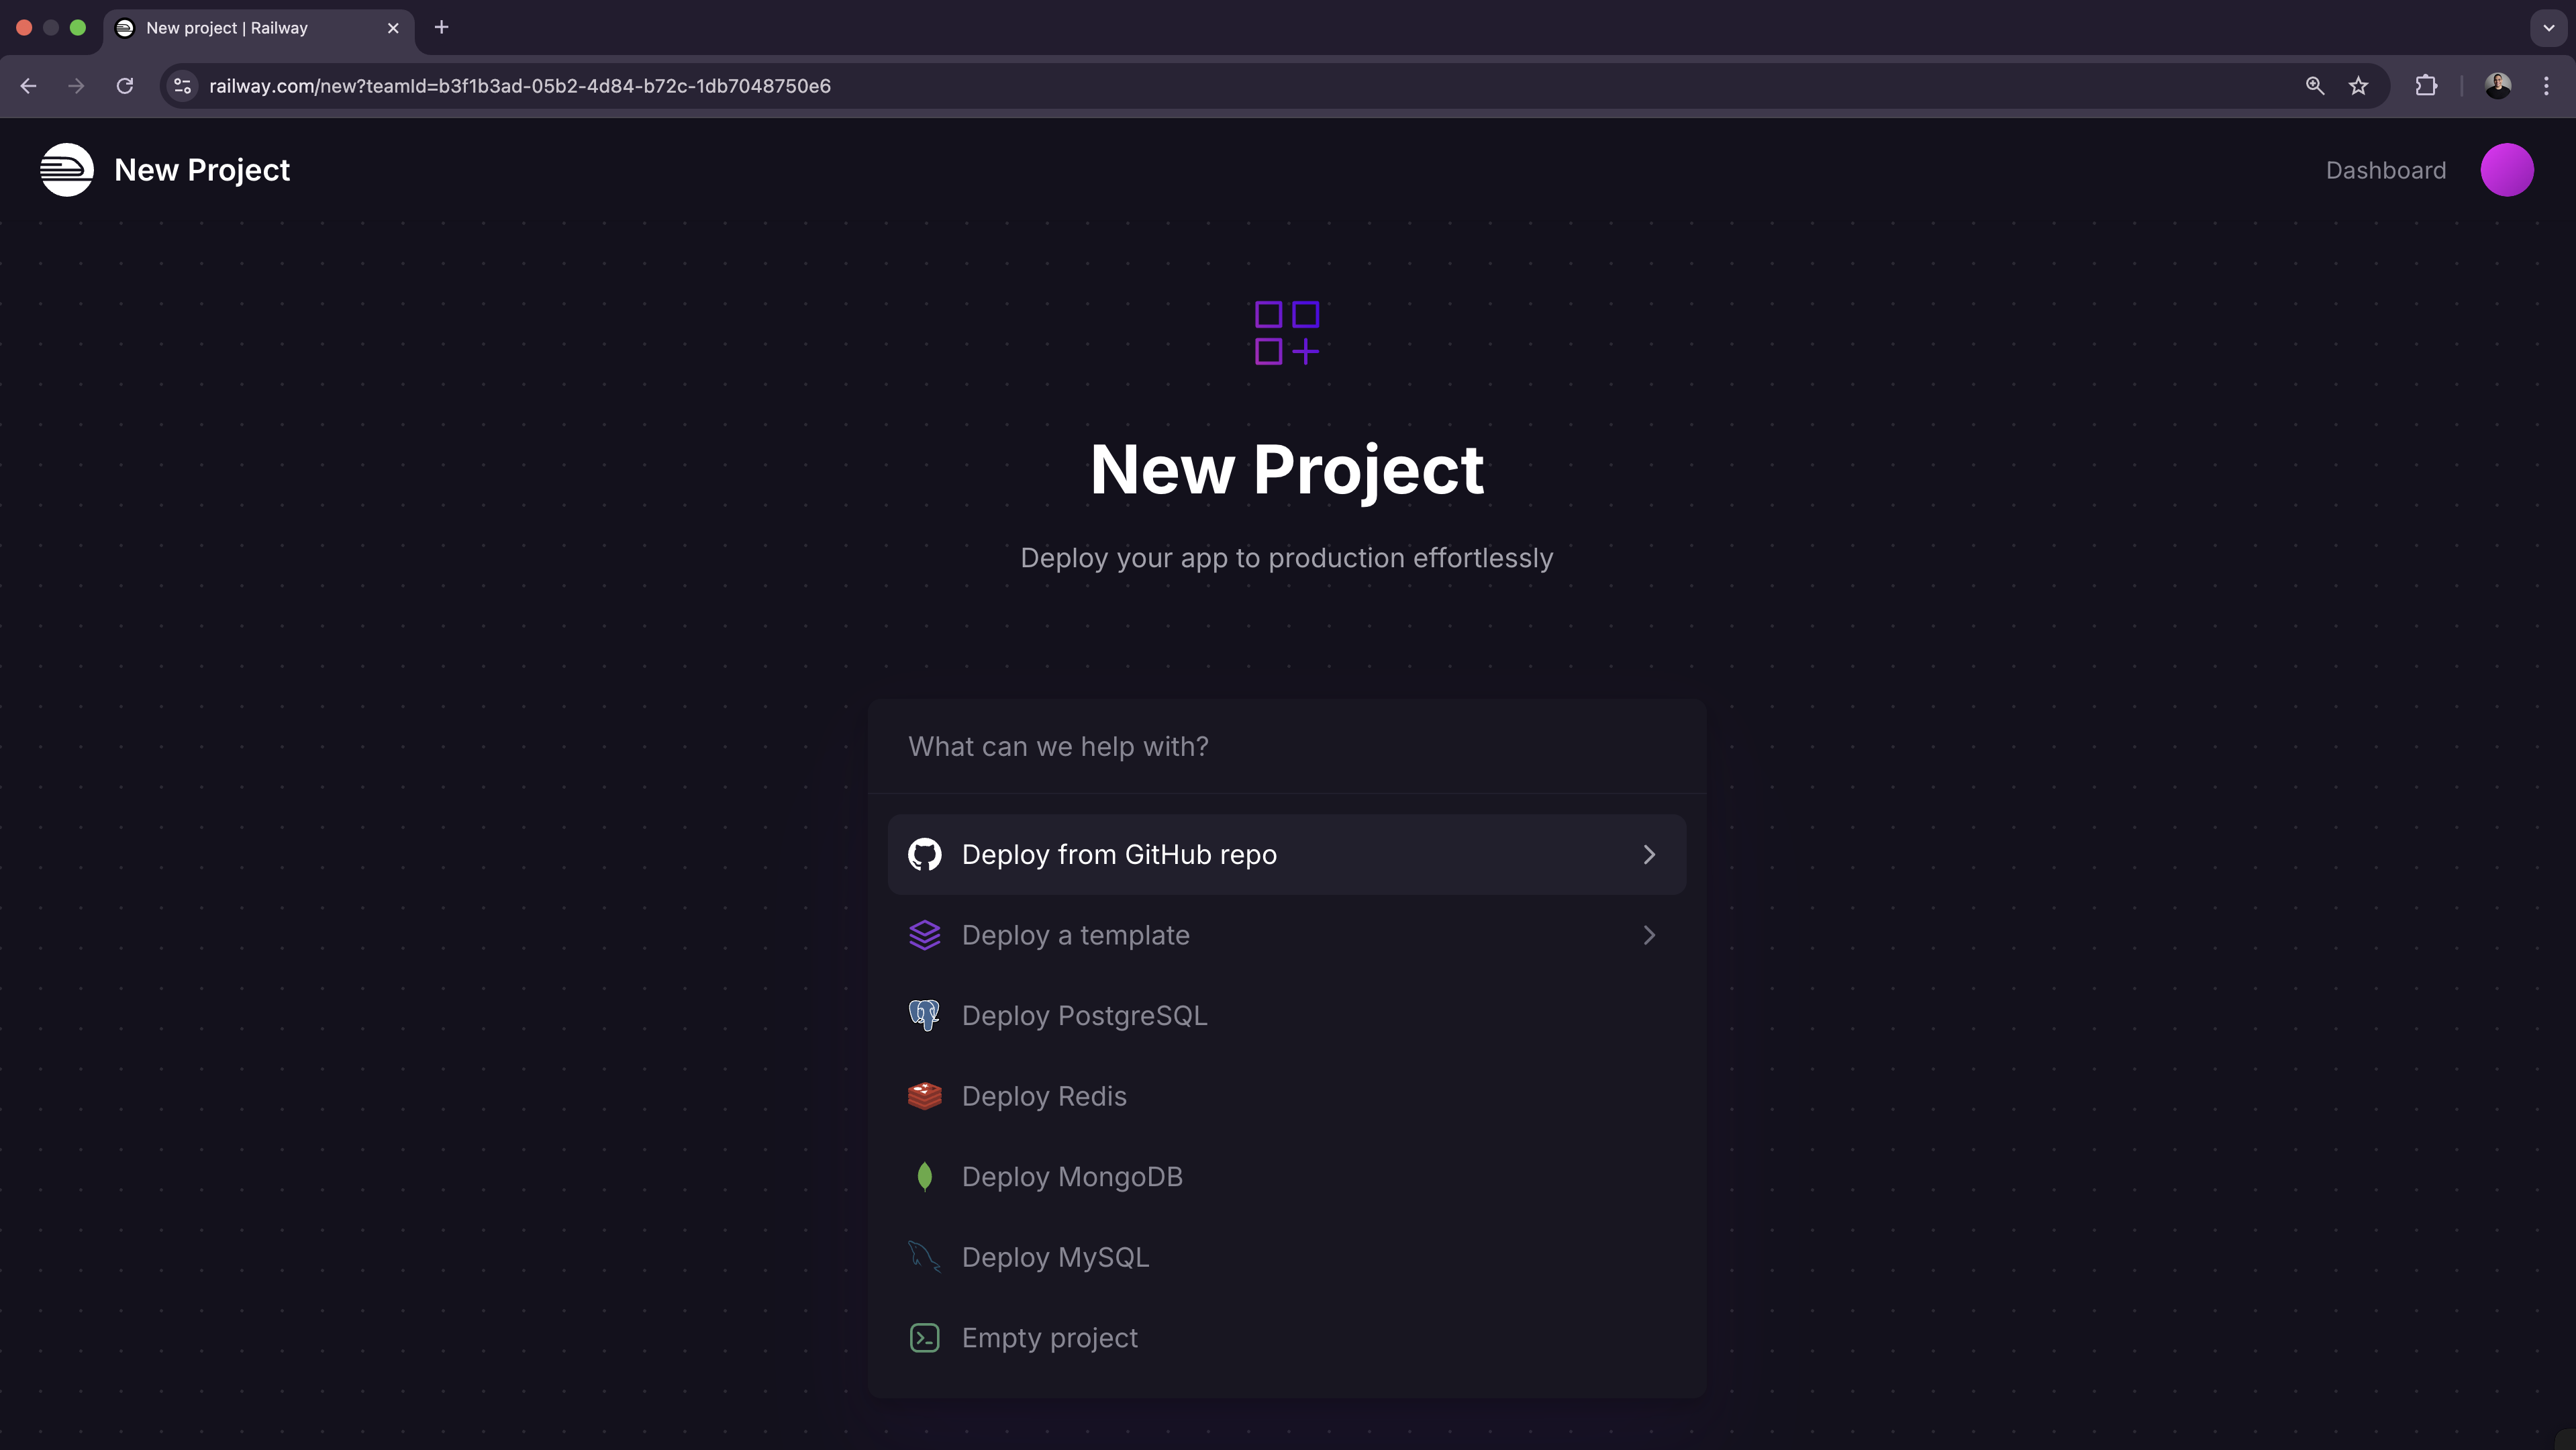
2. If your project is using any environment variables or secrets:
1. Click on the deployed service.
2. Navigate to the “Variables” tab.
3. Add a new variable by clicking the “New Variable” button. Alternatively, you can import a `.env` file by clicking “Raw Editor” and adding all variables at once.
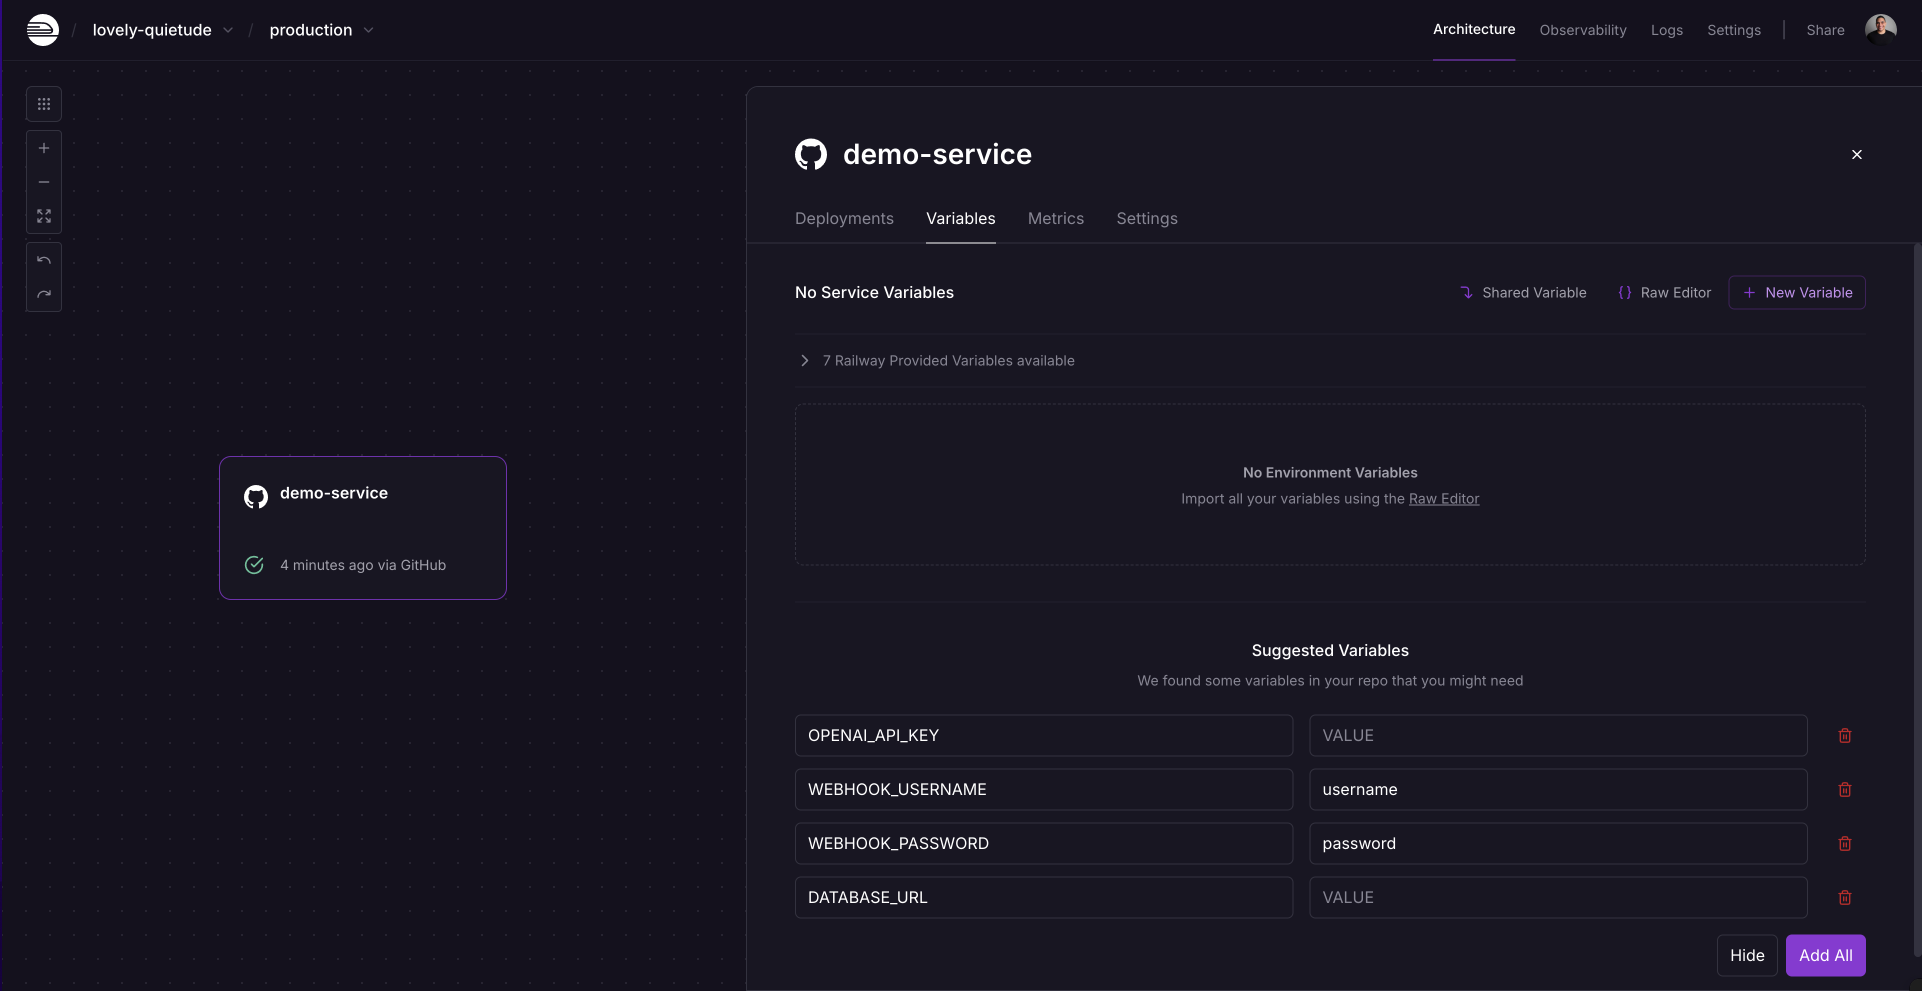
3. To make your project accessible over the internet, you will need to configure a domain:
1. From the project’s canvas, click on the service you would like to configure.
2. Navigate to the “Settings” tab.
3. Go to the “Networking” section.
4. You can either:
1. Generate a Railway service domain: this will make your app available under a `.up.railway.app` domain.
2. Add a custom domain: follow the DNS configuration steps.
#### Need help or have questions?
If you need help along the way, the [Help Station](https://station.railway.com/) is a great resource to get support from the team and community.
For larger workloads or specific requirements, you can [book a call with the Railway team](https://cal.com/team/railway/work-with-railway) to explore how we can best support your project.
### Compare to Northflank
Source: https://docs.railway.com/platform/compare-to-northflank.md
Compare Railway and Northflank on infrastructure, scaling, pricing, deployment experience, and AI capabilities, with a step-by-step migration guide.
_Last updated: July 2026_
At a high level, both Railway and Northflank can be used to package, deploy, host, and monitor software on the web. Both support multiple service types, including web applications, APIs, storage buckets, databases, and more, and both are easier to work with than most cloud service providers. That said, there are notable differences worth considering when choosing where to host your software, including the infrastructure model, pricing mechanics, and AI capabilities.
- Deployments from a Docker image or by importing source code from GitHub.
- Multi-service architecture: web applications, APIs, workers, and databases under one project.
- Services deployed to long-running servers.
- Persistent storage via volumes.
- Public and private networking out of the box.
- Healthchecks and zero-downtime deployments.
- Isolated preview environments for every pull request.
- Instant rollbacks.
- Integrated metrics and logs.
- Infrastructure-as-Code.
- CLI management of resources.
- Cron jobs.
- Custom domains with fully managed TLS.
- Remote SSH into deployed services.
- Usage-based billing.
- Sandboxes.
This guide covers both platforms in detail to help you understand when to choose each.
#### Infrastructure model
##### Northflank
Northflank makes running applications on Kubernetes (k8s) easier. Kubernetes is an extremely powerful container orchestration framework, but it comes with a steep learning curve. Northflank abstracts away many of the gnarliest parts of k8s operation, but core Kubernetes concepts are still intentionally part of the product surface: services map to cluster resources, and compute plans map to Kubernetes resource requests. This is a good fit if you have a team that's confident with container orchestration and looking for a platform to help operate or scale their clusters.
Northflank also lets you bring your own cloud and use Northflank as the control plane, leveraging it to package and deploy applications into your own cloud account. This can be valuable in two cases:
1. Users with strict data residency requirements.
2. Users who want to administer their own cluster directly.
The trade-off is that you'll have two bills to pay: one for Northflank and one for your cloud provider.
##### Railway
Railway abstracts away underlying infrastructure like Kubernetes, managing its own custom orchestration of servers on your behalf. You don't need to know about servers, containers, clusters, or networking. This is ideal for teams that are broadly uninterested in underlying infrastructure mechanics and want to focus on shipping code.
Railway operates its own infrastructure in data centers globally through [Railway Metal](/platform/railway-metal). Because of this, it can provide a significantly less expensive product, avoiding the margin typically associated with hyperscalers like GCP, AWS, and Azure. And because Railway provides and manages the infrastructure, there's only one vendor for procurement to vet and one bill to pay.
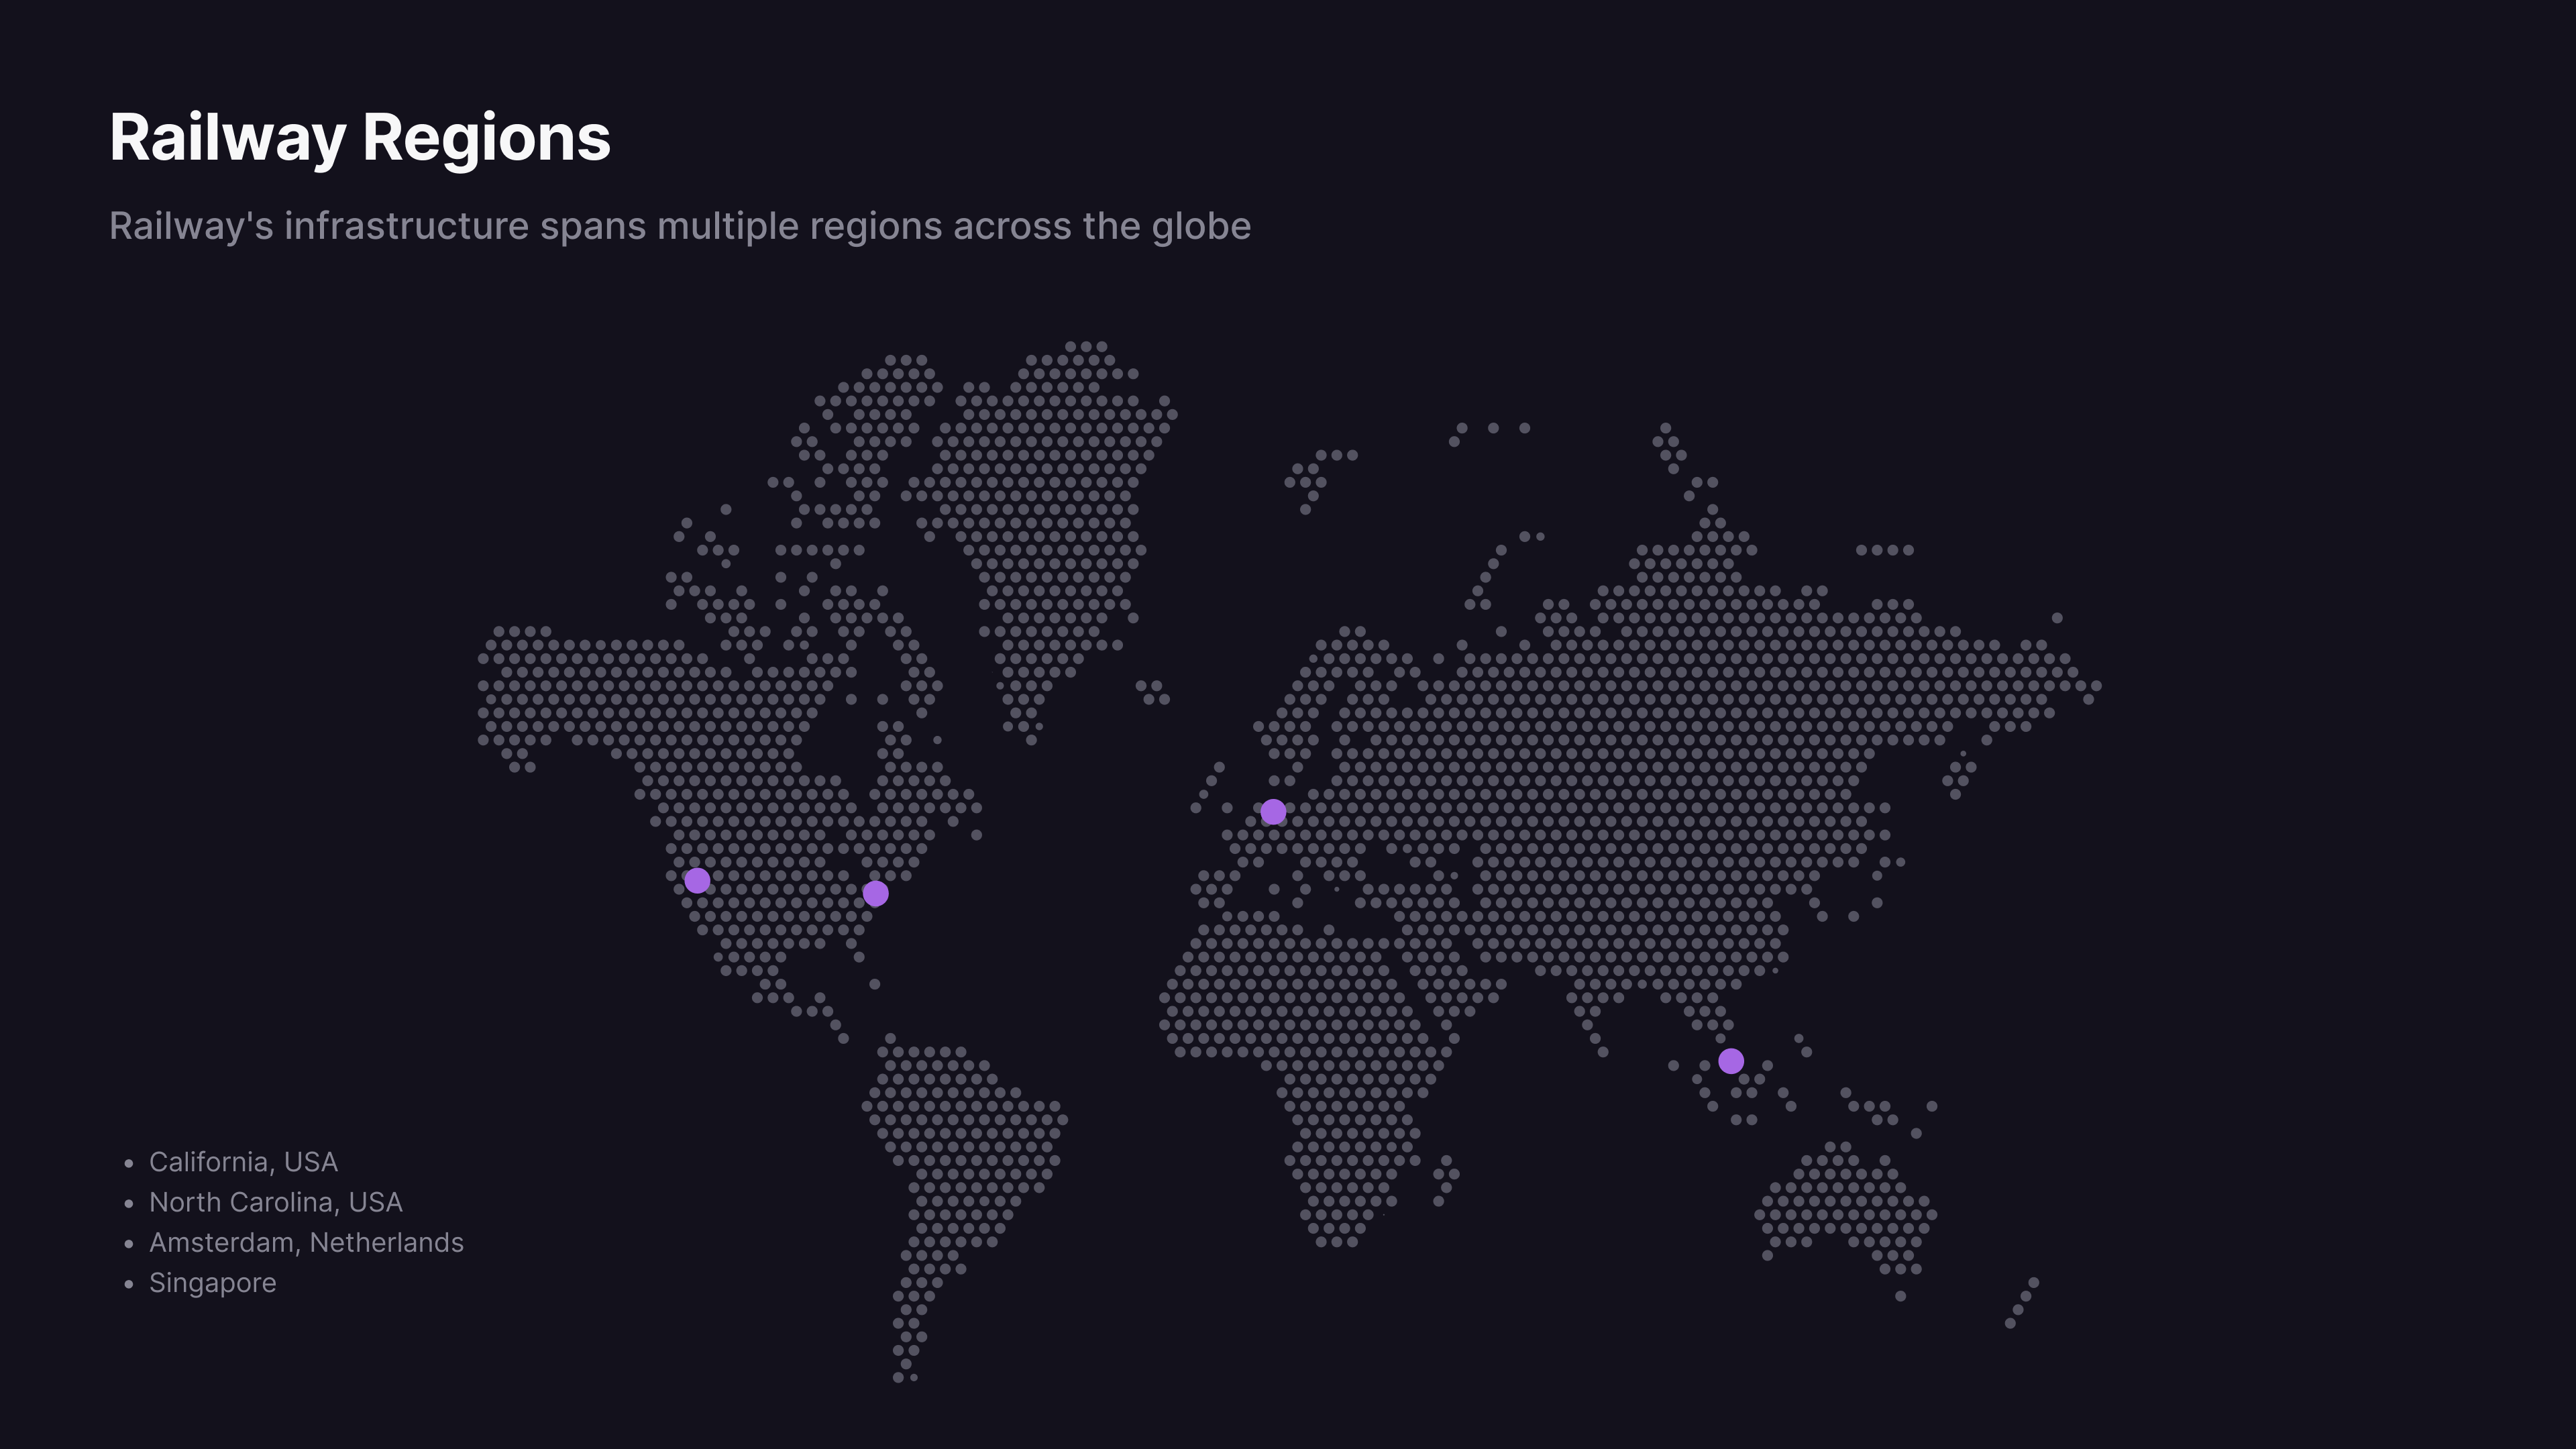
#### Scaling strategies
##### Northflank
Northflank follows a traditional, resource-based model. Each resource has a set of allocated compute resources for memory and CPU.
When your deployed service needs more resources, you can either scale vertically by manually upgrading to a larger instance size, or horizontally by specifying a machine count or configuring autoscaling rules.
##### Railway
Railway automatically manages compute resources for you. Your deployed services can scale up or down based on incoming workload without manual configuration of thresholds or picking instance sizes. Each plan includes defined CPU and memory limits that apply to your services.
You can also scale horizontally by deploying multiple replicas of your service. Railway automatically distributes public traffic randomly across replicas within each region. Each replica runs with the full resource limits of your plan.
Replicas can be placed in different geographical locations for multi-region deployments. The platform automatically routes public traffic to the nearest region, then randomly distributes requests among the available replicas within that region.
Scaling down is just as important as scaling up, and Railway automatically releases memory allocations as demand falls. By default, Railway always allocates a minimum amount of memory for your service, even when it's not in use. To scale even lower than that minimum, you can scale to zero by toggling [serverless](/deployments/serverless) in your service settings. After ten minutes, a serverless container that hasn't done any work is fully put to sleep, then wakes up on the next request.
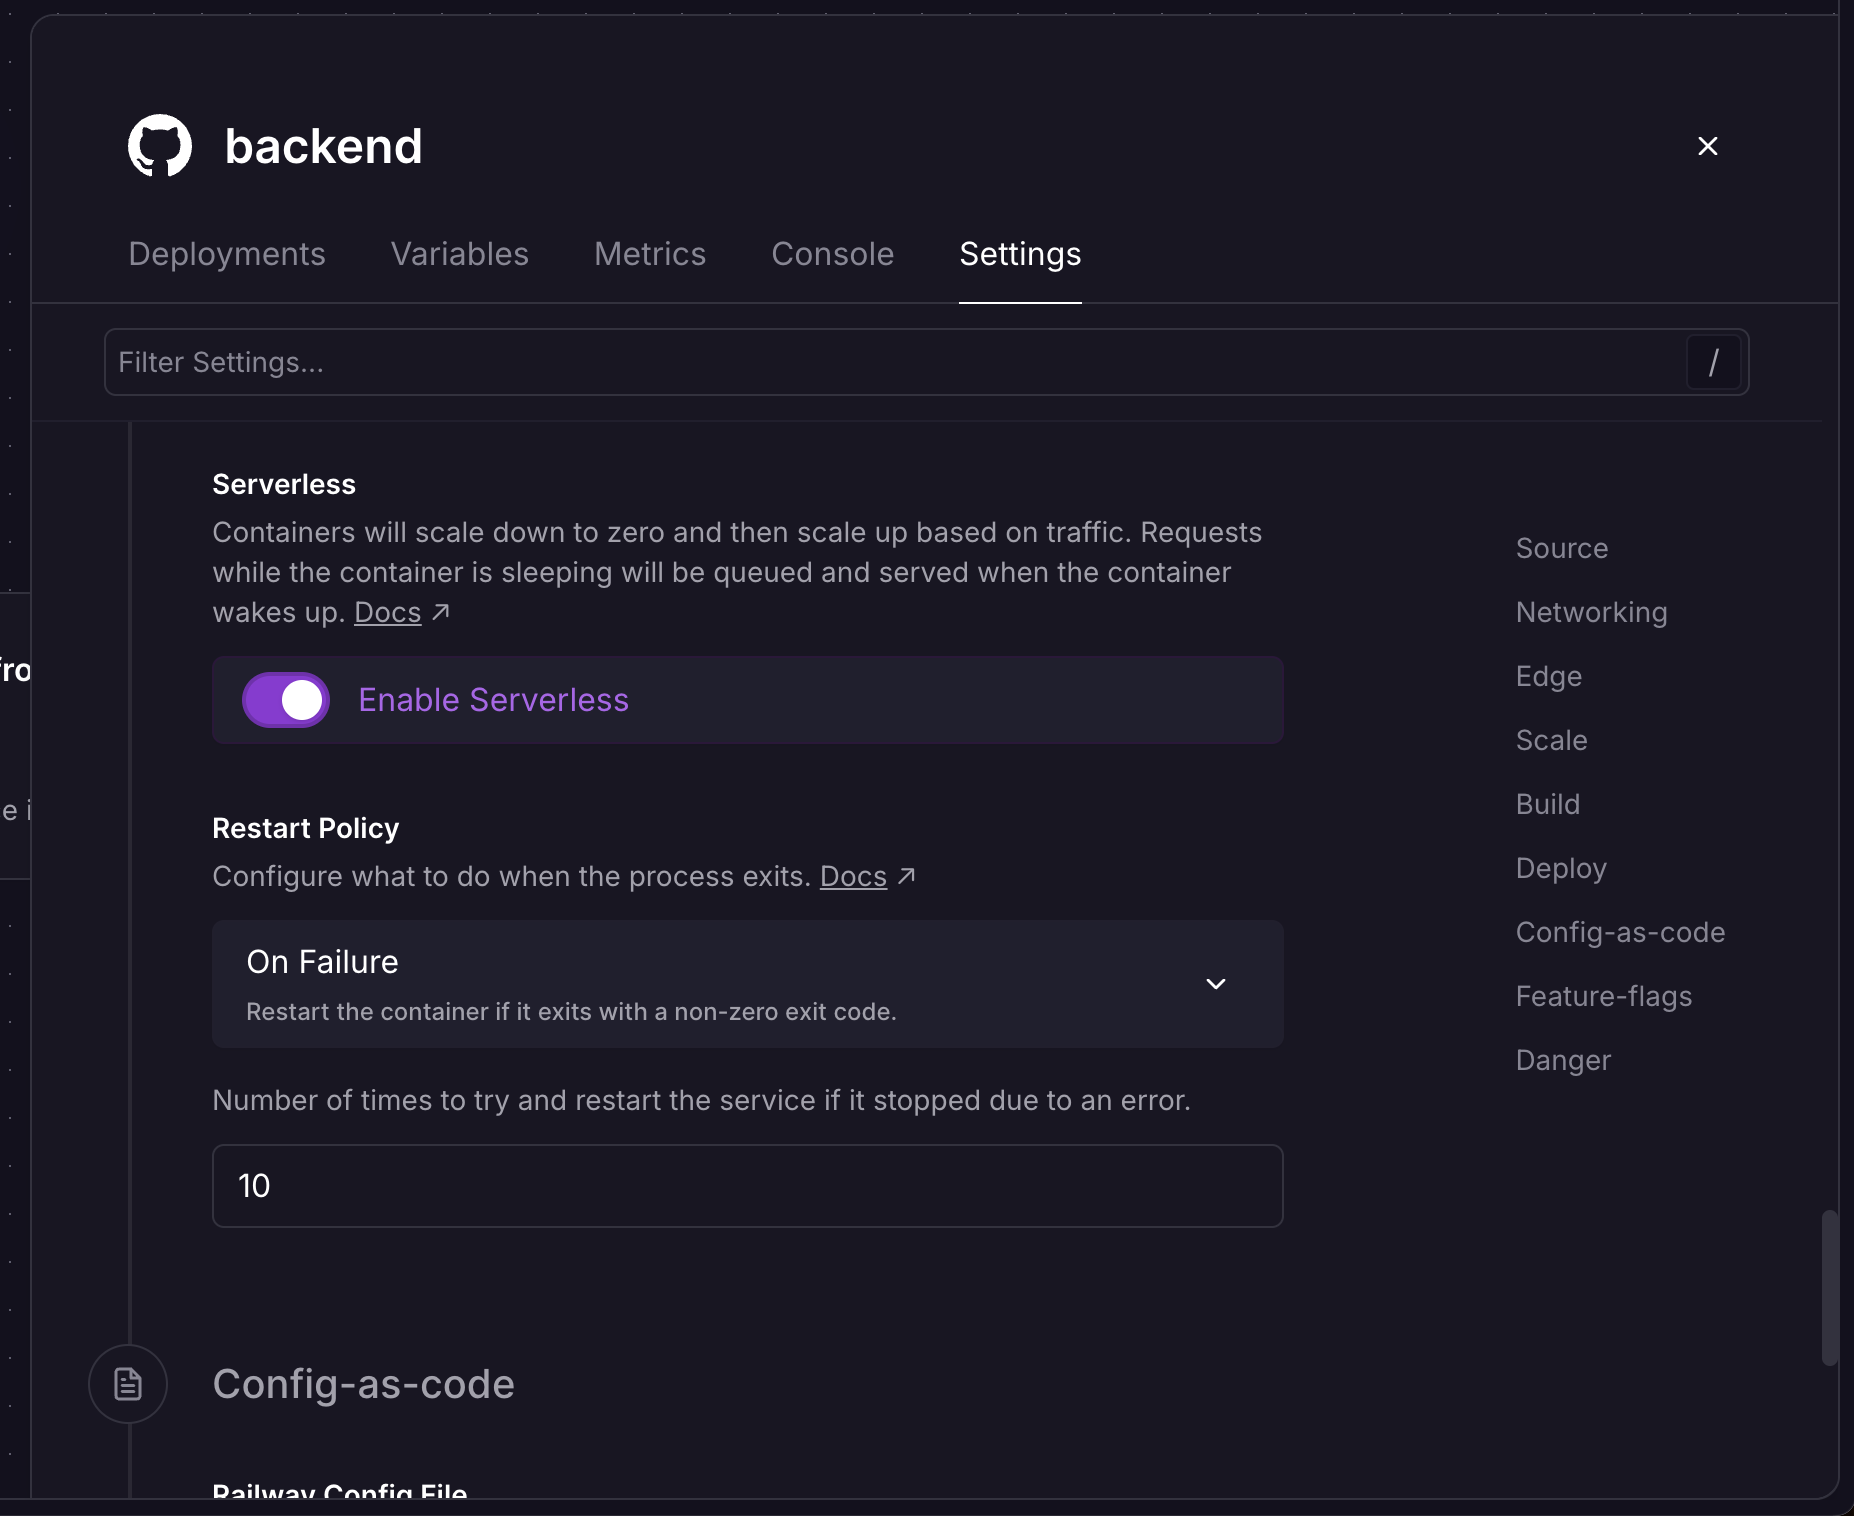
For services with known usage patterns, such as data workloads that run once a day, you can scale them efficiently by putting them on a cron schedule. This lets you run scripts at specific times and only pay for the time they're running.
#### Pricing
##### Northflank
Northflank bills per second of resource allocation. When you pick a plan for a service, you're billed at that plan's rate for the number of seconds the service exists. A running service bills its full plan size regardless of how much of its resources it uses. The rates themselves are straightforward, $0.01667 per vCPU-hour and $0.00833 per GB of memory per hour, and plans bundle those into fixed tiers like nf-compute-100-2 (1 vCPU, 2 GB) at $24 per month. Since billing is tied to the plan rather than the workload, the plan has to be sized for your service's peak, and every hour it spends below that peak is capacity you're paying for but not using.
A payment method is required before creating any resources, on every plan, including the free tier. As noted above, bringing your own cluster adds Northflank platform fees on top of your cloud provider bill.
##### Railway
Railway bills per minute of resource consumption. When you pick a plan, you're picking a resource ceiling that a service cannot exceed. If a service uses less than its ceiling, you're only charged for what it uses, including nothing at all for idle serverless services. Rates are $20 per vCPU-month and $10 per GB of memory per month, metered continuously, so a service that idles at 200 MB most of the day and briefly spikes to 2 GB bills mostly at 200 MB. There are no per-service instance sizes to select and no plan tiers to outgrow; services scale within the ceiling on their own.
This difference surfaces in workloads that aren't busy around the clock, which is most of them. On Northflank, you pay for the gap between peak sizing and actual usage. On Railway, that gap is closed automatically so you don't pay for it.
##### Pricing worked example
To illustrate the difference between Northflank's static pricing and Railway's more dynamic model, consider a background worker processing image uploads at unpredictable times around the clock.
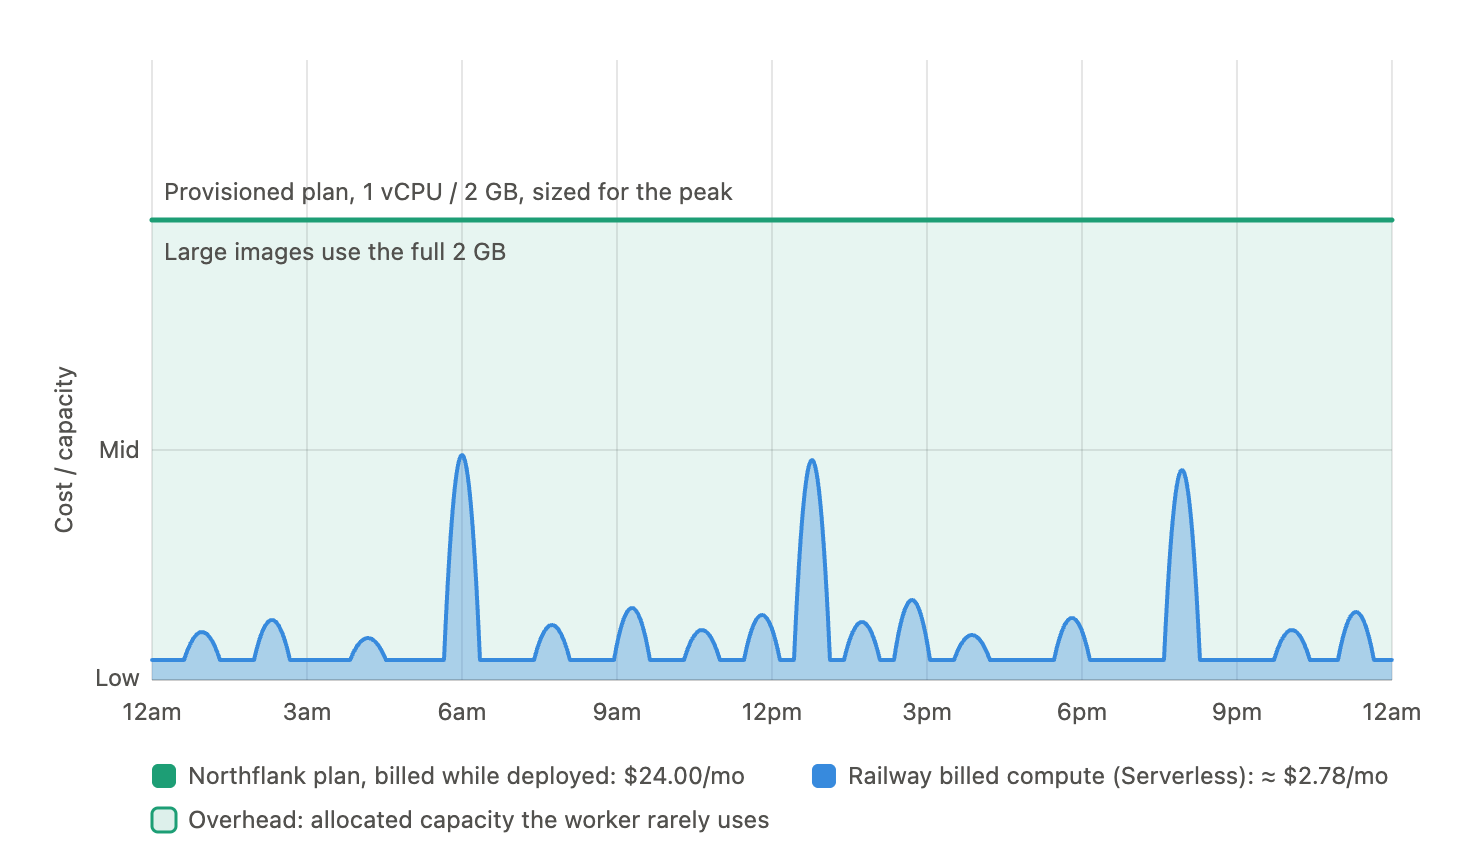
The example workload processes:
- ~50 uploads/day, at
- ~2 min processing each
- ≈ 100 active minutes/day,
- **~50 active hours/month**
Memory peaks around 2 GB while a large image is being processed, and idles at a couple hundred MB the rest of the time. Sized at 1 vCPU / 2 GB.
With Serverless enabled, Railway bills close to the ~50 hours it's actually processing something:
- Combined rate for 1 vCPU + 2 GB is $40/month (720 hrs) ≈ $0.0556/hour
- 50 hours × $0.0556 ≈ **$2.78/month**
That's the highest possible estimate, as Railway meters actual usage, so the minutes spent below 2 GB bill below 2 GB.
Northflank bills the selected plan for the full month deployed, since there's no traffic-triggered sleep to fall back on. The plan also has to be sized for the peak, because that occasional large image needs the full 2 GB whether it arrives once an hour or once a week. The matching plan is nf-compute-100-2 (1 dedicated vCPU, 2,048 MB) at **$24.00/month flat**.
In this case, Railway is roughly 8.6x less expensive, or about $21 per month saved per worker. Multiply that across eight or ten workers and multiple environments, and the savings can reach thousands per year.
This example favors Railway's model of billing on consumption. For workloads that stay saturated 24/7, some Northflank plans can be more cost-effective than their Railway equivalent. The reality is that most software is only utilized to its full resource extent very rarely, so paying for that capacity is unnecessary overhead.
#### UI experience
##### Northflank
Northflank's UI is centered around a traditional infrastructure monitoring dashboard. Projects contain services, jobs, and addons in a familiar hierarchy, and each comes with logs and metrics to help understand failures. Jobs also record per-run history, so individual executions can be reviewed after the fact.
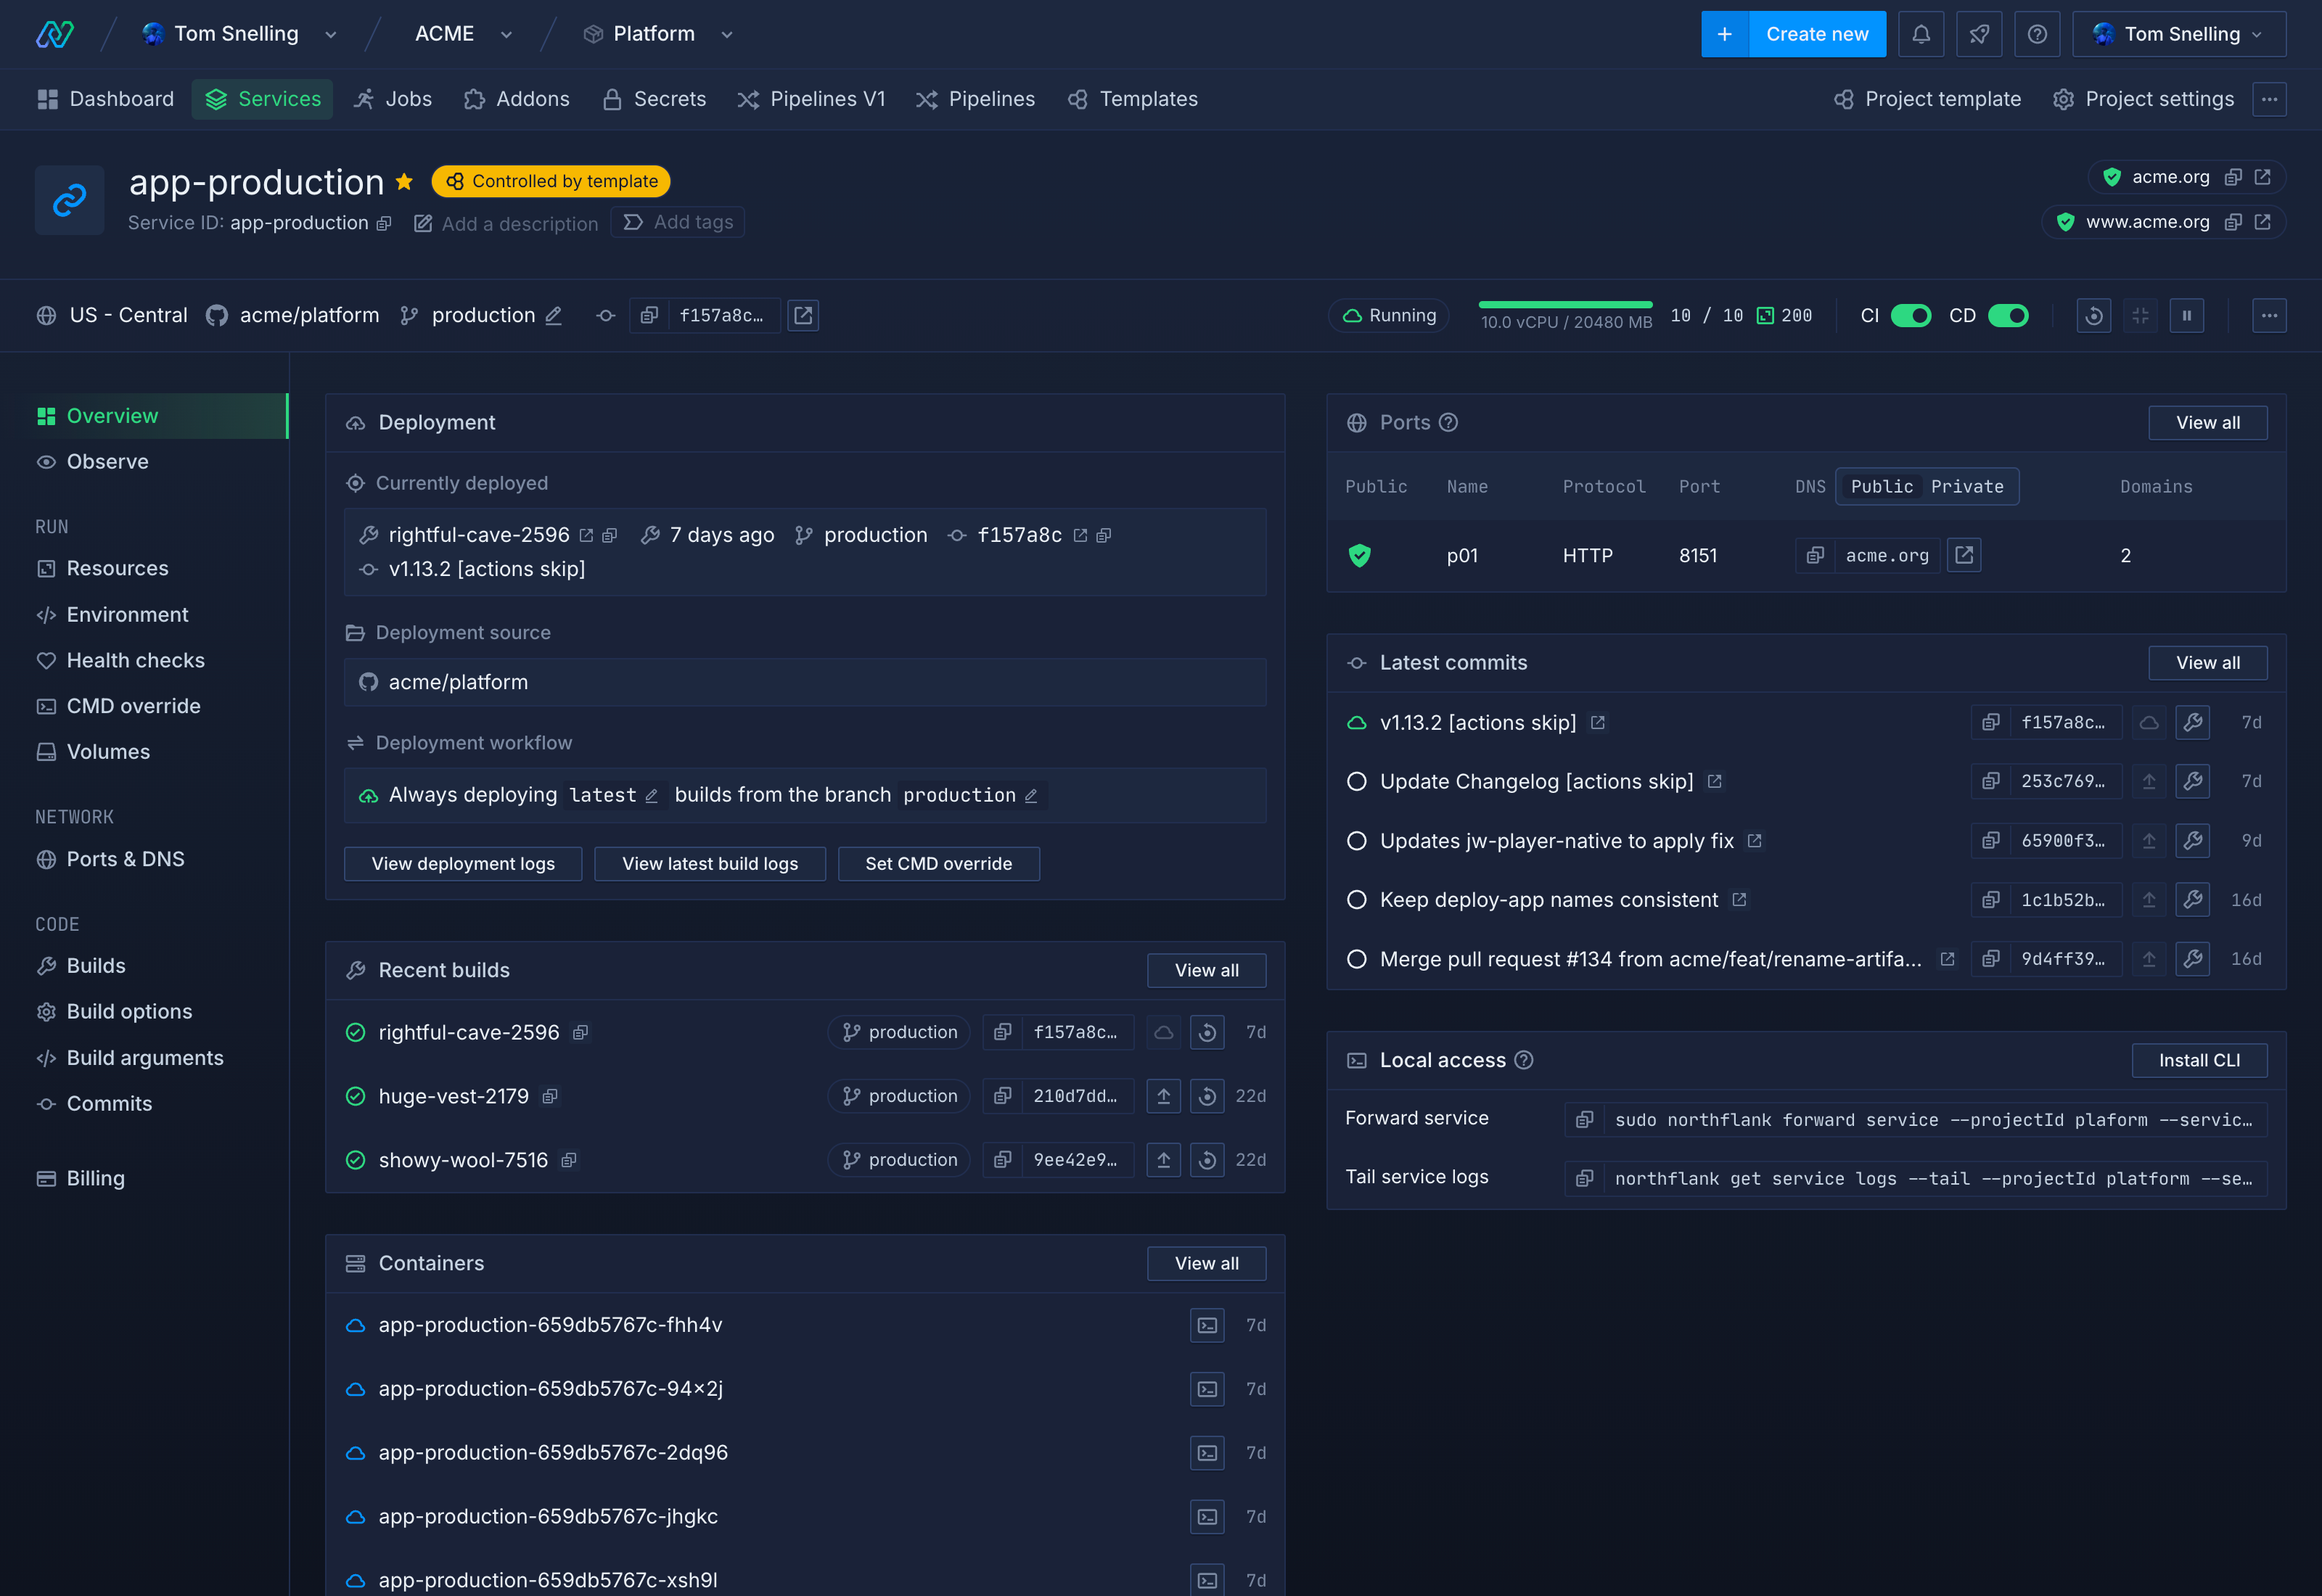
Northflank logs are available for 60 days, and log sinks pipe logs out to other observability systems. Northflank also provides a custom alerting suite that delivers infrastructure alerts through notification integrations and webhooks.
Kubernetes concepts appear in the dashboard as they do elsewhere in the product. You'll see compute plans when creating services, and cluster state when debugging.
##### Railway
Railway's default project UI is a real-time collaborative canvas showing all services and how they relate to one another. Changes from teammates appear live, and environment variables can be shared across services within a project instead of being duplicated per service.
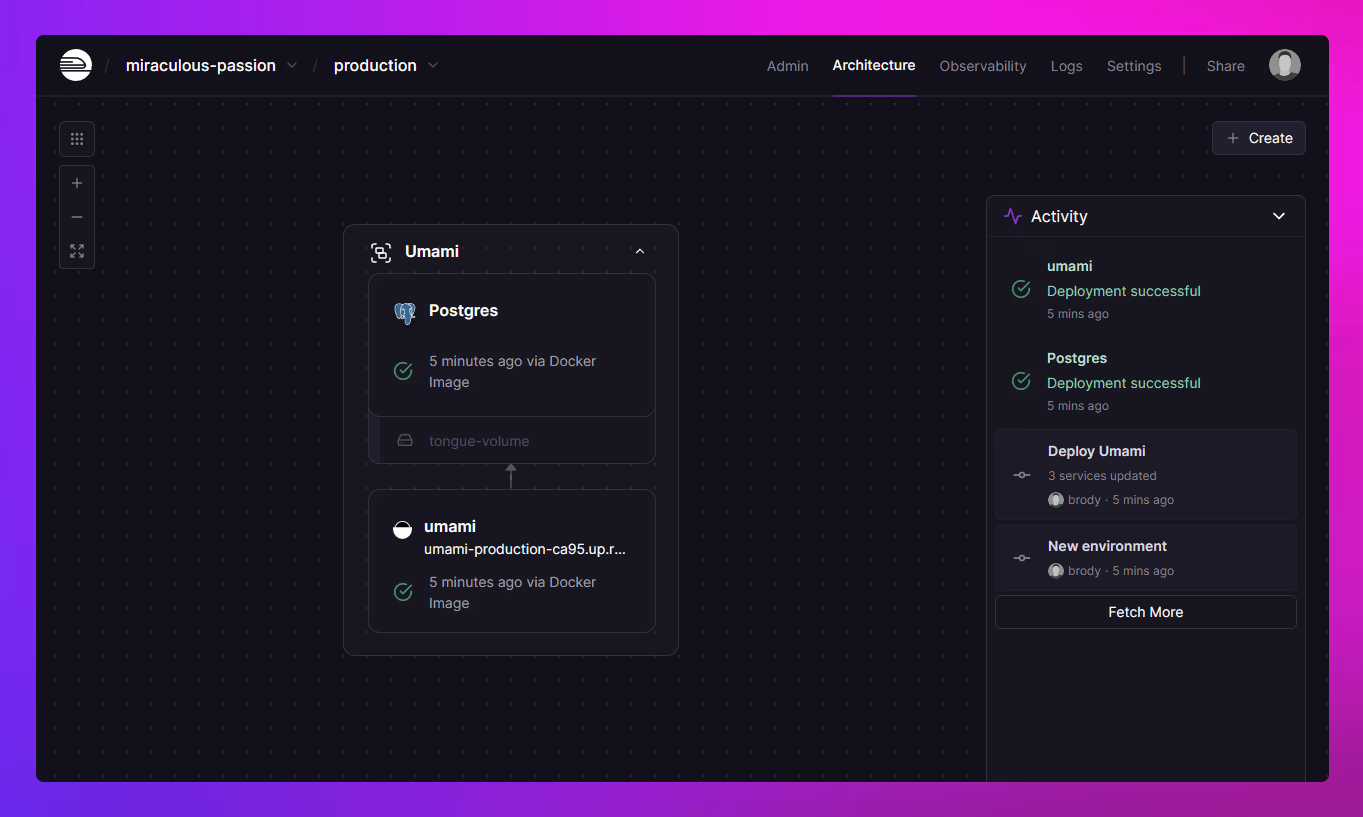
Every service comes with CPU, memory, disk, and network metrics, with up to 30 days of history. Deployments are marked on the metrics graphs to make it easier to connect a resource spike to the code change that caused it. Metrics for services with replicas can be viewed summed or per replica.
The Observability Dashboard provides a configurable view of metrics, logs, and spend for each environment. Log widgets accept the same filter syntax as the Log Explorer, monitors can be attached to any widget for alerting, and webhooks send deployment events to an external URL.
Railway also maintains a template directory where anyone can package and publish a deployable stack. Template creators earn a 25% kickback on the usage their templates generate.
#### AI capabilities
##### Northflank
Northflank primarily provides AI infrastructure _for_ AI workloads, including microVM-backed sandboxes for running untrusted LLM-generated code and GPUs for intensive machine learning workloads. These features are geared toward people building AI- and machine learning-powered products.
##### Railway
Railway also includes sandboxes for running untrusted code at scale, and it uses AI to make the process of shipping software effortless.
The Railway agent is a chat-based assistant that lives inside your project, with all the context and tools it needs to diagnose errors, fix bugs, build new features, and ship them to users.
The same underlying agent powers Railway's Slack and Discord notifications, where you can tag `@railway` and have it get to work without switching contexts. Railway's local and remote MCP servers also bring Railway context and tools into the agent harnesses you already use.
#### When to pick each
##### Northflank
Northflank is a great pick if your workloads require GPUs. Inference, model serving, and training are all supported, with fractional GPUs on the low end and H100 and B200 access on the high end.
Northflank is also the right choice when compliance requirements demand BYOC or in-your-VPC deployment. Data residency rules or a mandate to keep workloads inside your own cloud account can rule out a fully managed platform entirely, and Northflank makes bringing your own cloud a self-serve action rather than gating it behind an enterprise sales process.
Some teams simply want managed Kubernetes as their abstraction, and here Northflank shines. If your team is well staffed, already fluent in container orchestration, and looking for a control plane over their clusters instead of a replacement for them, Northflank fits how you already work.
##### Railway
Pick Railway if you don't want to think about infrastructure. The platform can be operated by a software engineer with basic infrastructure knowledge and doesn't require specialized platform or DevOps expertise. Deploying from a repo requires zero configuration, there are no Kubernetes concepts or compute plans to learn, and monitoring and alerting work right out of the box. Because everything runs on Railway-owned hardware, there's only one vendor to vet and one bill to pay.
Railway also shines if you don't want to think about scaling. Railway services bill on actual consumption rather than allocated capacity, and scale up and down automatically based on traffic. Idle services sleep to zero with serverless, so multi-service projects with variable load stay affordable without manual sizing of instances or tuning of autoscaling thresholds.
Railway is further along on AI-assisted operation. Railway Agent diagnoses failed deploys and can open a PR with a fix, while the MCP server and agent skills mean something you vibe-coded with Claude Code, Cursor, or Codex can be deployed by the same agent that wrote it, database and all, with no Dockerfile step first. Railway Sandboxes go a step further and ship with Claude Code, Codex, and OpenCode preinstalled, so an agent can build and deploy without ever leaving Railway's infrastructure.
#### Summary
| Category | Northflank | Railway |
| --- | --- | --- |
| Infrastructure | Multi-tenant Kubernetes or BYOC into your cloud account | Railway-owned global hardware (Railway Metal) |
| Kubernetes exposure | Intentional: plans map to cluster resources | None; custom orchestrator |
| Billing basis | Per-second, on a selected compute plan | Per-minute, on resources actually consumed within your plan's ceiling |
| Compute plan tiers | Fixed vCPU/GB tiers (for example, nf-compute-100-2) | No preset tiers; scales continuously up to plan limits |
| Serverless sleep | Not offered | Idle services sleep with no compute charges |
| Vertical scaling | Select a larger compute plan | Automatic to plan limits |
| Horizontal scaling | Threshold-based autoscaling; requires tuning | Replicas with automatic traffic distribution |
| Multi-region | Region configuration per service or cluster | Built-in; traffic routed to nearest region |
| GPU support | Yes (fractional up to H100/B200) | No |
| BYOC | Yes, self-serve | No |
| Databases | Managed addons: PostgreSQL, MySQL, MongoDB, Redis, MinIO, RabbitMQ, Memcached | One-click: PostgreSQL, MySQL, Redis, MongoDB; more engines via the template directory |
| Background workers | Dedicated worker service type | Any service without a public domain |
| Sandboxes | MicroVM-backed (Kata, Firecracker, gVisor), built for untrusted/multi-tenant code execution | Isolated VMs with exec, fork, checkpoints, and network isolation modes; built for agent and dev workflows |
| Observability | Logs and metrics retained 60 days; native log sinks to Datadog, Better Stack, Honeycomb, S3, and custom HTTP; audit logs | Metrics retained 30 days; configurable Observability Dashboard with log/metric widgets and monitors; forward logs via Vector, Fluent Bit, or OpenTelemetry |
| Templates | Stack templates | Template directory with 25% creator kickbacks |
| Free tier | Free Developer/Sandbox tier (2 services, 1 database, 2 cron jobs); payment method required to create resources | One-time $5 trial credit for 30 days, no card required; then Free plan with $1/month credit |
| UI | Traditional dashboard | Real-time collaborative canvas |
| AI capabilities | GPU hosting, microVM sandboxes for untrusted AI code execution | Railway Agent, MCP servers, agent skills, sandboxes for agent and dev workflows |
#### Frequently asked questions
##### Is Railway cheaper than Northflank?
It depends on the workload. Railway meters resource consumption per minute, so services that idle for part of the day, or sleep entirely with serverless, cost less than Northflank's fixed per-plan billing. For a service that's saturated 24/7 with nothing to scale down, Northflank's flat rate can come out ahead. See the pricing section above for a worked example.
##### Does Railway run on Kubernetes?
No. Railway runs on Railway Metal, its own custom orchestration layer, so there are no Kubernetes concepts anywhere in the product.
##### Does Railway support background workers?
Yes. Any service without a public domain works as a background worker, and services can be put on a cron schedule if they only need to run at specific times.
##### Does Railway support BYOC?
No. Railway doesn't offer a bring-your-own-cloud option; all services run on Railway-owned infrastructure.
##### Does Railway support GPU workloads?
No. Railway doesn't currently offer GPU instances.
##### Does Railway support AI workloads like inference or training?
Not directly. Railway doesn't offer GPU compute, so inference and training workloads that need it are better suited to Northflank.
##### Does Railway have an AI assistant?
Yes. Railway Agent is built into the dashboard and can create and configure services, set variables, connect databases, and diagnose failed deployments, including opening a pull request with a proposed fix.
##### Can I deploy an app built with Claude Code to Railway?
Yes. Railway's MCP server and agent skills let Claude Code, Cursor, Codex, and Copilot deploy and operate Railway directly, so an agent that wrote the app can also deploy it and fix issues without leaving the conversation.
#### Migrate from Northflank to Railway
To get started, [create an account on Railway](https://railway.com/new). It's free, comes with $5 in trial credits, and doesn't require a payment method to get started.
1. Choose "Deploy from GitHub repo", connect your GitHub account, and select the repo you want to migrate.

2. If your project uses any environment variables or secrets:
1. Click the deployed service.
2. Navigate to the "Variables" tab.
3. Add a new variable by clicking "New Variable". Alternatively, import a `.env` file by clicking "Raw Editor" and adding all variables at once.

3. To make your project accessible over the internet, configure a domain:
1. From the project's canvas, click the service you want to configure.
2. Navigate to the "Settings" tab.
3. Go to the "Networking" section.
4. You can either:
1. Generate a Railway service domain: this makes your app available under a `.up.railway.app` domain.
2. Add a custom domain: follow the DNS configuration steps.
If you're starting from scratch, check out the [Railway Quickstart](/quick-start).
#### Need help or have questions?
If you need help along the way, the [Help Station](https://station.railway.com/) is a great resource to get support from the team and community.
Working with a larger workload or have specific requirements? [Book a call with the Railway team](https://cal.com/team/railway/work-with-railway) to explore how we can best support your project.
### Compare to Vercel
Source: https://docs.railway.com/platform/compare-to-vercel.md
Compare Railway and Vercel on infrastructure, pricing model and deployment experience, with a step-by-step migration guide.
_Last updated: June 2026_
> Looking for a pricing-focused comparison? See [railway.com/compare/vercel](https://railway.com/compare/vercel).
At a high level, both Railway and Vercel enable you to deploy your app without the hassle of managing infrastructure. Both platforms share several similarities:
- Git-based automated deployments with support for instant rollbacks.
- Automatic preview environments.
- Built-in observability.
- Autoscaling resources with usage-based pricing.
That said, there are fundamental differences between both platforms, and certain use cases where Railway is a better fit.
#### Understanding the underlying infrastructure and ideal use cases
##### Vercel’s infrastructure
Vercel has developed a proprietary deployment model where infrastructure components are derived from the application code (see [Framework-defined infrastructure](https://vercel.com/blog/framework-defined-infrastructure)).
At build time, application code is parsed and translated into the necessary infrastructure components. Server-side code is then deployed as serverless functions, powered by [AWS](https://aws.com) under the hood.
To handle scaling, Vercel creates a new function instance for each incoming request with support for concurrent execution within the same instance (see [Fluid compute](https://vercel.com/docs/fluid-compute)). Over time, functions scale down to zero to save on compute resources.
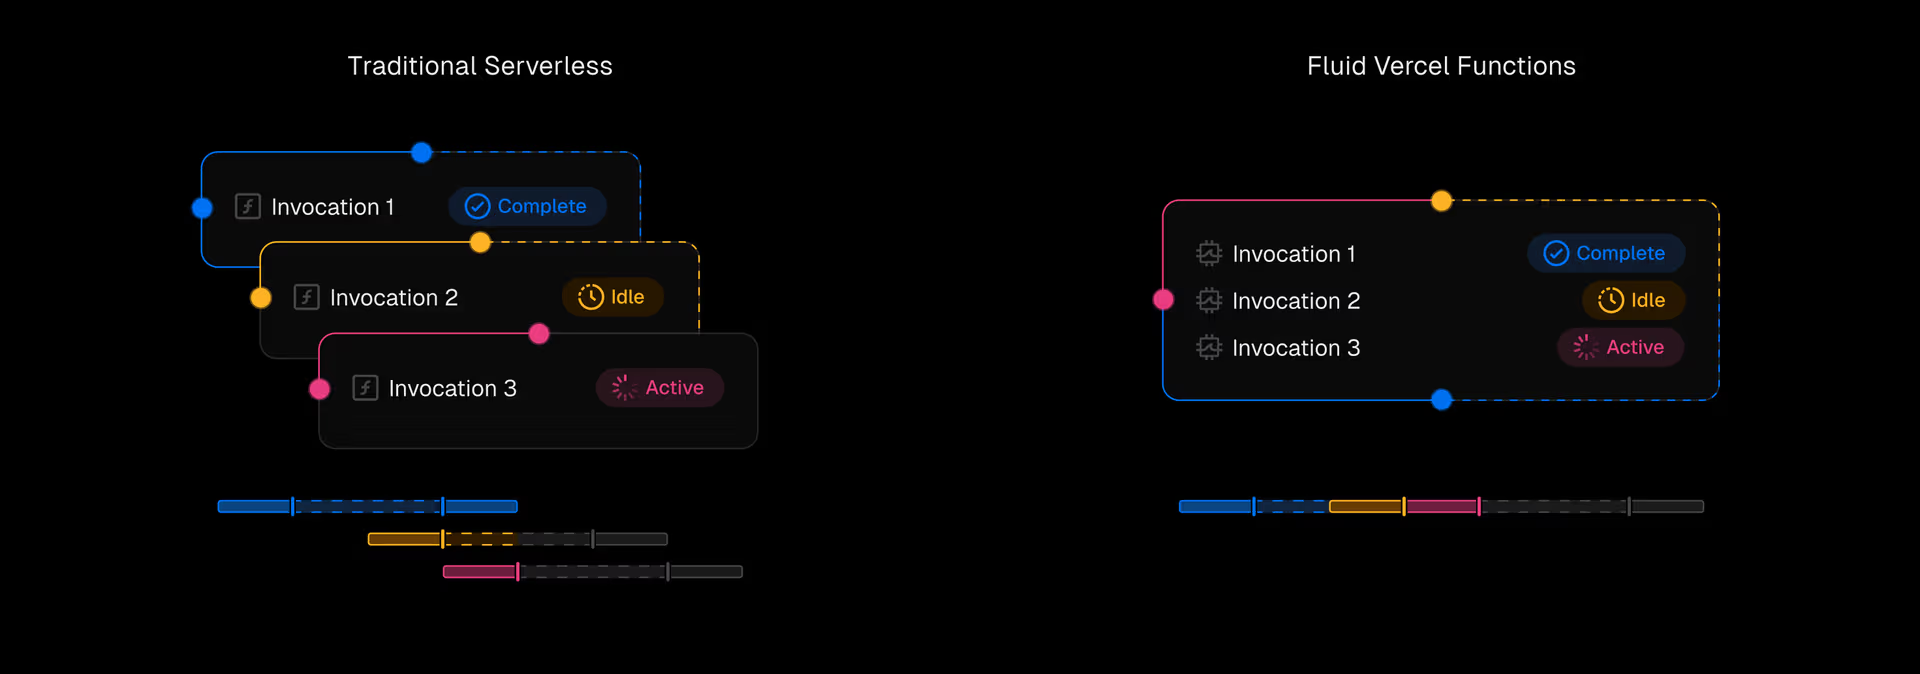
This deployment model abstracts away infrastructure, but introduces limitations:
- Memory limits: the maximum amount of memory per function is 4GB.
- Execution time limit: the maximum amount of time a function can run is 800 seconds (~13.3 minutes).
- Size (after gzip compression): the maximum is 250 MB.
- Cold starts: when a function instance is created for the first time, there’s an amount of added latency. Vercel includes [several optimizations](https://vercel.com/docs/fluid-compute#bytecode-caching), which reduces cold start frequency but won’t completely eliminate them.
If you plan on running long-running workloads such as:
- Data Processing: ETL jobs, large file imports/exports, analytics aggregation.
- Media Processing: Video/audio transcoding, image resizing, thumbnail generation.
- Report Generation: Creating large PDFs, financial reports, user summaries.
- DevOps/Infrastructure: Backups, CI/CD tasks, server provisioning.
- Billing & Finance: Usage calculation, invoice generation, payment retries.
- User Operations: Account deletion, data merging, stat recalculations.
Or if you plan on running workloads that require a persistent connection such as:
- Chat messaging: Live chats, typing indicators.
- Live dashboards: Metrics, analytics, stock tickers.
- Collaboration: Document editing, presence.
- Live tracking: Delivery location updates.
- Push notifications: Instant alerts.
- Voice/video calls: Signaling, status updates.
Then deploying your backend services to Vercel functions will not be the right fit.
##### Railway’s infrastructure
Railway's underlying infrastructure runs on hardware that’s owned and operated in data centers across the globe. By controlling the hardware, software, and networking stack end to end, the platform delivers best-in-class performance, reliability, and powerful features, all while keeping costs in check.
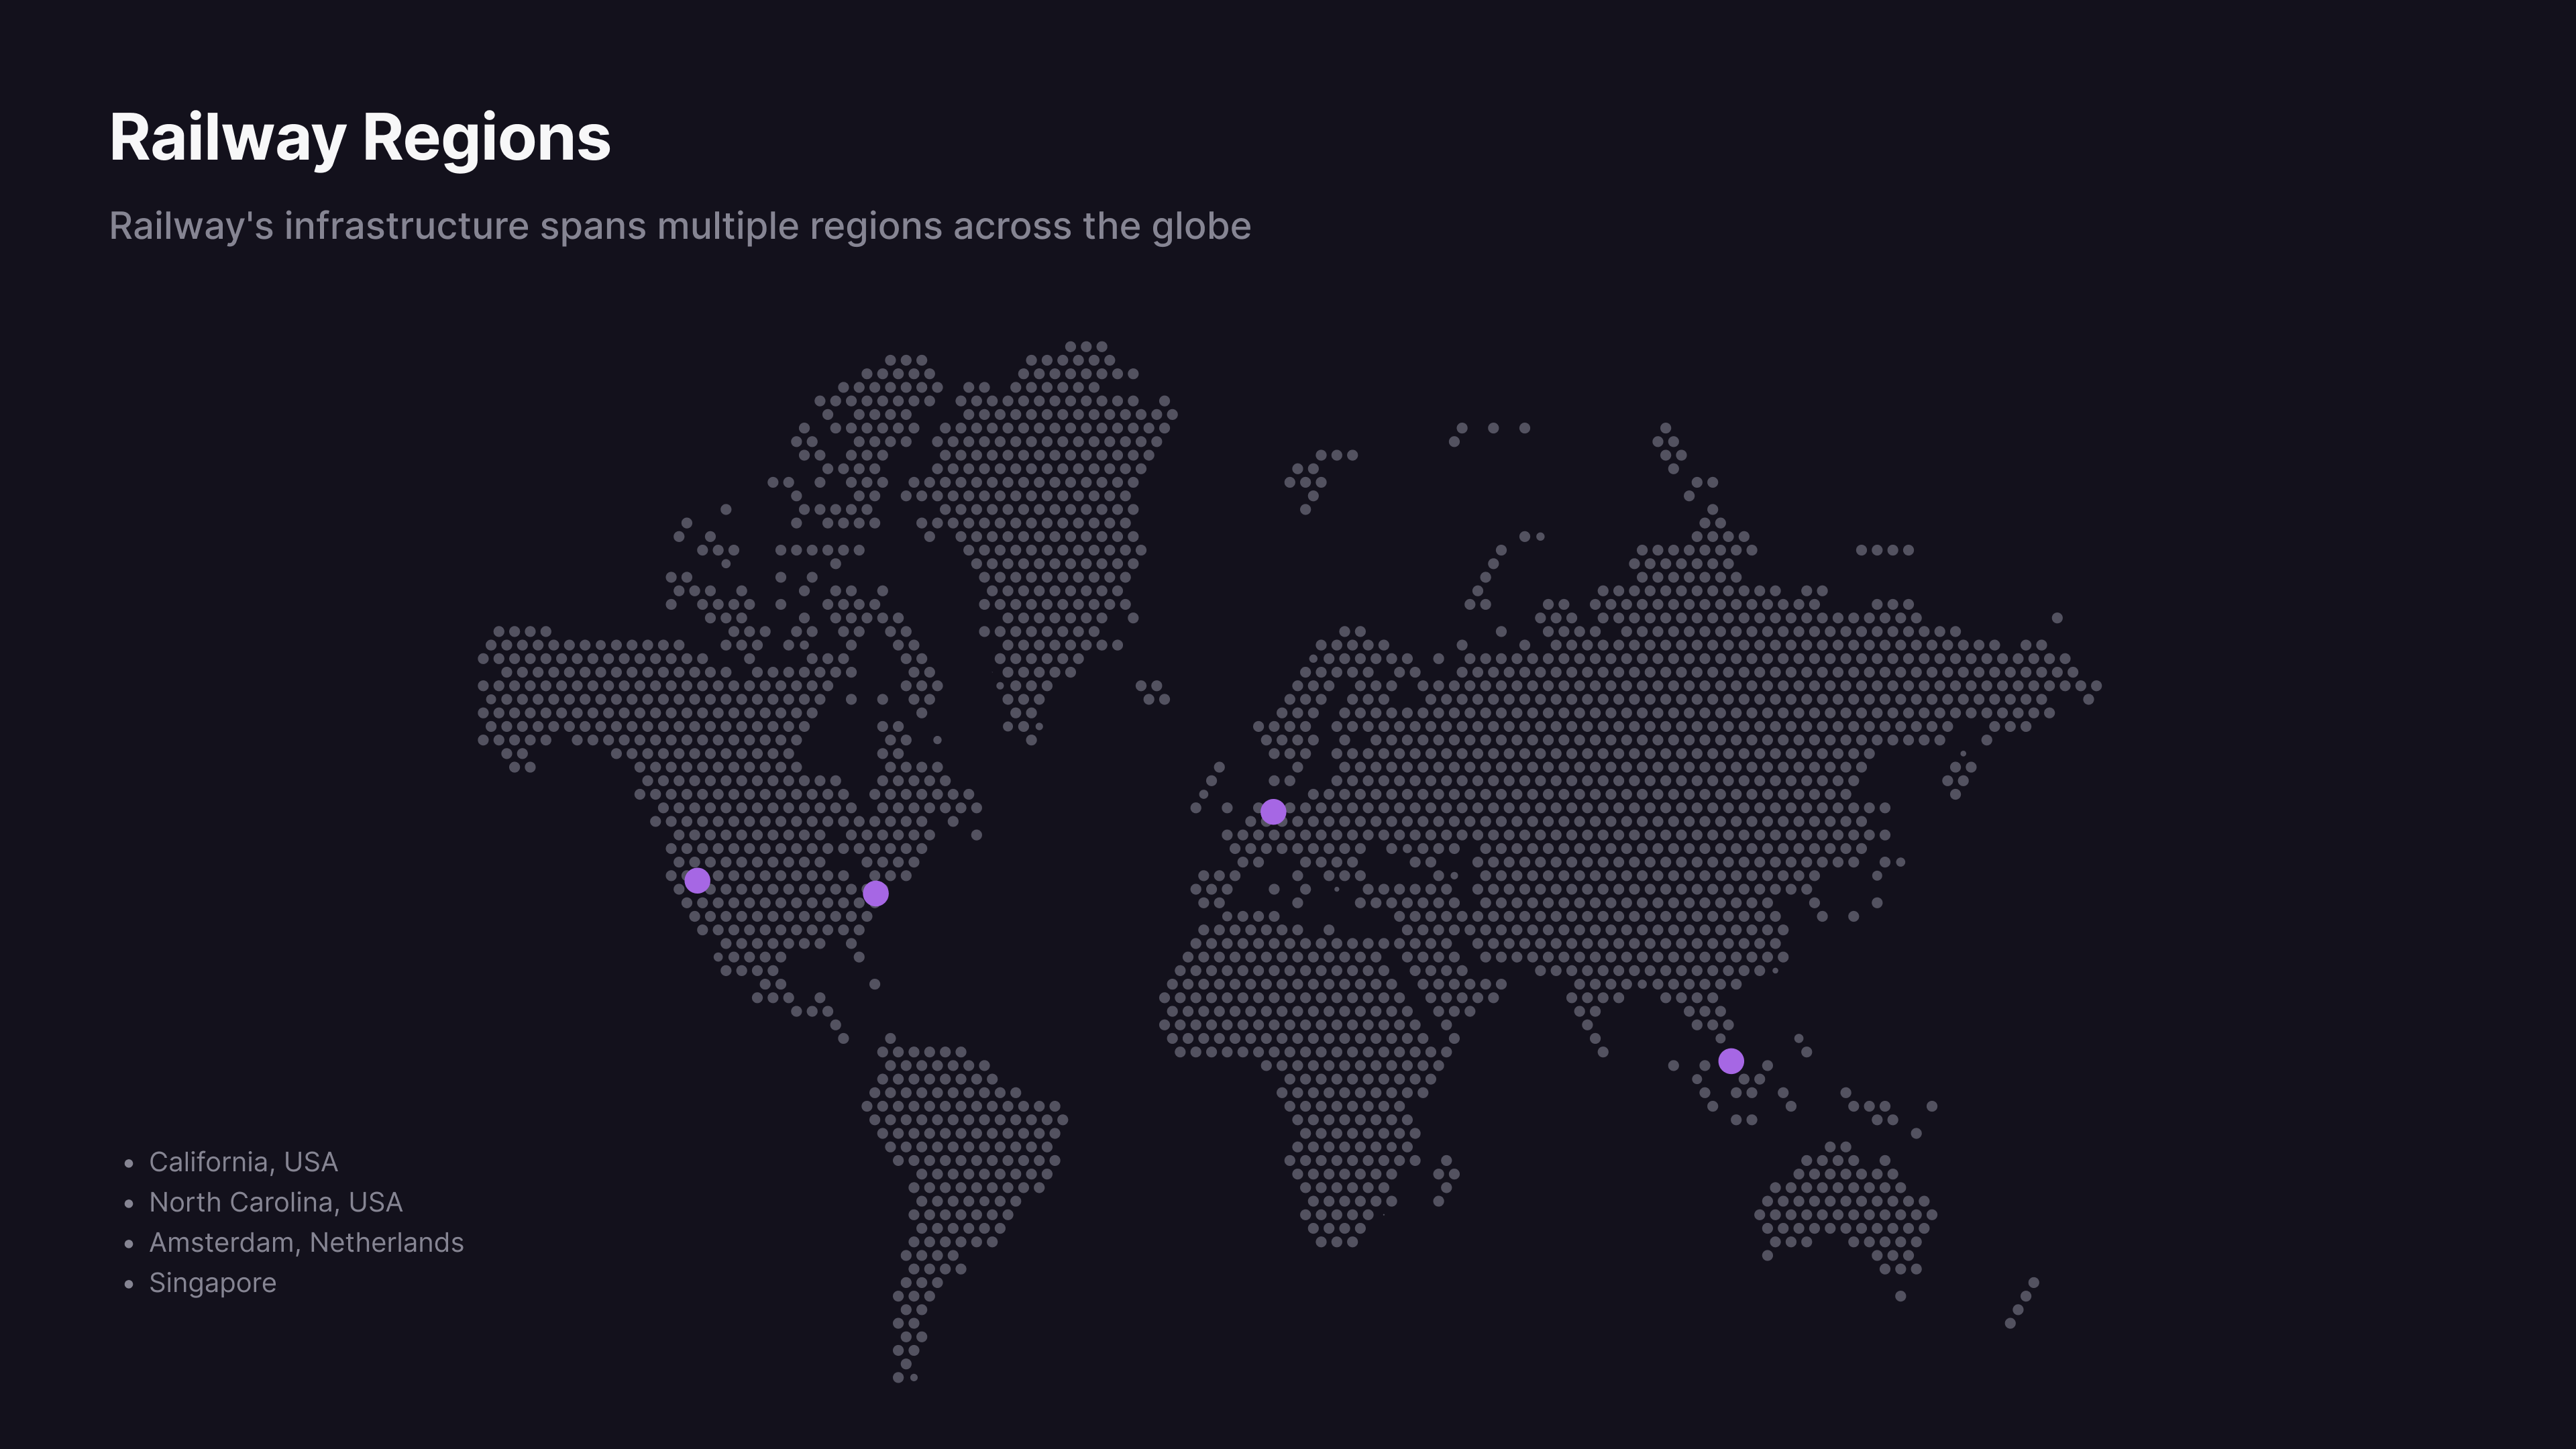
Railway uses a [custom builder](/builds) that takes your source code or Dockerfile and automatically builds and deploys it, without needing configuration.
Your code runs on a long-running server, making it ideal for apps that need to stay running or maintain a persistent connection.
All deployments come with smart defaults out of the box, but you can tweak things as needed. This makes Railway flexible across [different runtimes and programming languages](http://railway.com/deploy).
Each service you deploy can automatically scale up vertically to handle incoming workload. You also get the option to horizontally scale a service by spinning up replicas. Replicas can be deployed in multiple regions simultaneously.
You can also set services to start on a schedule using a crontab expression. This lets you run scripts at specific times and only pay for the time they’re running.
#### Pricing model differences
Both platforms follow a usage-based pricing model, but are different due to the underlying infrastructure.
##### Vercel
Vercel functions are billed based on:
- Active CPU: Time your code actively runs in milliseconds
- Provisioned memory: Memory held by the function instance, for the full lifetime of the instance
- Invocations: number of function requests, where you’re billed per request
Each pricing plan includes a certain allocation of these metrics.
This makes it possible for you to pay for what you use. However, since Vercel runs on AWS, the unit economics of the business need to be high to offset the cost of the underlying infrastructure. Those extra costs are then passed down to you as the user, so you end up paying extra for resources such as bandwidth, memory, CPU and storage.
##### Railway
Railway follows a usage-based pricing model that depends on how long your service runs and the amount of resources it consumes.
```
Active compute time x compute size (memory and CPU)
```

If you spin up multiple replicas for a given service, you’ll only be charged for the active compute time for each replica.
Railway also has a [serverless](/deployments/serverless) feature, which helps further reduce costs when enabled. When a service has no outbound requests for over 10 minutes, it is automatically put to sleep. While asleep, the service incurs no compute charges. It wakes up on the next incoming request, ensuring seamless reactivation without manual effort. This makes it ideal for sporadic or bursty workloads, giving you the flexibility of a full server with the cost efficiency of serverless, with the benefit of only paying when your code is running.
#### Deployment experience
##### Vercel
**Managing multiple services**
In Vercel, a project maps to a deployed application. If you would like to deploy multiple apps, you’ll do it by creating multiple projects.
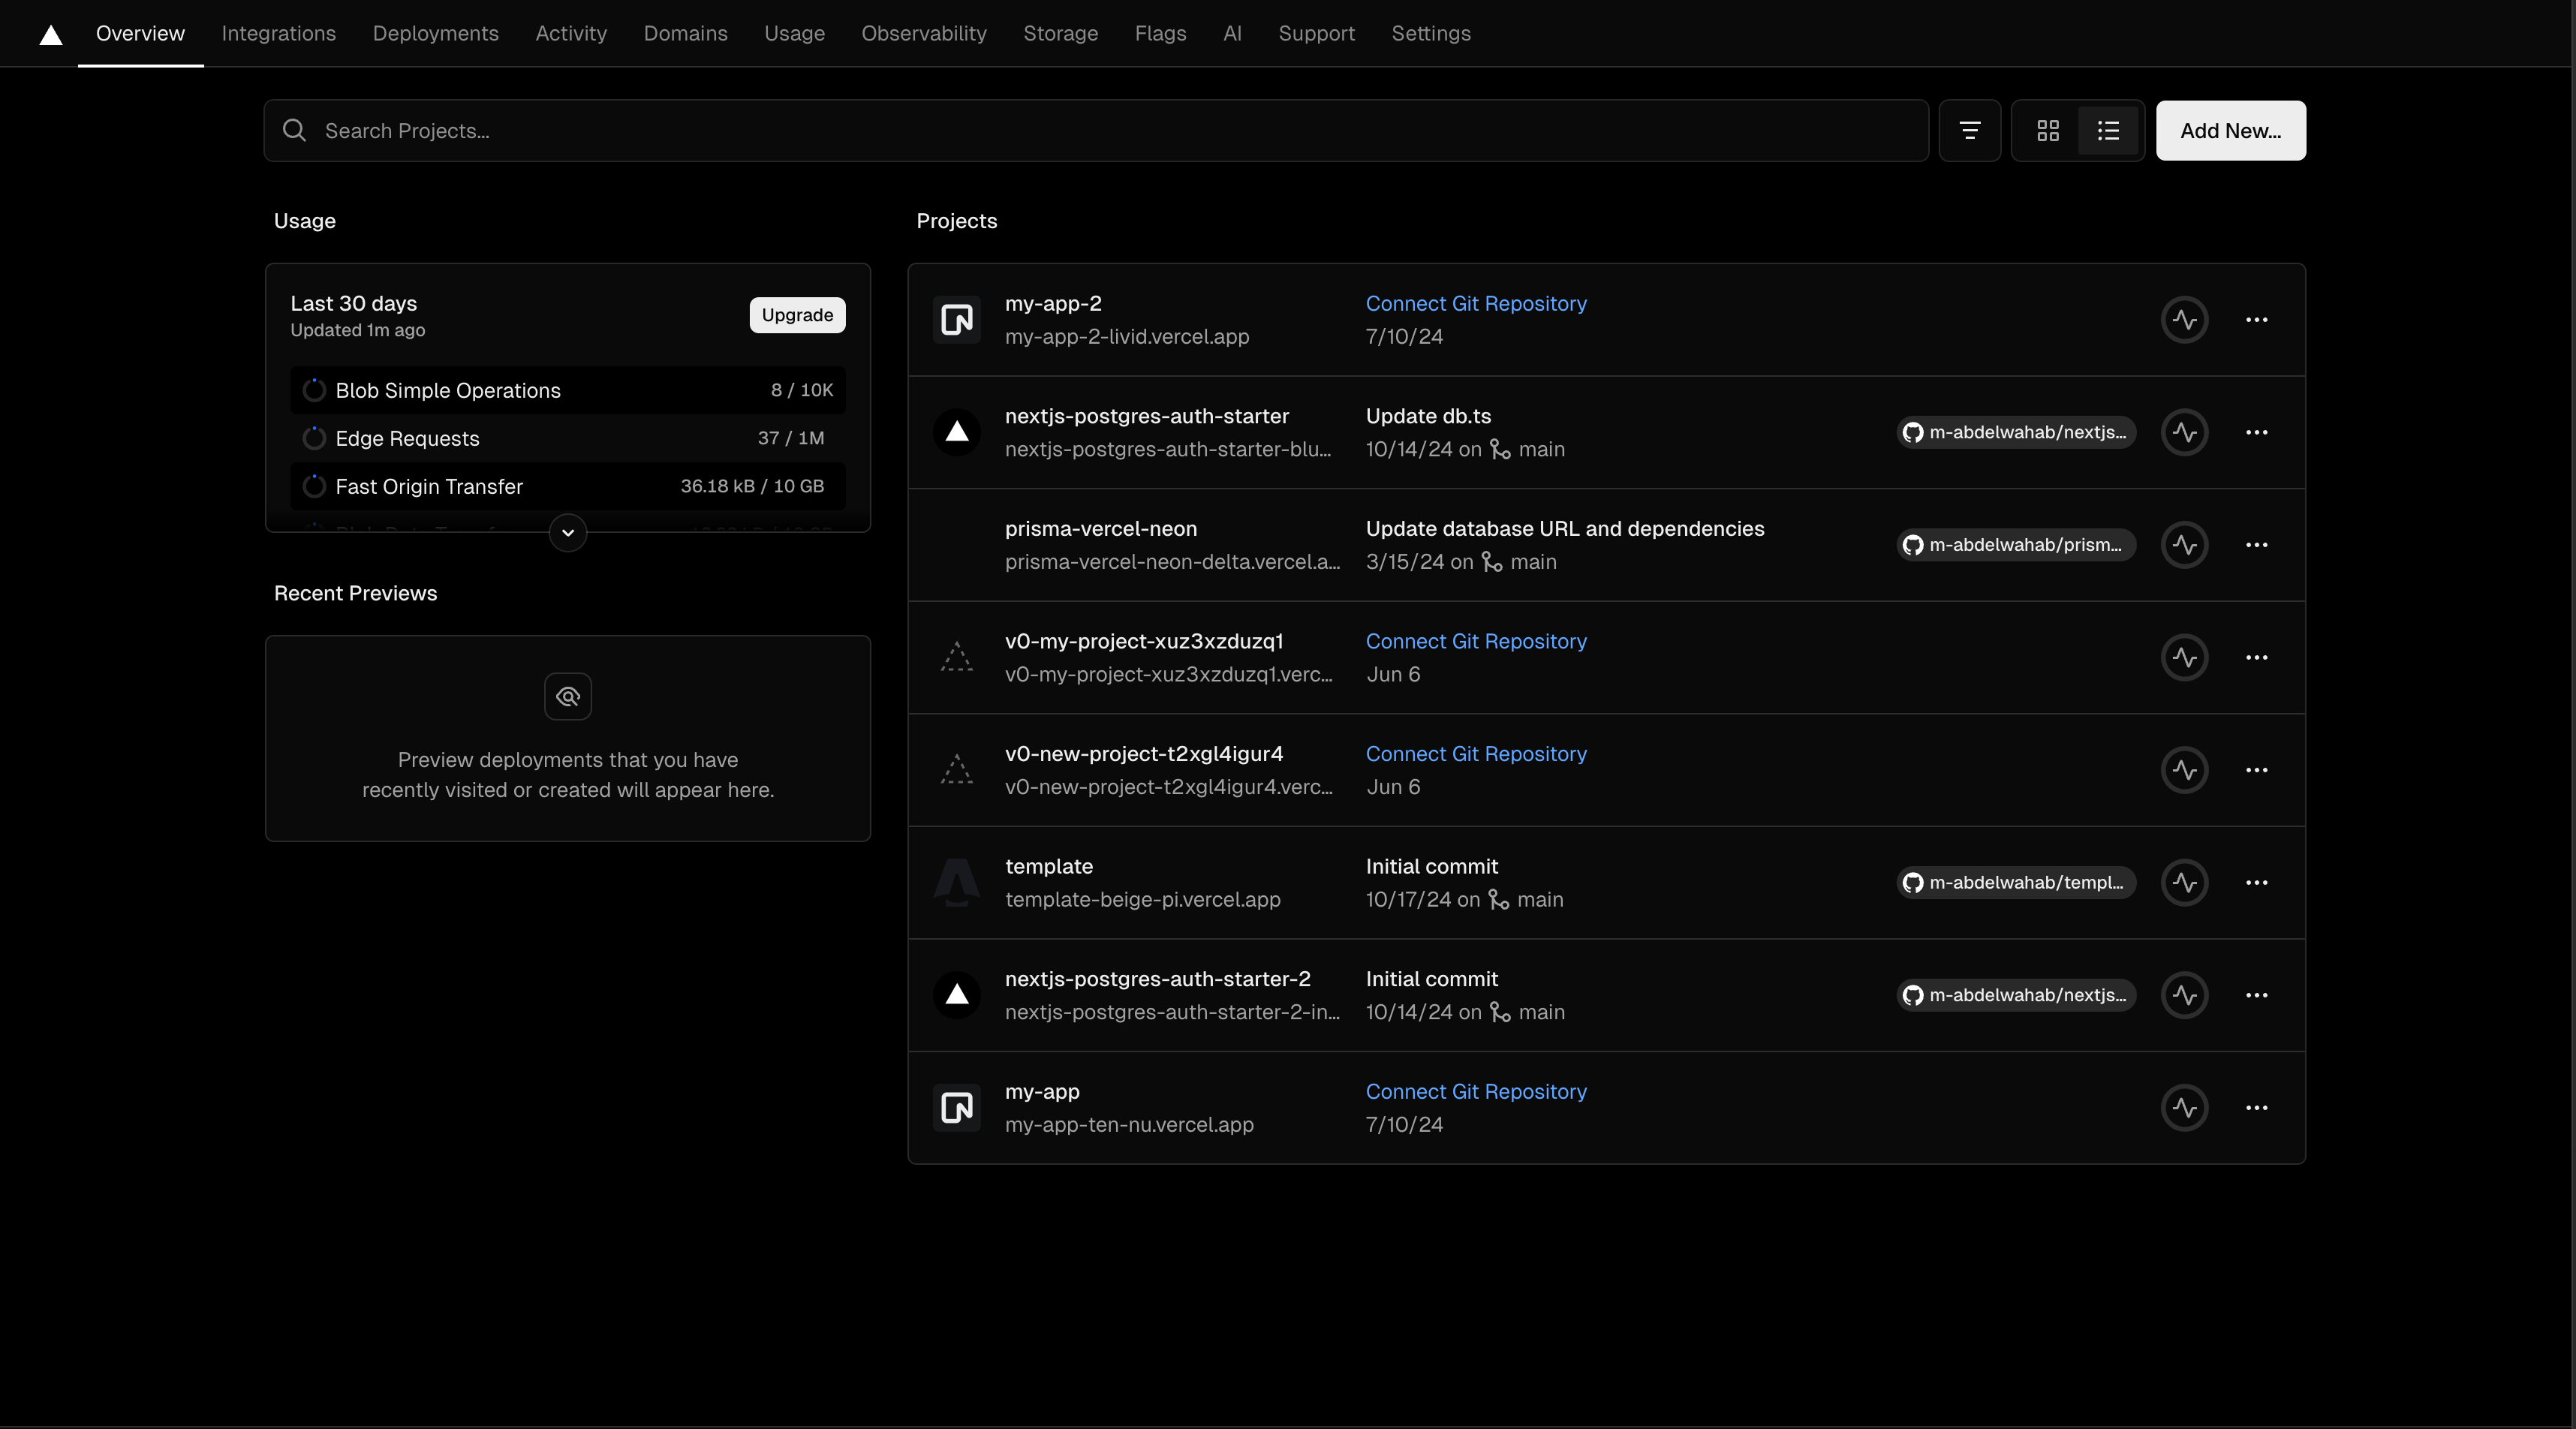
**Integrating your application with external services**
If you would like to integrate your app with other infrastructure primitives (e.g storage solutions for your application’s database, caching, analytical storage, etc.), you can do it through the Vercel marketplace.
This gives you an integrated billing experience, however managing services is still done by accessing the original service provider. Making it necessary to switch back and forth between different dashboards when you’re building your app.
##### Railway
**Managing projects**
In Railway, a project is a collection of services and databases. This can include frontend, API, background workers, analytics database, queues and so much more. All in a unified deployment experience that supports real-time collaboration.

**Databases**
Additionally, Railway has first-class support for Databases. You can one-click deploy any open-source database:
- Relational: Postgres, MySQL
- Analytical: ClickHouse, ParadeDB, Timescale
- Key-value: Redis, Dragonfly
- Vector: Chroma, Weaviate
- Document: MongoDB
Check out all of the [different storage solutions](https://railway.com/deploy?category=Storage) you can deploy.
Template directory
Finally, Railway offers a template directory that makes it easy to self-host open-source projects with just a few clicks. If you publish a template and others deploy it in their projects, you’ll earn a 25% kickback of their usage costs.
Check out all templates at [railway.com/deploy](http://railway.com/deploy)
#### Summary
| Feature | Railway | Vercel |
| ---------------------- | ------------------------------------------------------------------- | ------------------------------------------------------ |
| Infrastructure Model | Long-running servers on dedicated hardware | Serverless functions on AWS |
| Scaling | Vertical + horizontal scaling with replicas | Scales via stateless function instances |
| Persistent Connections | ✅ Yes (sockets, live updates, real-time apps) | ❌ Unsupported |
| Cold Starts | ❌ No cold starts | ⚠️ Possible cold starts (with optimizations) |
| Max Memory Limit | Up to full machine capacity | 4GB per function |
| Execution Time Limit | Unlimited (as long as the process runs) | 800 seconds (13.3 minutes) |
| Databases | Built-in one-click deployments for major databases | Integrated via marketplace (external providers) |
| Project Structure | Unified project: multiple services + databases in one | One service per project |
| Usage-Based Billing | $20/vCPU-month, $10/GB-month RAM, billed per second of actual usage | $20 per user/month plus usage; active CPU $0.128/hour, plus provisioned memory and invocations |
| Ideal For | Fullstack apps, real-time apps, backend servers, long-running tasks | Frontend-first apps, short-lived APIs |
| Support for Docker | ✅ Yes | ❌ No (function-based only) |
#### Frequently asked questions
##### Should I deploy my backend on Railway or Vercel?
If your backend needs persistent connections (websockets, live dashboards, chat) or long-running work (ETL, media processing, report generation), Railway is the better fit: services run on long-running servers with no 800-second execution limit, no 4 GB memory cap, and no cold starts. Your frontend, static or server-rendered, can deploy on Railway alongside that backend, so most teams don't need a second platform. For frontend-first apps with short-lived APIs, Vercel's serverless functions also work well.
##### Does Railway have cold starts like Vercel?
No. Railway services run on long-running servers, so there's no function instance to spin up per request. Vercel includes optimizations like bytecode caching that reduce cold start frequency, but they can't be completely eliminated.
##### Is Railway cheaper than Vercel?
Generally, yes. Vercel's Pro plan is $20 per user/month plus usage charges (active CPU at $0.128/hour, plus provisioned memory and invocations), while Railway Pro is a $20/month usage minimum with unlimited workspace seats included, not a per-user fee. Railway bills $20/vCPU-month, $10/GB-month RAM, and $0.05/GB egress, charged per second of actual usage. And because your static site or frontend can host on Railway next to your backend and database, you only need one platform instead of two.
##### Can I run Docker containers on Vercel?
No, Vercel is function-based only; your code is parsed at build time and deployed as serverless functions. Railway can deploy directly from a Docker image or Dockerfile, in addition to building from source.
#### Migrate from Vercel to Railway
To get started, [create an account on Railway](https://railway.com/new). You can sign up for free and receive $5 in credits to try out the platform.
##### Deploying your app
1. “Choose Deploy from GitHub repo”, connect your GitHub account, and select the repo you would like to deploy.

2. If your project is using any environment variables or secrets:
1. Click on the deployed service.
2. Navigate to the “Variables” tab.
3. Add a new variable by clicking the “New Variable” button. Alternatively, you can import a `.env` file by clicking “Raw Editor” and adding all variables at once.

3. To make your project accessible over the internet, you will need to configure a domain:
1. From the project’s canvas, click on the service you would like to configure.
2. Navigate to the “Settings” tab.
3. Go to the “Networking” section.
4. You can either:
1. Generate a Railway service domain: this will make your app available under a `.up.railway.app` domain.
2. Add a custom domain: follow the DNS configuration steps.
#### Need help or have questions?
If you need help along the way, the [Help Station](https://station.railway.com/) is a great resource to get support from the team and community.
Working with a larger workload or have specific requirements? [Book a call with the Railway team](https://cal.com/team/railway/work-with-railway) to explore how we can best support your project.
### Compare to DigitalOcean
Source: https://docs.railway.com/platform/compare-to-digitalocean.md
Compare Railway and DigitalOcean App Platform on infrastructure, pricing model and deployment experience, with a step-by-step migration guide.
_Last updated: June 2026_
> See how Railway compares to other platforms at [railway.com/compare](https://railway.com/compare).
At a high level, both Railway and DigitalOcean App Platform can be used to deploy your app. Both platforms share many similarities:
- You can deploy your app from a Docker image or by importing your app’s source code from GitHub.
- Multi-service architecture where you can deploy different services under one project (e.g. a frontend, APIs, databases, etc.).
- Services are deployed to a long-running server.
- Public and private networking are included out-of-the-box.
- Healthchecks are available to guarantee zero-downtime deployments.
- Connect your GitHub repository for automatic builds and deployments on code pushes.
- Support for instant rollbacks.
- Integrated metrics and logs.
- Define Infrastructure-as-Code (IaC).
- Command-line-interface (CLI) to manage resources.
- Integrated build pipeline with the ability to define pre-deploy command.
- Support for wildcard domains.
- Custom domains with fully managed TLS.
- Run arbitrary commands against deployed services (SSH).
- Shared environment variables across services.
- Both platforms’ infrastructure runs on hardware that’s owned and operated in data centers across the globe.
That said, there are some differences between the platforms that might make Railway a better fit for you.
#### Scaling strategies
##### DigitalOcean app platform
DigitalOcean App Platform follows a traditional, instance-based model. Each instance has a set of allocated compute resources (memory and CPU).
In the scenario where your deployed service needs more resources, you can either scale:
- Vertically: you will need to manually upgrade to a large instance size to unlock more compute resources.
- Horizontally: your workload will be distributed across multiple running instances. You can either:
- Manually specify the machine count.
- Autoscale by defining a minimum and maximum instance count. The number of running instances will increase/decrease based on a target CPU and/or memory utilization you specify.
The main drawback of this setup is that it requires manual developer intervention. Either by:
- Manually changing instance sizes/running instance count.
- Manually adjusting thresholds because you can get into situations where your service scales up for spikes but doesn’t scale down quickly enough, leaving you paying for unused resources.
Beyond scaling, there are other notable limitations. DigitalOcean App Platform doesn’t natively support multi-region deployments. To achieve that, you must create separate instances in different regions and set up an external load balancer to route traffic appropriately.
Furthermore, services deployed to the platform do not offer persistent data storage. Any data written to the local filesystem is ephemeral and will be lost upon redeployment, meaning you'll need to integrate with external storage solutions if your application requires data durability.
##### Railway
Railway automatically manages compute resources for you. Your deployed services can scale up or down based on incoming workload without manual configuration of metrics/thresholds or picking instance sizes. Each plan includes defined CPU and memory limits that apply to your services.
You can scale horizontally by deploying multiple replicas of your service. Railway automatically distributes public traffic randomly across replicas within each region. Each replica runs with the full resource limits of your plan.
For example, if you're on the Pro plan, each replica gets 24 vCPU and 24 GB RAM. So, deploying 3 replicas gives your service a combined capacity of 72 vCPU and 72 GB RAM.
```bash
Total resources = number of replicas × maximum compute allocation per replica
```
Replicas can be placed in different geographical locations for multi-region deployments. The platform automatically routes public traffic to the nearest region, then randomly distributes requests among the available replicas within that region. No need to define compute usage thresholds.
You can also set services to start on a schedule using a crontab expression. This lets you run scripts at specific times and only pay for the time they’re running.
#### Pricing
##### DigitalOcean app platform
DigitalOcean App Platform follows a traditional, instance-based pricing. You select the amount of compute resources you need from a list of instance sizes where each one has a fixed monthly price.
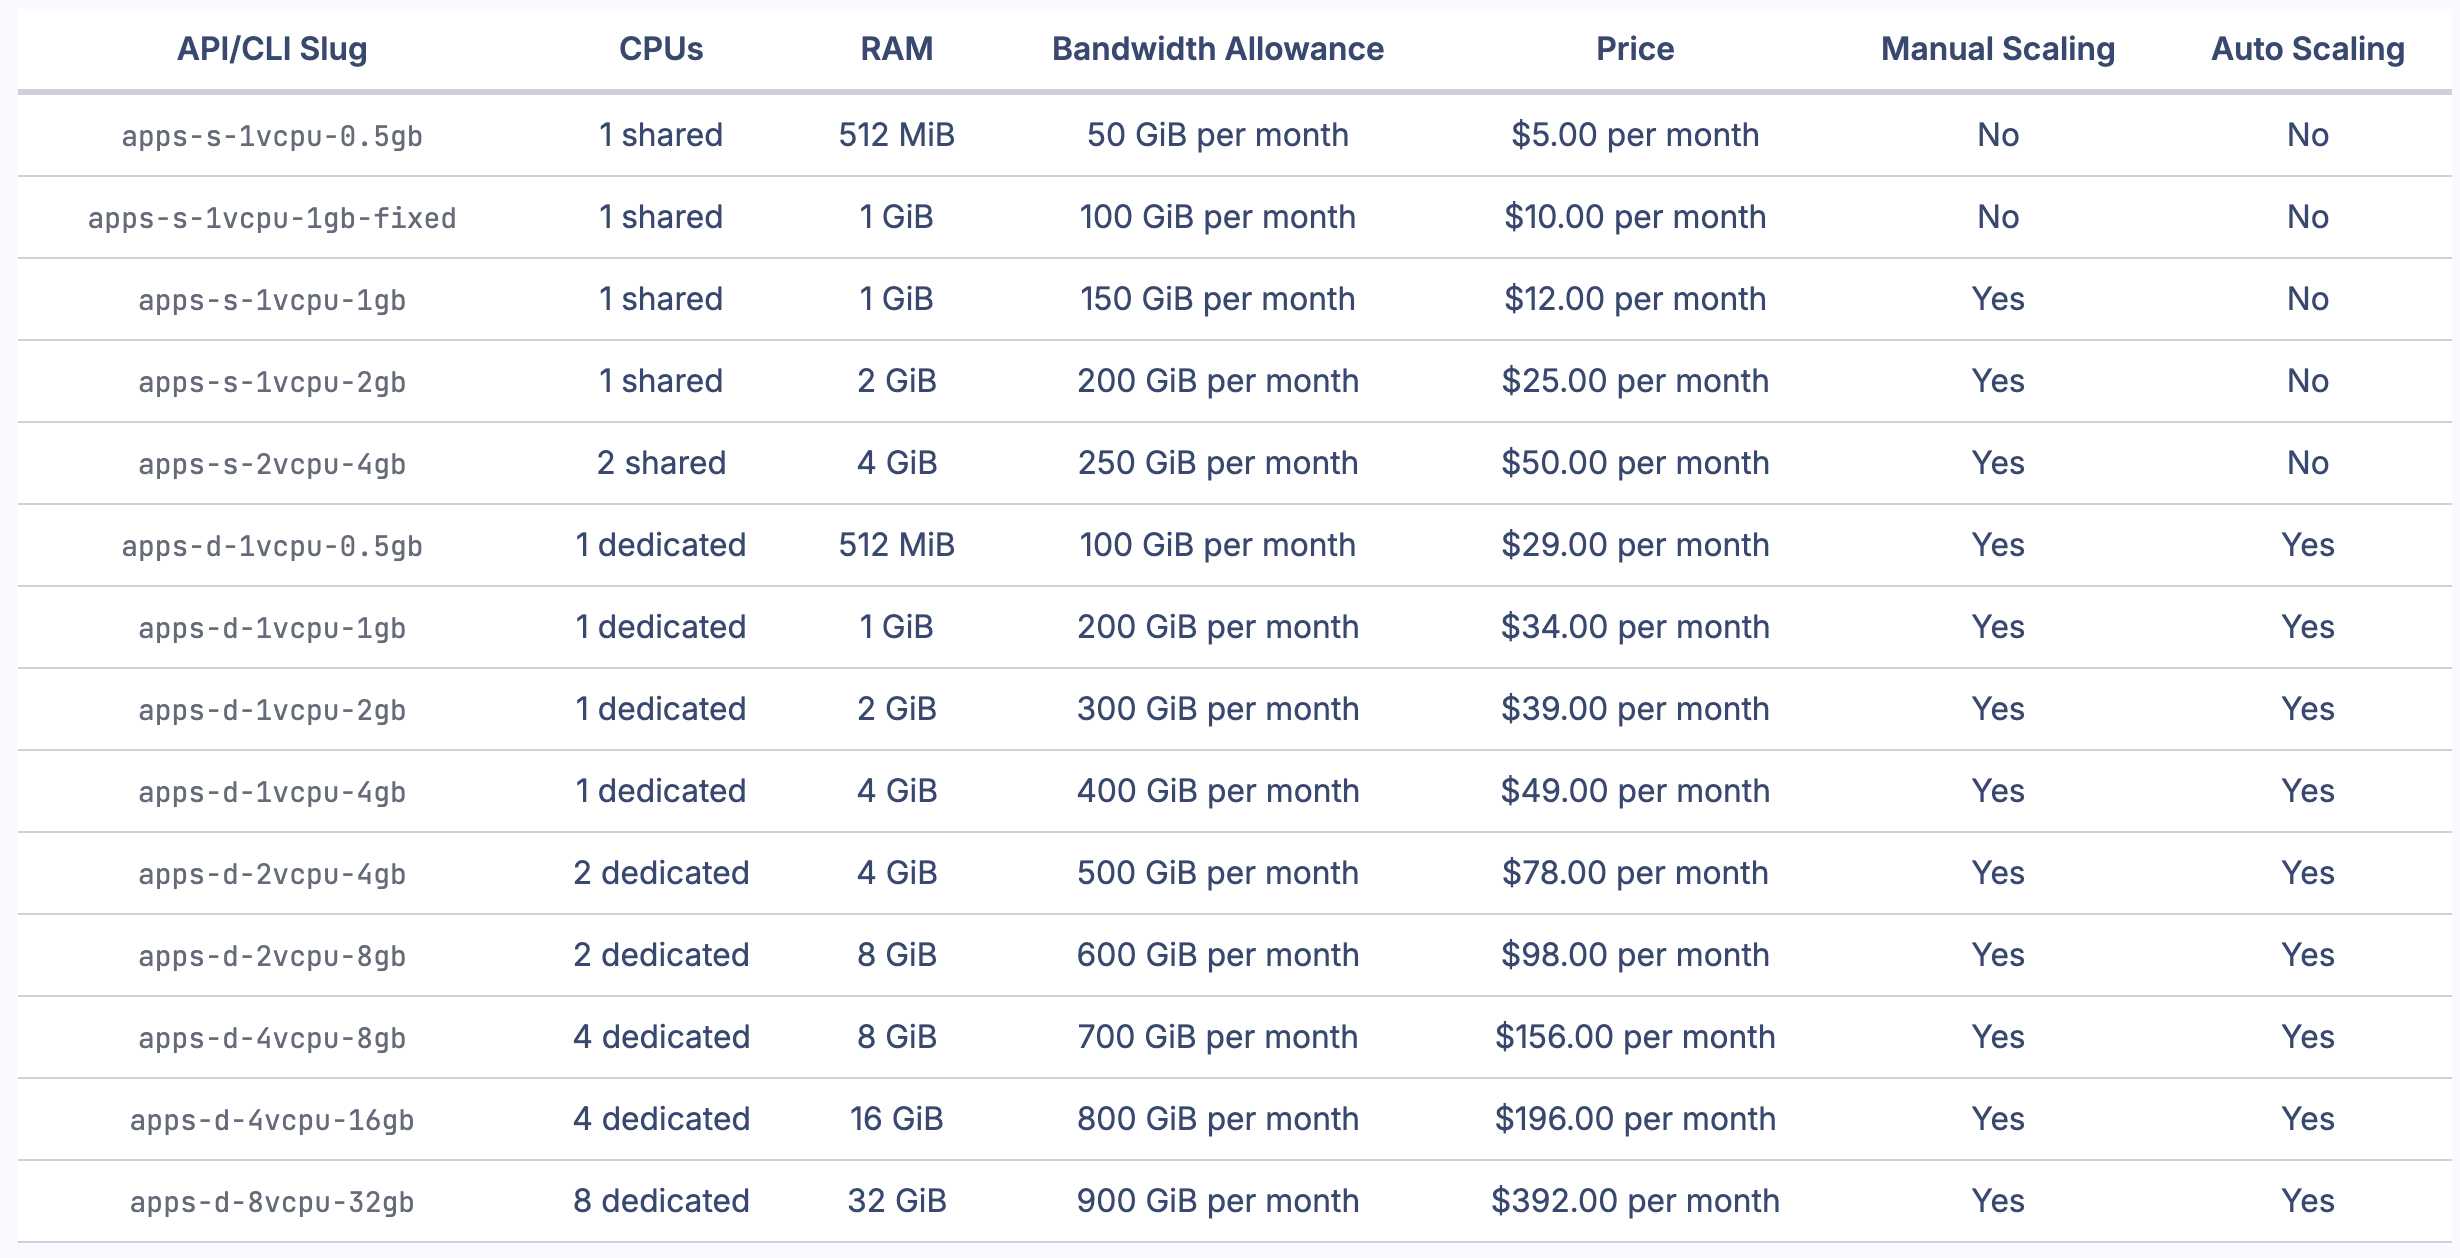
While this model gives you predictable pricing, the main drawback is you end up in one of two situations:
- Under-provisioning: your deployed service doesn’t have enough compute resources which will lead to failed requests.
- Over-provisioning: your deployed service will have extra unused resources that you’re overpaying for every month.
Enabling horizontal autoscaling can help with optimizing costs, but the trade-off will be needing to figure out the right amount of thresholds instead.
##### Railway
Railway automatically scales your infrastructure up or down based on workload demands, adapting in real time without any manual intervention. This makes it possible to offer a usage-based pricing model that depends on active compute time and the amount of resources it consumes. You only pay for what your deployed services use.
```
Active compute time x compute size (memory and CPU)
```
You don’t need to think about instance sizes or manually configure them. All deployed services scale automatically.

If you spin up multiple replicas for a given service, you’ll only be charged for the active compute time for each replica.
Railway also has a [serverless](/deployments/serverless) feature, which helps further reduce costs when enabled. When a service has no outbound requests for over 10 minutes, it is automatically put to sleep. While asleep, the service incurs no compute charges. It wakes up on the next incoming request, ensuring seamless reactivation without manual effort. This is ideal for workloads with sporadic or bursty traffic, so you only pay when your code is running.
#### Developer workflow & CI/CD
##### DigitalOcean app platform
DigitalOcean App Platform’s dashboard offers a traditional dashboard where you can view all of your project’s resources.
However, DigitalOcean App Platform lacks built-in CI/CD capabilities around environments:
- No concept of “environments” (e.g., development, staging, and production). To achieve proper environment isolation, you must create separate projects for each environment.
- No native support for automatically creating isolated preview environments for every pull request. To achieve this, you'll need to integrate third-party CI/CD tools like [GitHub Actions](https://github.com/features/actions).
Finally, DigitalOcean App Platform doesn't support webhooks, making it more difficult to build integrations with external services.
##### Railway
Railway’s dashboard offers a real-time collaborative canvas where you can view all of your running services and databases at a glance. You can group the different infrastructure components and visualize how they’re related to one another.

Additionally, Railway offers a template directory that makes it easy to self-host open-source projects with just a few clicks. If you publish a template and others deploy it in their projects, you’ll earn a 25% kickback of their usage costs.
Check out all templates at [railway.com/deploy](http://railway.com/deploy)
#### Summary
| **Category** | **DigitalOcean App Platform** | **Railway** |
| ------------------------- | ------------------------------------------------------------------------------------------------------------------------------------- | -------------------------------------------------------------------------- |
| **Scaling Model** | Manual instance-based scaling | Fully automated scaling |
| **Vertical Scaling** | Manual upgrade to larger instance | N/A – no instance sizes to manage |
| **Horizontal Scaling** | Manually add/remove instances or autoscaling (based on CPU/memory thresholds); requires tuning | Deploy multiple replicas; traffic auto-distributed; no thresholds required |
| **Multi-region Support** | Manual via separate instances and load balancers | Built-in support; traffic routed to nearest region |
| **Persistent volumes** | Not supported | Supported |
| **Pricing Model** | Fixed monthly pricing per instance size; Droplets from $4/mo, App Platform from $5/mo per component | $20/vCPU-month, $10/GB-month RAM, billed per second of actual usage |
| **Cost Optimization** | Requires tuning to avoid over/under-provisioning | Inherently optimized. Pay only for used compute |
| **Developer Dashboard** | Traditional project dashboard | Real-time collaborative canvas with visual service layout |
| **Environments & CI/CD** | No native concept of environments, requires manual project setup. Automated preview deployments not supported. Webhooks not supported | Native support for preview environments, CI/CD integrations, and webhooks |
| **Templates & Ecosystem** | Limited | Extensive template directory; creators can earn from deployed usage |
#### Frequently asked questions
##### Is Railway cheaper than DigitalOcean App Platform?
For a single small, fully-utilized instance, DigitalOcean's fixed pricing (App Platform components from $5/mo, Droplets from $4/mo) can be cheaper and easier to forecast. As you scale, Railway tends to be more cost-effective: DigitalOcean charges per component provisioned, so every service, worker, and environment adds a fixed line item whether it's busy or idle, while Railway bills $20/vCPU-month and $10/GB-month RAM per second of aggregate actual usage with no per-service charge. A ten-service project on Railway costs what those services actually consume, not ten instance fees.
##### Does DigitalOcean App Platform support persistent storage?
No. Services on App Platform have an ephemeral filesystem, so data written locally is lost on redeploy and you need external storage solutions for durability. Railway supports persistent volumes ($0.15/GB-month) for services that need to keep data on disk.
##### Can I get preview environments on DigitalOcean App Platform?
Not natively. App Platform has no concept of environments and no automatic preview environments per pull request, so you'd set up separate projects and third-party CI/CD tools like GitHub Actions. Railway includes environments and isolated preview environments for every pull request out of the box.
##### How do I migrate from DigitalOcean App Platform to Railway?
Both platforms deploy from a GitHub repo or Docker image, so migration is mostly connecting your repo, copying environment variables, and configuring a domain; the steps below walk through it. You can sign up for free and receive $5 in credits to try the platform first.
#### Migrate from DigitalOcean app platform to Railway
To get started, [create an account on Railway](https://railway.com/new). You can sign up for free and receive $5 in credits to try out the platform.
##### Deploying your app
1. “Choose Deploy from GitHub repo”, connect your GitHub account, and select the repo you would like to deploy.

2. If your project is using any environment variables or secrets:
1. Click on the deployed service.
2. Navigate to the “Variables” tab.
3. Add a new variable by clicking the “New Variable” button. Alternatively, you can import a `.env` file by clicking “Raw Editor” and adding all variables at once.

3. To make your project accessible over the internet, you will need to configure a domain:
1. From the project’s canvas, click on the service you would like to configure.
2. Navigate to the “Settings” tab.
3. Go to the “Networking” section.
4. You can either:
1. Generate a Railway service domain: this will make your app available under a `.up.railway.app` domain.
2. Add a custom domain: follow the DNS configuration steps.
#### Need help or have questions?
If you need help along the way, the [Help Station](https://station.railway.com/) is a great resource to get support from the team and community.
Working with a larger workload or have specific requirements? [Book a call with the Railway team](https://cal.com/team/railway/work-with-railway) to explore how we can best support your project.
### Compare to Replit
Source: https://docs.railway.com/platform/compare-to-replit.md
Compare Railway and Replit on development workflow, infrastructure control, scaling, and production readiness, with a step-by-step migration guide.
_Last updated: June 2026_
> See how Railway compares to other platforms at [railway.com/compare](https://railway.com/compare).
At a high level, both Railway and Replit can be used to deploy web applications. Both platforms share some similarities:
- Deploy web applications from code with public URLs.
- Provide database access (Replit Database and Replit PostgreSQL vs. Railway managed databases).
- Browser-based interfaces for managing your projects.
- Support for environment variables and secrets.
That said, there are some fundamental differences between the platforms that might make Railway a better fit for you.
#### Development environment
##### Replit
Replit is an AI-powered IDE combined with hosting. You write code in Replit's browser-based editor, use AI code generation to build features, and deploy from the same interface. Everything lives in one place.
This makes Replit a strong choice for prototyping, learning to code, and building small projects quickly. The tight integration between editor and hosting removes friction when you're getting started.
##### Railway
Railway is a cloud provider for deploying and running applications. You bring your own code, your own IDE, and your own development workflow. Railway connects to your GitHub repository and handles the build, deploy, and hosting steps.
This separation means you can use any editor (VS Code, JetBrains, Vim, etc.), any language, and any framework. Your development environment is not tied to your hosting provider.
#### Infrastructure control
##### Replit
Replit gives you a single container per project. You deploy one application, and Replit manages the underlying resources. There is no concept of multi-service architecture within a single project. If your application needs a background worker, a database, and an API, you would need to manage those as separate Replit projects or use external services.
##### Railway
Railway gives you full control over your infrastructure within a project. A single project can contain multiple services, managed databases, cron jobs, and volumes, all connected through private networking.
For example, you can deploy a frontend, an API, a background worker, a PostgreSQL database, and a Redis instance in one project. Services communicate over a private network, and you manage everything from a single canvas view.
You also have the option to use custom Dockerfiles, define pre-deploy commands, and configure health checks for each service independently.
#### Scaling
##### Replit
Replit offers limited scaling options. Paid plans unlock more compute (CPU and RAM), but there is no horizontal scaling. If your application needs to handle more traffic, you can upgrade to a higher plan for more resources, but you cannot run multiple instances of your application behind a load balancer.
##### Railway
Railway uses usage-based scaling. Your services automatically scale vertically based on the resources they consume, up to the limits of your plan.
You can also scale horizontally by deploying multiple replicas of a service. Railway distributes traffic across replicas automatically. Replicas can be placed in different regions for multi-region deployments, with traffic routed to the nearest region.
For low-traffic services, Railway offers a [serverless](/deployments/serverless) mode that puts services to sleep when idle and wakes them on the next incoming request. You only pay for compute time when the service is actively running.
#### Pricing
##### Replit
Replit uses subscription-based pricing. You choose a plan (Core for individuals, Teams for collaboration) and pay a fixed monthly fee. Each plan includes a set amount of compute resources. If you need more, you upgrade to a higher tier.
##### Railway
Railway uses usage-based pricing. You pay for the compute time and resources your services actually consume.
```
Active compute time x compute size (memory and CPU)
```
There are no fixed instance sizes to choose from. All services scale automatically within your plan's limits, and you are billed based on what they use. This avoids both over-provisioning (paying for idle resources) and under-provisioning (running out of resources during traffic spikes).
#### Production readiness
##### Replit
Replit is designed primarily for development and prototyping. It provides basic hosting and deployment, but lacks several features that production applications typically require:
- No private networking between services.
- No pre-deploy commands or migration support.
- No zero-downtime deployments or rollback support.
- Limited observability (basic logs, no integrated metrics).
- No health check configuration.
##### Railway
Railway is designed for running production workloads. It includes:
- **Observability**: integrated logs and metrics for all services.
- **Private networking**: services within a project communicate over a private network, not the public internet.
- **Pre-deploy commands**: run database migrations or other setup steps before traffic is routed to a new deployment.
- **Health checks**: configure HTTP health checks to verify a service is ready before it receives traffic.
- **Zero-downtime deployments**: new deployments are brought up alongside the existing one, and traffic switches only after the new deployment passes health checks.
- **Rollbacks**: instantly roll back to a previous deployment if something goes wrong.
#### Database support
##### Replit
Replit offers Replit Database (a simple key-value store) and Replit PostgreSQL. These are useful for prototyping and small projects, but come with limited management tools and no advanced features like backups or monitoring tools.
##### Railway
Railway provides managed PostgreSQL, MySQL, Redis, and MongoDB. Each database includes:
- Point-in-time backups.
- Connection pooling (for PostgreSQL).
- Database metrics and monitoring.
- Private networking to your application services.
- Persistent volumes for data durability.
#### Summary
| **Category** | **Replit** | **Railway** |
| -------------------------- | -------------------------------------------------------------------------- | ---------------------------------------------------------------------------------------------------- |
| **Primary focus** | AI-powered IDE + hosting | Cloud provider for deploying and running applications |
| **Development environment**| Integrated browser IDE with AI code generation | Bring your own IDE and workflow; Railway handles deployment and hosting |
| **Infrastructure control** | Single container per project; no multi-service architecture | Multiple services, databases, cron jobs, and volumes per project with private networking |
| **Vertical scaling** | Upgrade to a higher plan for more resources | Auto-scales based on usage within plan limits |
| **Horizontal scaling** | Not supported | Multiple replicas with automatic load balancing across regions |
| **Pricing model** | Subscription plans with fixed tiers, plus usage-based Agent/compute charges | $20/vCPU-month, $10/GB-month RAM, billed per second of actual usage |
| **Database options** | Replit Database (key-value) and Replit PostgreSQL | Managed PostgreSQL, MySQL, Redis, MongoDB with backups and database views |
| **Private networking** | Not available | Included for all projects |
| **Zero-downtime deploys** | Not supported | Supported with health checks and automatic traffic switching |
| **Rollbacks** | Not supported | Instant rollback to any previous deployment |
| **Observability** | Basic logs | Integrated logs and metrics |
| **Pre-deploy commands** | Not supported | Supported for migrations and setup tasks |
| **Best suited for** | Prototyping, learning, AI-assisted development | Production applications, multi-service architectures, teams with existing development workflows |
#### Frequently asked questions
##### Can Replit apps run in production?
They can, but Replit is designed primarily for development and prototyping. It lacks several features production applications typically rely on: private networking between services, zero-downtime deployments, rollbacks, health checks, and integrated metrics. Railway includes all of these, which is why many teams prototype on Replit and move to Railway when the app needs to serve real traffic.
##### Is Railway a replacement for Replit?
Not exactly; they solve different problems. Replit is an AI-powered IDE with hosting bundled in, while Railway is a cloud provider that deploys code you bring from your own editor and GitHub workflow. If you want to keep coding in Replit but need production-grade hosting, you can do both.
##### How do I move my Replit app to Railway?
Push your code to a GitHub repository, then connect that repo to a new Railway project and copy over your environment variables. You can sign up for free and receive $5 in credits, and the [step-by-step migration guide](/platform/migrate-from-replit) walks through the details.
##### When should I use Replit instead of Railway?
For prototyping, learning to code, and building small projects quickly, Replit's integrated browser IDE with AI code generation removes a lot of friction. If you don't need multi-service architecture, horizontal scaling, or production deployment features yet, Replit's all-in-one environment is a strong choice.
#### Migrate from Replit to Railway
To get started, [create an account on Railway](https://railway.com/new). You can sign up for free and receive $5 in credits to try out the platform.
For a step-by-step walkthrough, see [Migrate from Replit to Railway](/platform/migrate-from-replit).
#### Need help or have questions?
If you need help along the way, the [Help Station](https://station.railway.com/) is a great resource to get support from the team and community.
Working with a larger workload or have specific requirements? [Book a call with the Railway team](https://cal.com/team/railway/work-with-railway) to explore how we can best support your project.
### Compare to Lovable
Source: https://docs.railway.com/platform/compare-to-lovable.md
Compare Railway and Lovable on what they do, infrastructure control, and production readiness, with a step-by-step migration guide.
_Last updated: June 2026_
> See how Railway compares to other platforms at [railway.com/compare](https://railway.com/compare).
Lovable and Railway are both fantastic products, and they share some similarities: both can deploy a web application to the internet, connect to a database to store your data, handle environment variables and configuration, and set up a custom domain. But they're ultimately different tools for solving different problems.
Lovable is built to take you from zero to one. You describe what you want, and it writes the code and hosts the result. The value is in the high-quality code that Lovable generates from human language. Railway takes over from there: you bring the code, and Railway handles everything you need to run and scale that application reliably as it grows, including packaging, infrastructure, deployment, and observability.
In this piece, we'll go a bit deeper on what each platform does best.
#### Application code generation
##### Lovable
Lovable generates application code from natural language prompts. You describe a feature, a screen, or even a whole product, and Lovable builds it. This makes it an excellent choice to go from an idea to something working.
##### Railway
Railway comes with a coding agent that can help with project and service configurations, debugging, and some lighter-weight coding tasks.
#### Deployment and hosting
Once your app is written, the code needs to be packaged, deployed to the cloud, and made available to users at a URL.
##### Lovable
Hosting is included in Lovable as part of the core product experience. For getting something live quickly, it works great, but there is limited control over performance issues, and rollbacks are code-only. You can't control the underlying deployment environment. This is generally fine for prototypes, but when you have real users who expect things to work across updates, it can become a significant drawback.
##### Railway
Railway gives you full control over how your application is deployed and served, which is important as you scale. As new code goes out, health checks verify that deployments are actually working before they receive traffic. Your app stays up during updates thanks to Railway's rolling updates, and if something does go wrong, rollbacks let you get back to a known good state in seconds with no data loss.

#### Databases
A database is where your application stores and retrieves data: user accounts, posts, orders, anything that needs to persist between sessions.
##### Lovable
Lovable includes a built-in backend option called Lovable Cloud, which handles your database, authentication, and file storage without leaving the platform. You can also connect an external Supabase account if you want more control, but that means another login, another vendor to pay as you scale, and another place to look when something breaks.
##### Railway
Railway includes multiple native database options depending on the needs of your application, including PostgreSQL, MySQL, Redis, and MongoDB. You can add one to your project in a few clicks, and it will live on the same private network as your application, with automatic backups and a query view in the dashboard so you can browse your data without leaving Railway.
#### Scaling
As demand on your application grows, either because of more users, sales, or anything else your app does, the infrastructure behind it needs to grow in size to accommodate the higher traffic.
##### Lovable
Lovable deploys a single application. There's no visibility into how it is performing under load, and no way to scale it as your user base grows and demands higher throughput or more compute power.
##### Railway
Railway lets you scale vertically by giving a service more CPU or memory, and horizontally by running multiple copies of it simultaneously. When traffic spikes, Railway distributes requests across those copies automatically. A project can contain multiple services, each independently scalable: a frontend, an API, a background worker, a database. They communicate over private networking, so they stay fast and isolated from the public internet.

#### Observability and debugging
Observability means being able to see what is happening inside your running application. Without it, you only find out something is broken when a user tells you.
##### Lovable
Lovable offers limited visibility into running applications, with no full logs or metrics. If something breaks or slows down in production, there's little to help you see what happened or when.
##### Railway
Railway includes logs, metrics, and a full deployment history. You can see every request, every error, and CPU and memory usage over time. When something goes wrong, you can trace it back to a specific deploy and roll it back.

#### Pricing
##### Lovable
Lovable uses subscription tiers based on the number of prompts and the features included in your plan. This works well if you're building at a steady pace, but unused prompts don't roll over, so a slow month means you're just paying for nothing.
##### Railway
Railway uses usage-based pricing, which means you only pay for active compute time and the resources your services consume. This works well for real apps with real usage patterns, as costs scale with your app's traffic.
#### Using Lovable and Railway together
Lovable and Railway work well as a team. You can build and iterate in Lovable, push the code to GitHub, and deploy on Railway for production hosting.
Once that connection is in place, every push Lovable makes to your GitHub repo triggers a new deploy on Railway automatically. You get the speed of AI-assisted development with the reliability of production-grade infrastructure underneath it.
See [Deploy a Lovable App on Railway](/guides/lovable) to get started.
#### Summary
| **Category** | **Lovable** | **Railway** |
| --------------------------- | ------------------------------------------------------------------ | ------------------------------------------------------------------------------------------------ |
| **Primary purpose** | AI code generation from natural language prompts | Cloud hosting and infrastructure for your code |
| **Code source** | Generated by the platform | Bring your own (GitHub, CLI, Docker) |
| **Infrastructure control** | Minimal; managed by the platform | Full control over runtime, networking, scaling, and deployment |
| **Multi-service support** | Single application only | Multiple services, workers, cron jobs in one project |
| **Database support** | Built-in (Lovable Cloud) or external Supabase | Managed PostgreSQL, MySQL, Redis, MongoDB with backups and database views |
| **Observability** | Limited | Logs, metrics, and deployment history |
| **Zero-downtime deploys** | No | Yes |
| **Rollbacks** | No | Yes |
| **Health checks** | No | Yes |
| **Custom domains with TLS** | Limited | Fully managed, including wildcard domains |
| **Pricing model** | Subscription-based (per plan) | Usage-based (pay for compute time and resources consumed) |
| **Best for** | Generating and prototyping apps with AI | Production hosting with full infrastructure control |
#### Migration path
If you're ready to move your Lovable app to Railway, just connect your GitHub repo, import your environment variables, and configure your domain. See [Migrate from Lovable to Railway](/platform/migrate-from-lovable) for a step-by-step guide.
#### Need help or have questions?
If you need help along the way, the [Help Station](https://station.railway.com/) is a great resource to get support from the team and community.
Working with a larger workload or have specific requirements? [Book a call with the Railway team](https://cal.com/team/railway/work-with-railway) to explore how we can best support your project.
### Compare to Bolt
Source: https://docs.railway.com/platform/compare-to-bolt.md
Compare Railway and Bolt on what they do, infrastructure control, and production readiness, with a step-by-step migration guide.
_Last updated: June 2026_
> See how Railway compares to other platforms at [railway.com/compare](https://railway.com/compare).
Bolt (bolt.new) is an AI-powered development tool that generates full-stack web applications from prompts. Railway is an intelligent cloud provider that deploys and hosts your code. While they serve different purposes, there is some overlap:
- Deploy web applications
- Provide hosting with public URLs
- Environment variable support
These tools can complement each other: use Bolt for code generation, then deploy on Railway for production hosting.
#### What they do
##### Bolt
Bolt generates code from prompts directly in the browser. You describe what you want, and it builds a full-stack application for you. Once generated, you can deploy through Bolt's built-in hosting, export the code to GitHub, or download it as a zip file.
Bolt is a code generation tool first and a hosting platform second. It is well suited for rapid prototyping and getting an application started quickly.
##### Railway
Railway deploys and hosts code from any source, including GitHub, the CLI, or Docker images. You bring the code, and Railway handles the infrastructure.
Railway does not generate code for you. Instead, it focuses on giving you full control over how your application runs in production.
#### Infrastructure control
##### Bolt
Bolt provides basic hosting for the applications it generates. There is no support for multi-service architecture, managed databases, private networking, persistent volumes, or cron jobs. If your application needs a database, you typically rely on an external service.
##### Railway
Railway gives you full control over your infrastructure. A single project can contain multiple services (API, frontend, workers, cron jobs) plus managed databases, all communicating over private networking.
Key infrastructure capabilities include:
- Managed databases: PostgreSQL, MySQL, Redis, and MongoDB with backups and database views.
- Persistent volumes for data storage.
- Private networking between services.
- Custom Dockerfiles for full build control.
- Cron jobs for scheduled tasks.
- Horizontal scaling with multiple replicas.
#### Production readiness
##### Bolt
Bolt's hosting is designed for getting your generated application online quickly. It offers limited observability and does not include health checks, zero-downtime deployments, or rollbacks.
##### Railway
Railway is built for production workloads. Deployed services include:
- Observability with integrated metrics and logs.
- Health checks to verify service availability.
- Zero-downtime deployments so updates don't interrupt traffic.
- Instant rollbacks to revert to a previous deployment.
- Pre-deploy commands for running migrations or setup steps.
- Custom domains with fully managed TLS.
#### Pricing
##### Bolt
Bolt uses subscription-based pricing with plans that include a set number of prompts. You pay for access to the AI code generation features.
##### Railway
Railway uses usage-based pricing. You pay for compute time and the resources your services consume.
```
Active compute time x compute size (memory and CPU)
```
There are no prompt limits or generation caps. You pay only for the infrastructure your applications use.
#### Summary
| **Category** | **Bolt** | **Railway** |
| -------------------------- | --------------------------------------------------------------------- | ------------------------------------------------------------------------------------------------ |
| **Primary function** | AI code generation with basic hosting | Cloud hosting with full infrastructure control |
| **Code source** | Generated from prompts in the browser | Bring your own code from GitHub, CLI, or Docker |
| **Multi-service projects** | Single application deployment | Multiple services, workers, and cron jobs in one project |
| **Database support** | Relies on external database services | Managed PostgreSQL, MySQL, Redis, and MongoDB |
| **Private networking** | Not available | Included at no extra cost |
| **Persistent storage** | Not available | Persistent volumes supported |
| **Health checks** | Not available | Supported with configurable endpoints |
| **Zero-downtime deploys** | Not available | Supported when health checks are configured |
| **Rollbacks** | Not available | Instant rollback to any previous deployment |
| **Observability** | Limited | Integrated metrics and logs |
| **Pricing model** | Token-based subscription plans with prompt limits | $20/vCPU-month, $10/GB-month RAM, billed per second of actual usage |
| **Best for** | Rapid prototyping and generating application code quickly | Production hosting with full infrastructure control |
#### When to use each
- **Use Bolt** when you want AI to generate code quickly for prototyping or getting a project started.
- **Use Railway** when you need production hosting with full infrastructure control, managed databases, and multi-service architecture.
- **Use both together**: generate your application with Bolt, export the code to GitHub, and deploy it on Railway for production.
#### Frequently asked questions
##### Can Bolt.new apps run in production?
Bolt's built-in hosting is designed for getting a generated app online quickly, not for production traffic. It offers limited observability and no health checks, zero-downtime deployments, or rollbacks. For apps that need those guarantees, the usual path is to export the code to GitHub and host it on a platform like Railway.
##### How do I deploy a Bolt.new app to Railway?
Export your generated code from Bolt to GitHub (or download it as a zip and push it yourself), then connect that repo to a new Railway project. You can sign up for free and receive $5 in credits, and the [step-by-step migration guide](/platform/migrate-from-bolt) covers the details.
##### Does Bolt.new include a database?
No, Bolt has no managed databases, so applications that need one typically rely on an external service. Railway includes managed PostgreSQL, MySQL, Redis, and MongoDB with backups, connected to your services over private networking.
##### When is Bolt.new the better choice?
When you want AI to generate a full-stack application from a prompt and get a prototype running quickly, Bolt is built exactly for that. The two tools work well together: generate with Bolt, then deploy on Railway when the project needs production infrastructure.
#### Migrate from Bolt to Railway
To get started, [create an account on Railway](https://railway.com/new). You can sign up for free and receive $5 in credits to try out the platform.
For a step-by-step walkthrough, see [Migrate from Bolt to Railway](/platform/migrate-from-bolt).
#### Need help or have questions?
If you need help along the way, the [Help Station](https://station.railway.com/) is a great resource to get support from the team and community.
Working with a larger workload or have specific requirements? [Book a call with the Railway team](https://cal.com/team/railway/work-with-railway) to explore how we can best support your project.
### Compare to VPS
Source: https://docs.railway.com/platform/compare-to-vps.md
Compare Railway and VPS hosting on infrastructure management, security, monitoring, pricing, and operational overhead, with a step-by-step migration guide.
_Last updated: June 2026_
> See how Railway compares to other platforms at [railway.com/compare](https://railway.com/compare).
At a high level, both Railway and a VPS (Virtual Private Server) can be used to deploy applications. The fundamental difference lies in the level of abstraction and operational overhead you're willing to manage.
VPS hosting providers like [AWS EC2](https://aws.amazon.com/ec2/), [DigitalOcean Droplets](https://www.digitalocean.com/products/droplets), [Hetzner Cloud](https://www.hetzner.com/cloud), [Linode](https://www.linode.com/), or [Vultr](https://www.vultr.com/) give you a virtual machine where you have full control over the operating system, software stack, and configuration. This offers maximum flexibility but requires significant DevOps expertise and ongoing maintenance.
Railway provides a fully managed platform that abstracts away infrastructure complexity while giving you the flexibility of a dedicated environment. You get VPS-level control without the operational burden.
#### Quick comparison: VPS VS. Railway
| Dimension | VPS Hosting | Railway |
| -------------------------- | --------------------------------------------------------------------------------- | -------------------------------------------------------------------- |
| **Infrastructure** | Full responsibility: OS setup, patches, SSL, firewalls, scaling | Zero-config deploy, managed OS/security, built-in scaling |
| **Security & Compliance** | Manual hardening, audits, SOC 2/ISO require major effort | SOC 2 Type II, GDPR, MFA, automatic patches, DDoS protection |
| **Monitoring & Logging** | Must integrate Prometheus/Grafana/ELK manually | Built-in observability, logs, metrics, dashboards, alerting |
| **Scaling & Distribution** | Manual vertical/horizontal scaling, DNS/load balancer setup, complex multi-region | Auto vertical/horizontal scaling, multi-region deploy with one click |
| **Pricing Model** | Fixed monthly price per server (e.g. $5-$50/mo) plus your operations time | $20/vCPU-month, $10/GB-month RAM, billed per second of actual usage; serverless sleeping |
| **Workflow & Deployment** | Manual CI/CD setup, manual rollbacks, secrets management | GitHub integration, preview envs, instant rollback, managed secrets |
#### Infrastructure & operational overhead
##### VPS hosting
When you choose VPS hosting, you're essentially becoming your own infrastructure team. This means taking full responsibility for:
**Server Setup & Configuration**
* Installing and configuring the operating system (Ubuntu, CentOS, Debian, etc.)
* Applying security patches and system updates
* Configuring firewalls, SSH access, and user management
* Installing and configuring web servers (Nginx, Apache)
* Setting up reverse proxies and load balancers
* Managing SSL certificates and renewals
**Application Environment Management**
* Installing/managing programming runtimes (Node.js, Python, Go, etc.)
* Setting up process managers (PM2, systemd, supervisor)
* Configuring environment variables and secrets management
* Managing database installs/configs (MySQL, Postgres, MongoDB, etc.)
* Setting up caching layers (Redis, Memcached)
**System Administration**
* Monitoring disk space, memory usage, CPU performance
* Managing log rotation and aggregation
* Automated backups and disaster recovery planning
* Applying vulnerability patches
* DNS configuration and domain setup
You’ll need to continuously maintain and update this stack, troubleshoot outages, and scale resources as needed.
##### Railway
Railway eliminates this operational burden:
**Zero-Configuration Deployment**
* Deploy directly from GitHub with automatic builds
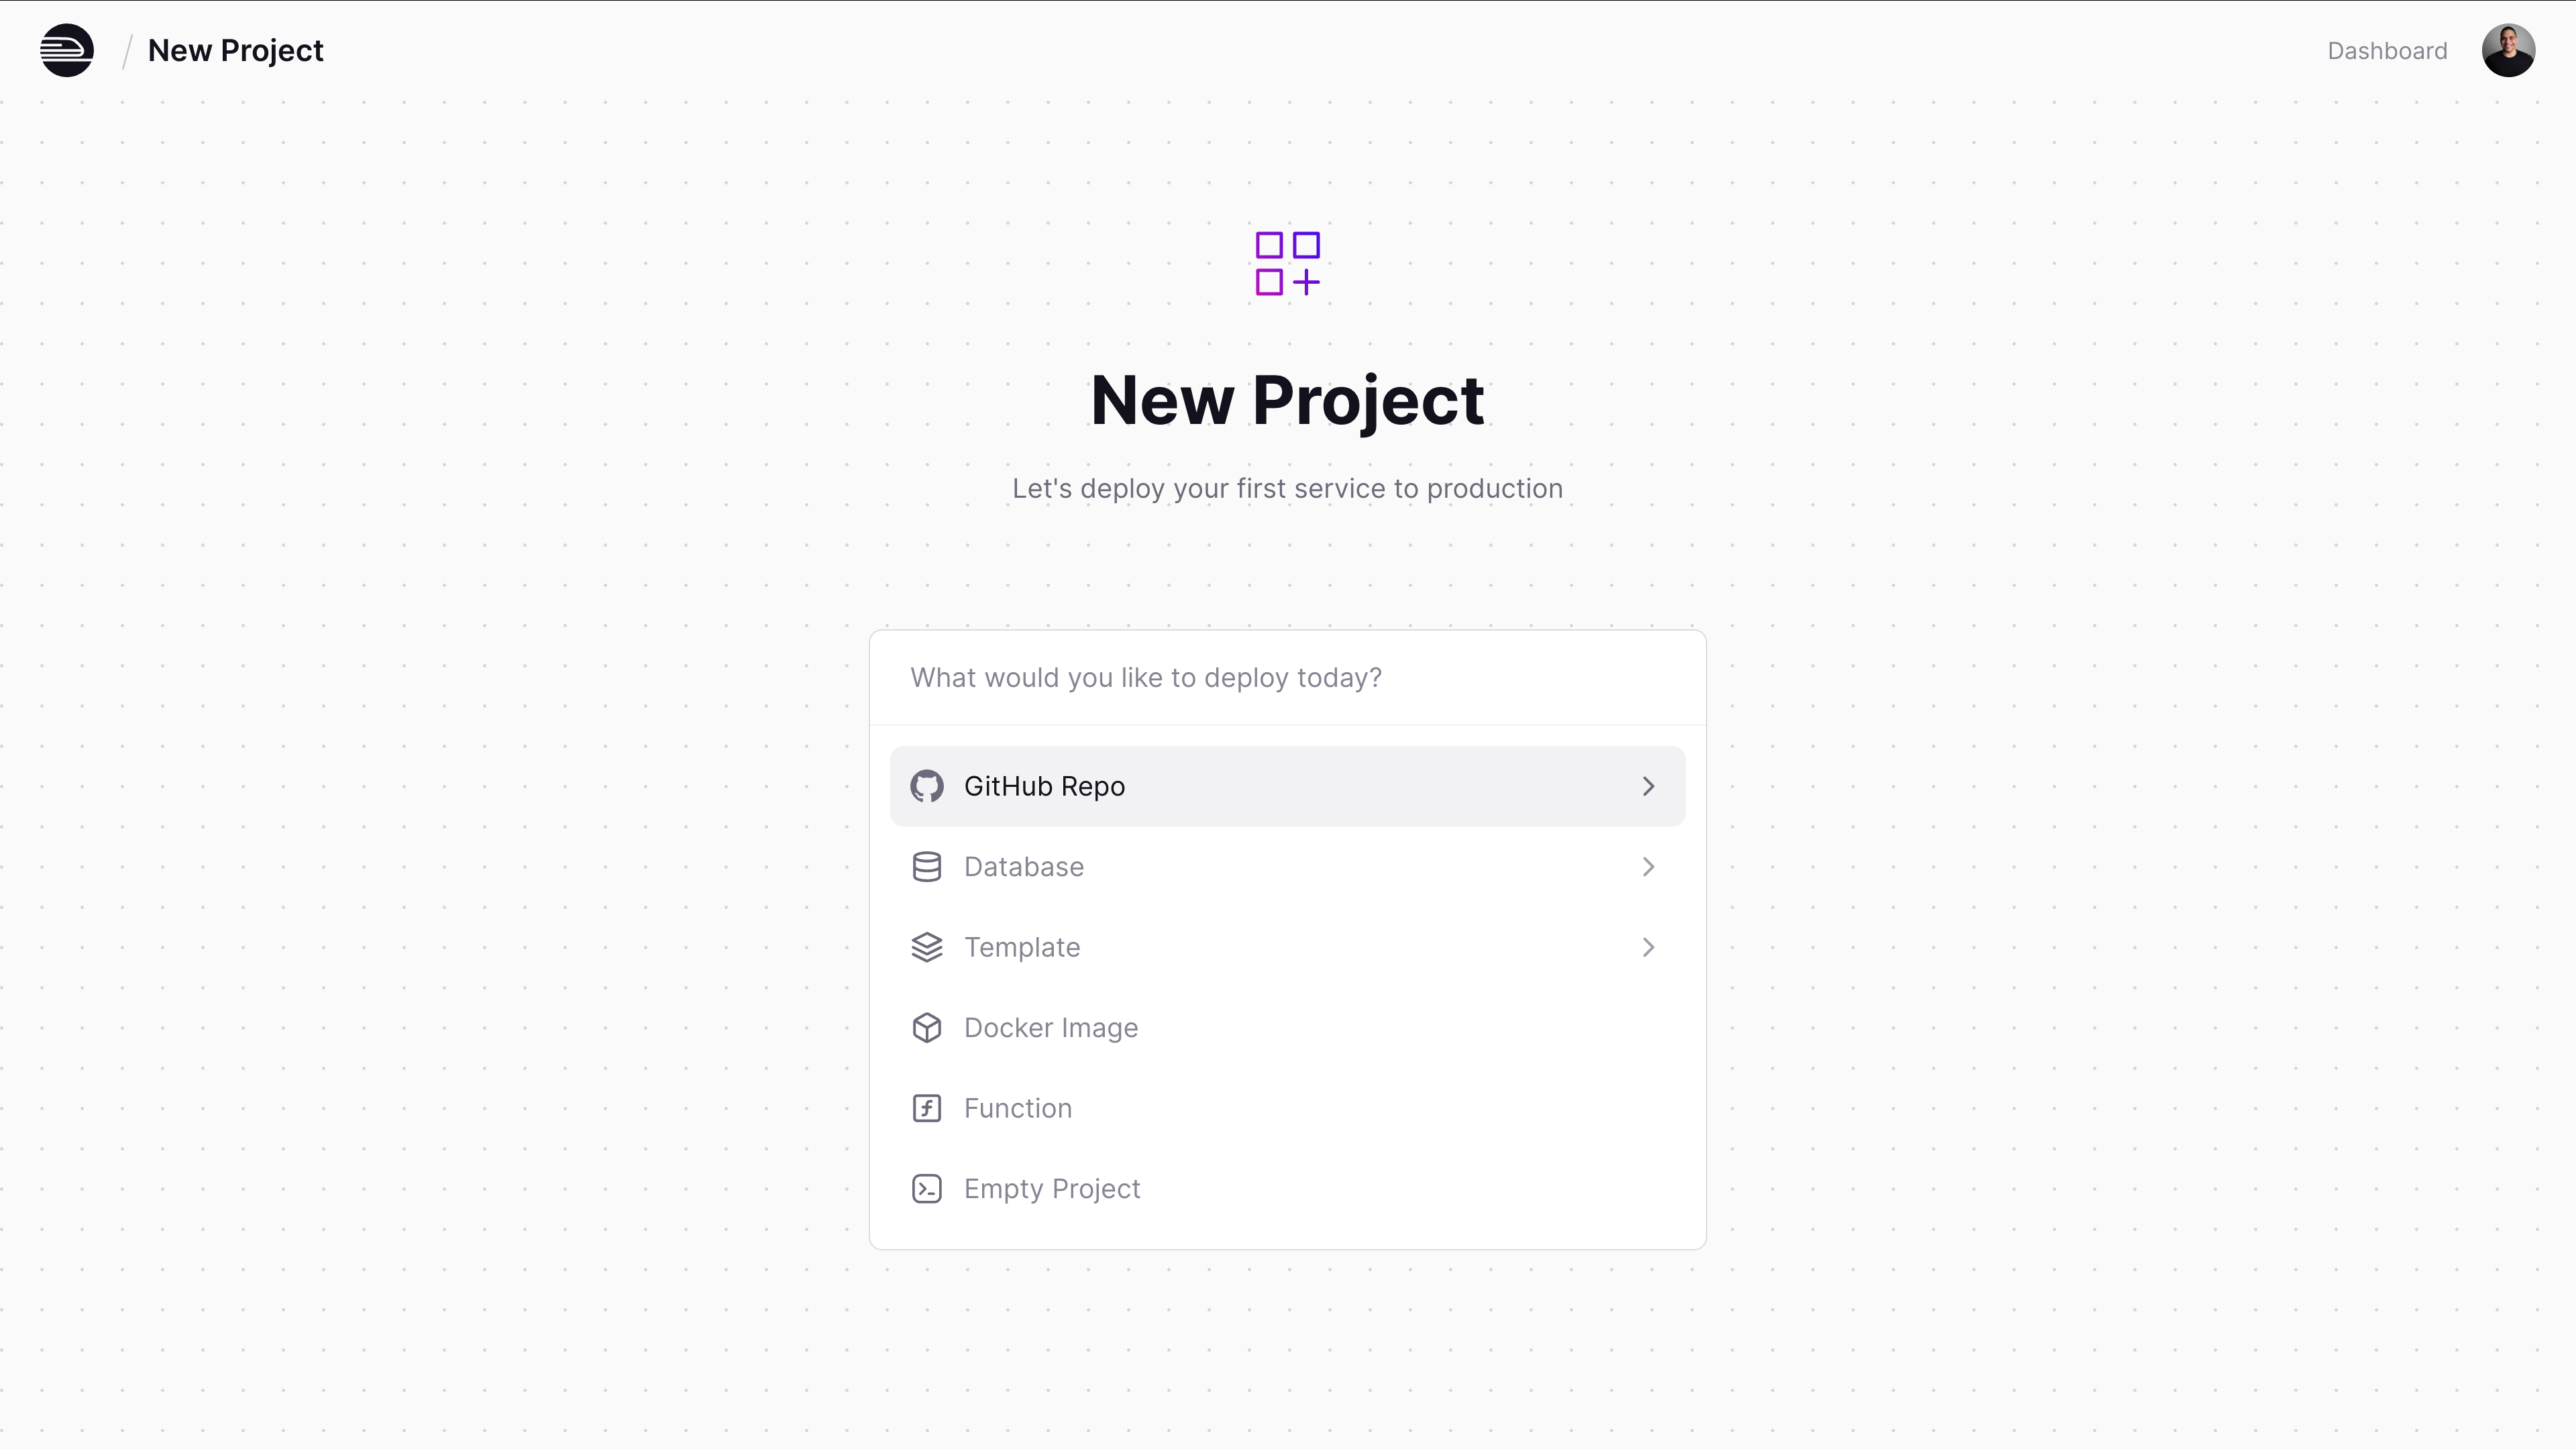
* Auto-detects dependencies and installs them
* Built-in support for major programming languages and frameworks
* Automatic SSL provisioning and renewal
* Health checks and automatic restarts
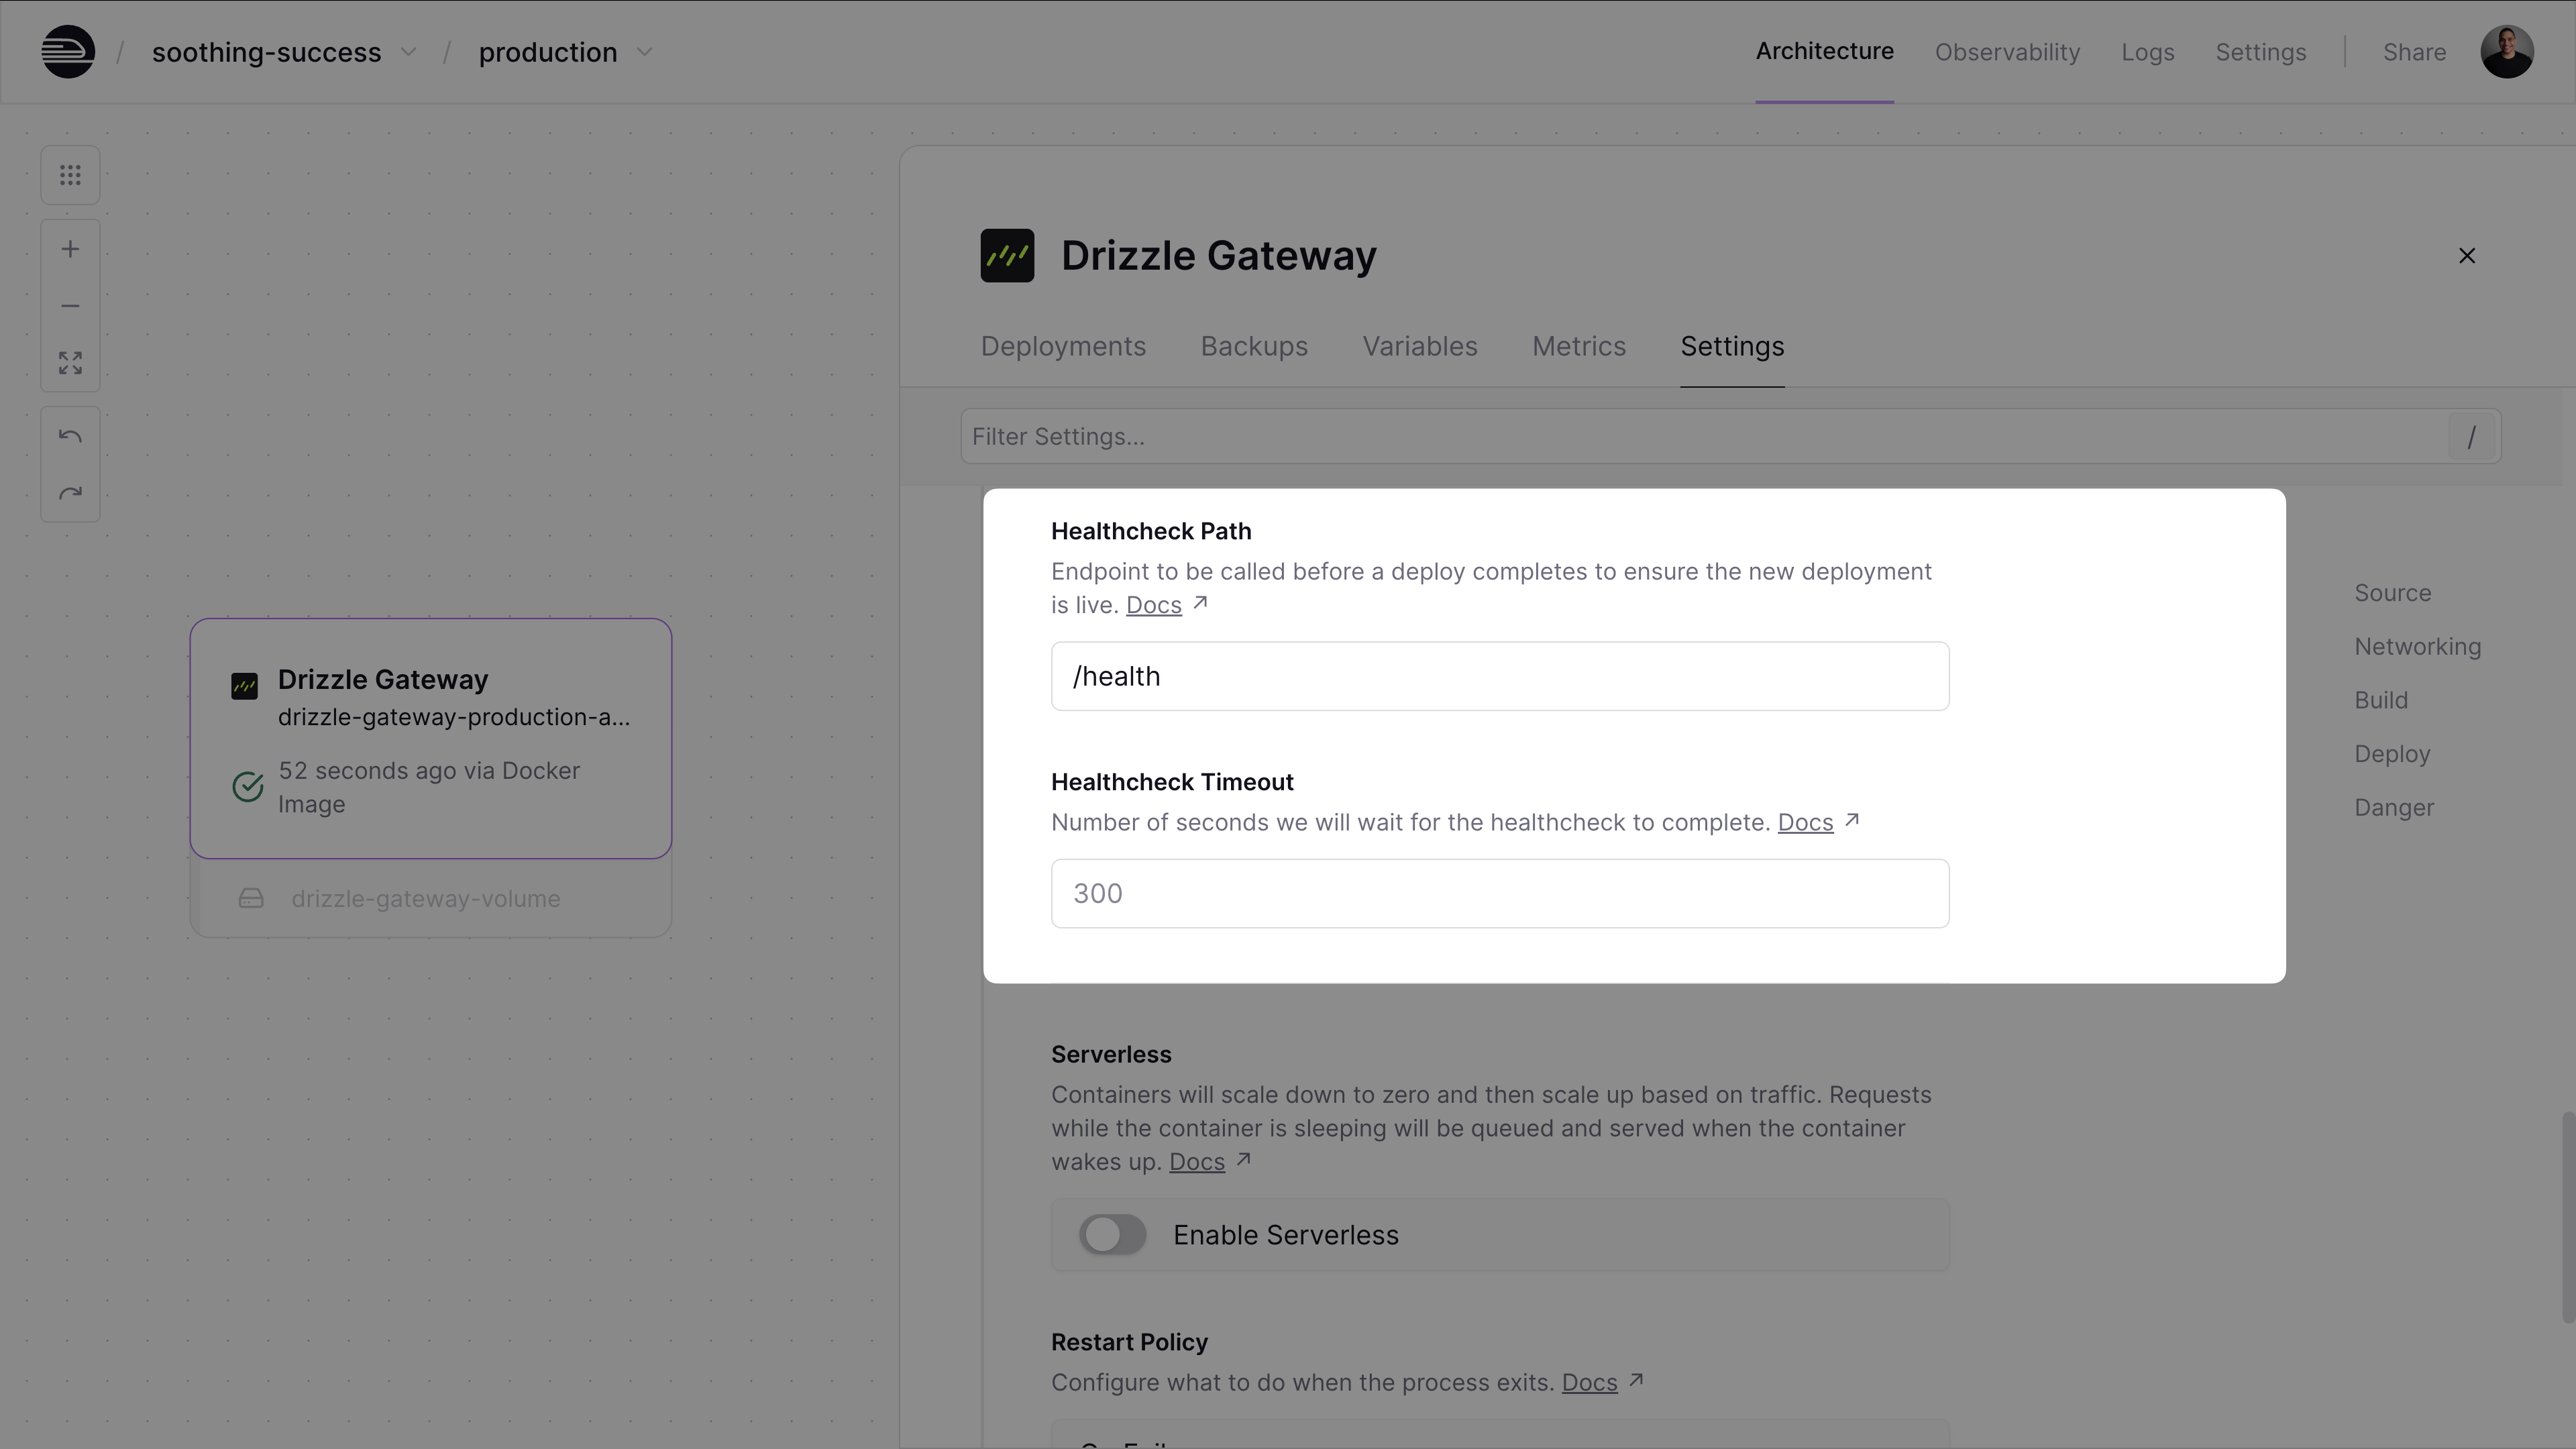
**Managed Infrastructure**
* Railway owns/operates underlying hardware
* Automatic OS/security patches
* Built-in load balancing and traffic distribution via [service replicas](/deployments/scaling#horizontal-scaling-with-replicas)
* Automatic scaling based on workload demand
* Managed networking with private service communication
#### Security & compliance
##### VPS hosting
Security is entirely your responsibility, including:
**Basic Security Hardening**
* Disable root login, enforce SSH key auth
* Configure firewalls (UFW/iptables)
* Install intrusion detection (fail2ban, IDS)
* Regular audits and patching
**Application Security**
* File permissions and ownership
* Secure headers (HSTS, CSP, X-Frame-Options)
* Rate limiting and DDoS protection
* Secure secret management
* Secure database connections
**Compliance Requirements**
Achieving certifications on VPS requires significant additional work:
* Access controls and audit logging
* Data classification/handling procedures
* Incident response/business continuity plans
* Security assessments & penetration testing
* Evidence collection and documentation
* Encryption/key management systems
This typically requires dedicated expertise and can be costly.
##### Railway
Railway provides enterprise-grade security out of the box:
**Built-in Security Features**
* Encrypted secret/environment management
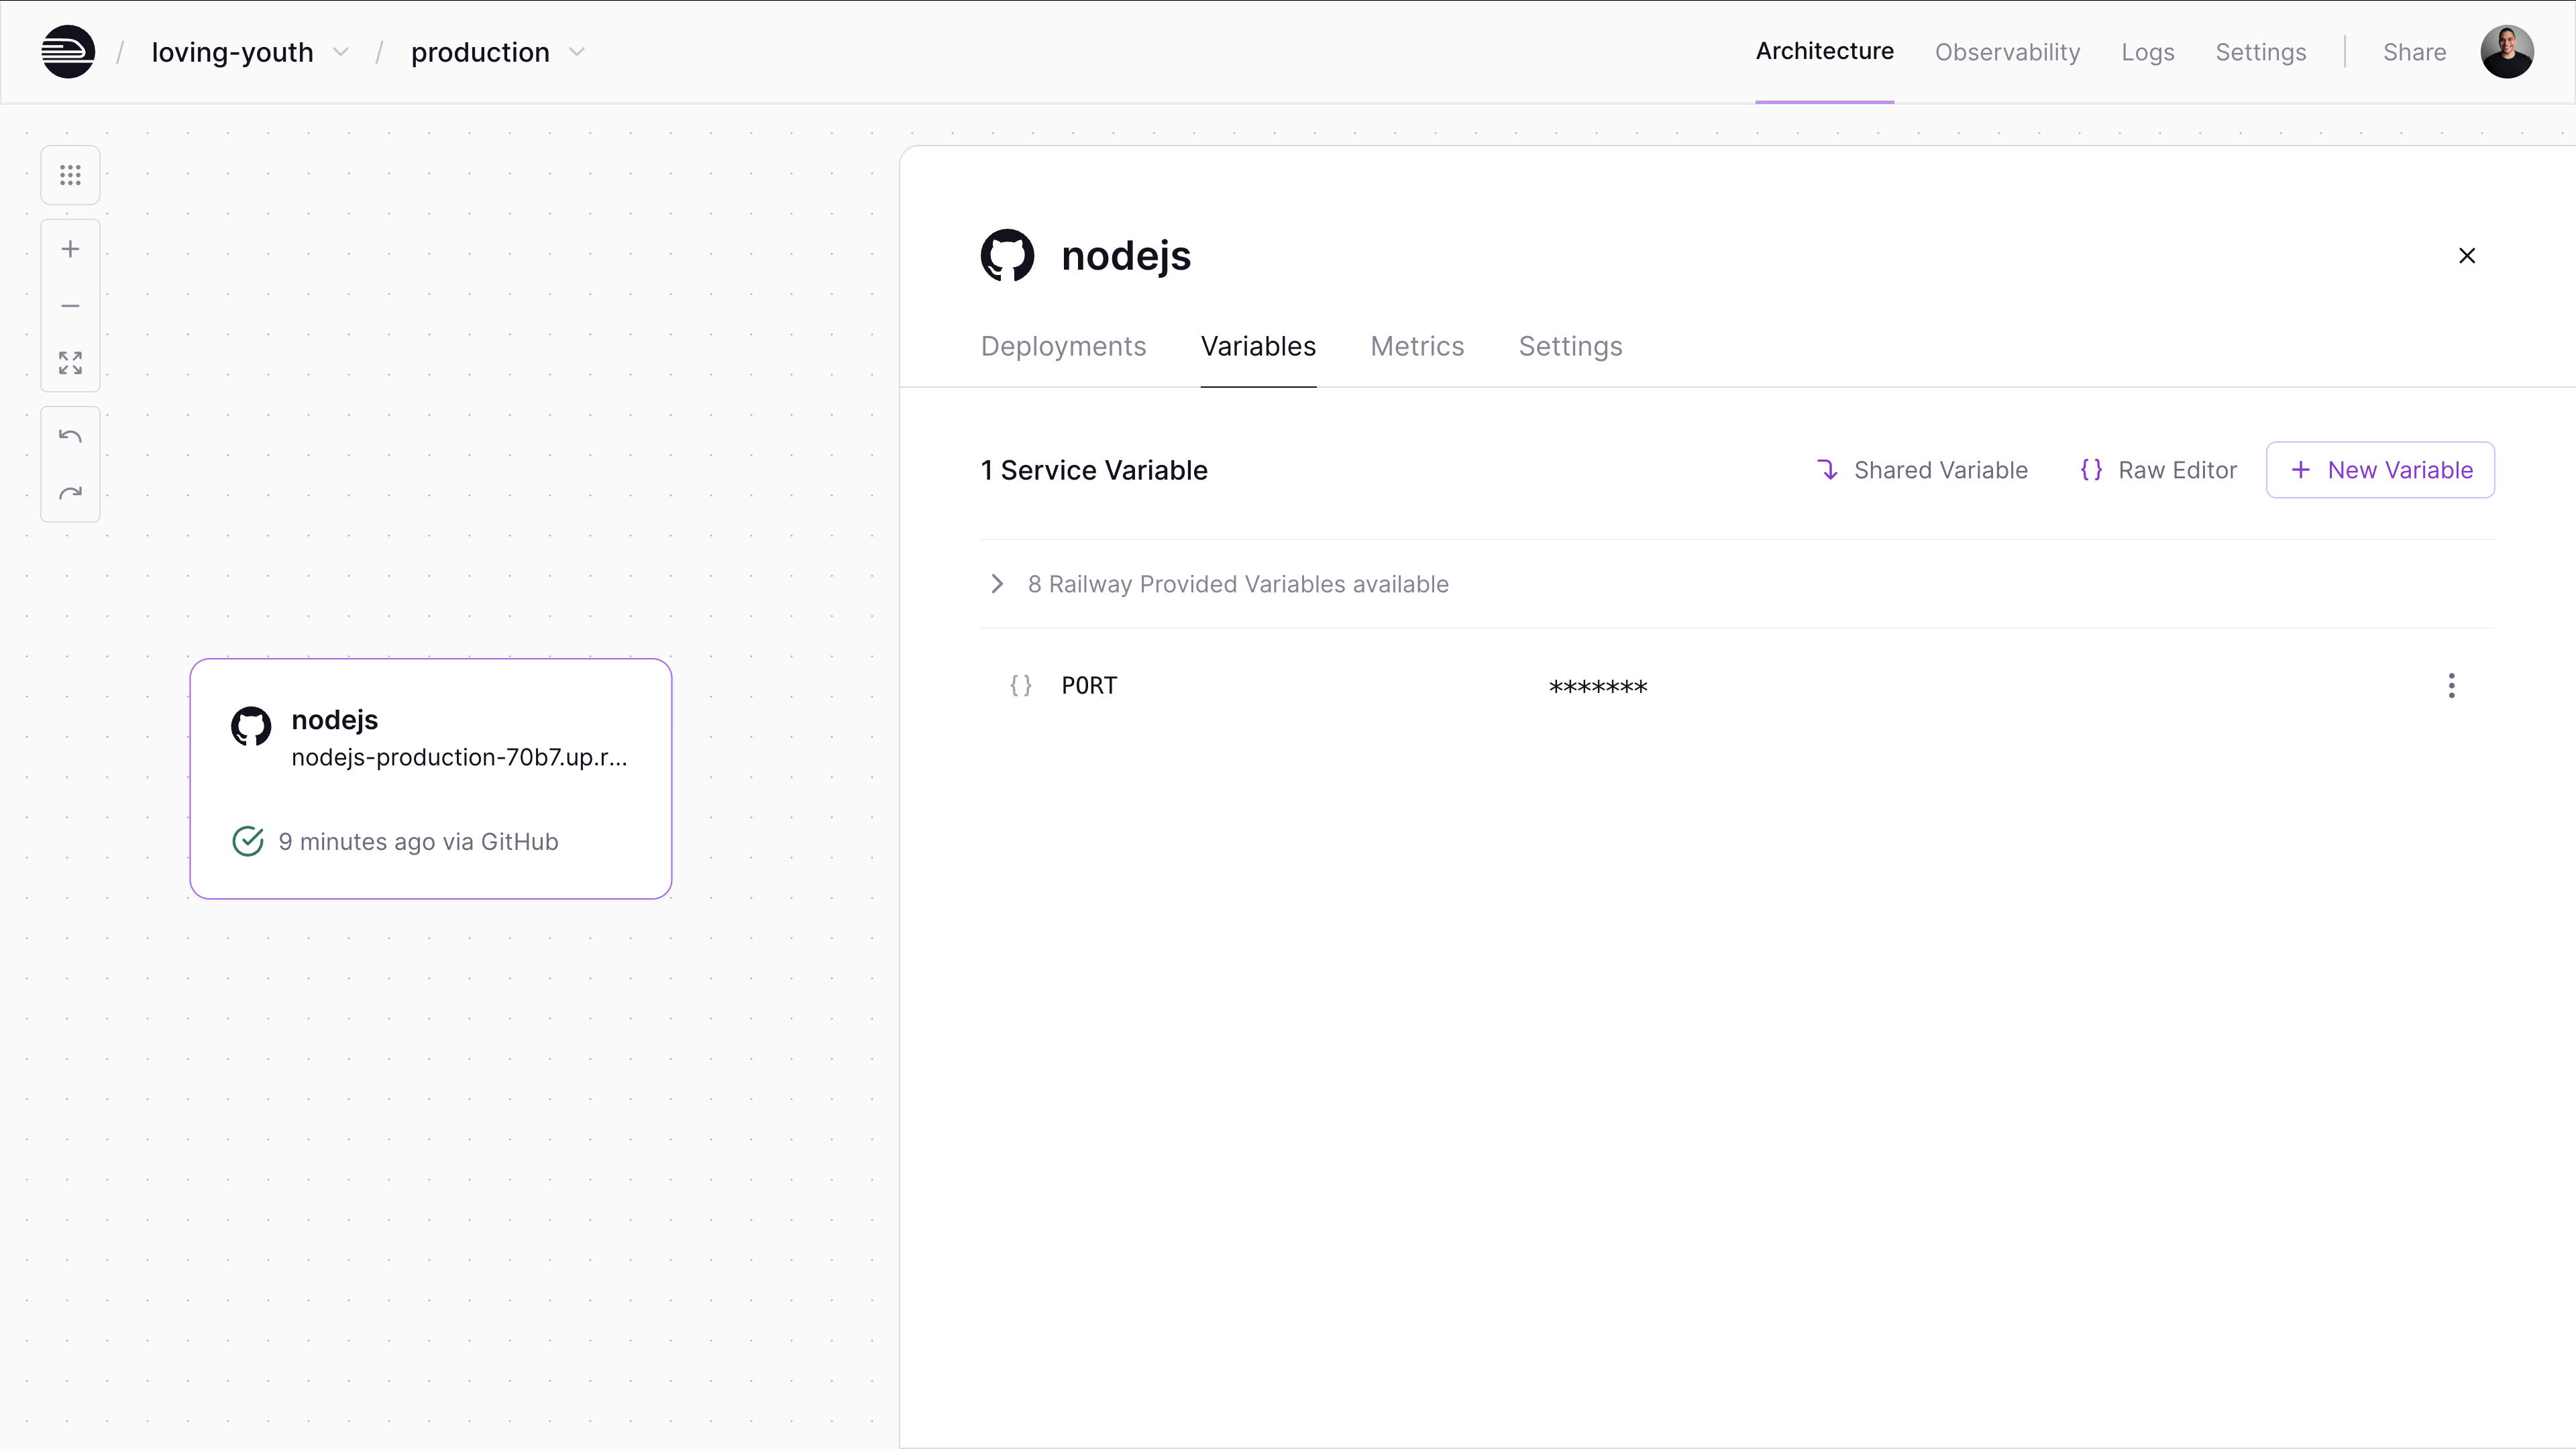
* SSL/TLS encryption for all services
* Private networking within projects
* Automatic patches and updates
* DDoS protection
**Compliance & Certifications**
* SOC 2 Type II
* GDPR compliance
* HIPAA compliance
* Regular third-party audits
**Security Best Practices**
* Role-based access control
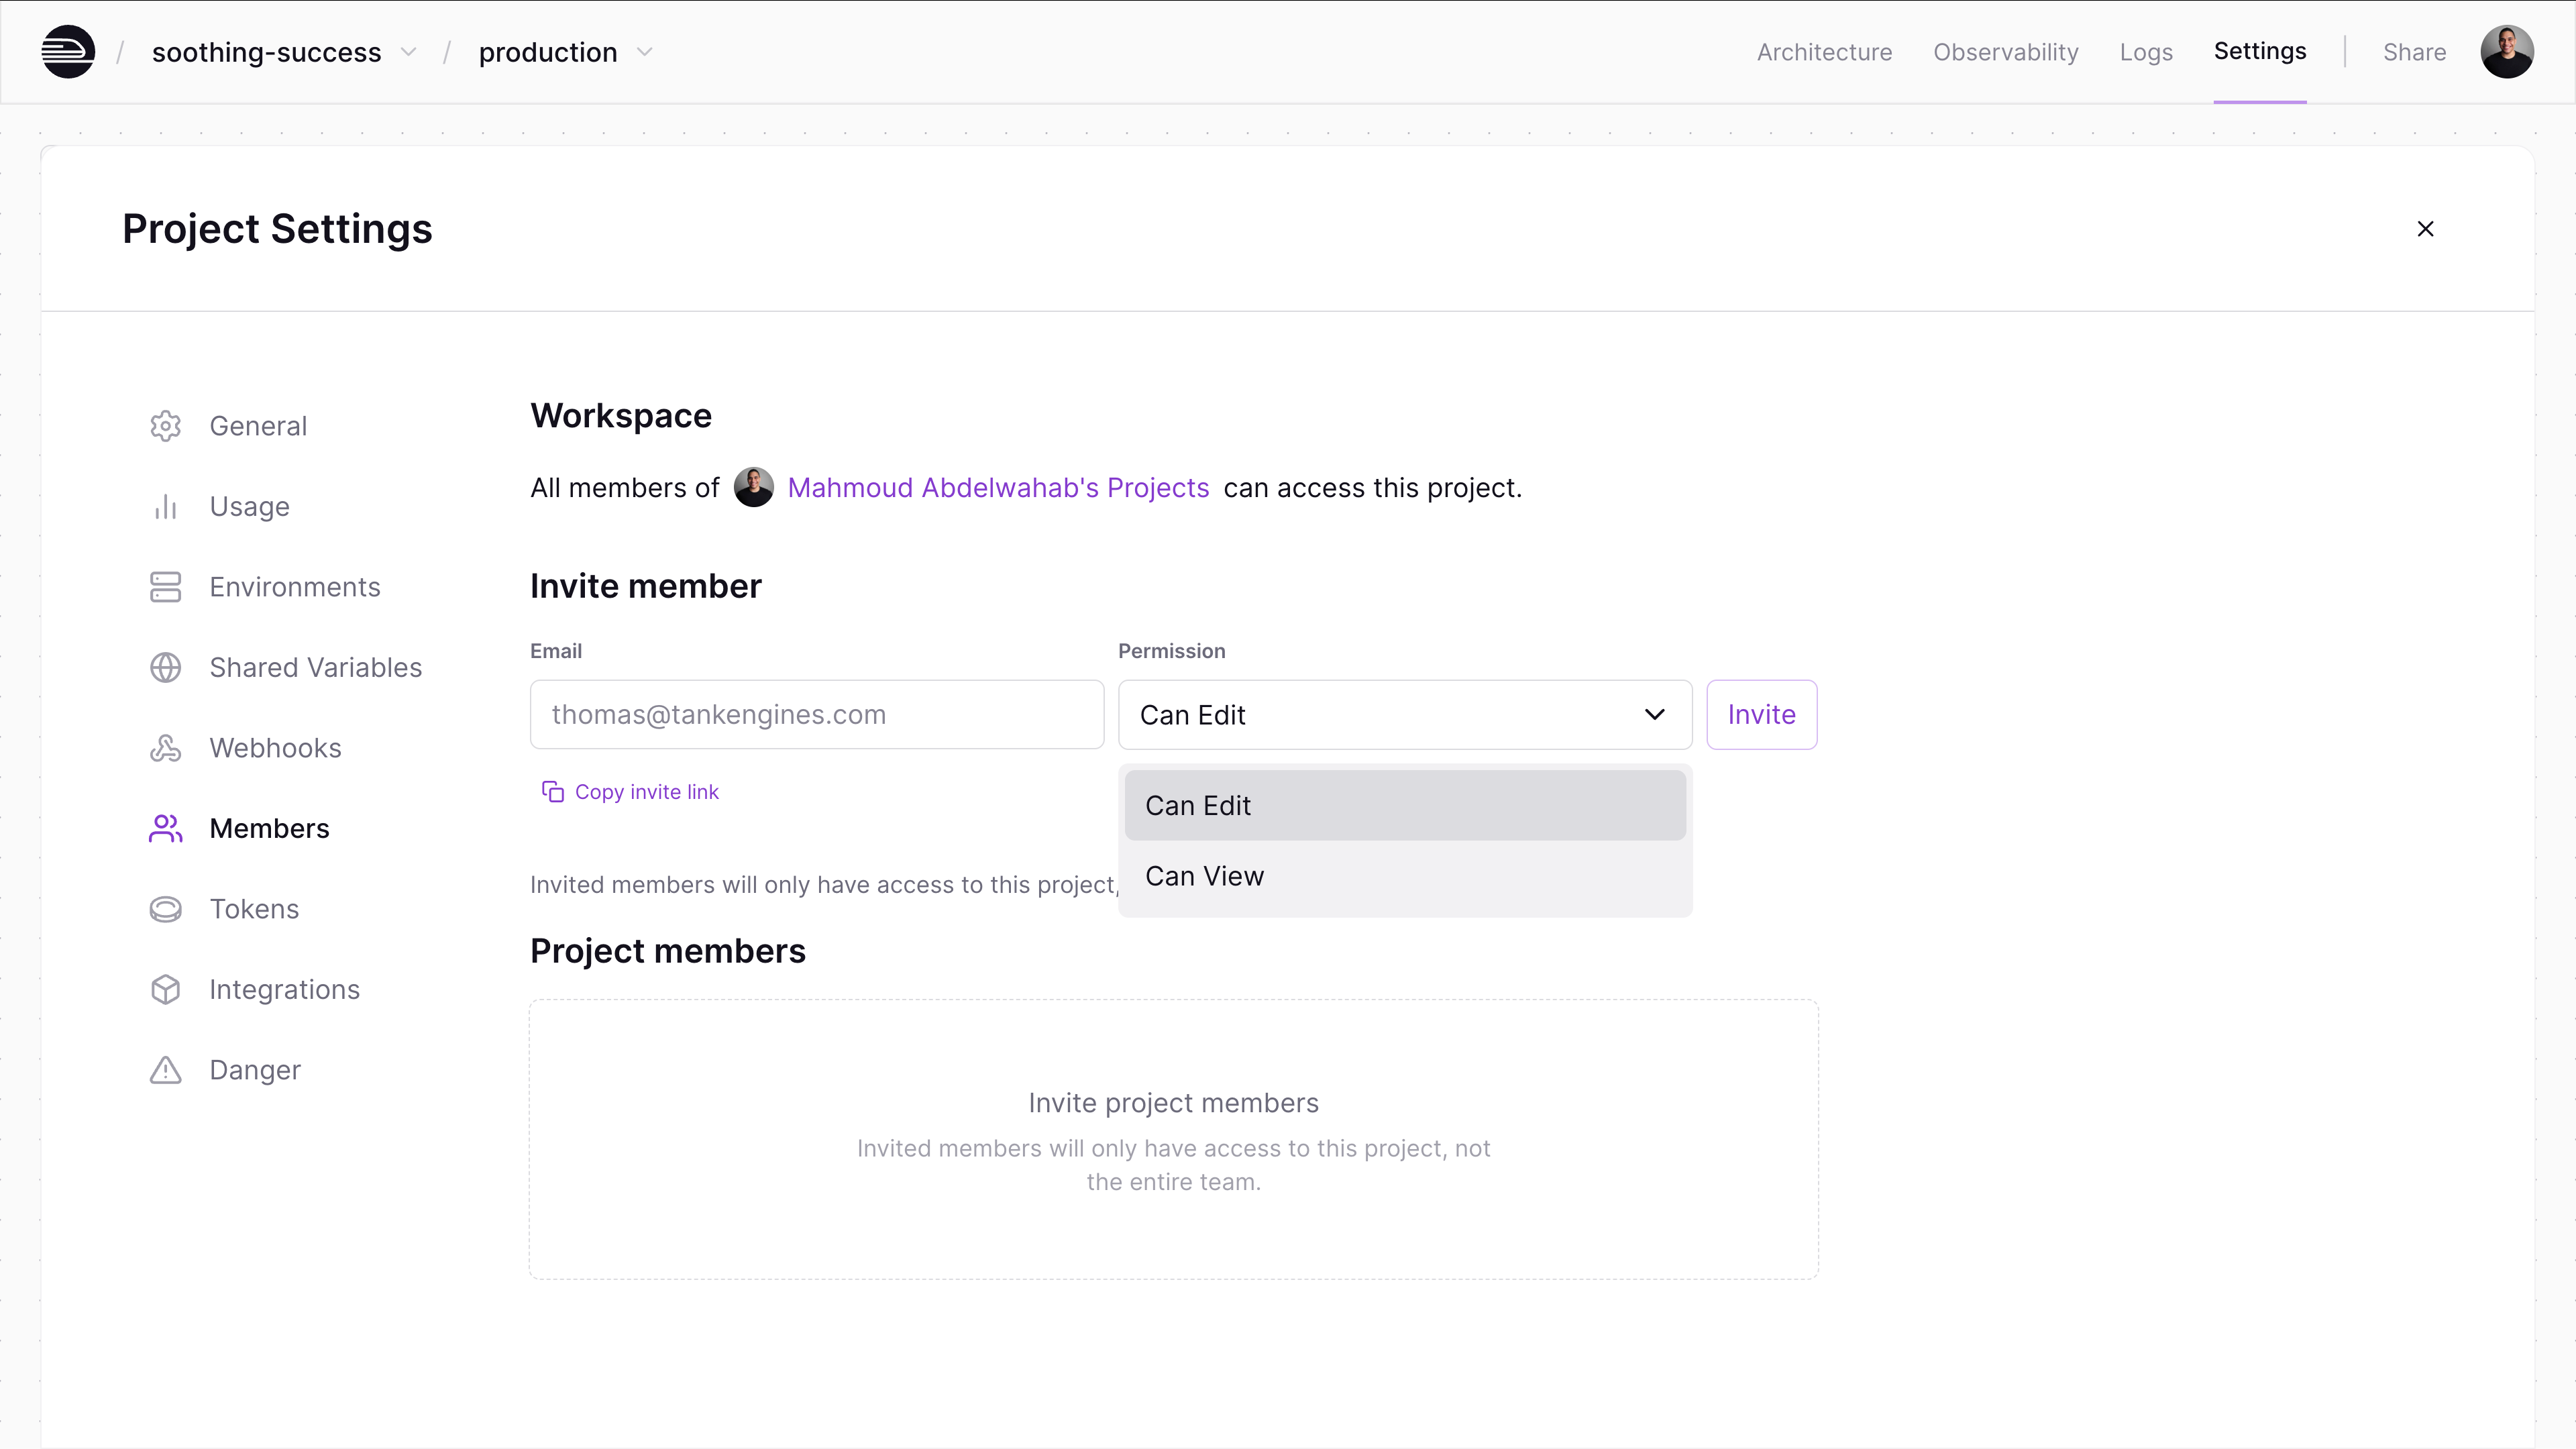
* MFA and passkey support
* Regular assessments and penetration testing
* Incident response and continuity planning
#### Monitoring & observability
##### VPS hosting
Requires integrating multiple tools:
**System & Application Monitoring**
* Install agents (Prometheus, Grafana, commercial tools)
* Custom dashboards for CPU, memory, disk, network
* Configure alerting rules and notification channels
* Implement log aggregation/analysis (ELK, Loki)
* Uptime monitoring and health checks
##### Railway
Monitoring is built-in:
**Observability Dashboard**
* CPU, memory, network metrics
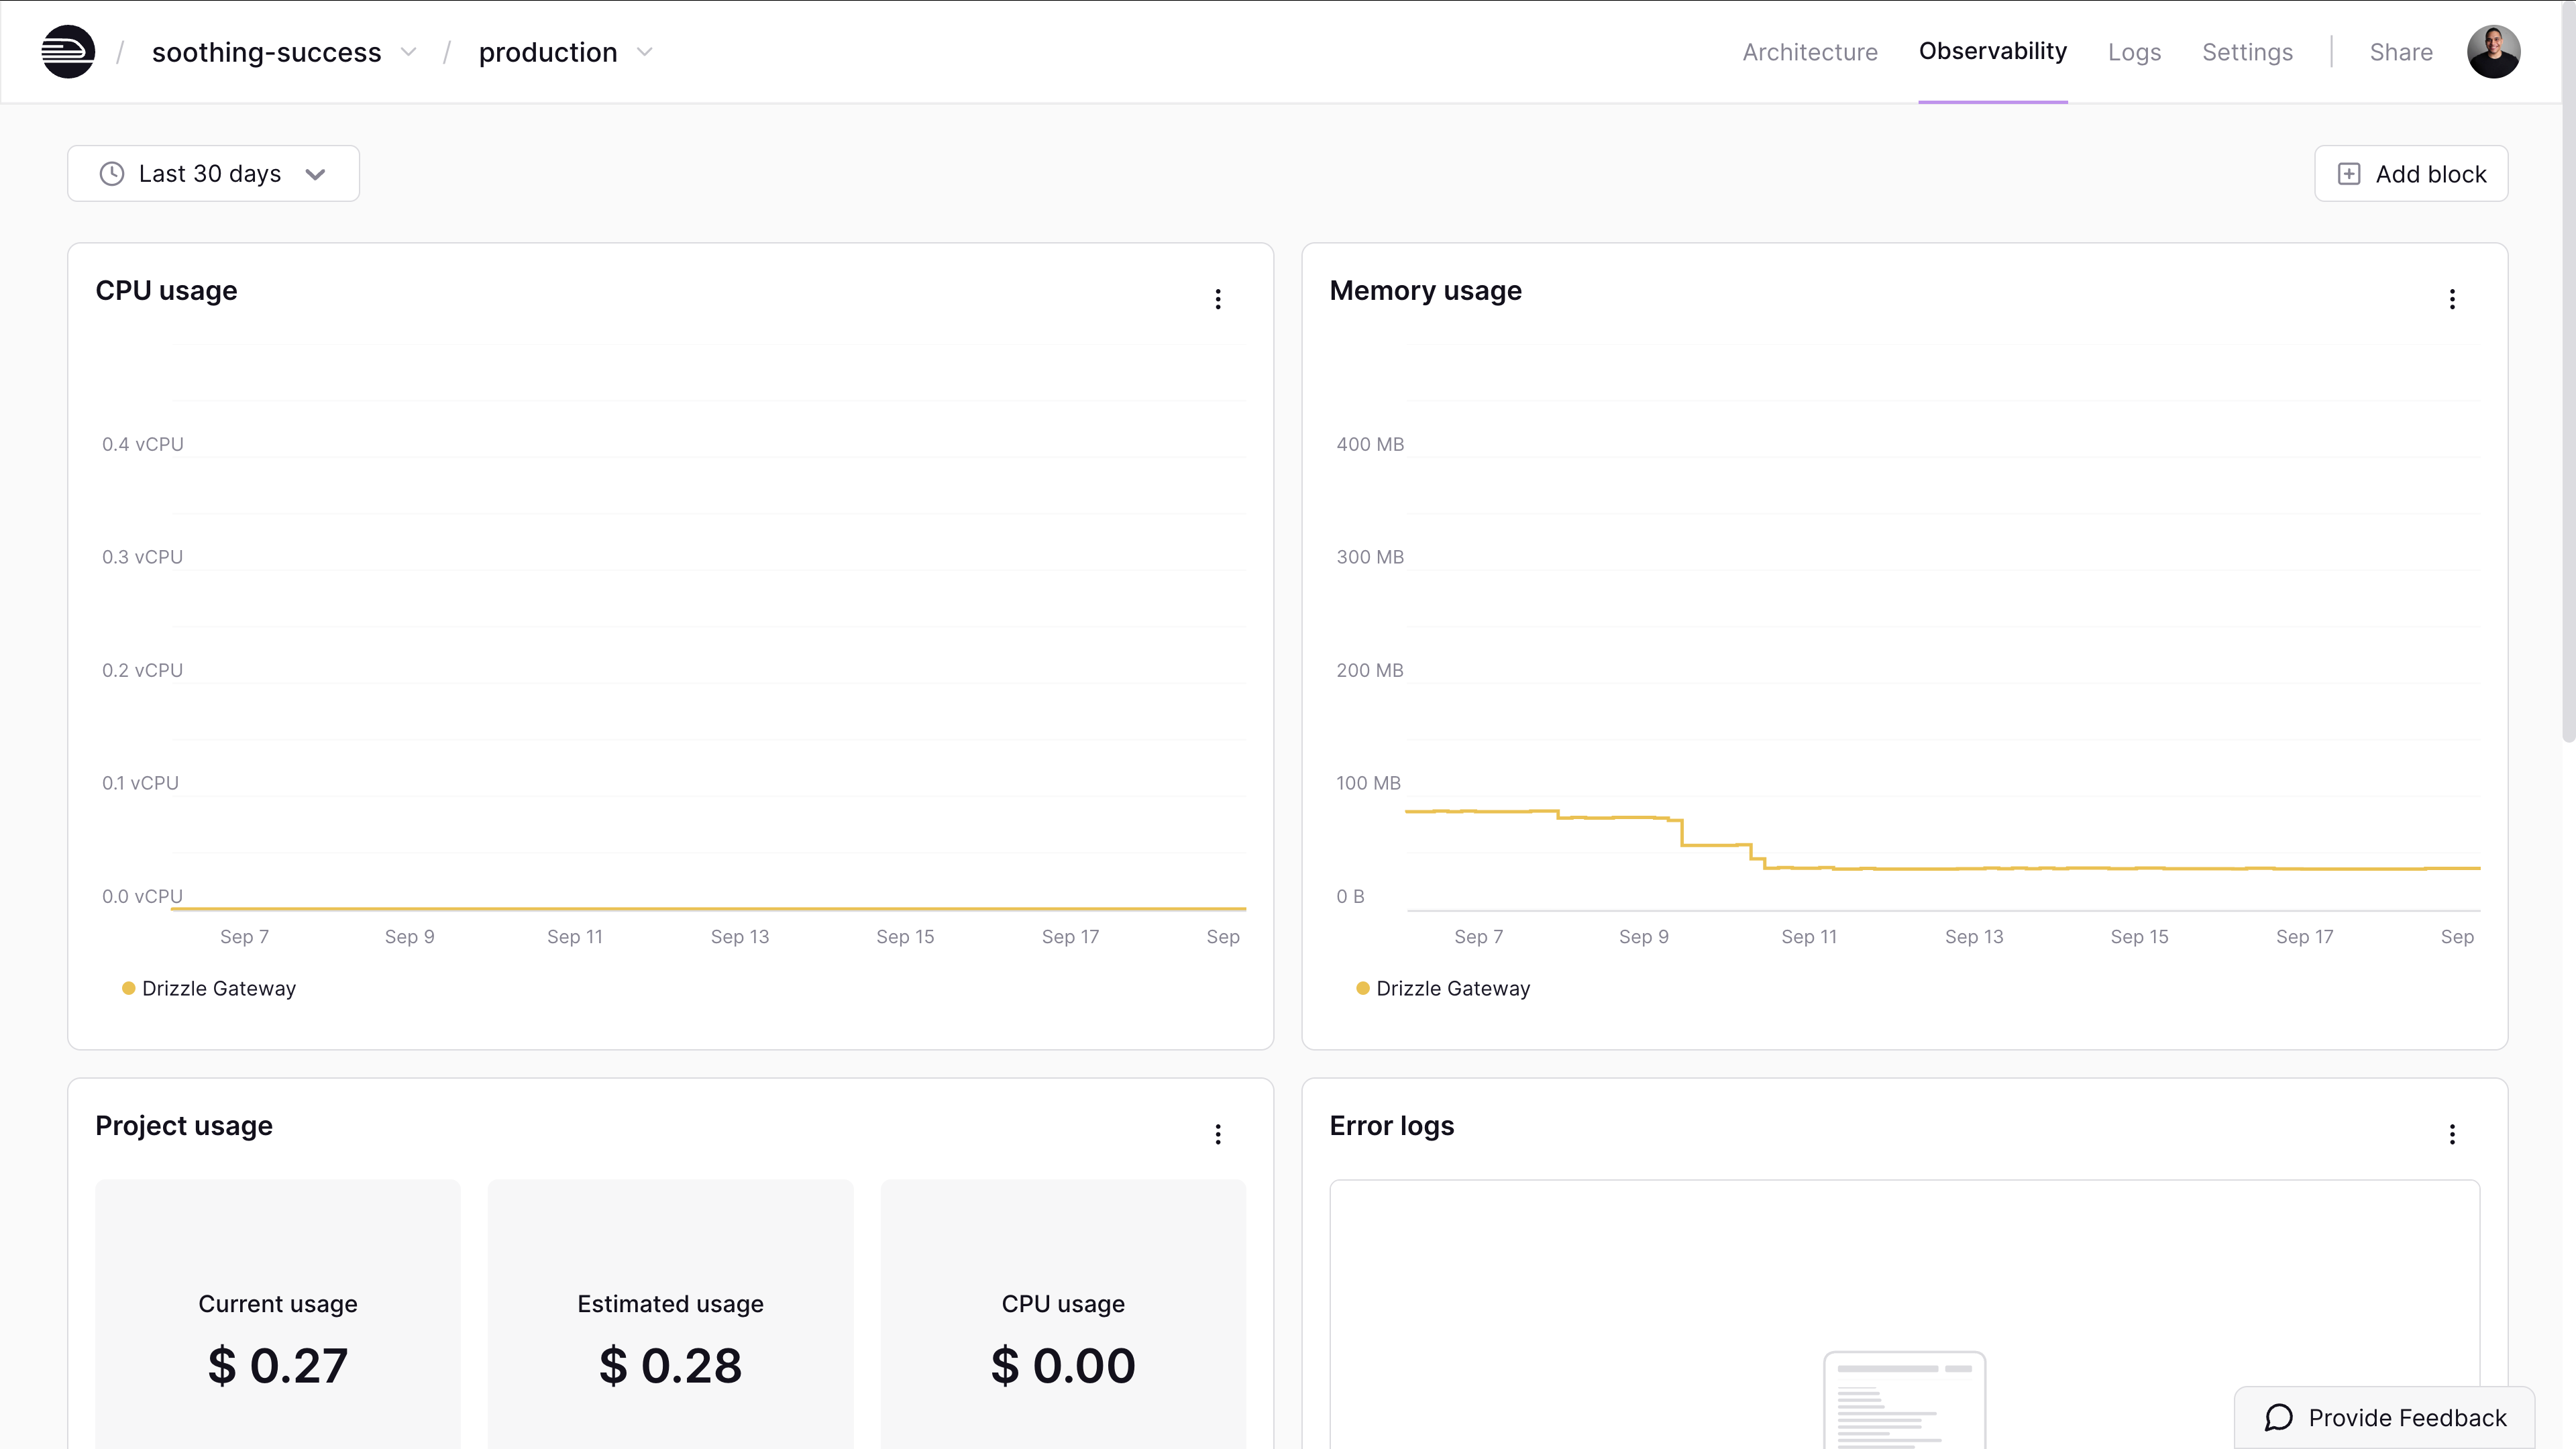
* Integrated log aggregation and search
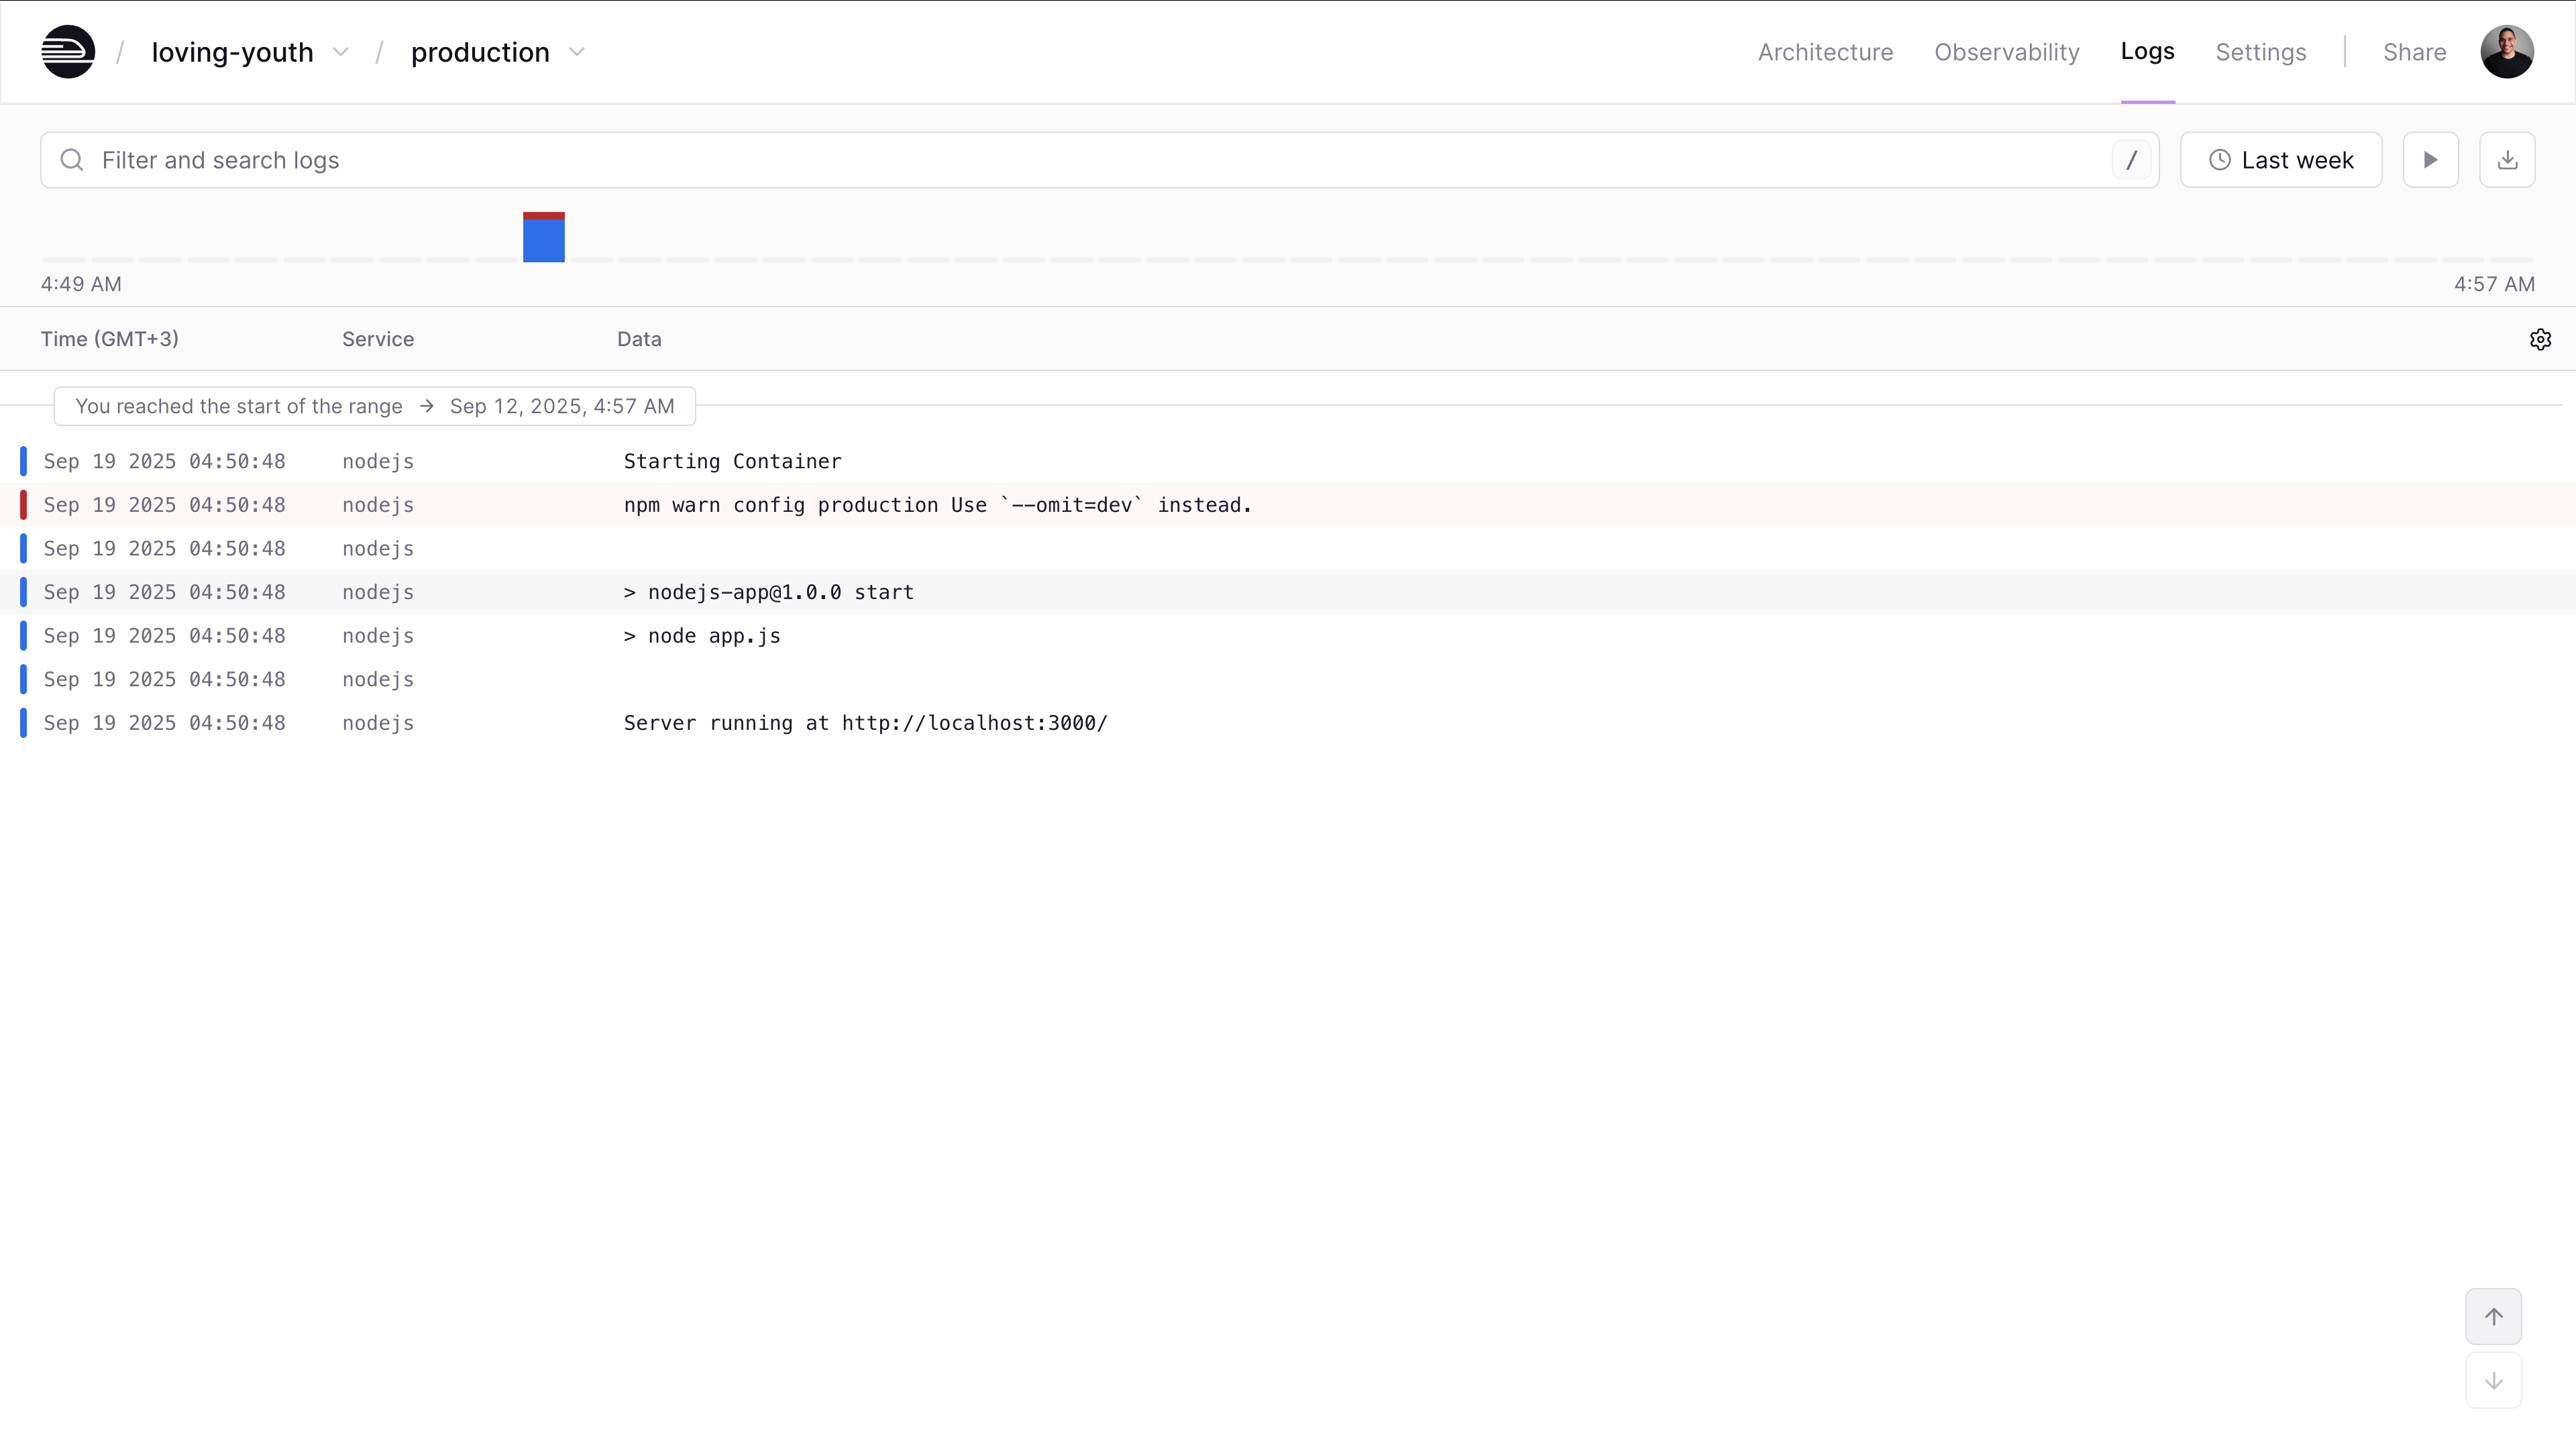
* Auto alerting and notifications
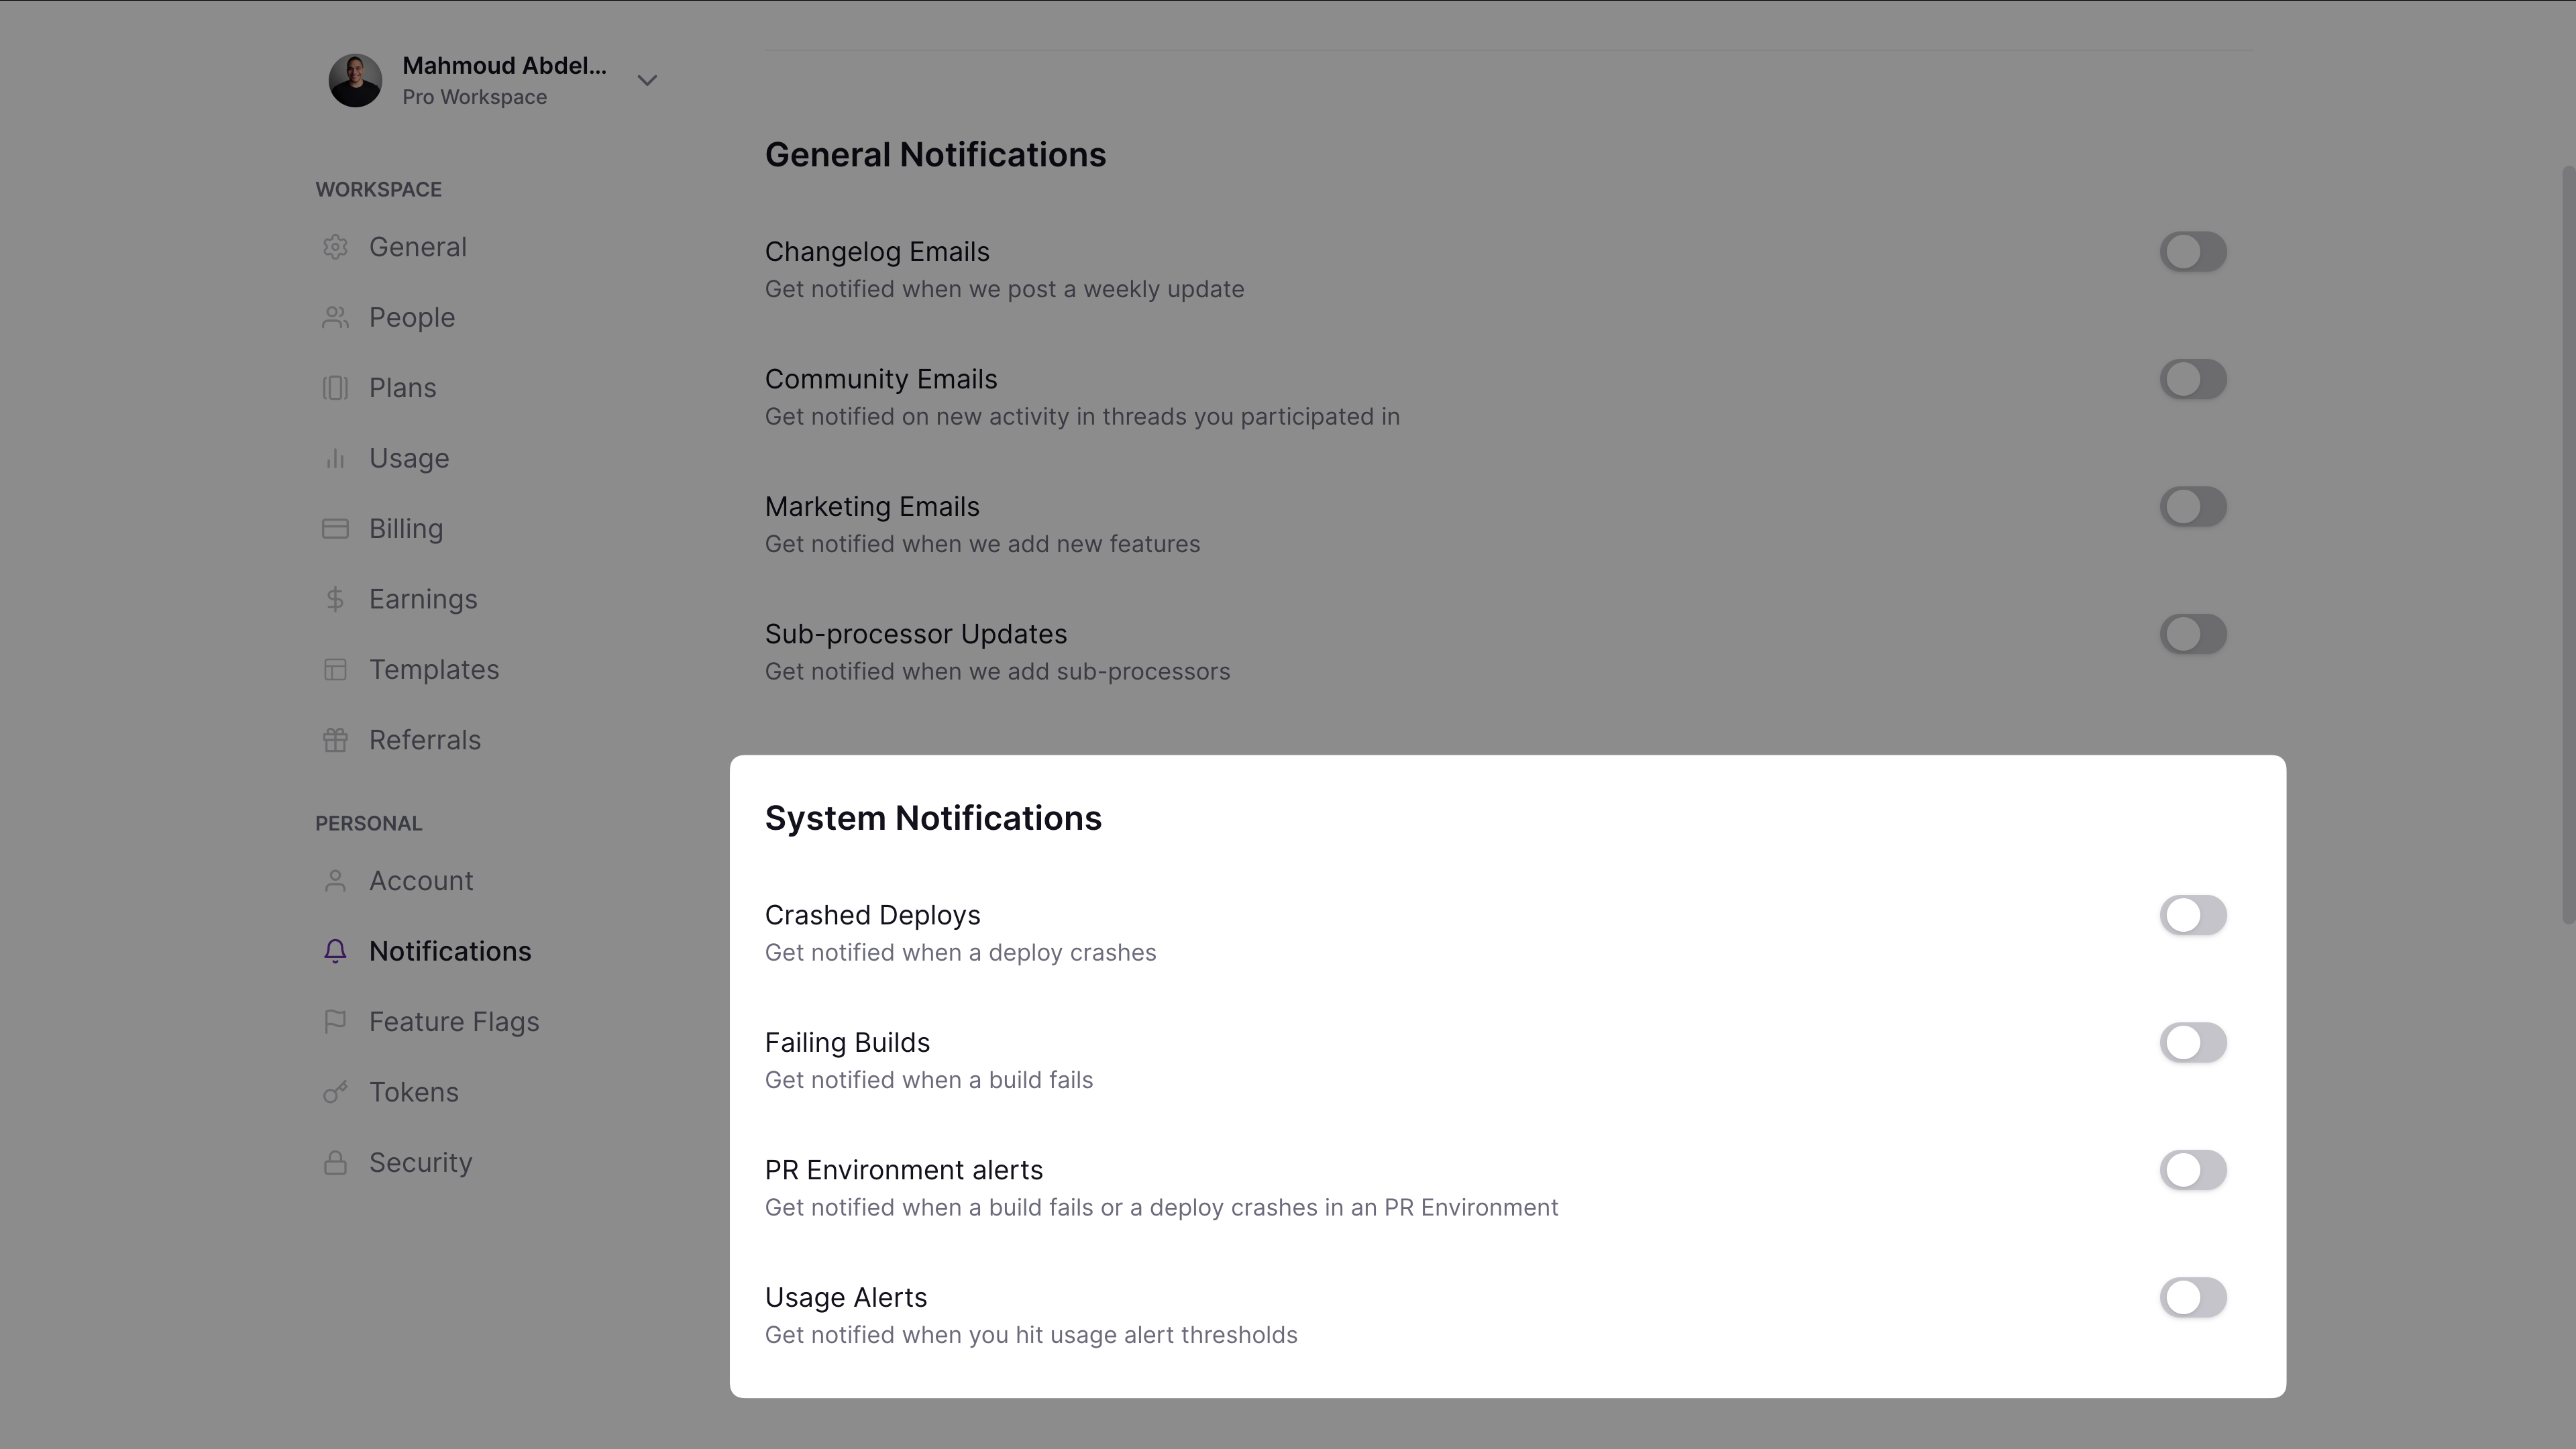
#### Scalability & global distribution
##### VPS hosting
Scaling requires manual setup:
**Vertical Scaling (Up)**
* Manually upgrade to larger instances
* Typically downtime during resizing
* Application restarts required
* Persistent storage resizing often requires downtime
**Horizontal Scaling (Out)**
* Provision additional VPS instances
* Configure load balancers (HAProxy, Nginx, cloud LB)
* Manage session persistence/sticky sessions
* Database connection pooling/discovery
**Multi-Region Deployment Challenges**
* Manual VPS setup in each region
* Complex DNS/georouting configs
* Data replication/sync complexity
* Cross-region latency
* Higher operational overhead and cost
##### Railway
Scaling and distribution are automatic:
**Automatic Vertical Scaling**
* Scale up to plan limits automatically
* No downtime or manual intervention
* Live volume resizing without service interruption
**Effortless Horizontal Scaling**
* Deploy replicas with one click
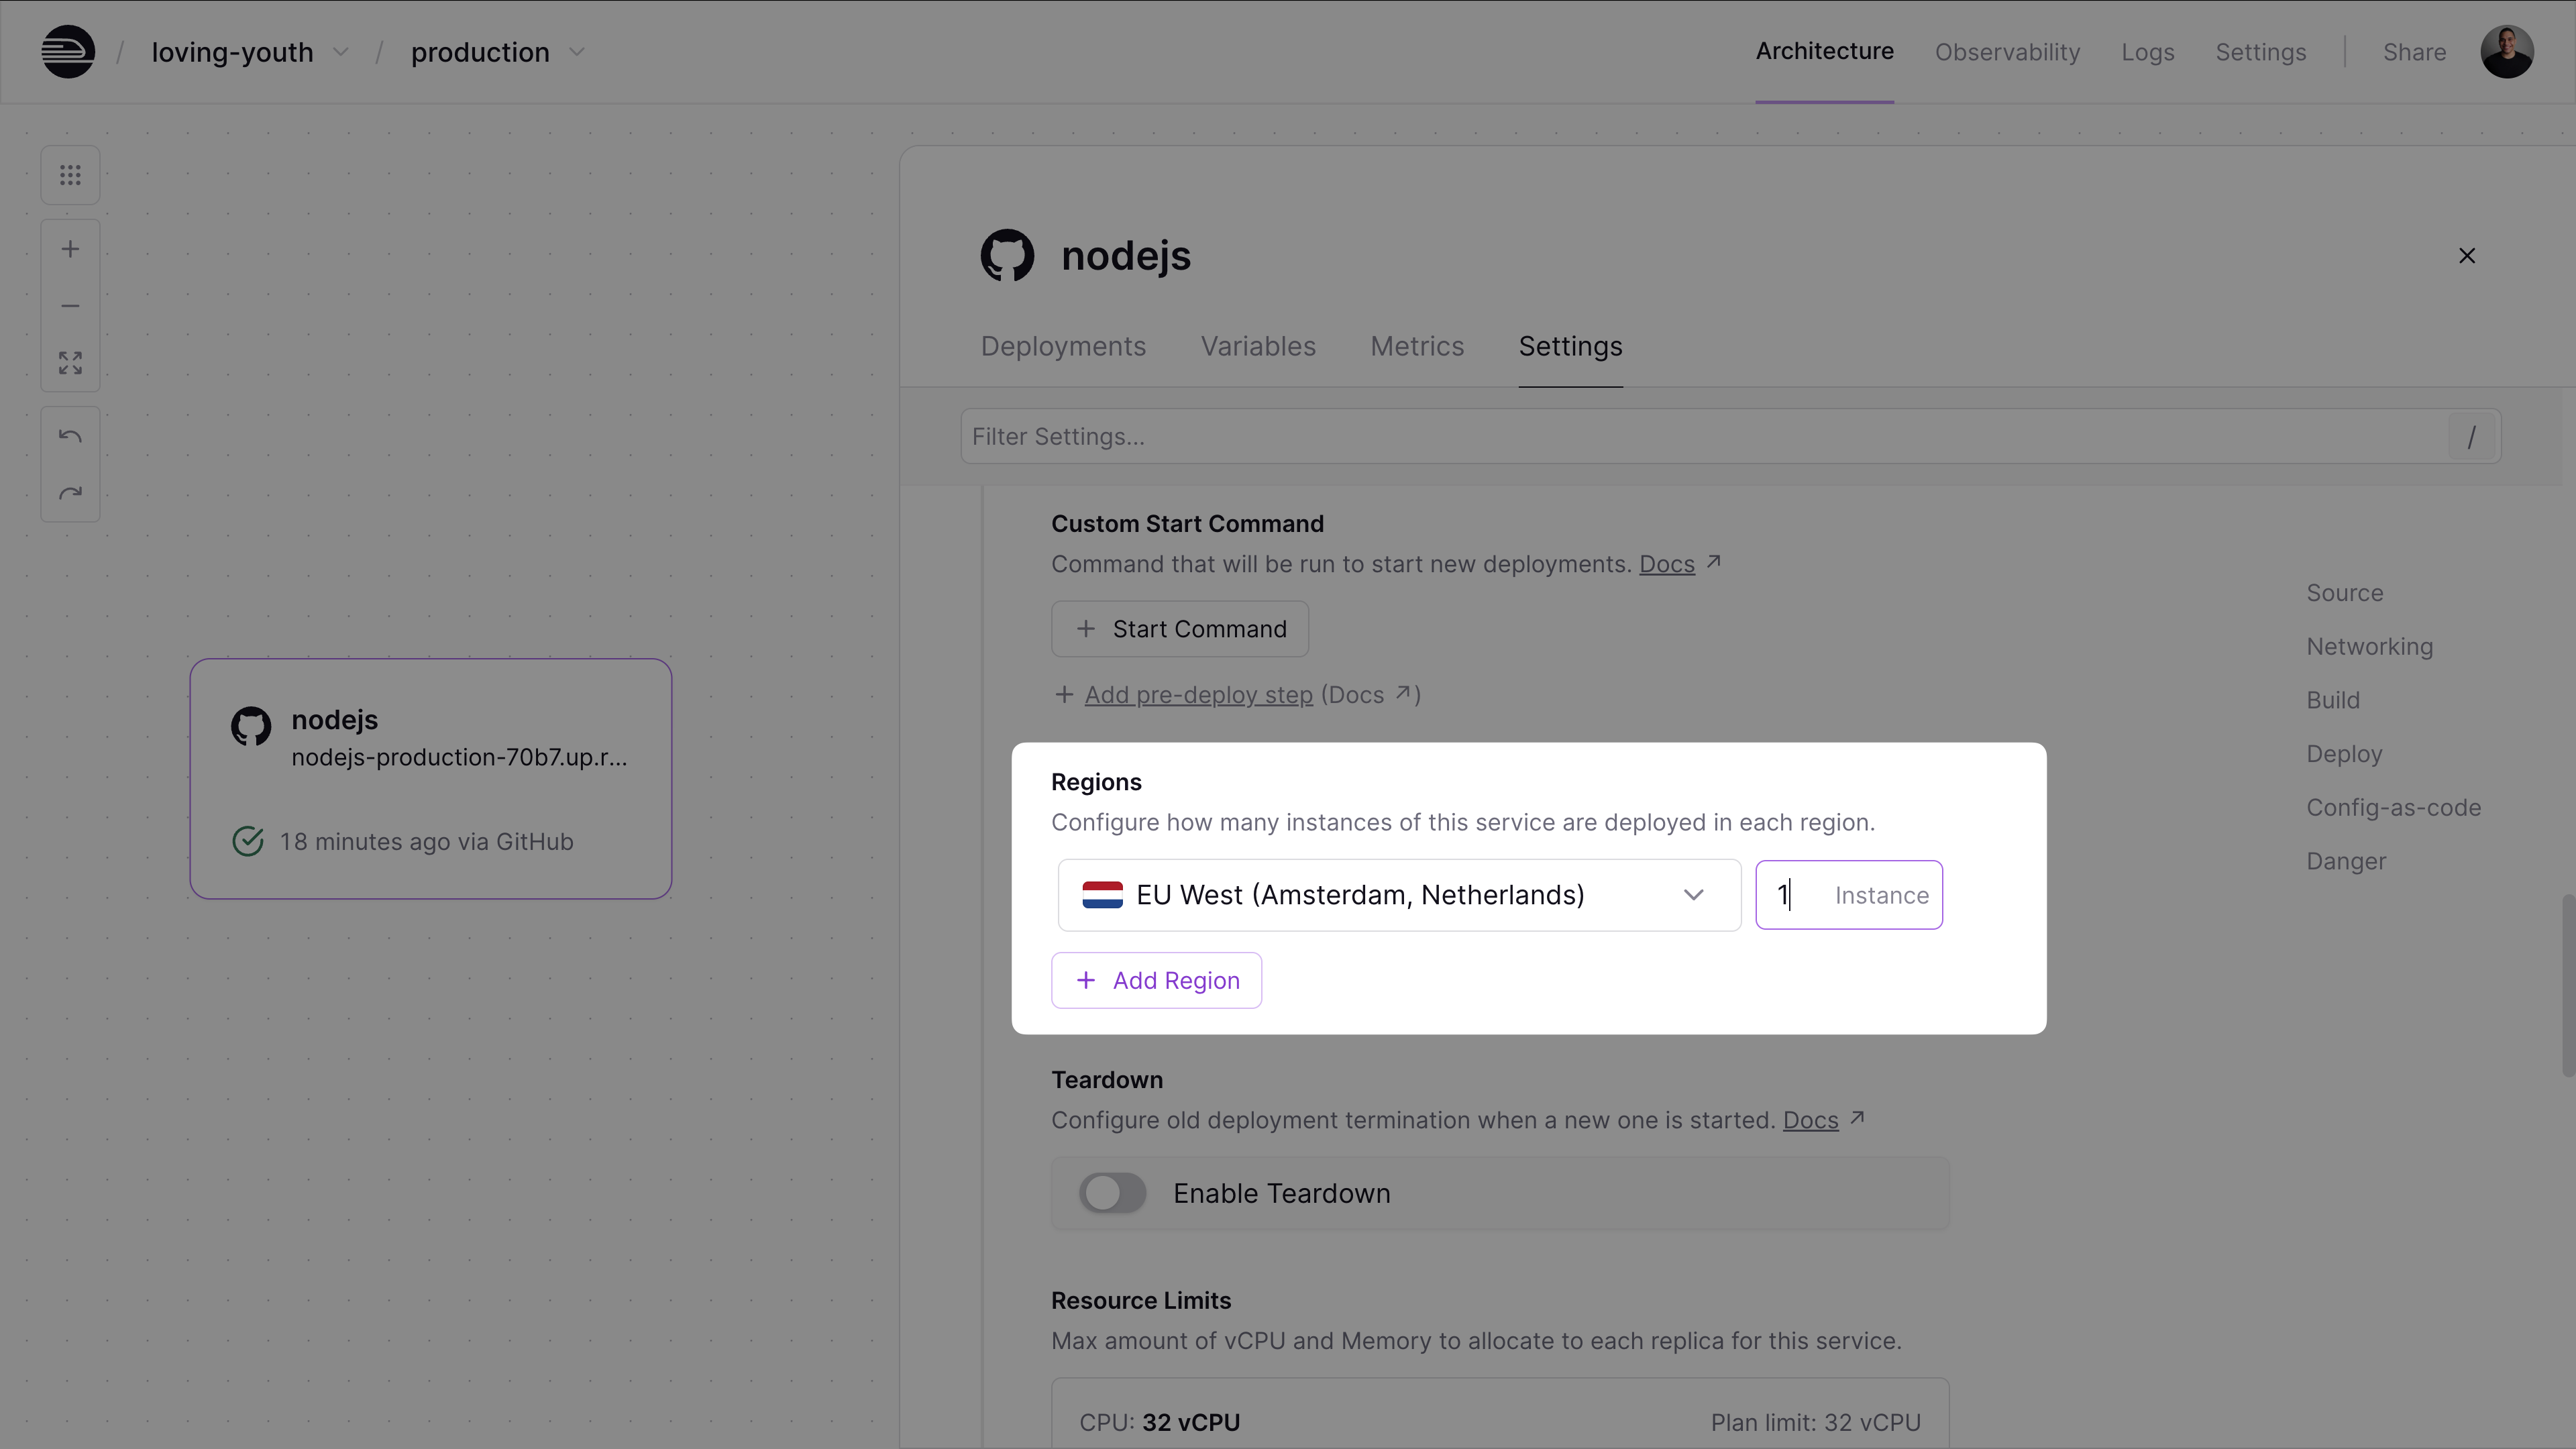
* Automatic load balancing & health checks
* Automatic traffic routing to nearest region
**Multi-Region Deployment**
* Deploy globally with one command
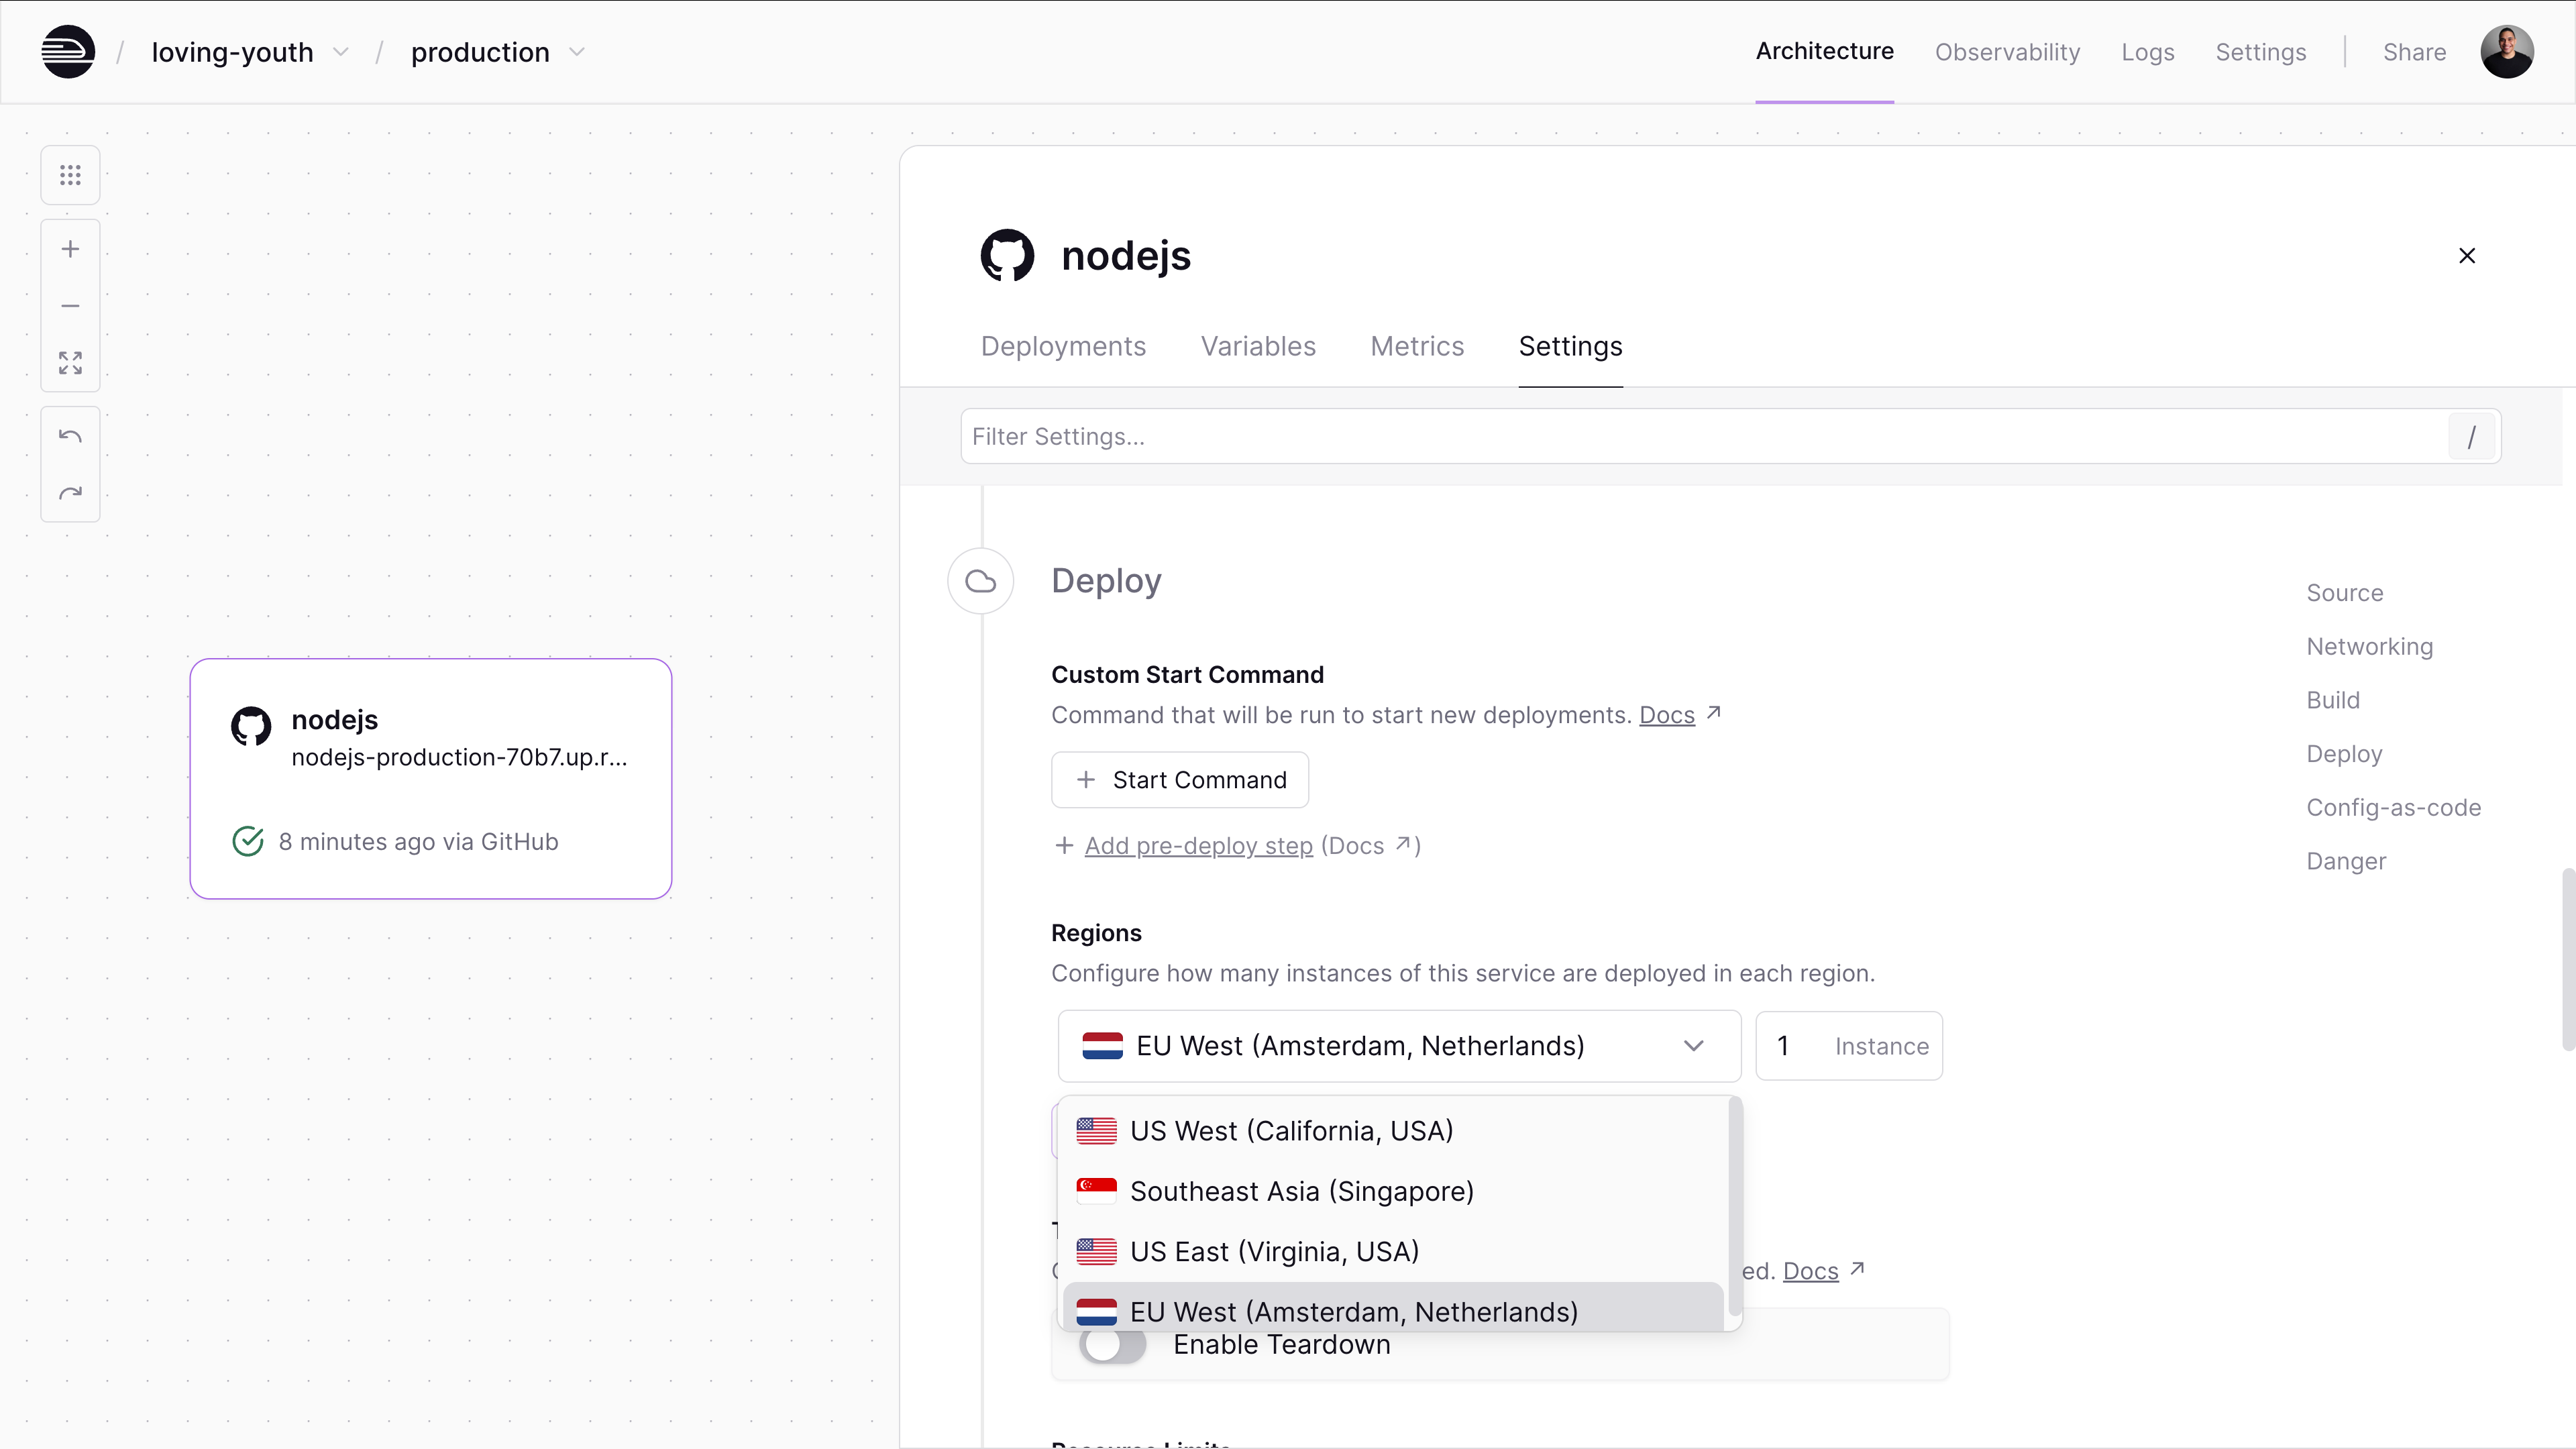
* Auto traffic routing, failover, replication
* CDN integration for static assets
* Simplified data management
* Reduced latency for global users
#### Pricing & cost optimization
##### VPS hosting
* Fixed monthly pricing by instance size.
* Extra tools (monitoring, backups, scaling) often add hidden costs.
##### Railway
Railway follows a usage-based pricing model that depends on how long your service runs and the amount of resources it consumes. You only pay for activce CPU and memory, not for idle time.
```
Active compute time x compute size (memory and CPU)
```

Pricing plans start at $5/month. You can check out the [pricing page](https://railway.com/pricing) for more details.
**Cost Optimization**
If you would like to further reduce costs, you can enable the [serverless](/deployments/serverless) feature. When a service has no outbound requests for over 10 minutes, it is automatically put to sleep. While asleep, the service incurs no compute charges. It wakes up on the next incoming request, ensuring seamless reactivation without manual effort. This makes it ideal for sporadic or bursty workloads, giving you the flexibility of a full server with the cost efficiency of serverless, with the benefit of only paying when your code is running.
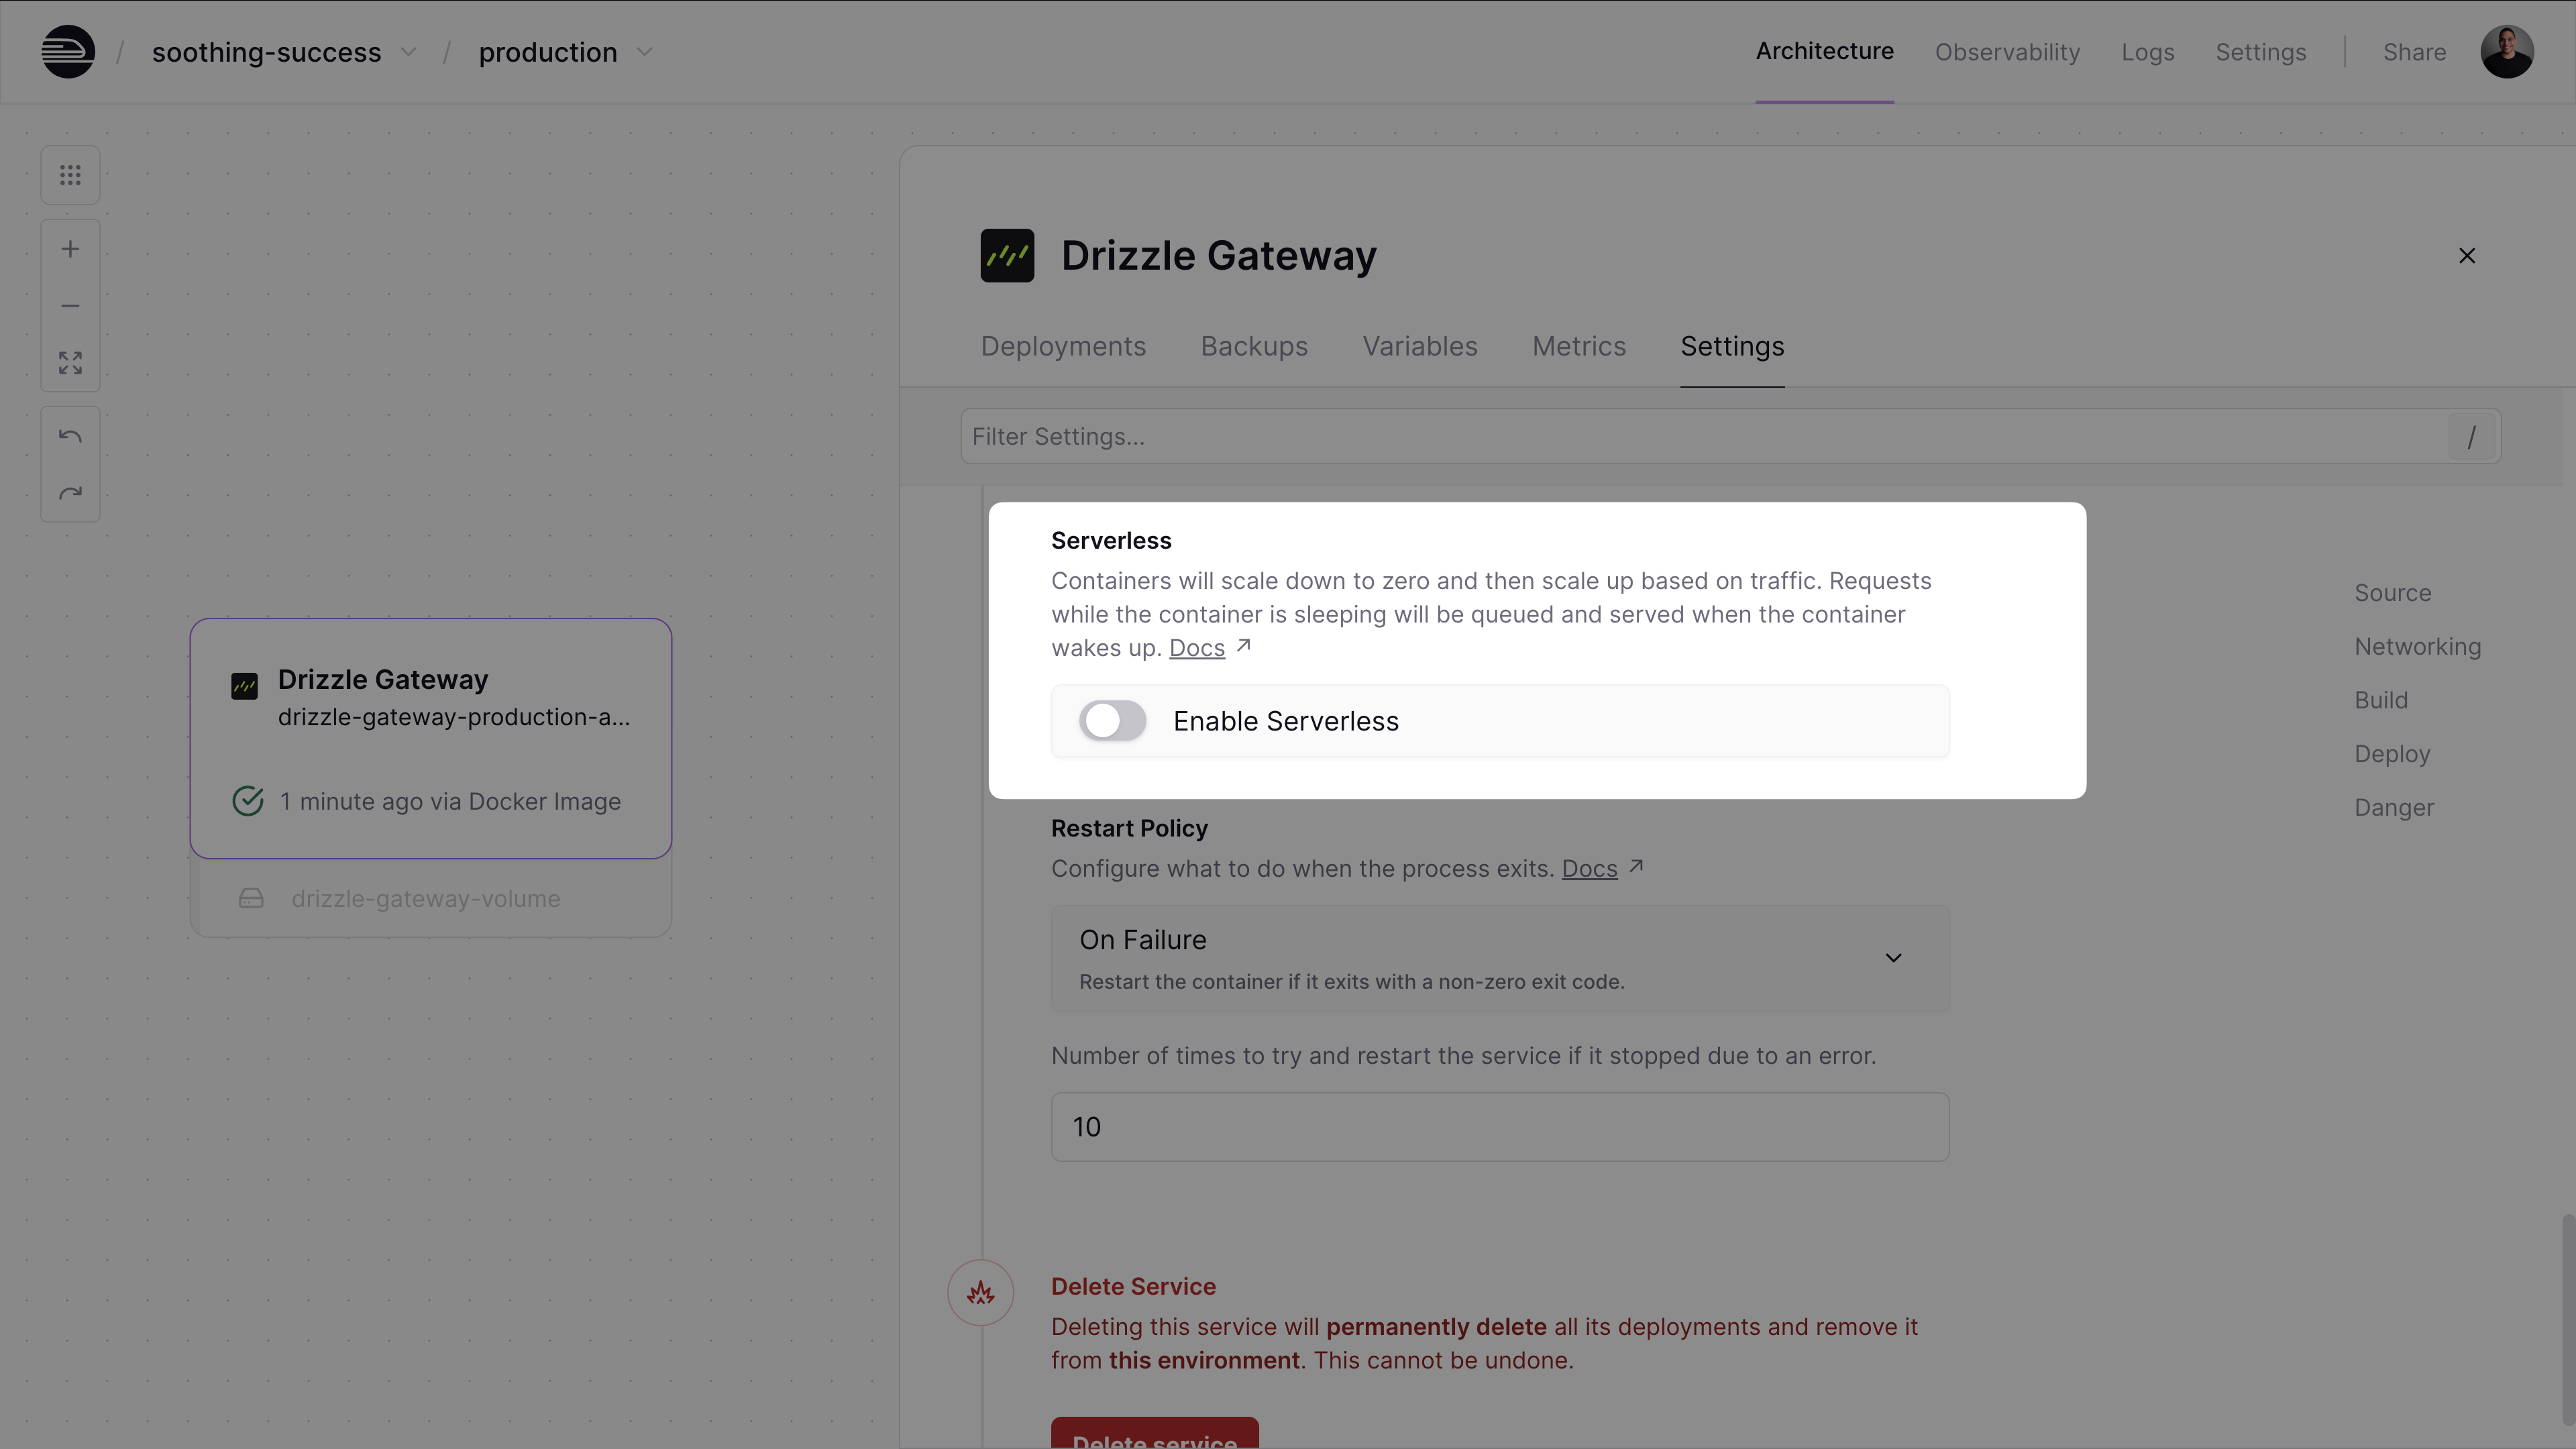
#### Developer workflow & deployment
##### VPS hosting
Deploying requires building your own CI/CD:
**CI/CD**
* Configure GitHub Actions/Jenkins/etc.
* Write deployment scripts
* Separate staging/production setup
* Automated testing/quality gates
* Rollback procedures
**Environment Management**
* Manual env var config
* Separate servers for staging/prod
* Manual DB migrations/schema updates
* Complex secret management
##### Railway
CI/CD and environments are built-in:
**Automatic CI/CD**
* GitHub repo integration
* Preview environments per pull request
* One-click rollbacks
* Automatic env var management
**Environment Management**
* Built-in support for dev/staging/prod
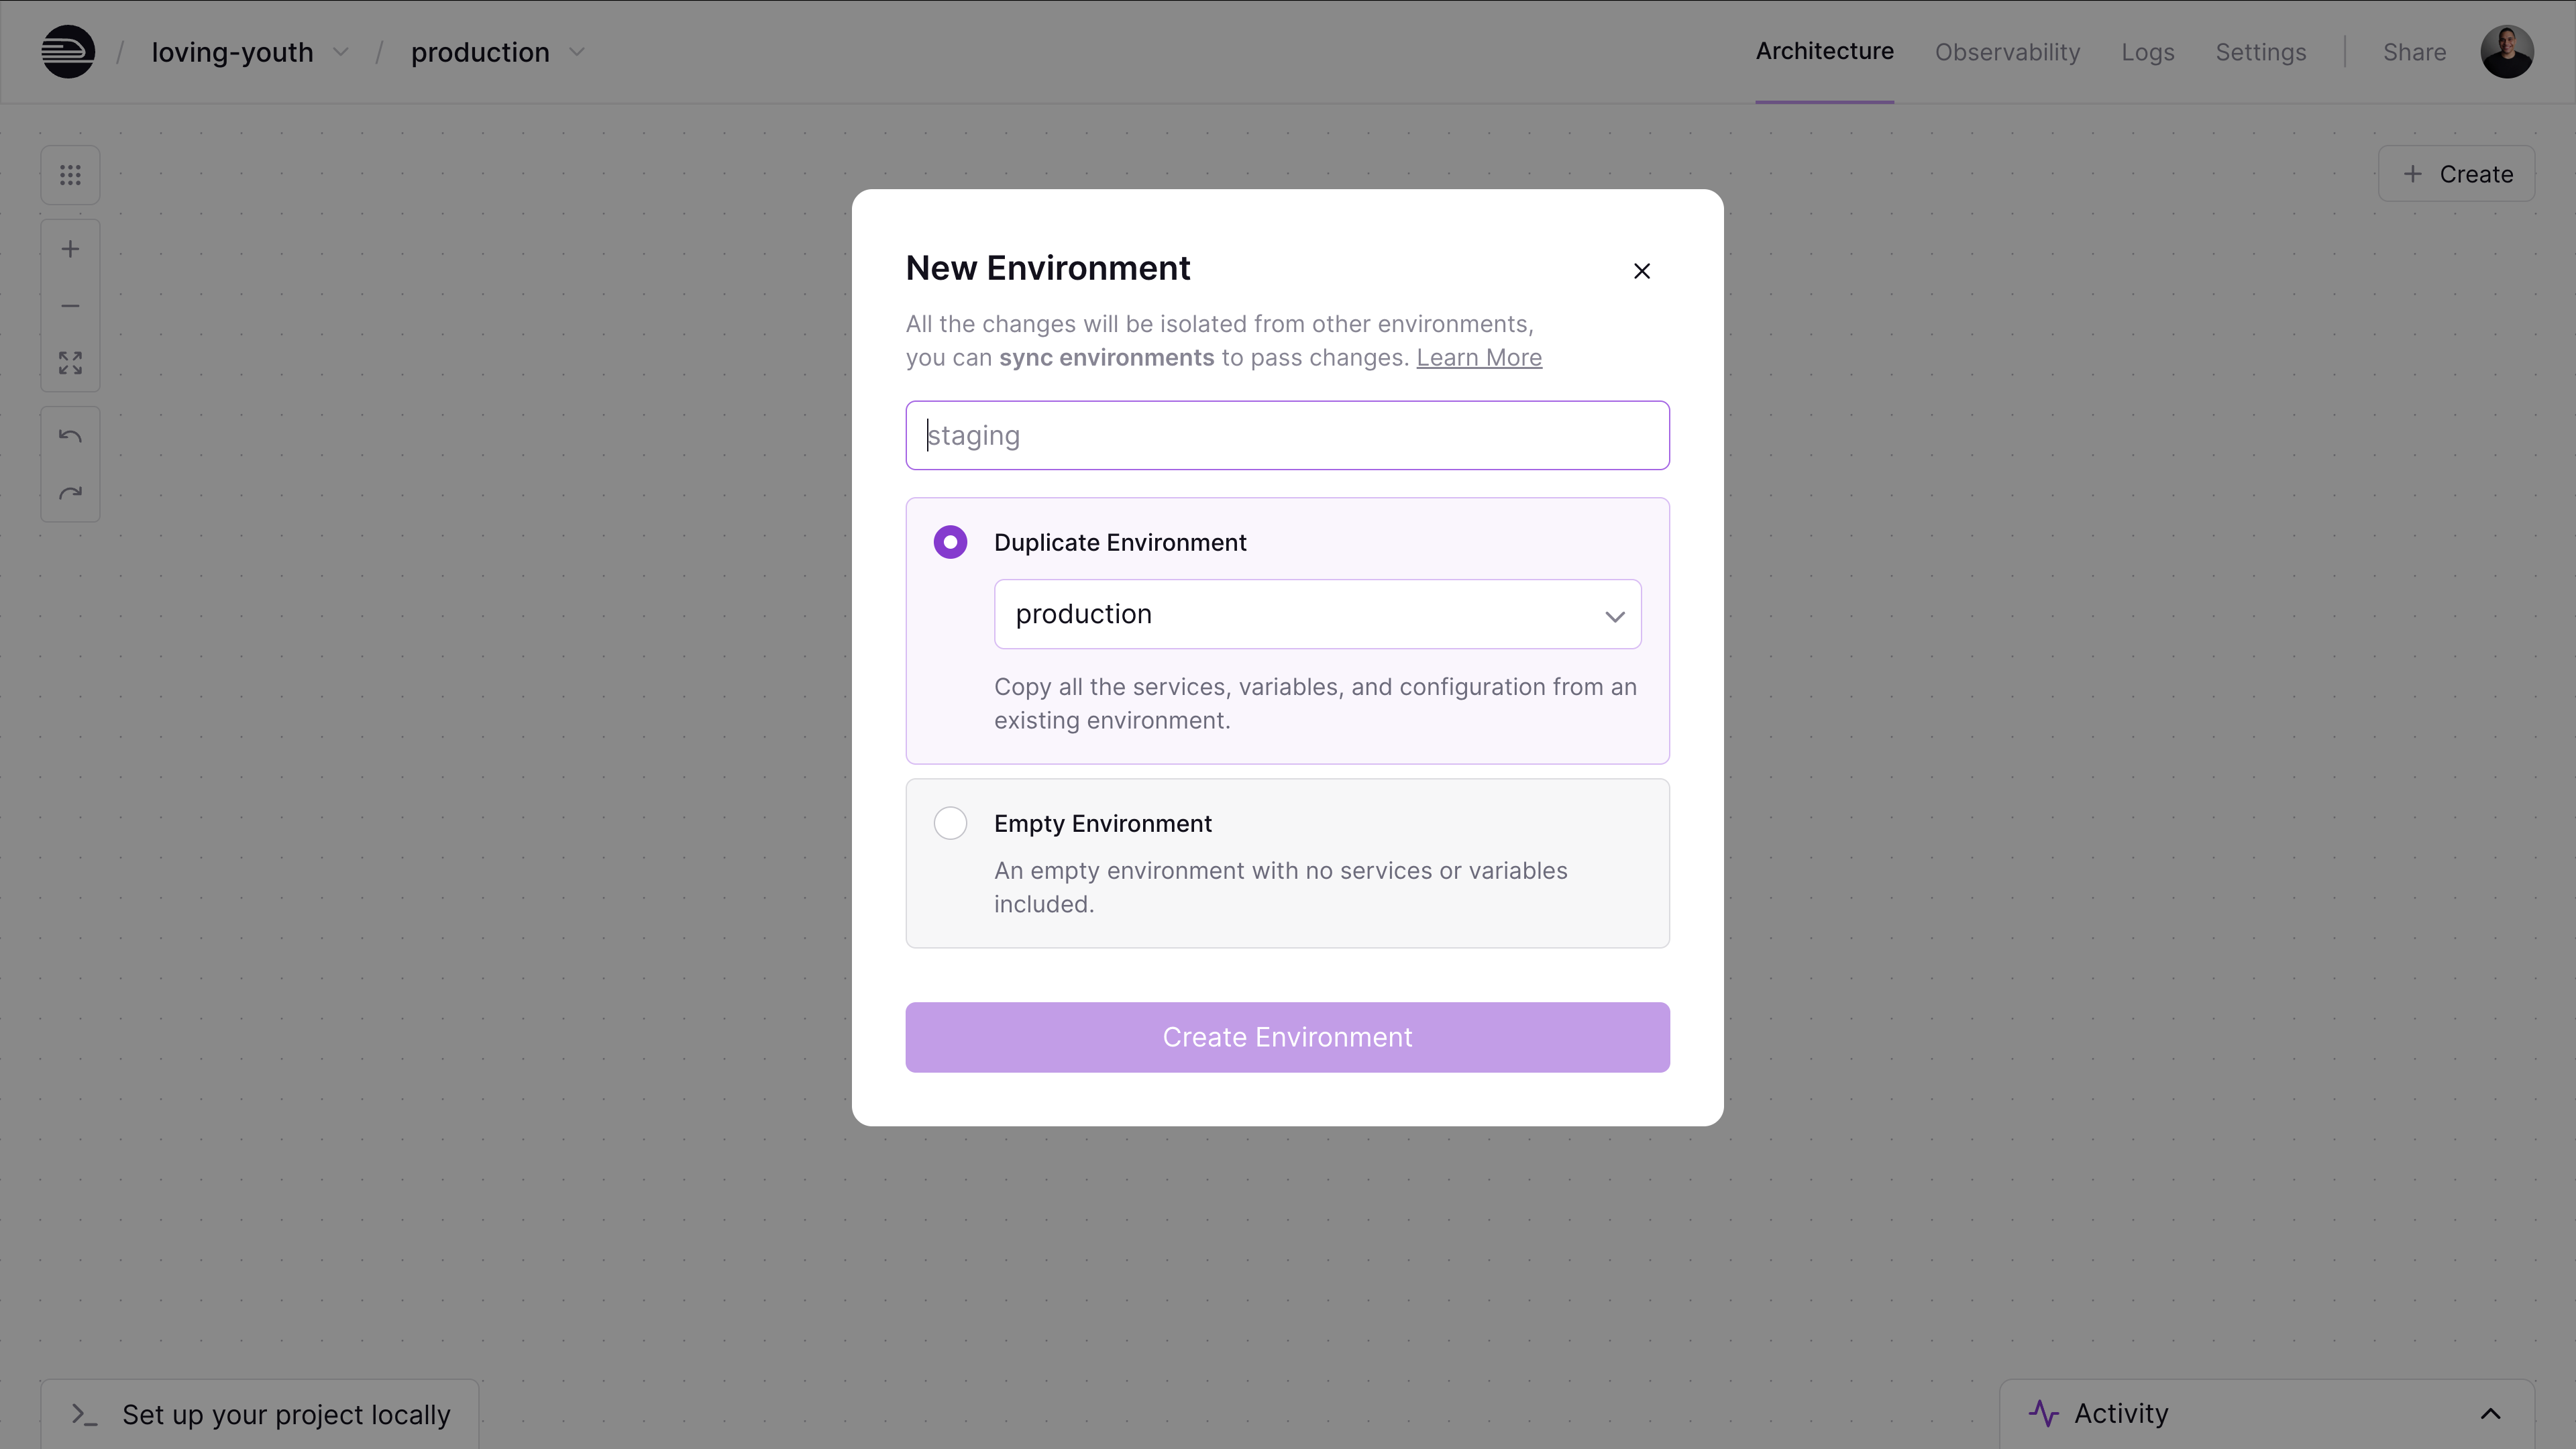
* Shared env vars across services
* Encrypted secret management
* Auto DB migrations/schema updates by customizing the pre-deploy command
#### Railway as a VPS alternative: migrate from VPS to Railway
To get started, [create an account on Railway](https://railway.com/new). You can sign up for free and receive $5 in credits to try out the platform.
##### Deploying your app
1. Choose "Deploy from GitHub repo", connect your GitHub account, and select the repo you would like to deploy.

2. If your project is using any environment variables or secrets:
1. Click on the deployed service.
2. Navigate to the “Variables” tab.
3. Add a new variable by clicking the “New Variable” button. Alternatively, you can import a `.env` file by clicking “Raw Editor” and adding all variables at once.

3. To make your project accessible over the internet, you will need to configure a domain:
1. From the project’s canvas, click on the service you would like to configure.
2. Navigate to the “Settings” tab.
3. Go to the “Networking” section.
4. You can either:
1. Generate a Railway service domain: this will make your app available under a `.up.railway.app` domain.
2. Add a custom domain: follow the DNS configuration steps.
#### Frequently asked questions
##### Do I still need a VPS if I use Railway?
For most applications, no. Railway gives you a dedicated environment with deploys, scaling, SSL, monitoring, and backups managed for you, so the work you'd do by hand on a VPS is built in. A VPS still makes sense when you need full control over the operating system and software stack, and you have the DevOps expertise to maintain it.
##### Is Railway more expensive than a VPS?
The raw server is often cheaper on a VPS (fixed prices in the $5-$50/mo range), but that price doesn't include the monitoring, backup, and scaling tooling you have to add, or the hours spent on patches, hardening, and outages. Railway bills $20/vCPU-month and $10/GB-month RAM per second of actual usage, plans start at $5/month, and the serverless feature sleeps idle services so they cost nothing while inactive. For workloads that don't run hot 24/7, the usage-based model frequently comes out ahead once operations time is counted.
##### Can I get SOC 2 compliance on a VPS?
You can, but it requires significant additional work: access controls, audit logging, incident response plans, penetration testing, and evidence collection are all your responsibility, which typically demands dedicated expertise. Railway is SOC 2 Type II certified and GDPR compliant out of the box, with automatic patching and DDoS protection included.
##### When does a VPS make more sense than Railway?
When you need full control over the OS, kernel, and software stack, or your team already has the infrastructure expertise and wants to manage everything directly. The trade-off is that server setup, security hardening, scaling, and monitoring all become your ongoing responsibility.
#### Need help or have questions?
If you need help along the way, the [Help Station](https://station.railway.com/) is a great resource to get support from the team and community.
Working with a larger workload or have specific requirements? [Book a call with the Railway team](https://cal.com/team/railway/work-with-railway) to explore how we can best support your project.
---
### Migrate from Heroku
Source: https://docs.railway.com/platform/migrate-from-heroku.md
Learn how to migrate your apps from Heroku to Railway with this step-by-step guide. Fast, seamless, and hassle-free.
Migrating your app from Heroku to Railway is very simple. We even support Procfiles out of the box. (Only a single process is supported for now).
All you need to do is create a project in Railway, push your code, and migrate your environment variables.
This guide will step you through the process of migrating a simple web service, using the [Railway CLI](/cli).
#### Working directory
In your terminal, ensure your current working directory is the same directory where your service code is located.
This is important so that as you complete the following steps, the [Railway CLI](/cli) is properly linked.
#### 1. Login to Railway from the CLI
Ensure your CLI is authenticated to your Railway account:
```bash
railway login
```
This command will prompt to open a browser to complete authentication. Once authenticated, commands executed by the Railway CLI, will be performed in the context of your Railway account.
#### 2. Create a new project
Now, let's create a new [project](/projects):
```bash
railway init
```
This command will prompt you to define a name for your service.
#### 3. Deploy the service
Once your project is created, you can push your code into the project and assign a domain.
##### Push the Code
Push the code into a [service](/services) in Railway:
```bash
railway up -d
```
At this point, the service is being deployed, but let's give it a domain.
##### Assign a domain
The service being migrated is a web service that should be available over the Internet, so let's assign a domain:
```bash
railway domain
```
Now the service will be available over the Internet via the provided domain.
#### 4. Migrate the environment variables
Finally, import the environment variables from Heroku into Railway.
##### Open the project in Railway
Let's pop over to your new project in the [Railway canvas](/projects#project-canvas).:
```bash
railway open
```
This will open the project in your browser.
##### Add Heroku variables to the service
From the project canvas, import the Heroku variables into the service:
- click on the service
- click `Variables` tab
- open the command palette using `CMD + K` or `Ctrl + K`.
- search for `Import variables from Heroku`
- confirm the Heroku service and hit `Enter`
Your Heroku variables will be imported into the service, and it will automatically redeploy.
_Note: The first time you import variables from Heroku, you will be prompted to Allow Railway to connect to your Heroku account._
#### Conclusion
Following this guide, you have successfully migrated a simple web service from Heroku to Railway, including importing variables from Heroku into Railway.
The migration is complete by pushing your code directly from your local machine into a service in Railway. Once you are comfortable with Railway, you may want to integrate [deployments](/deployments) into your development workflow.
For more advanced operations, like migrating your databases from Heroku to Railway, the process will be a bit more involved, but we are happy to help work out a solution!
#### Need help?
If you run into any issues, or would like help with your migrations, we would be more than happy to answer your questions on [Central Station](https://station.railway.com) or over email at [team@railway.com](mailto:team@railway.com).
### Migrate from Render
Source: https://docs.railway.com/platform/migrate-from-render.md
Learn how to migrate your apps from Render to Railway with this step-by-step guide. Fast, seamless, and hassle-free.
This guide walks you through the steps needed to seamlessly migrate your app and data from Render to Railway.
With features like instant deployments, CI/CD integrations, private networking, observability, and effortless scaling, Railway helps developers focus on building rather than managing infrastructure.
Railway boasts of a superior and intuitive user experience that makes deploying complex workloads easy to configure and manage.
Railway offers:
- **Broad Language and Framework Support**: Deploy apps in [any language or framework](/languages-frameworks).
- **Flexible Deployment Options**: Use GitHub, Dockerfiles, Docker images from supported registries (Docker Hub, GitHub, RedHat, GitLab, Microsoft), or local deployments via the Railway CLI.
- **Integrated Tools**: Simplify environment variable management, CI/CD, observability, and service scaling.
- **Networking Features:** Public and private networking.
- **Best in Class Support:** Very active community on the [Railway Help Station](https://station.railway.com/).
..and so much more. Want to see for yourself? [Try Railway for a spin today!](https://railway.com/new)
#### Migration steps
In this guide, we will migrate a Go (Beego) app with a Postgres database from Render to Railway.
Here’s the link to the app. A simple chat app that have the options of Long polling and Web socket: https://github.com/unicodeveloper/beego-WebIM
##### 1. Set up a Railway project
Navigate to [Railway's Project Creation Page](https://railway.com/new).
Select the **Deploy from GitHub Repo** option and connect your repository. If your Railway account isn’t linked to GitHub yet, you’ll be prompted to do so.
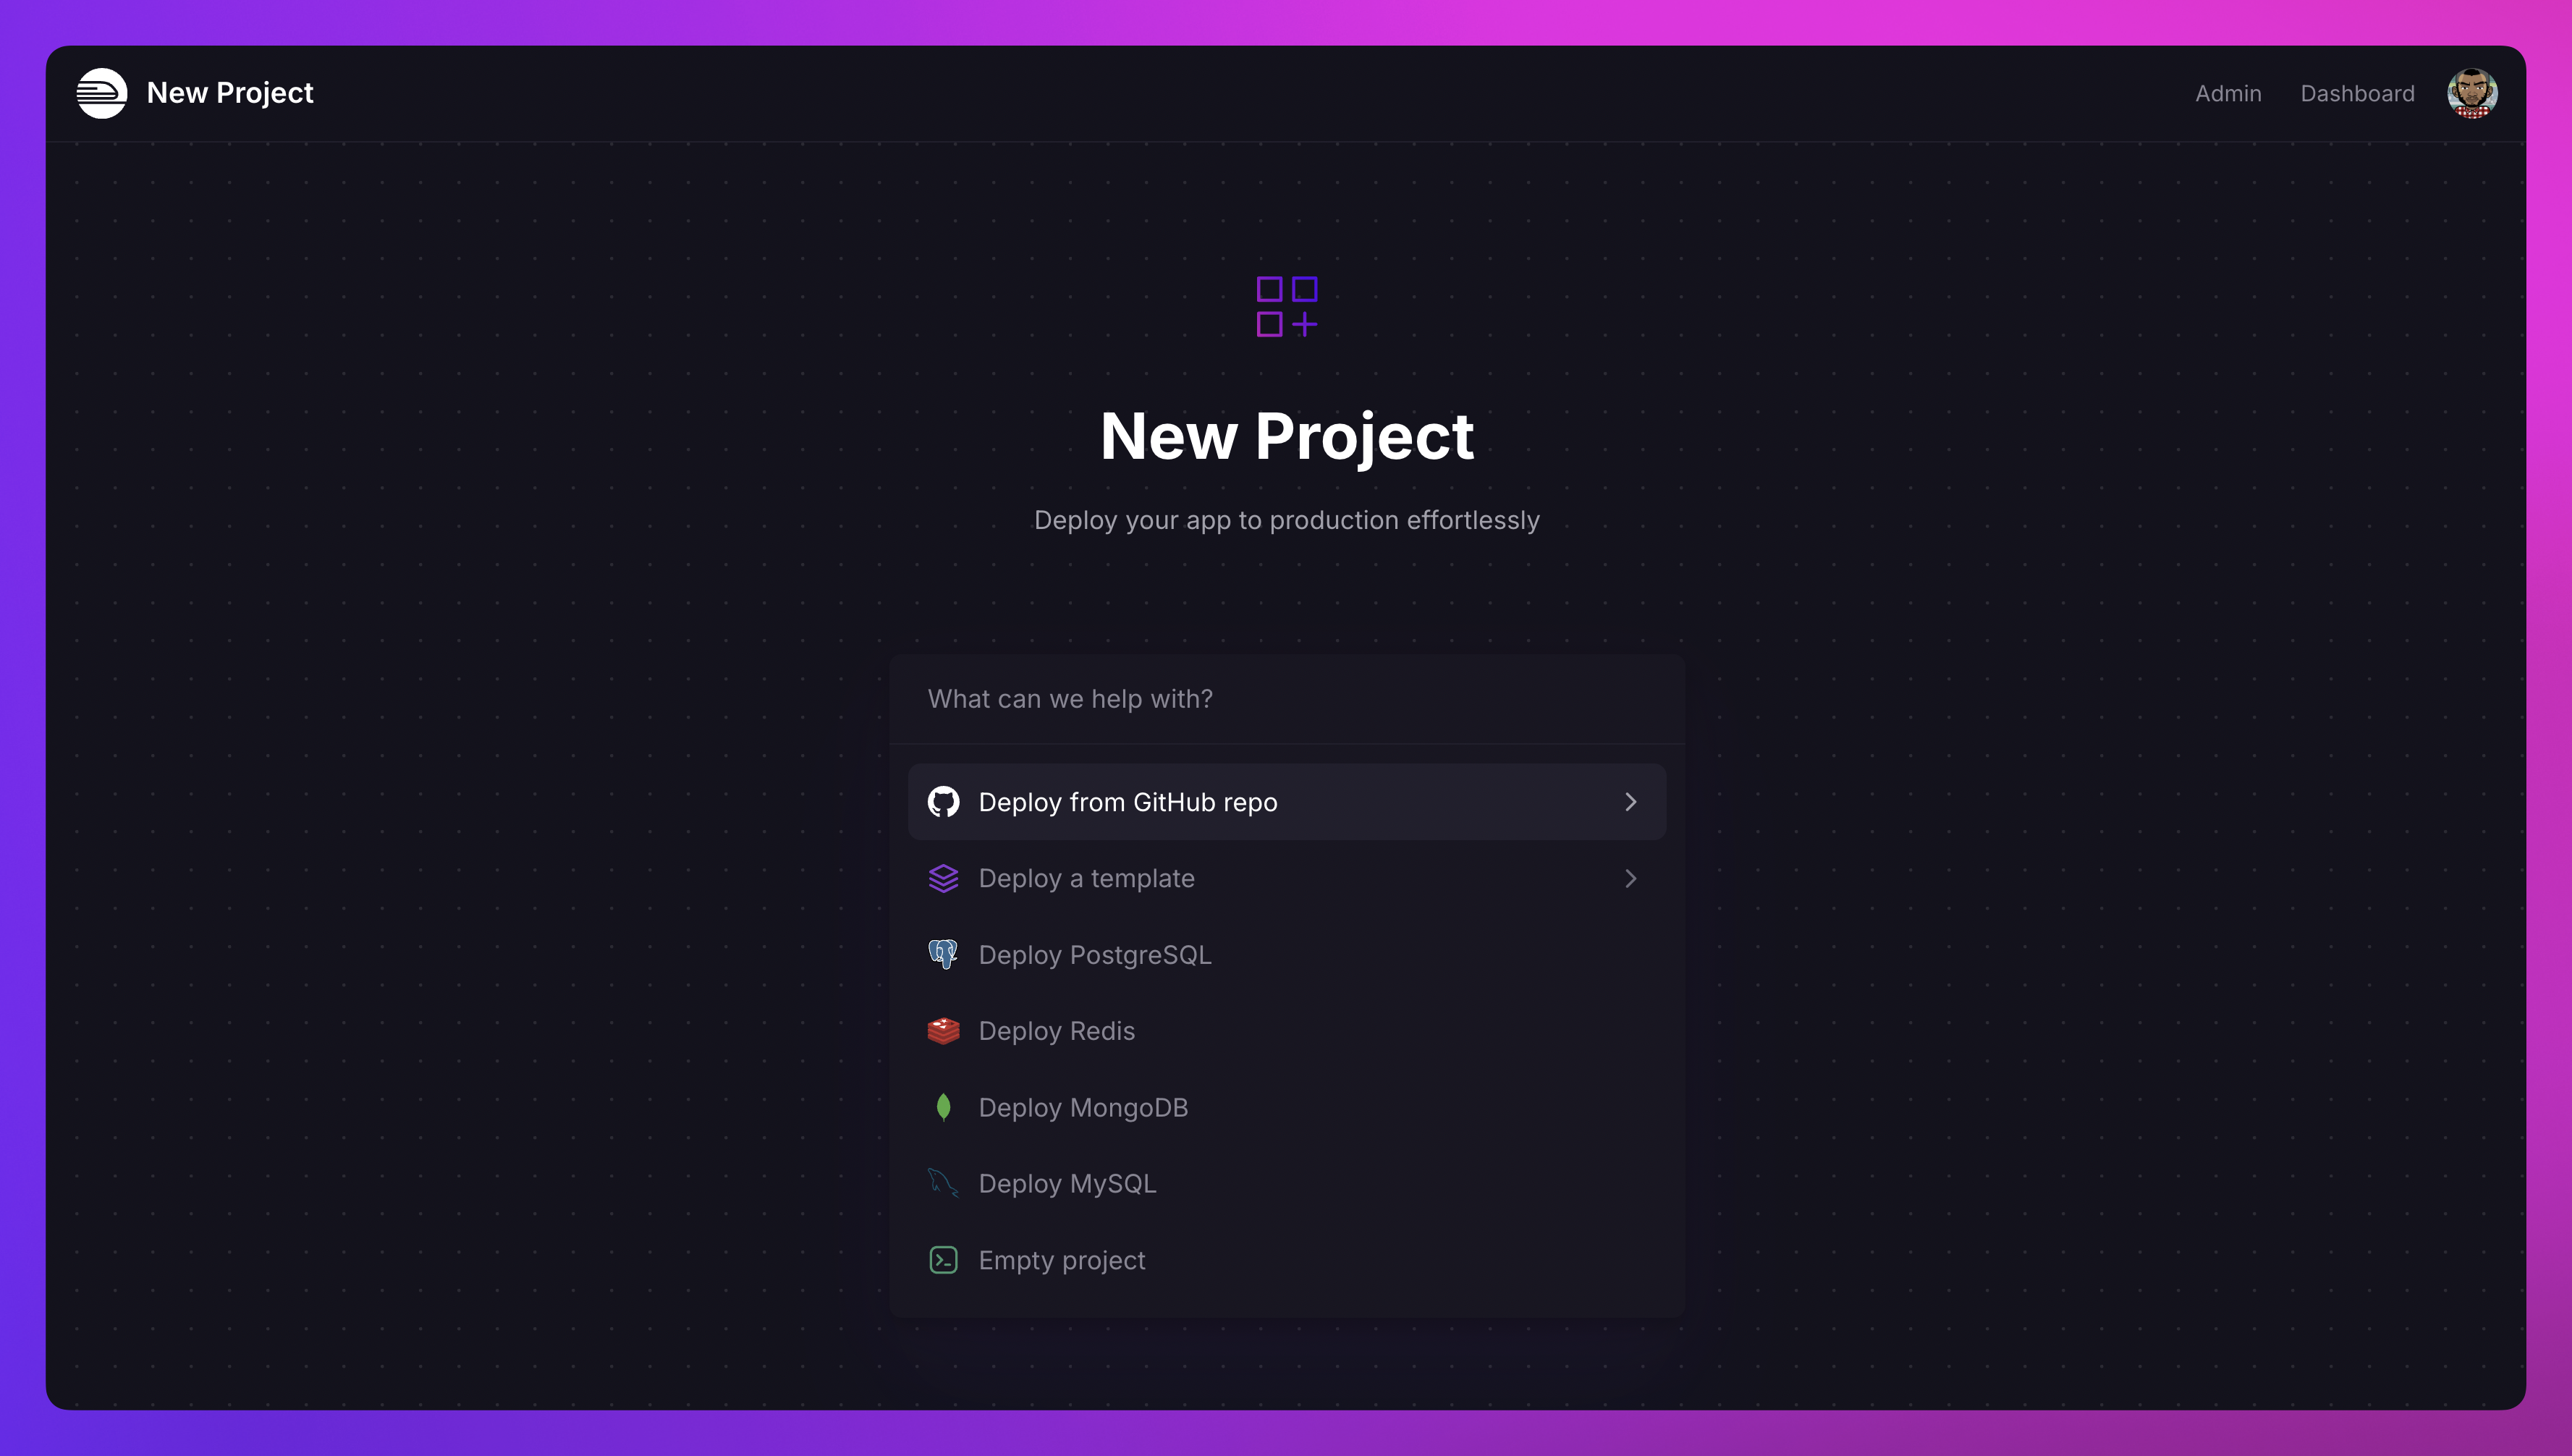
##### 2. Deploy the app
Railway automatically detects a `render.yaml` file in your repository and provisions the corresponding services, including databases, web (both public and private), crons, and workers.
If environment variables are defined in your `render.yaml`, Railway will import them automatically to the appropriate services. If they are not defined, you can manually migrate them by following these steps:
**On Render**:
1. Go to the **Environment Variables** page of your service.
2. Copy all the variables and their values.
**On Railway**:
1. Open the **Variables** section for the relevant service.
2. Switch to the **Raw Editor** and paste the copied environment variables.
3. Deploy the changes to apply the configuration.
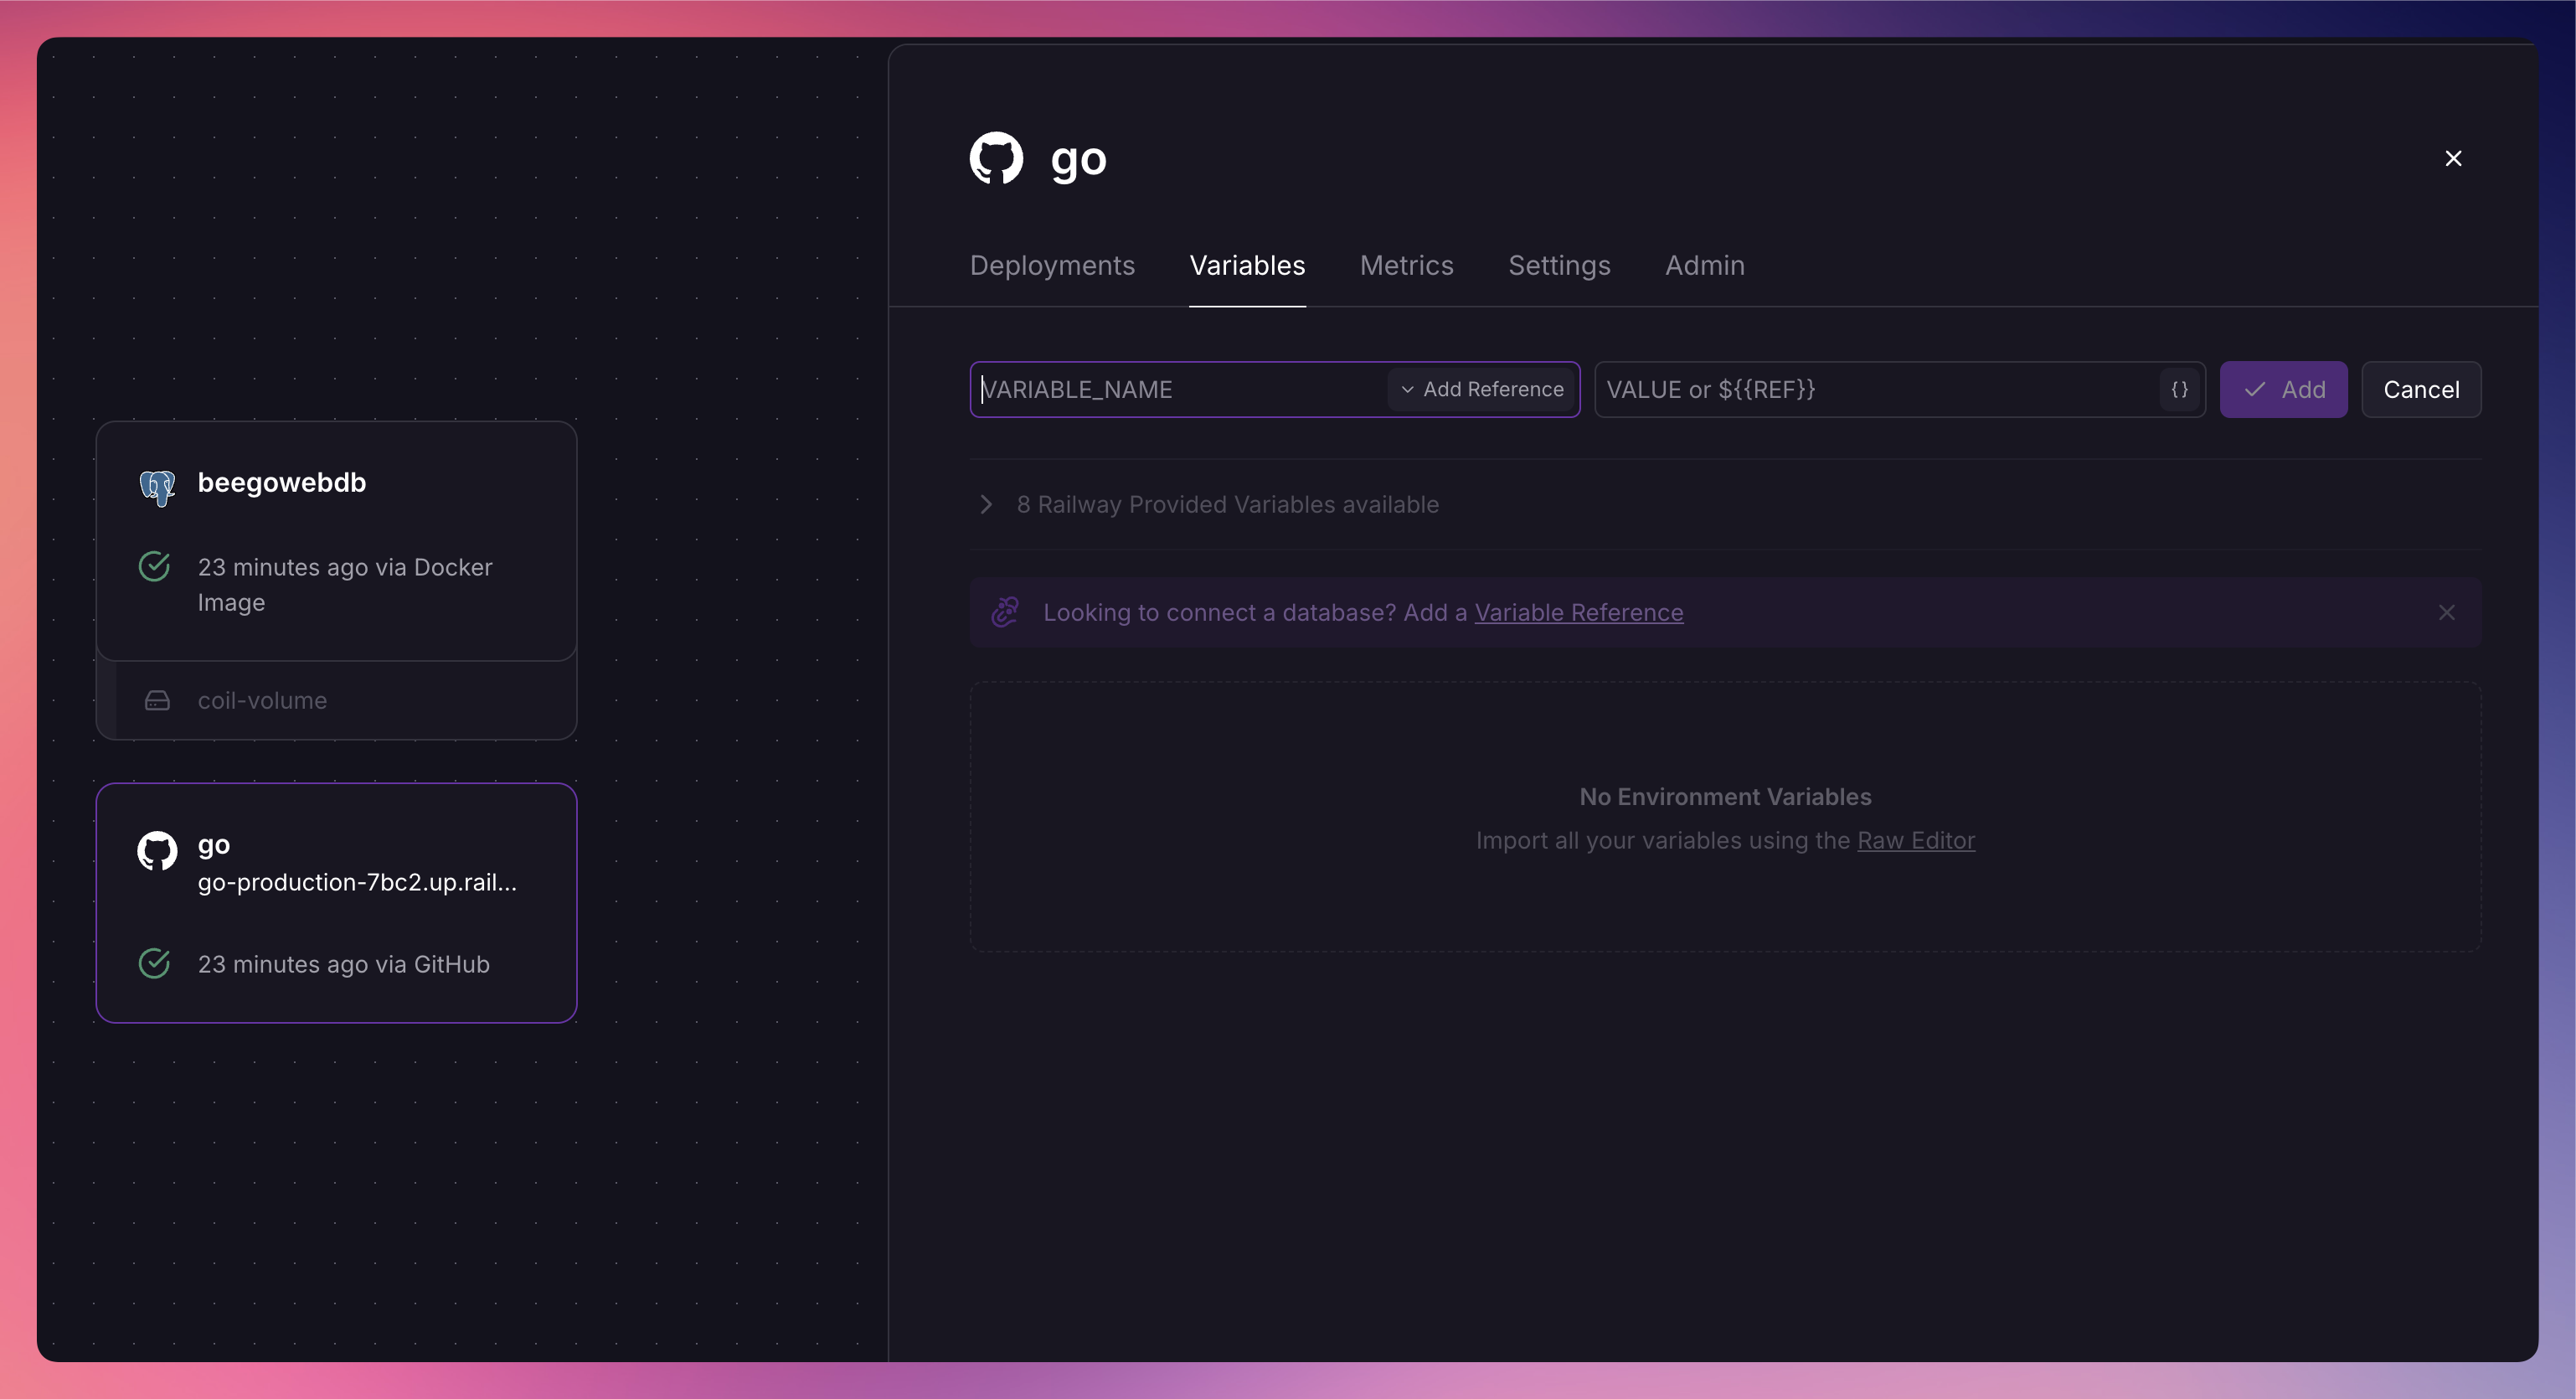
Railway will deploy both the Go app as a service and the database, as shown in the image above. You can monitor the service building and deploying in the [Project Canvas](/projects#project-canvas).
##### 3. Database migration
Railway supports a variety of databases, including **PostgreSQL**, **MongoDB**, **MySQL**, and **Redis**, allowing you to deploy the one that best fits your application needs.
When a `render.yaml` file includes a `databases` section, Railway will automatically provision a **PostgreSQL database** for your app. If you're migrating data to Railway, you can follow these steps:
1. Export your database from Render using tools like `pg_dump`.
2. Import the data into Railway using `psql`.
For detailed instructions, check out [this comprehensive tutorial on migrating PostgreSQL data between services.](https://blog.railway.com/p/postgre-backup)
Once the migration is complete, update the `DATABASE_URL` environment variable in your Railway app to point to the new PostgreSQL database.
##### 4. Multi-region deployments
If your app needs to use multi-region deployments, you can leverage Railway’s [multi-region replicas](/deployments/scaling#multi-region-replicas).
Enable this in the **Settings** section of your Railway service to keep your app close to users worldwide.
**Note:** Multi-region replicas is currently available to Pro users.
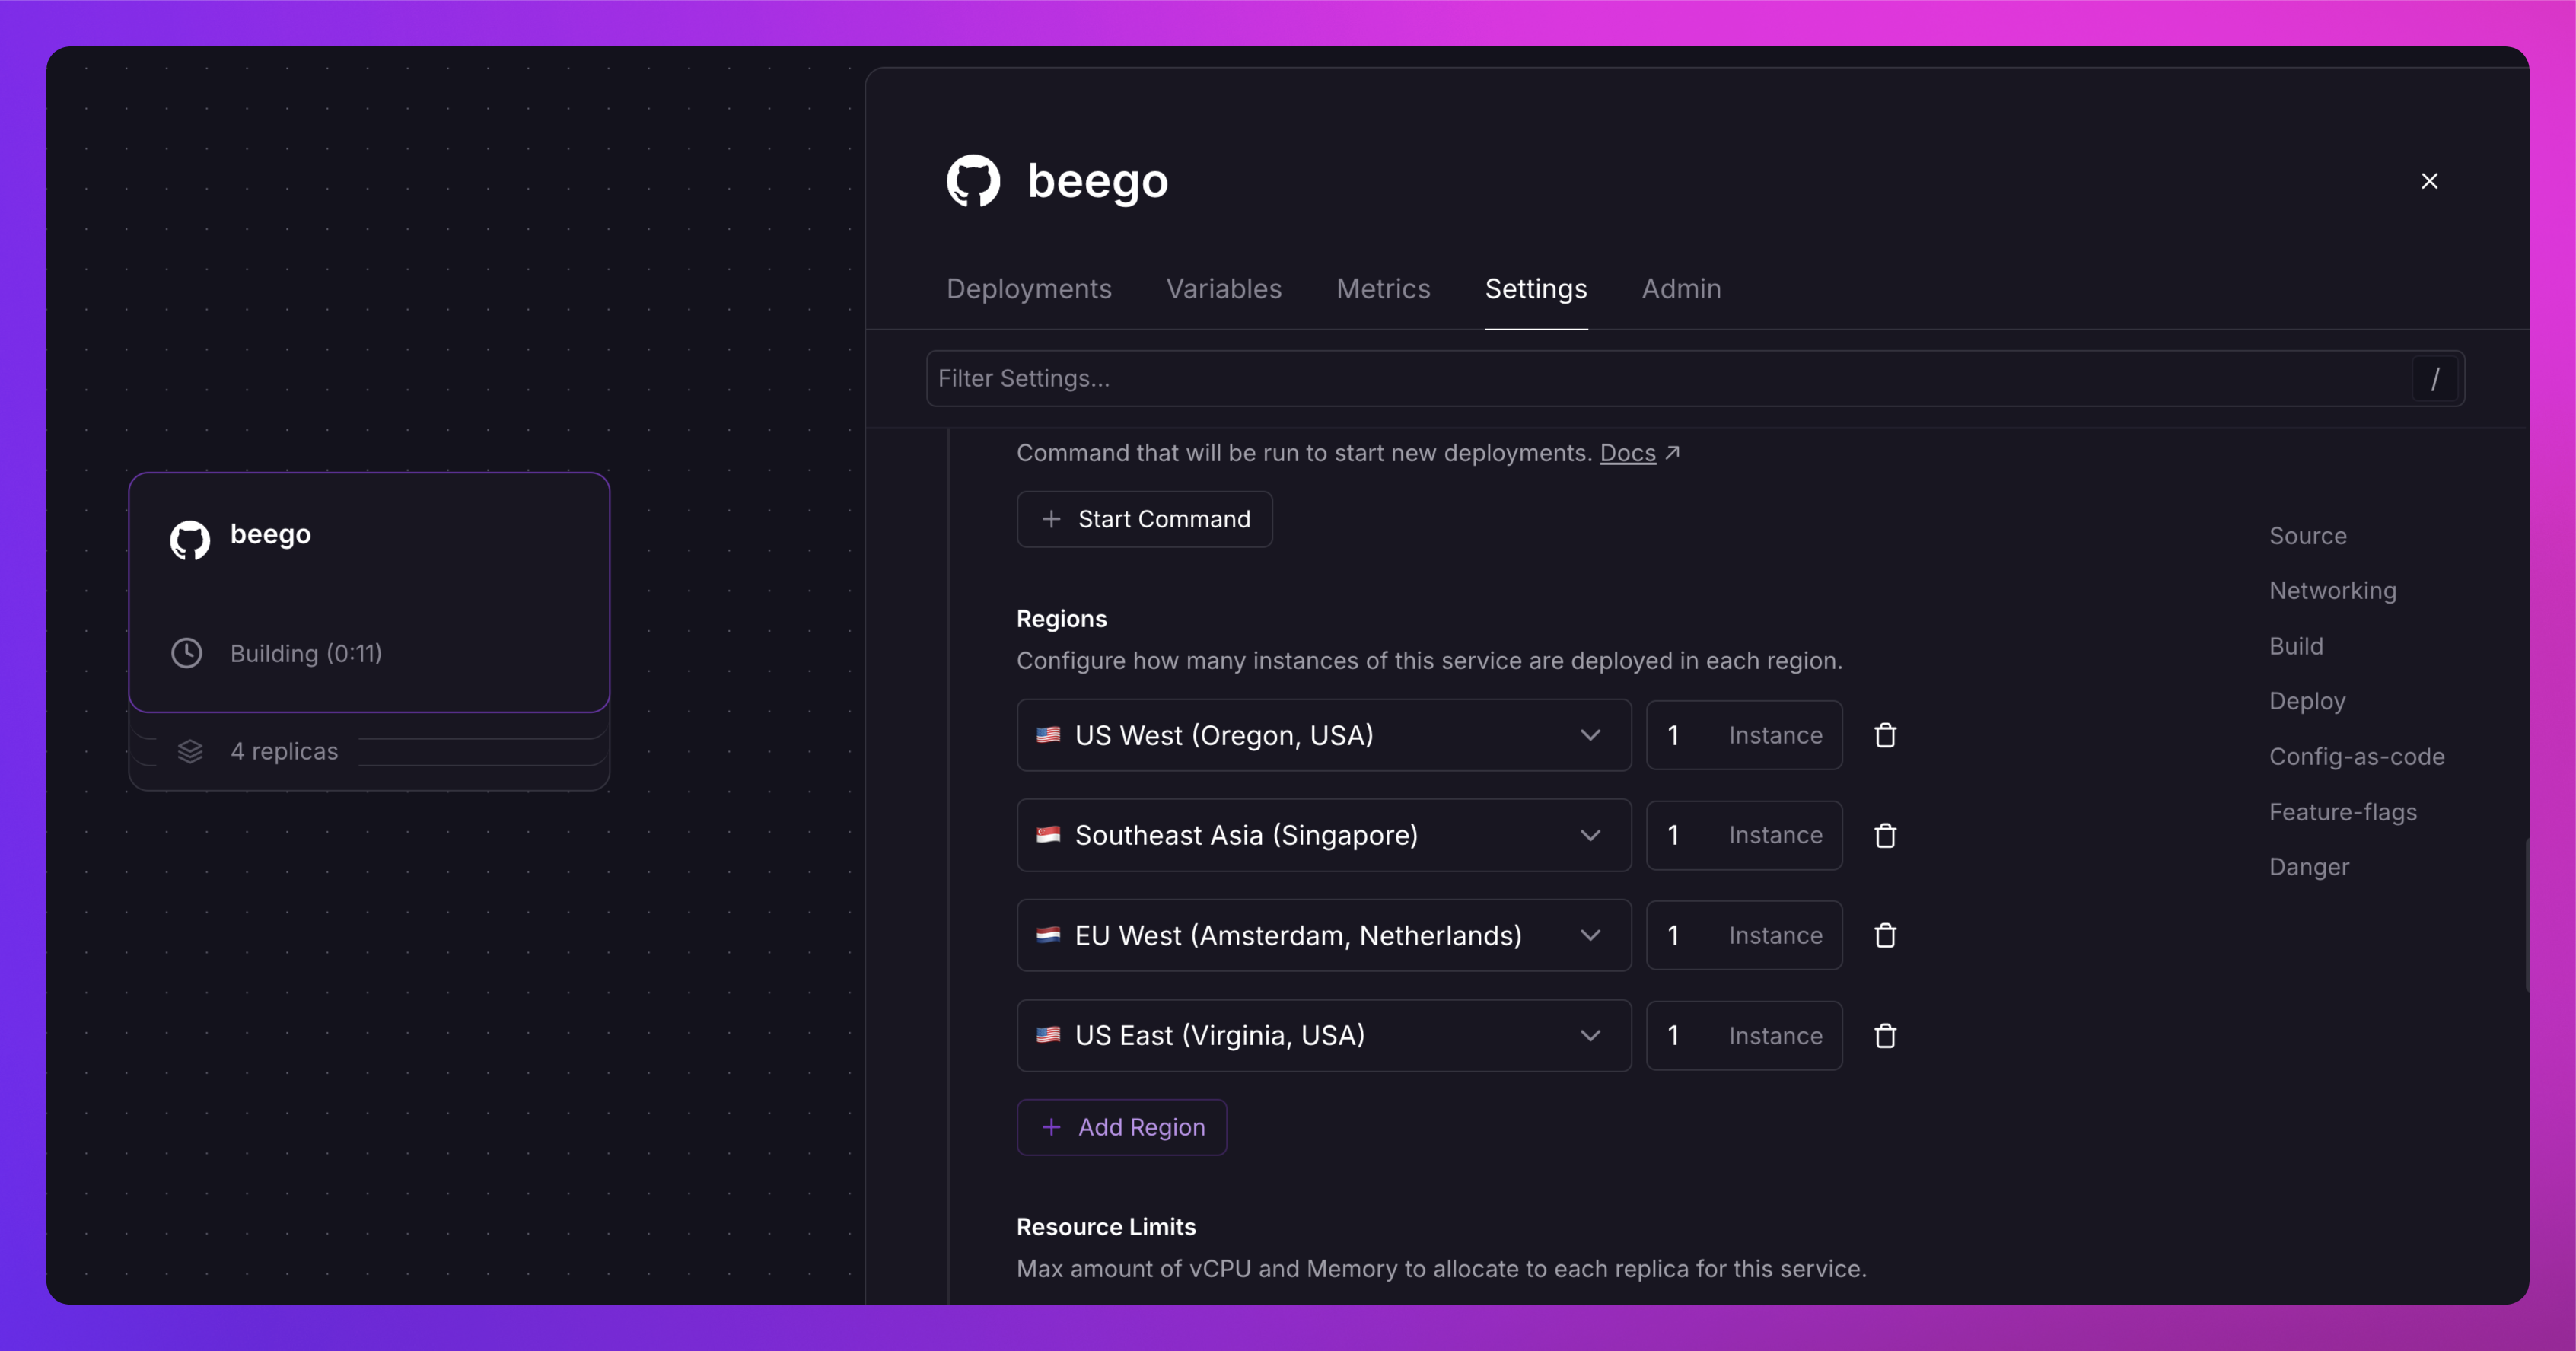
And that’s it. That’s all you need to migrate your app from Render to Railway.
### Migrate from Fly
Source: https://docs.railway.com/platform/migrate-from-fly.md
Learn how to migrate your apps from Fly.io to Railway with this step-by-step guide. Fast, seamless, and hassle-free.
This guide walks you through the steps needed to seamlessly migrate your app and data from Fly.io to Railway. This process is straightforward and typically takes an average of **5 - 20 minutes**, depending on the size of your database and app complexity.
**TL;DR: Quick Migration Steps**
- Set up new app on Railway
- Export data from Fly.io and Import into Railway DB
- Deploy app (including auto-migration of app config & variables)
We provide everything Fly.io offers and more! Check out the [comparison guide](/platform/compare-to-fly) to see the differences and make an informed choice.
Why take Railway's word for it? Experience the [Railway advantage yourself, give it a spin today!](https://railway.com/new)
#### Migration steps
In this guide, we will migrate a Go (Gin) app with a Postgres database from Fly.io to Railway. While we are using this app as an example, the process applies to any app, making it easy to transition your projects smoothly.
Here’s the link to the [app](https://github.com/unicodeveloper/gin).
##### 1. Set up a Railway project
Navigate to [Railway's Project Creation Page](https://railway.com/new).
Select the **Deploy from GitHub Repo** option and connect your repository. If your Railway account isn’t linked to GitHub yet, you’ll be prompted to do so.
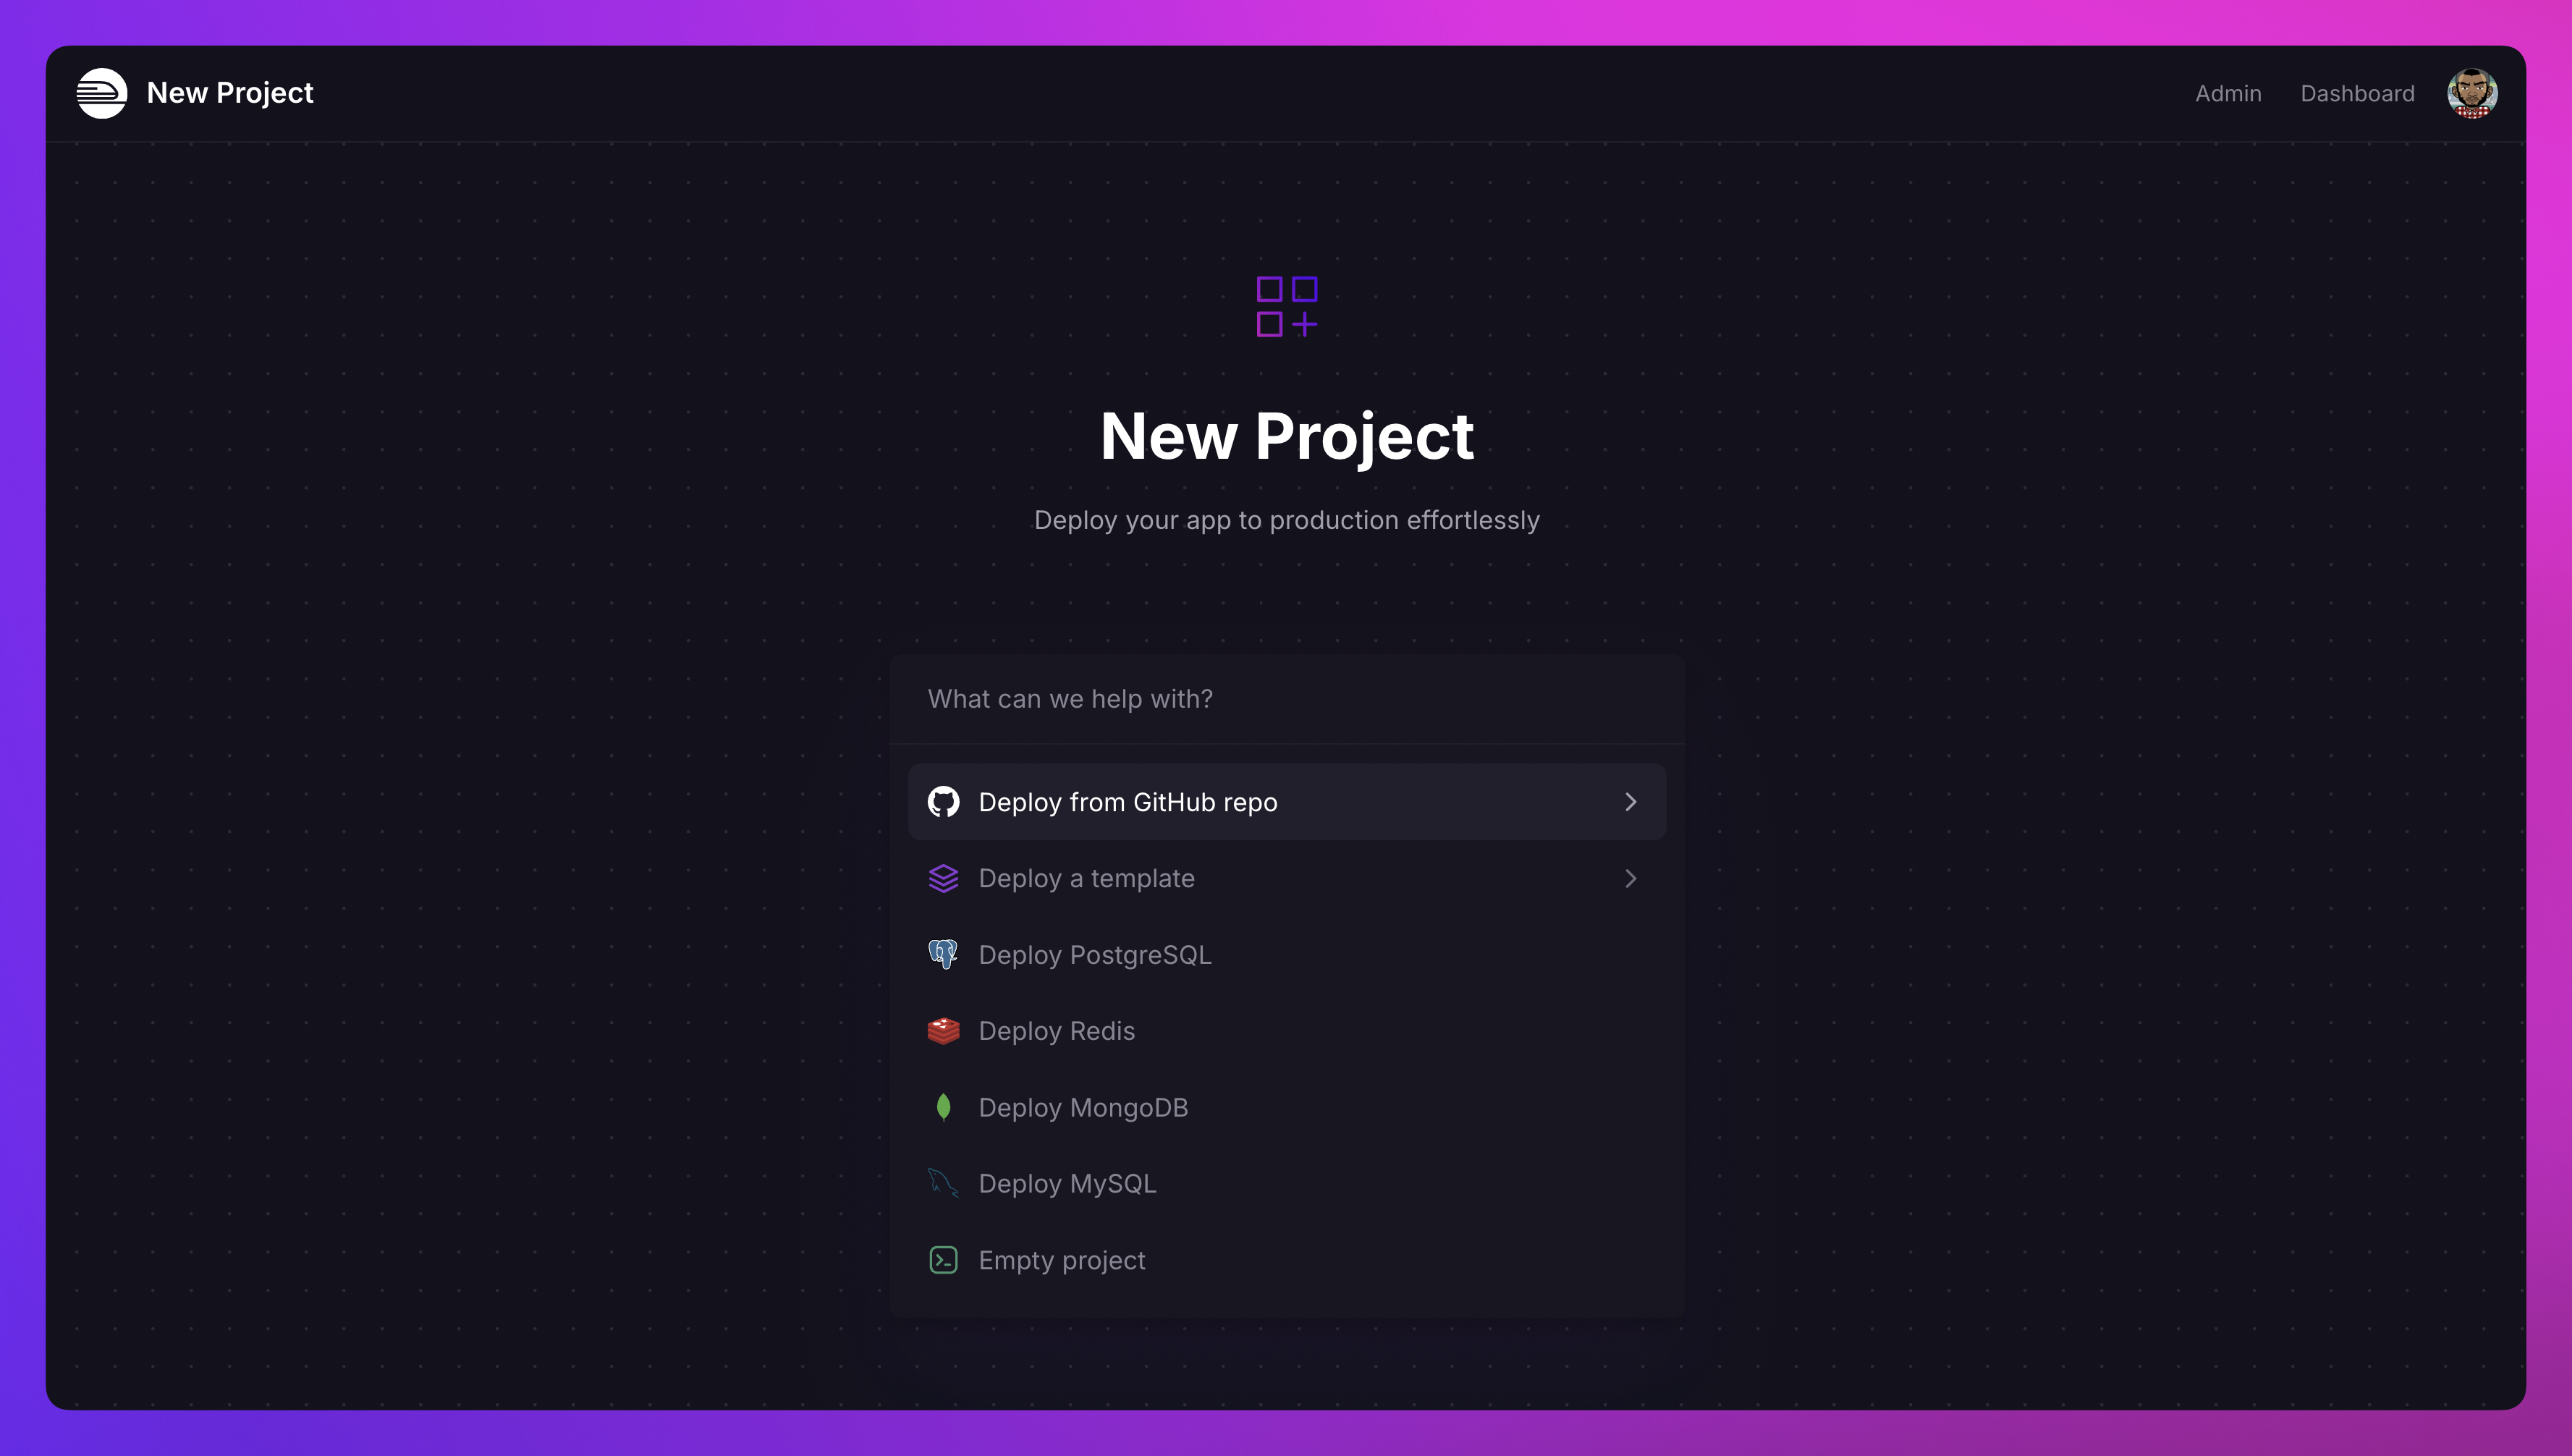
##### 2. Deploy the app
Railway auto-imports all the build configurations, deploy commands, environment variables from your Fly.io app repo. No manual setup needed.
If the environment variables are missing, you can easily add them manually by following these steps:
##### Adding environment variables on Railway:
1. Navigate to the **Variables** section of your service.
2. Switch to the **Raw Editor** and paste the copied environment variables.
3. Deploy the changes to apply the configuration.
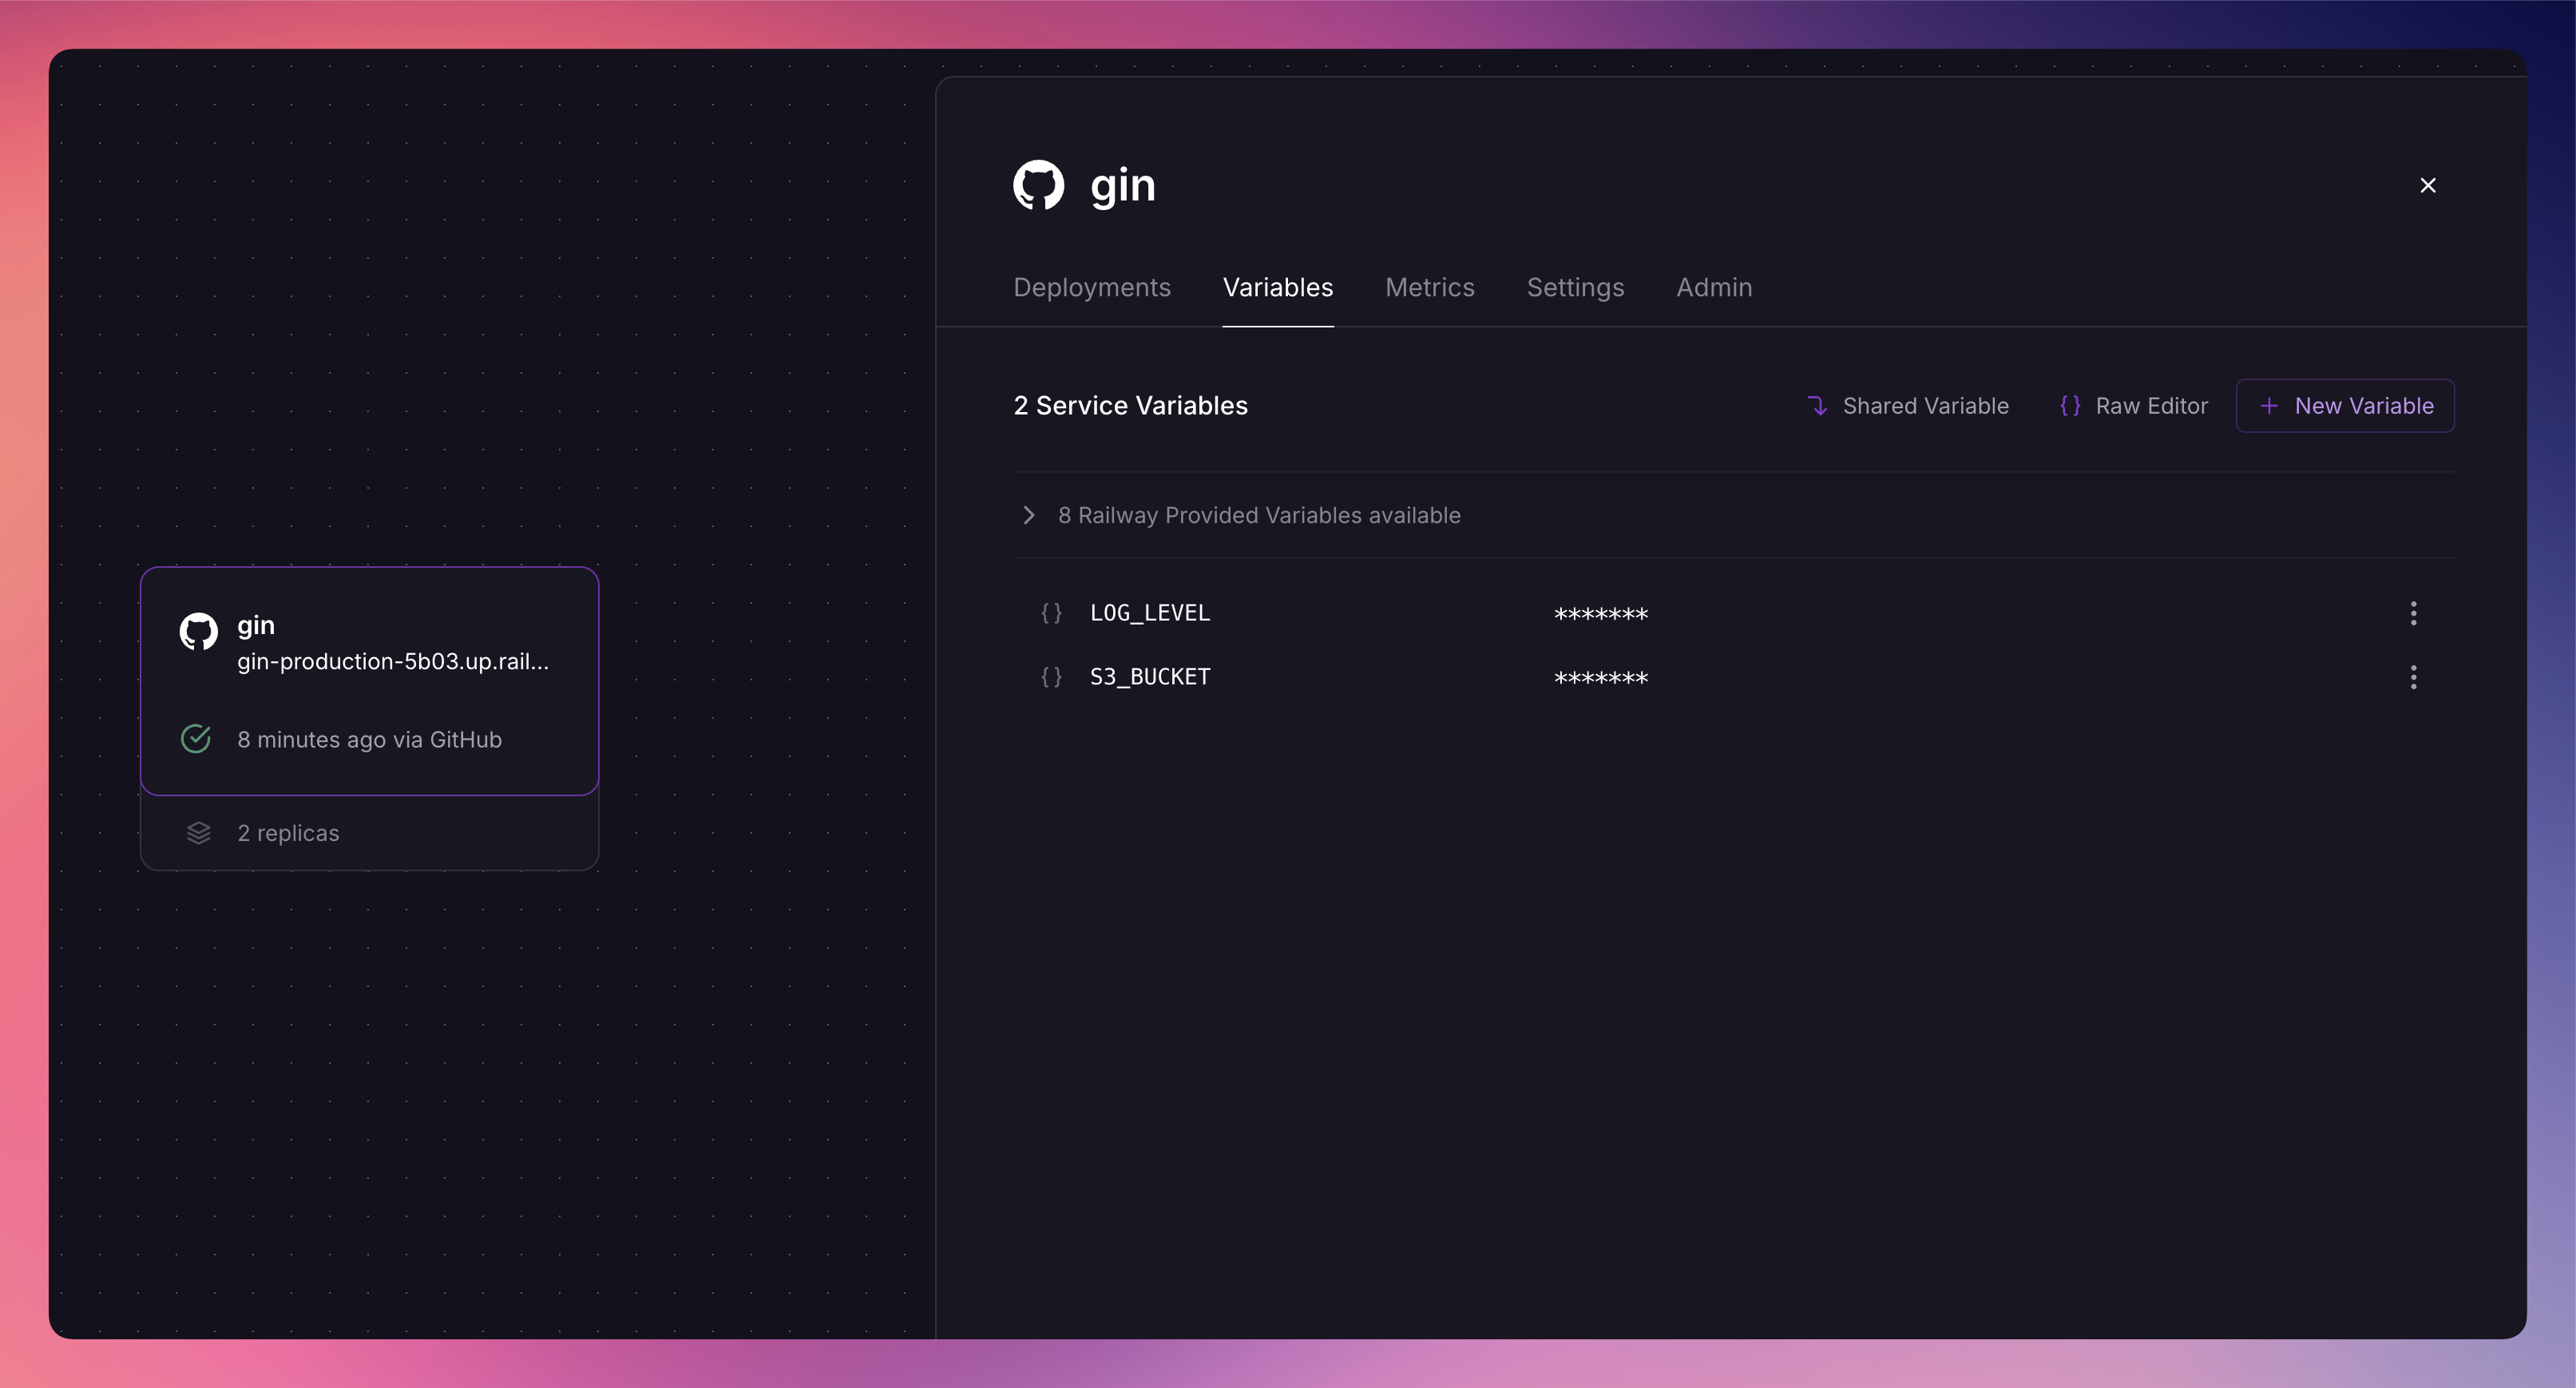
Railway will deploy the Gin app as a service, as shown in the image above. You can monitor the service building and deploying in the [Project Canvas](/projects#project-canvas).
[**Serverless (App Sleep) activated**](/deployments/serverless): In this [**Fly.io** app](https://github.com/unicodeveloper/gin/blob/main/fly.toml), the HTTP service is configured with **`auto_stop_machines='stop'`** and **`auto_start_machines=true`**, enabling automatic stopping and restarting of machines. On Railway import, we automatically enable this setting to effortlessly optimize resource usage.
##### 3. Database migration
Railway supports a variety of databases, including **PostgreSQL**, **MongoDB**, **MySQL**, and **Redis**, allowing you to deploy the one that best fits your application needs. We also support many more via the [templates marketplace](https://railway.com/templates).
If you're migrating data to Railway from Fly, you can follow these steps:
1. Provision a new database by right clicking on the dashboard canvas and selecting Postgres.
2. Export your data from Flyio
- Use `flyctl` to connect to your Flyio Postgres instance
- `fly postgres connect -a `
- Use `pg_dump` to export your database
- `pg_dump -Fc --no-acl --no-owner -h localhost -p 5432 -U -d -f flyio_db_backup.dump`
- Use `pg_restore` to connect to your Railway database and restore the data from the dump.
- `pg_restore -U -h -p -W -F t -d `
For detailed instructions, check out [this comprehensive tutorial on migrating PostgreSQL data between services.](https://blog.railway.com/p/postgre-backup)
Once the migration is complete, update the `DATABASE_URL` environment variable in your Railway app to point to the new PostgreSQL database and redeploy.
##### 4. Replicas & multi-region deployments
In this [Fly.io app](https://github.com/unicodeveloper/gin/blob/main/fly.toml), the setting **`min_machines_running=2`** ensures that at least **two instances** of the service remain active. On Railway import, we automatically translate this configuration to ensure that two **service instances** are running without any extra setup.
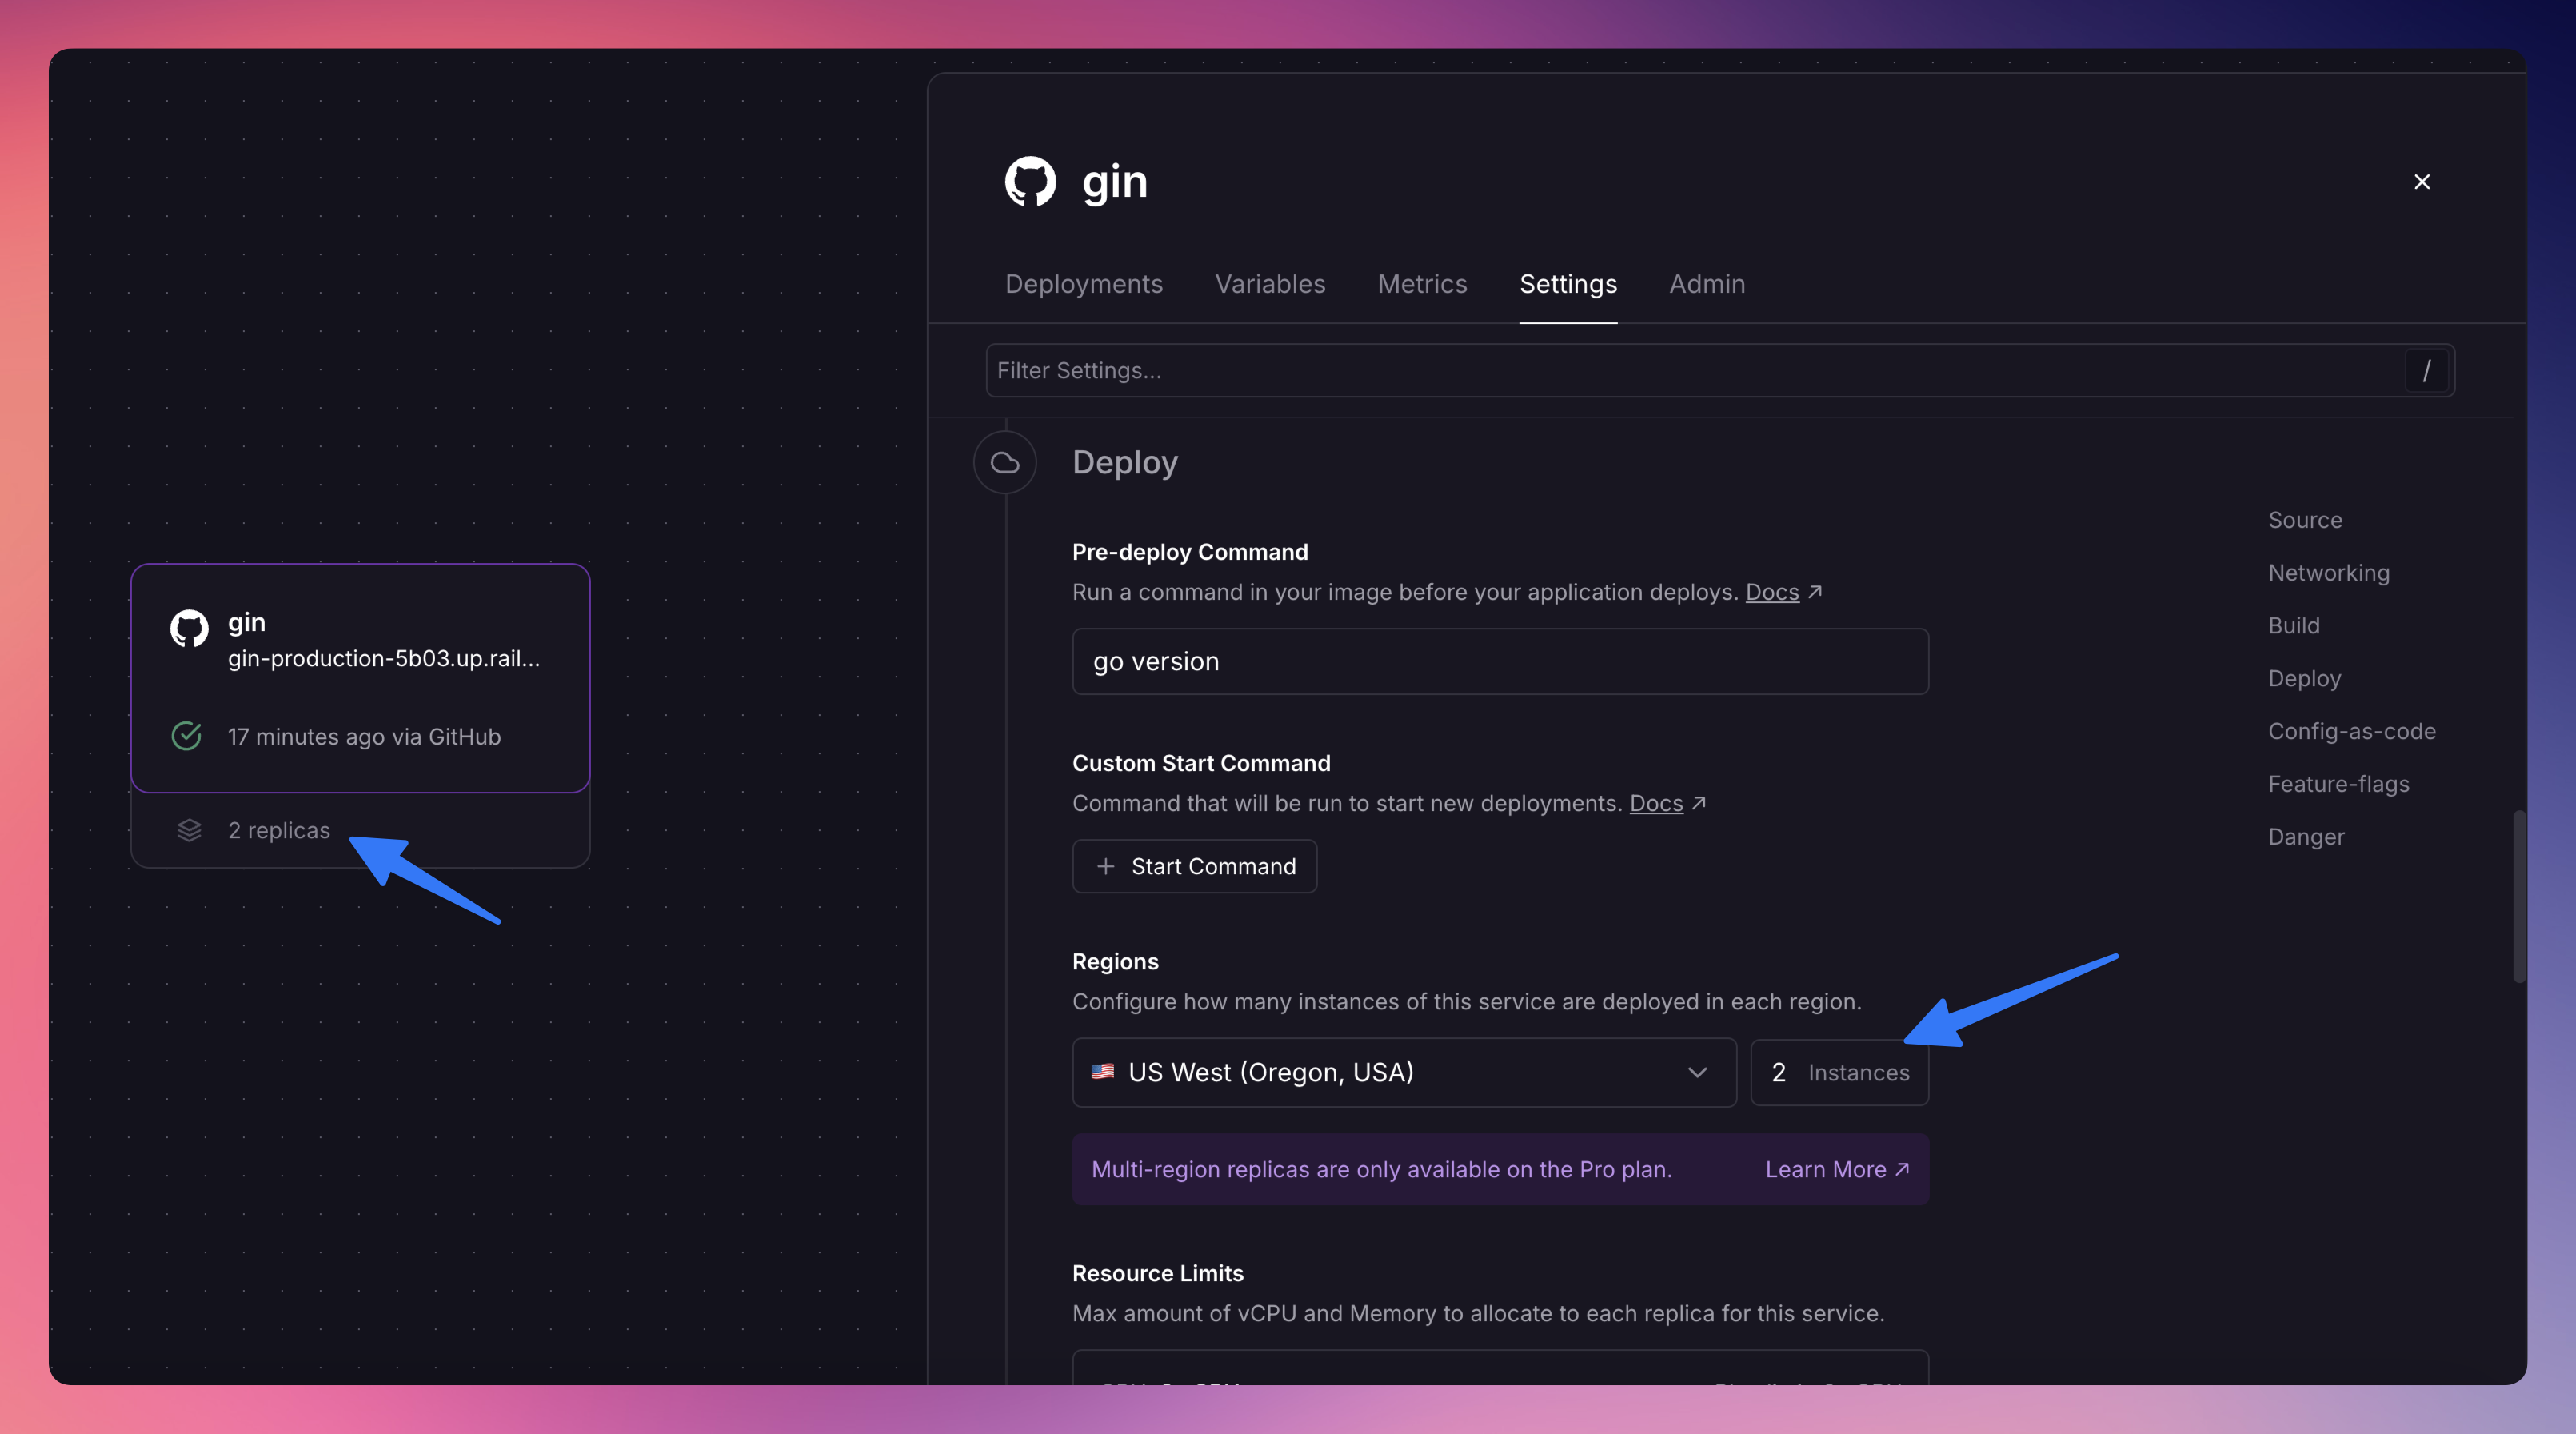
If your app needs to use multi-region deployments, you can leverage Railway’s [multi-region replicas](/deployments/scaling#multi-region-replicas).
Enable this in the **Settings** section of your Railway service to keep your app close to users worldwide.
**Note:** Multi-region replicas is currently available to Pro users.
And that’s it. That’s all you need to migrate your app from Flyio to Railway.
### Migrate from Vercel
Source: https://docs.railway.com/platform/migrate-from-vercel.md
Learn how to migrate your Next.js app from Vercel to Railway with this step-by-step guide. Fast, seamless, and hassle-free.
This guide demonstrates how to transition your application from Vercel to Railway's developer-centric platform. Whether you're running a simple static site or a complex full-stack application, Railway streamlines your deployment workflow.
With features like instant rollbacks, integrated observability, and seamless environment management, Railway empowers developers to focus on building great applications rather than managing infrastructure.
Railway offers -
- **Next.js Optimization**: Built-in support for all Next.js features including ISR, SSR, and API routes
- **Zero Config Deployments**: Automatic framework detection and build optimization
- **Enhanced Development Flow**: Local development with production parity
- **Collaborative Features**: Team management, deployment protection, and role-based access
- **Priority Support**: Dedicated support for Railway users
#### Migration steps
Let's walk through migrating a Next.js application to Railway. For this guide, you'll use a sample e-commerce app that showcases common Next.js features and configurations.
##### Deploying your application
To get started deploying your NextJS app, first create a new project.
- Open up the dashboard → Click **New Project**.
- Choose the **GitHub repo** option.
_Railway requires a valid GitHub account to be linked. If your Railway account isn't associated with one, you will be prompted to link it._
- Search for your GitHub project and click on it.
- Choose either **Deploy Now** or **Add variables**.
**Deploy Now** will immediately start to build and deploy your selected repo.
**Add Variables** will bring you to your service and ask you to add variables, when done you will need to click the **Deploy** button at the top of your canvas to initiate the first deployment.
_For brevity, choose **Deploy Now**._
When you click **Deploy Now**, Railway will create a new project for you and kick off an initial deploy after the project is created.
**Once the project is created you will land on your Project Canvas**.
From here Railway will automatically -
- Detect your Next.js configuration
- Configure the appropriate Node.js version
- Build your application
- Run your application
##### Environment configuration
Next.js applications often rely on environment variables for API keys, database connections, and feature flags. Here's how to transfer them -
**From Vercel -**
1. Visit your Vercel project settings
2. Navigate to the Environment Variables tab
3. Export your variables (you can copy them directly)
**To Railway -**
1. Select your service in the Project Canvas
2. Open the Variables tab
3. Use the Raw Editor for bulk variable import
4. Click Deploy to apply changes
##### Domain configuration
Railway makes it simple to set up custom domains or use Railway-provided domains -
1. Open your service's Settings
2. Navigate to the Public Networking section
3. Choose between:
- Generating a Railway service domain
- Adding your custom domain
4. Follow the DNS configuration steps if using a custom domain
##### Deployment verification
Before finalizing your migration:
1. Check your application's core functionality
2. Verify environment variables are properly set
3. Test dynamic routes and API endpoints
4. Confirm image optimization is working
5. Monitor build and runtime logs
Railway's integrated observability helps you catch any issues early in the migration process.
##### Local development
Railway makes local development seamless with your production environment:
1. Install the Railway CLI: `npm i -g @railway/cli`
2. Run `railway link` to connect to your project
3. Use `railway run` to start your app locally with production variables
This ensures development/production parity and helps catch issues before they reach production.
That's all it takes to move your Next.js application to Railway! Need help? The [team and community](https://station.railway.com/) are always ready to assist.
Need more information on how we compare to Vercel? Check out the [comparison page](/platform/compare-to-vercel).
### Migrate from DigitalOcean
Source: https://docs.railway.com/platform/migrate-from-digitalocean.md
Learn how to migrate your WordPress site from DigitalOcean to Railway with this step-by-step guide. Fast, seamless, and hassle-free.
This guide demonstrates how to migrate your WordPress site from DigitalOcean to Railway's modern cloud platform. Railway provides a streamlined deployment experience with powerful infrastructure features.
Railway offers:
- **Modern Infrastructure**: High-performance cloud platform
- **Quick Setup**: WordPress-ready deployment template
- **Database Support**: MariaDB database capabilities
- **Integrated SSL**: Automatic SSL certificate management
- **Scalable Infrastructure**: Easily handle traffic spikes and growth
- **Collaborative Features**: Team management, deployment protection, and role-based access
- **Priority Support**: Dedicated support for Railway users
#### Migration steps
Let's walk through migrating a WordPress site from DigitalOcean to Railway. This process involves backing up your existing installation, deploying WordPress on Railway and then restoring from your backup.
##### 1. Backup your WordPress site
- Ensure you have a backup of your existing site. Use a WordPress backup plugin of your choice to export your site data.
Make sure this backup includes, All WordPress files, All WordPress database tables, All WordPress uploads.
- Document your current configuration
- Note any custom domain settings
- Keep track of your username and password for wp-admin.
##### 2. Deploy WordPress
- Open the [WordPress Template](https://railway.com/deploy/EP4wIt) page
- Click "Deploy Now" to Deploy the WordPress template.
- Since this template doesn’t require any configuration, Click "Deploy" and wait for the deployment to complete.
The template will automatically configure -
- A MariaDB database
- Initial WordPress setup
- Required environment variables
- A temporary service domain
##### 3. Restore your site content
After the template deployment completes -
1. Access your WordPress installation via the temporary service domain.
2. Configure your WordPress settings
3. Install your preferred backup plugin
4. Restore your site content from your backup
##### 4. Configure domain settings
To set up your custom domain:
1. Open your service's Settings in Railway
2. Navigate to the "Networking" section
3. Add your custom domain
4. Update your DNS records according to the instructions given.
**Note:** You will need to redeploy your service for WordPress to pick up the new domain.
##### 5. Verify migration
Before finalizing your migration -
1. Test all WordPress functionality
2. Verify all pages and posts are displaying correctly
3. Check media files are properly loaded
4. Test user authentication
5. Verify contact forms and other interactive elements
##### 6. Performance optimization
Consider these optimization options for your WordPress deployment:
- Configure caching by placing Cloudflare or a similar CDN in front of your site.
- Optimize database performance by setting up a caching plugin.
- Set up appropriate scaling configurations.
- Implement CDN if needed
That's all you need to migrate your WordPress site from DigitalOcean to Railway! Need assistance? The [Central Station](https://station.railway.com/) is there to help you with any questions during your migration process.
### Migrate from Replit
Source: https://docs.railway.com/platform/migrate-from-replit.md
Step-by-step guide to migrate a Replit project to Railway. Covers code export, environment variables, database migration, and deployment configuration.
This guide covers how to move a project from Replit to Railway, including code export, environment variables, database migration, and deployment configuration.
#### Prerequisites
- A Railway account
- A GitHub account
- Access to your Replit project
- The [Railway CLI](/cli) installed (optional, but useful for database migration)
#### 1. Export your code from Replit
Your code needs to be in a GitHub repository before you can deploy it on Railway.
**If your Replit project is already connected to GitHub:**
No export is needed. You will connect the same repository to Railway in the next step.
**If your Replit project is not connected to GitHub:**
1. In Replit, open your project and click the three-dot menu in the file tree.
2. Select **Download as zip**.
3. Create a new repository on GitHub.
4. Unzip the downloaded project and push the code to your new repository:
```bash
cd your-project
git init
git add .
git commit -m "Initial commit"
git remote add origin https://github.com/your-username/your-repo.git
git branch -M main
git push -u origin main
```
Remove the `.replit` and `replit.nix` files from your repository before pushing: Railway does not use them.
#### 2. Create a Railway project
1. Go to railway.com/new.
2. Select **Deploy from GitHub Repo**.
3. Connect your GitHub account if you have not already, then select the repository containing your code.
Railway creates a new project with a service linked to your repository. Pushes to your default branch will trigger deployments automatically.
#### 3. Configure environment variables
Replit stores environment variables in the **Secrets** tab. You need to copy these into Railway.
1. In Replit, open the **Secrets** tab and note each key-value pair.
2. In Railway, click on your service and go to the **Variables** tab.
3. Add each variable individually, or click **Raw Editor** to paste multiple variables at once in `KEY=VALUE` format.
After saving, Railway redeploys the service with the updated variables.
If your Replit project references a `DATABASE_URL` or similar connection string, update it after completing the database migration in the next step.
#### 4. Migrate your database
Skip this step if your Replit project does not use a database.
##### Replit PostgreSQL to Railway Postgres
1. Right-click on the Railway project canvas and select **Database > Add PostgreSQL** to provision a new Postgres instance.
2. Export your data from Replit's PostgreSQL using `pg_dump`:
```bash
pg_dump -Fc --no-acl --no-owner -h -p -U -d -f backup.dump
```
3. Restore the dump into your Railway Postgres instance:
```bash
pg_restore --no-acl --no-owner -h -p -U -d backup.dump
```
You can find your Railway Postgres connection details in the **Variables** tab of the database service.
4. Update the `DATABASE_URL` variable in your app service to reference the Railway Postgres instance. You can use the [reference variable](/variables#reference-variables) `${{Postgres.DATABASE_URL}}` to keep the value in sync automatically.
For more detail, see [PostgreSQL on Railway](/databases/postgresql).
##### Replit Database (key-value) to Railway Redis
Replit Database is a key-value store. If your project uses it, you can migrate to a Redis instance on Railway.
1. Write a script in your Replit project to export all keys and values from Replit Database to a JSON file:
```python
from replit import db
import json
data = dict(db)
with open("replit_db_export.json", "w") as f:
json.dump(data, f)
```
2. Provision a Redis instance in Railway by right-clicking on the project canvas and selecting **Database > Add Redis**.
3. Write a script to import the JSON data into Redis:
```python
import json
import redis
r = redis.Redis.from_url("your-railway-redis-url")
with open("replit_db_export.json", "r") as f:
data = json.load(f)
for key, value in data.items():
r.set(key, json.dumps(value) if not isinstance(value, str) else value)
```
4. Update your application code to use Redis instead of `replit.db`.
#### 5. Configure builds and deployments
Replit uses the `.replit` file to define run commands and language settings. Railway uses Railpack for build detection and does not read `.replit` files.
**Automatic detection:** Railpack detects your project type from standard files:
- **Node.js:** `package.json` (reads `scripts.start` for the start command)
- **Python:** `requirements.txt` or `pyproject.toml`
- **Go:** `go.mod`
If Railpack detects your project correctly, no configuration is needed.
**Custom build or start commands:** If you need to override the defaults, go to your service's **Settings** tab and set the **Build Command** and **Start Command** fields.
**Dockerfile:** If your project requires a custom build environment, you can add a `Dockerfile` to your repository. Railway detects and uses it automatically.
#### 6. Set up a public domain
Replit provides `.replit.app` domains. On Railway, you can generate a `.up.railway.app` domain or configure a custom domain.
1. Click on your service in the project canvas.
2. Go to the **Settings** tab.
3. Under **Networking > Public Networking**, click **Generate Domain** to get a `.up.railway.app` domain.
To use a custom domain, see [Custom Domains](/networking/domains).
#### Migration checklist
- [ ] Code exported to GitHub
- [ ] `.replit` and `replit.nix` files removed from the repository
- [ ] Environment variables migrated
- [ ] Database migrated (if applicable)
- [ ] Build and start commands verified
- [ ] Public domain configured
- [ ] Application tested
#### Next steps
- [Add a Database Service](/databases)
- [Monitor your app](/observability)
- [Set up a custom domain](/networking/domains)
### Migrate from Lovable
Source: https://docs.railway.com/platform/migrate-from-lovable.md
Step-by-step guide to migrate a Lovable-generated app to Railway. Covers GitHub export, environment variables, database setup, and production configuration.
This guide is for users who want to stop using Lovable entirely and run their application on Railway. You take full ownership of the codebase, infrastructure, and deployment pipeline.
If you want to keep using Lovable for AI code generation while hosting on Railway, see [Deploy a Lovable App on Railway](/guides/lovable) instead.
#### When to migrate vs. when to deploy
**Keep using Lovable + deploy to Railway** if you still want Lovable's AI code generation and prompt-driven development. Changes you make in Lovable auto-deploy to Railway. See the [Lovable deployment guide](/guides/lovable).
**Migrate fully to Railway** if you've outgrown Lovable's environment, want full control over your codebase, or need infrastructure Lovable doesn't support (background workers, cron jobs, multiple services, managed databases).
#### Prerequisites
- A Lovable project with a working application
- A GitHub account
- A Railway account
#### 1. Connect your Lovable project to GitHub
If your Lovable project is already connected to GitHub, skip to [step 2](#2-create-a-railway-project-from-the-github-repo).
1. In Lovable, go to **Settings > Integrations > GitHub**.
2. Click **Connect GitHub** and authorize Lovable to access your GitHub account.
3. Install the Lovable GitHub App on your account or organization.
4. Click **Connect project** and select where the repository should be created.
Lovable creates a repository containing your application code. Changes made through Lovable's interface push to this repository automatically. This repository is what you deploy on Railway.
#### 2. Create a Railway project from the GitHub repo
1. Go to railway.com/new.
2. Select **Deploy from GitHub repo** and choose the repository Lovable created.
3. Click **Deploy**.
Railway detects the project configuration from `package.json` and starts the build. Once the deployment finishes, check **View logs** to confirm the application started.
#### 3. Configure environment variables
Lovable may store API keys and configuration values in its own environment. These do not transfer automatically.
1. In Lovable, open your project settings and note any environment variables (Supabase keys, OpenAI keys, Stripe keys, etc.).
2. In Railway, open your service and go to the **Variables** tab.
3. Add each variable as a key-value pair.
Railway redeploys automatically when variables change. See the [Variables guide](/variables) for more detail.
#### 4. Add a database
Many Lovable projects use Supabase as their database. You have two options:
**Keep Supabase.** Add your Supabase connection string as an environment variable in Railway. No other changes are needed. Your application connects to the hosted Supabase instance the same way it did on Lovable.
**Migrate to Railway Postgres.** If you want to run the database on Railway:
1. Click **+ New** in your Railway project and select **Database > PostgreSQL**.
2. Export your Supabase data with `pg_dump`:
```bash
pg_dump -h -U postgres -d postgres -F c -f backup.dump
```
3. Import into Railway Postgres with `pg_restore`:
```bash
pg_restore -h -U postgres -d railway -F c backup.dump
```
4. Update the database connection string in your Railway service variables to point to the new instance.
See [PostgreSQL on Railway](/databases/postgresql) for connection details and configuration.
#### 5. Configure production builds
Lovable typically generates React applications using Vite. Railway's build system auto-detects Node.js projects and runs `npm run build` from `package.json`.
Where things may differ from Lovable's hosted environment:
- **Static frontend apps.** If your Lovable project is a single-page application with no backend server, it produces a `dist/` folder during the build. You need a way to serve those static files. See the [serving a static site guide](/guides/static-hosting) for options, including adding a lightweight server like `serve` to your project.
- **Apps with a backend.** If your project includes a backend (Express, Fastify, or similar), check that the start command in `package.json` runs the server. Railway uses the `start` script by default.
- **Supabase Edge Functions.** If your Lovable project relies on Supabase Edge Functions, those continue to run on Supabase. They do not need to be deployed on Railway unless you are replacing them with your own backend service.
#### 6. Set up a public domain
Railway services are not publicly accessible by default.
1. Open your service and go to **Settings > Networking**.
2. Click **Generate Domain** to get a `.up.railway.app` URL.
To use a custom domain, add it in the networking settings and update your DNS records. See [Custom Domains](/networking/domains) for instructions.
#### 7. Disconnect Lovable GitHub sync
Once you've verified that Railway is serving your application correctly, you can disconnect the Lovable GitHub integration to stop auto-syncing changes from Lovable to your repository.
1. In Lovable, go to **Settings > Integrations > GitHub**.
2. Disconnect the project from the repository.
This is optional but recommended if you are fully migrating. Disconnecting prevents accidental changes in Lovable from pushing to the repository and triggering Railway deployments.
#### Migration checklist
- [ ] Lovable project connected to GitHub
- [ ] Railway project created from the GitHub repository
- [ ] Environment variables copied from Lovable to Railway
- [ ] Database connected (Supabase or Railway Postgres)
- [ ] Build and start commands verified in deployment logs
- [ ] Public domain configured
- [ ] Lovable hosting can be retired once Railway deployment is confirmed working
- [ ] Lovable GitHub sync disconnected (optional)
#### Next steps
- [Add a Database Service](/databases)
- [Monitor your app](/observability)
- [Set up a custom domain](/networking/domains)
### Migrate from Bolt
Source: https://docs.railway.com/platform/migrate-from-bolt.md
Step-by-step guide to migrate a Bolt-generated app to Railway. Covers code export, environment variables, and production deployment.
This guide covers how to move a Bolt-generated app to Railway for production hosting.
#### Prerequisites
- A Railway account
- A GitHub account
- A Bolt project ready to export
#### 1. Export your code from Bolt
Bolt provides two ways to get your code out:
- **GitHub integration**: If your Bolt project is already connected to GitHub, note the repository name. You will connect this same repo to Railway.
- **Download as zip**: In your Bolt project, download the project as a zip file. Extract it to a local directory.
#### 2. Push to GitHub
If you downloaded the zip, create a new GitHub repository and push the code:
```bash
cd your-project
git init
git add .
git commit -m "Initial commit from Bolt"
git remote add origin https://github.com/your-username/your-repo.git
git push -u origin main
```
If you used Bolt's GitHub integration, your repo is already set. Skip to the next step.
#### 3. Create a Railway project
1. Go to railway.com/new.
2. Select **Deploy from GitHub Repo**.
3. Connect your GitHub account if you have not already.
4. Select the repository containing your Bolt project.
5. Click **Deploy Now**.
Railway will begin building and deploying your app. You can monitor progress in the [Project Canvas](/projects#project-canvas).
#### 4. Configure environment variables
Bolt projects often rely on environment variables for API keys, database connections, and third-party service credentials.
1. In Bolt, open your project settings and note all configured environment variables.
2. In Railway, select your service in the Project Canvas.
3. Open the **Variables** tab.
4. Use the **Raw Editor** to paste your variables in `KEY=VALUE` format.
5. Click **Deploy** to apply.
#### 5. Add a database (if needed)
If your Bolt project uses a database:
- **External database (e.g., Supabase, PlanetScale)**: Add the connection string as an environment variable in Railway. No other changes are needed.
- **Railway-managed database**: Right-click the Project Canvas and add a Postgres, MySQL, or Redis service. Railway provides connection variables automatically when you link the database to your service.
See [Databases on Railway](/databases) for setup details.
#### 6. Configure builds
Bolt typically generates React, Next.js, or Vite projects. Railway's build system (Railpack) auto-detects Node.js projects and installs dependencies automatically.
Some framework-specific notes:
- **Next.js**: Set `output: "standalone"` in your `next.config.js`. See the [Next.js guide](/guides/nextjs) for details.
- **Vite SPA**: If your app is a single-page application with client-side routing, you may need to configure static file serving or add a small server.
- **Full-stack projects**: If your Bolt project has both a frontend and a backend, deploy them as separate services within the same Railway project. Each service gets its own build and deploy configuration.
#### 7. Set up a public domain
1. Select your service in the Project Canvas.
2. Go to **Settings**.
3. Under **Public Networking**, click **Generate Domain** to get a `.up.railway.app` URL.
To use a custom domain, see [Custom Domains](/networking/domains).
#### Migration checklist
- [ ] Code exported from Bolt and pushed to GitHub
- [ ] Railway project created and linked to the repo
- [ ] Environment variables transferred to Railway
- [ ] Database provisioned or external connection string set (if applicable)
- [ ] Build completes without errors
- [ ] App is accessible via the public domain
- [ ] Custom domain configured (if applicable)
#### Next steps
- [Add a Database Service](/databases)
- [Monitor your app](/observability)
- [Set up a custom domain](/networking/domains)
## Pricing
### Plans
Source: https://docs.railway.com/pricing/plans.md
Learn about Railway's plans and pricing.
Railway plans and pricing are designed to give you maximum resources while only charging you for your usage. We charge a base subscription price, which goes towards your resources and usage.
#### Plans
Railway offers four plans in addition to a [Trial](/pricing/free-trial):
| | |
| -------------- | -------------------------------------------------------------------------------------------------------------------------------------------------- |
| **Free** | For running small apps with $1 of free credit per month |
| **Hobby** | For indie hackers and developers to build and deploy personal projects |
| **Pro** | For professional developers and their teams shipping to production |
| **Enterprise** | For teams building and deploying production applications with the need for enterprise features related to compliance, SLAs, and account management |
##### Subscription pricing
Each Railway account needs an active subscription. The base subscription fee allows you to use the Railway platform and features included in the tier of your subscription. The subscription fee goes towards your usage-costs on the platform.
| Plan | Price |
| -------------- | ----------- |
| **Free** | $0 / month |
| **Hobby** | $5 / month |
| **Pro** | $20 / month |
| **Enterprise** | Custom |
Read more about Railway's plans at railway.com/pricing.
Curious about potential savings? [Upload your current invoice](https://railway.com/pricing#pricing-invoice) and see how much you can save by running your workloads on Railway.
##### Default plan resources
Depending on the plan you are on, you are allowed to use up these resources per service.
| Plan | **Replicas** | **RAM** | **CPU** | **Ephemeral Storage** | **Volume Storage** | **Image Size** |
| -------------- | ------------ | ------------ | -------------- | --------------------- | ------------------ | -------------- |
| **Trial** | **2** | **1 GB** | **2 vCPU** | **1 GB** | **0.5 GB** | **4 GB** |
| **Free** | **1** | **0.5 GB** | **1 vCPU** | **1 GB** | **0.5 GB** | **4 GB** |
| **Hobby** | **6** | **48 GB** | **48 vCPU** | **100 GB** | **5 GB** | **100 GB** |
| **Pro** | **42** | **1 TB** | **1,000 vCPU** | **100 GB** | **1 TB \*** | **Unlimited** |
| **Enterprise** | **50** | **2.4 TB** | **2,400 vCPU** | **100 GB** | **5 TB \*** | **Unlimited** |
Note that these are maximum values and include replica multiplication.
\* For Volumes, Pro users and above can self-serve to increase their volume up to 1 TB. Check out [this guide](/volumes#live-resizing-the-volume) for information.
##### Resource usage pricing
On top of the base subscription fee above, Railway charges for the resources that you consume.
You are only charged for the resources you actually use, which helps prevent runaway cloud costs and provides assurances that you're always getting the best deal possible on your cloud spend.
| Resource | Resource Price |
| ---------------------------------------- | ----------------------------------------------------- |
| **RAM** | $10 / GB / month ($0.000231 / GB / minute) |
| **CPU** | $20 / vCPU / month ($0.000463 / vCPU / minute) |
| **Network Egress** | $0.05 / GB ($0.000000047683716 / KB) |
| [**Volume Storage**](/volumes) | $0.15 / GB / month ($0.000003472222222 / GB / minute) |
To learn more about controlling your resource usage costs, read the FAQ on [How do I prevent spending more than I want to?](/pricing/faqs#how-do-i-prevent-spending-more-than-i-want-to)
#### Included usage
The Hobby plan includes $5 of resource usage per month.
If your total resource usage at the end of your billing period is $5 or less, you will not be charged for resource usage. If your total resource usage exceeds $5 in any given billing period, you will be charged the delta.
Included resource usage is reset at the end of every billing cycle and does not accumulate over time.
**Examples**:
- If your resource usage is $3, your total bill for the cycle will be $5. You are only charged the subscription fee because your resource usage is below $5 and therefore included in your subscription
- If your resource usage is $7, your total bill for the cycle will be $7 ($5 subscription fee + $2 of usage), because your resource usage exceeds the included resource usage
Similarly, the Pro plan includes $20 of resource usage per month and the same examples and billing logic apply. If your usage stays within $20, you'll only pay the subscription fee. If it exceeds $20, you'll be charged the difference on top of the subscription.
##### Additional services
Railway offers [Business Class Support](/platform/support#business-class) as an add-on service to the Pro plan. Business Class Support is included with Enterprise. [Contact us](mailto:team@railway.com?subject=Business%20Class%20Support) to get started.
#### Image retention policy
Railway retains images for a period of time after a deployment is removed. This is to allow for rollback to a previous deployment.
| Plan | **Policy** |
| ---------------- | ------------- |
| **Free / Trial** | **24 hours** |
| **Hobby** | **72 hours** |
| **Pro** | **120 hours** |
| **Enterprise** | **360 hours** |
When a deployment is removed, the image will be retained for the duration of the policy.
Rolling back a removed deployment within the retention policy will restore the previous image, settings, and all variables with a new deployment; no redeployment is required.
A removed deployment that is outside of the retention policy will not have the option to rollback; instead, you will need to use the redeploy feature. This will rebuild the image from the original source code with the deployment's original variables.
#### One-time Grant of Credits on the Free Trial
Users who create a new Trial account receive a free one-time grant of $5. Railway will expend any free credit before consuming any purchased credits. Trial plan users are unable to purchase credits without upgrading to the Hobby plan.
Learn more about Railway's Free Trial [here](/pricing/free-trial).
#### Partial month charges
In some cases, your billing method may be charged for the partial amount of your bill earlier in the billing cycle.
This ensures that your account remains in good standing, and helps us mitigate risk and fraud.
#### FAQs
##### Which plan is right for me?
- **Hobby** is for indie hackers and developers to build and deploy personal projects
- **Pro** is for professional developers and their teams shipping to production
- **Enterprise** is for dev teams building and deploying production applications with the need for enterprise features related to compliance, SLAs, and account management
##### Can I upgrade or downgrade at any time?
You can upgrade any time, and when you do, you will get to the features of your new plan, as well as access to more powerful resources, immediately. When you downgrade, the changes will take effect at the beginning of your next billing cycle.
##### What is the difference between subscription and resource usage?
There are two main components to your bill:
| Component | Description |
| ------------------ | ----------------------------------------------------------------------- |
| **Subscription** | Cost of the plan you're on |
| **Resource Usage** | Cost of the resources you've consumed: `[cost per unit] x [used units]` |
Subscription is a flat fee you pay monthly for the tier you're subscribed to, and Resource Usage varies according to your resource consumption for the month.
##### Can I add collaborators to my project?
Railway's Pro and Enterprise plans are designed for collaboration. These plans allow you to add members to your workspace and manage their permissions.
Read more about adding members to your Pro or Enterprise workspace [here](/projects/workspaces#inviting-members).
##### How long does Railway keep my volume data if I am no longer on a paid plan?
Railway will delete your data from the platform as per the timeline below after sufficient warning.
| Plan | Days |
| ---------------------- | -------------------------- |
| **Free or Trial plan** | 30 days after expiry |
| **Hobby plan** | 60 days after cancellation |
| **Pro plan** | 90 days after cancellation |
##### Is the hobby plan free?
No. The Hobby Plan is $5 a month, and it includes a resource usage credit of $5. Even if you do not use the $5 in usage (CPU, Memory, egress), you always pay the $5 subscription fee.
##### Can I get the hobby plan subscription fee waived?
Railway waives the monthly Hobby plan subscription fee for a small set of active builders on the platform.
Eligibility is automatically assessed based on several factors, including your usage on the platform, your GitHub account, and more. If you qualify, you will be notified in the Dashboard or when you upgrade to the Hobby plan. If you do not qualify, you will not be eligible for the waiver.
This is a fully automated process, and Railway does not respond to requests for waiver.
##### I prefer to prepay. Is that possible?
Not anymore as of March 30th, Railway requires the use of a post-paid card.
##### What happens if I use credits as a payment method and my account runs out of credits?
If you are using credits as a payment method and your credit balance reaches zero, your subscription will be cancelled. You will no longer be able to deploy to Railway and we will stop all of your workloads. To resolve this, you will need to sign up for a new subscription after topping up sufficient credits.
##### Why was I charged for a partial month of usage?
Railway has an automated system in place which can result in a partial amount of your bill being charged to your payment method, earlier in the billing cycle.
This is intended to ensure that your account remains in good standing, and helps us to mitigate risk and fraud.
### Free trial
Source: https://docs.railway.com/pricing/free-trial.md
Learn about Railway's free trial plan.
New users can take the platform for a spin by starting a free trial. The trial gives access to basic features for up to 30 days and includes a one-time grant of $5.
After 30 days passes or $5 is spent, the free trial reverts to the [Free](/pricing/plans#plans) plan, which provides $1 of free credit per month. The credit does not roll over month to month.
#### Full VS limited trial
Your trial experience depends on whether Railway can verify your account.
| Trial Type | Deploy Code | Deploy Databases | Deploy Buckets | Network Access |
| ----------------- | ----------- | ---------------- | -------------- | -------------- |
| **Full Trial** | ✅ | ✅ | ✅ | Full |
| **Limited Trial** | ✅ | ✅ | ✅ | Restricted |
When you sign up for a free Trial, you can connect your GitHub account to initiate verification. Your verification status depends on a number of factors, including the age and activity of your GitHub account.
If your account is not verified (either because you have not initiated the verification process or your account does not meet Railway's criteria for verification), your trial will have some network restrictions. Specifically, services on the Limited Trial have restricted outbound network access and only a limited set of ports are available.
Verification is a necessary measure to prevent abuse of the free Trial, limiting users from creating multiple accounts and reducing the risk of trial users deploying or hosting content that violates Railway's [Terms of Service](https://railway.com/legal/fair-use).
This is a fully automated process, and Railway does not respond to requests for verification. If your account is not verified, you can upgrade to the Hobby plan to unlock the full Railway experience.
#### FAQs
##### How do I get started with the free trial?
If you do not already have a Railway account, you can sign up for a free Trial by clicking "Login" at [railway.com](https://railway.com/).
##### How does the trial work?
When you sign up for the free Trial, you will receive a one-time grant of $5 in credits that you can use to try out Railway. The credits will be applied towards any usage on the platform and expire in 30 days.
If you upgrade to a plan while you still have a credit balance from the Trial, the remaining balance will carry over to your new plan. To prevent fraud and ensure your payment method is valid and in good standing, the carried-over Trial credits may not be applied to your first billing cycle, and will instead be applied as a discount to subsequent charges once a successful payment has been processed.
##### What resources can I access during the trial?
During the trial, you can access the same features as on the Hobby plan, however you will be limited to 1 GB of RAM and shared (rather than dedicated) vCPU cores. Additionally, your projects will be limited to 5 services per project.
As a trial user, you can spin up databases and deploy code. However, if you are on the [Limited Trial](#full-vs-limited-trial), your services will have some network restrictions.
##### What's the difference between the limited trial and the full trial?
If you connect your GitHub account, and we are able to verify it against a set of parameters, you will be on the Full Trial with full network access.
If you do not connect a GitHub account, or we are not able to verify your account, you will be on the Limited Trial. You can still deploy code, databases, and buckets, but your services will have restricted outbound network access and only a limited set of ports will be available.
While you're on the Limited Trial, you can initiate verification at any time by visiting [railway.com/verify](https://railway.com/verify) in order to access the Full Trial experience.
##### How far will the $5 one-time trial grant last?
The longevity of your one-time trial grant depends on how many resources you consume within the 30 day period you sign-up for the platform. The more resources you deploy, the greater the consumption.
##### Data retention
Railway deletes stateful volumes created by Trial accounts 30 days after the expiration of your credits. To retain your data, upgrade your account after the Trial period.
### Understanding your bill
Source: https://docs.railway.com/pricing/understanding-your-bill.md
Learn how Railway billing works, why you're charged when idle, and how to read your invoice.
This guide explains how Railway billing works in practice, helping you understand your charges and avoid unexpected costs.
#### How Railway billing works
Your subscription fee ($5 Hobby, $20 Pro) is a minimum usage commitment. It covers your first $5 or $20 of resource usage each month.
At the end of each billing cycle:
- **Usage ≤ plan amount**: You owe nothing extra, just your subscription for the next month
- **Usage > plan amount**: You pay the difference between your actual usage and what your plan already covered
Your invoice combines two periods:
- **Subscription** (billed in advance): Your minimum commitment for the upcoming month
- **Usage overage** (billed in arrears): Any resource usage from the previous month that exceeded your plan's included amount
**Example (Pro plan):** Your December 21 invoice includes:
- $20 Pro subscription for Dec 21 – Jan 21 (next month)
- $0 overage if Nov 21 – Dec 21 usage was under $20, OR the amount over $20 if you exceeded it
In some cases, Railway may charge a partial amount earlier in the billing cycle to ensure your account remains in good standing and to help mitigate fraud.
#### Why you're charged when your app has no traffic
A common question: "Why am I being charged when my app has no traffic?"
The key concept is that **you pay for allocated resources, not traffic**. When your service is running, it consumes CPU and RAM regardless of whether it's actively handling requests.
Think of it like electricity: you pay for appliances that are plugged in and running, not just when you're actively using them. A server running idle still uses memory to stay loaded and CPU cycles to stay responsive.
##### Solutions to reduce idle costs
| Solution | Description |
| --------------------------------------------------- | -------------------------------------------------------- |
| [Serverless](/deployments/serverless) | Automatically stops services when inactive |
| [Usage Limits](/pricing/cost-control) | Set spending caps to prevent unexpected charges |
| Delete unused services | Remove services you no longer need |
| [Private Networking](/networking/private-networking) | Reduce egress costs by keeping traffic internal |
#### Understanding included usage
Both paid plans include a usage credit that offsets your resource consumption:
| Plan | Subscription | Included Usage |
| ---------- | ------------ | -------------- |
| **Hobby** | $5/month | $5 |
| **Pro** | $20/month | $20 |
**How it works:**
1. Your subscription fee goes toward your resource usage
2. If usage stays within the included amount, you only pay the subscription fee
3. If usage exceeds the included amount, you pay the difference
**Examples (Hobby plan):**
| Resource Usage | Subscription | Included Usage Applied | Total Bill |
| -------------- | ------------ | ---------------------- | ---------- |
| $3 | $5 | $3 | $5 |
| $5 | $5 | $5 | $5 |
| $8 | $5 | $5 | $8 |
| $15 | $5 | $5 | $15 |
**Important:** Included usage credits reset each billing cycle. They do not accumulate or roll over to the next month. If you use $2 this month, you don't get $8 next month.
#### Reading your invoice
Your Railway invoice contains several line items. Here's what each means:
##### Subscription charges
The flat fee for your plan appears as a line item:
- "Hobby plan" - $5.00
- "Pro plan" - $20.00
Pro and Enterprise workspaces also show a per-seat line item:
- "Pro (per seat)" - $0.00 (seats are free, this line just shows the member count)
##### Resource usage charges
Resources are listed by type with the unit and billing period:
| Line Item | Meaning |
| ------------------------------------- | -------------------------------------------- |
| "Disk (per GB / min)" | Volume storage charges |
| "Network (per MB)" | Outbound data transfer (egress) charges |
| "vCPU (per vCPU / min)" | CPU usage charges |
| "Memory (per MB / min)" | RAM usage charges |
Each line item shows the quantity used, unit price, and total amount for the billing period.
##### Included usage
Your plan's included usage appears as a discount in the invoice summary:
- "Hobby plan included usage ($5.00 off)"
- "Pro plan included usage ($20.00 off)"
The amount in parentheses shows the maximum credit available. The actual discount applied equals your resource usage up to that maximum. For example, if your resource usage is $15.39 on the Pro plan, you'll see "-$15.39" applied even though the max is $20.00.
##### Applied balance
"Applied balance" appears in the invoice summary when you have account credits or small amounts carried forward:
- **Credit applied**: If you have credits on your account (from refunds, promotions, or previous overpayments), they appear as a negative "Applied balance" reducing your amount due
- **Small amounts deferred**: If your total invoice is less than $0.50, Railway marks it as paid and carries the amount forward to your next invoice
##### Tax and VAT
If applicable based on your billing location, you may see:
- "Sales Tax" or "VAT" as a separate line item
Ensure your [billing information](https://railway.com/workspace/billing) is accurate to receive correct tax assessment.
#### Common causes of unexpected charges
##### High network egress
Network egress (outbound data transfer) is charged at $0.05/GB. Common causes of high egress:
- **Not using private networking for databases**: If your app connects to your Railway database using the public URL instead of the private URL, all that traffic counts as egress. Use `DATABASE_URL` (private) instead of `DATABASE_PUBLIC_URL`.
- **Large file transfers**: Serving large files, images, or videos directly from your service.
- **API responses**: High-traffic APIs returning large payloads.
**Solution:** Use [private networking](/networking/private-networking) for all service-to-service communication within Railway.
##### PR deploys / ephemeral environments
When you have [PR deploys](/environments#ephemeral-environments) enabled, Railway creates a copy of your environment for each pull request. These environments run real services that consume real resources.
If you have 5 open PRs, you may be running 5x your normal workload.
**Solution:** Close PRs promptly or disable PR deploys if you don't need them.
##### Idle services still running
Services consume resources even when not handling traffic. If you have development, staging, or test environments running continuously, they add up.
**Solution:** Enable [Serverless](/deployments/serverless) on services that don't need to be always-on, or delete unused services.
##### Memory leaks
If your application has a memory leak, it will gradually consume more RAM over time until it hits limits or gets restarted. This inflates your memory costs.
**Solution:** Monitor your service metrics for growing memory usage and fix leaks in your application code.
#### Related resources
- [Plans and Pricing](/pricing/plans) - Detailed pricing information
- [Pricing FAQs](/pricing/faqs) - Common pricing questions
- [Optimize Usage](/pricing/cost-control) - Guide to reducing costs
- [Usage Limits](/pricing/cost-control) - Set spending caps
- [Serverless](/deployments/serverless) - Auto-stop inactive services
- [Private Networking](/networking/private-networking) - Reduce egress costs
### FAQs
Source: https://docs.railway.com/pricing/faqs.md
General common Questions & Answers related to Railway's pricing.
General common Questions & Answers related to Railway's pricing.
##### Can I try Railway without a credit-card?
Yes. As a new Railway user, you can sign up for a [Free Trial](/pricing/free-trial). You will receive a one-time grant of $5 to use on resources.
##### What payment methods are accepted?
Railway only accepts credit cards for plan subscriptions. We also support custom invoicing for customers on the Enterprise plan.
##### What will it cost to run my app?
With Railway, you are billed for the [subscription fee](/pricing/plans#plan-subscription-pricing) of the plan you're subscribed to, and the [resource usage](/pricing/plans#resource-usage-pricing) of your workloads.
To understand how much your app will cost to run on Railway, we recommend that you:
1. Deploy your project with the [Trial](/pricing/free-trial) or Hobby plan
2. Allow it to run for one week
3. Check your Estimated Usage in the [Usage Section](https://railway.com/workspace/usage) of your Workspace settings
Keeping it running for one week allows us to rack up sufficient metrics to provide you with an estimate of your usage for the current billing cycle. You can then use this information to extrapolate the cost you should expect.
We are unable to give exact quotes or estimates for how much it will cost to run your app because it is highly dependent on what you're deploying.
If you are supporting a commercial application, we highly recommend you to upgrade to the Pro plan for higher resource limits and access to [priority support](/platform/support#priority-threads).
##### How do I prevent spending more than I want to?
Check out the [guide on cost control](/pricing/cost-control).
##### Why is my resource usage higher than expected?
You can check your resource usage in the [Usage Section](https://railway.com/workspace/usage) of your Workspace settings. This includes a breakdown of your resource usage by project, along with the resource it's consuming (CPU, Memory, Network, etc.)
Common reasons for high resource usage include:
- Memory leaks in your application, causing it to consume more memory than necessary
- Higher traffic than usual, causing your app to consume more CPU and/or Network
- Certain templates or apps may be inherently more resource-intensive than others
- If you notice high egress cost in your bill, ensure that you are connecting to your Railway databases over [Private Networking](/networking/private-networking)
- If you have [PR deploys](/environments#ephemeral-environments) enabled in your project, Railway will deploy a mirror copy of your workload(s) based on the environment it forks from (`production` by default). You are billed for those workload(s) running in the ephemeral environment
Unfortunately, we are unable to assist with figuring out why your bill is higher than normal, as it is entirely dependent on what you have deployed. Resource usage is billed in a manner akin to how a utility company operates: they can tell you the amount of electricity you've consumed, but they can't explain the reasons for your high usage. Similarly, we can only provide information on the quantity of resources you consume, not the reasons behind it.
##### Why am I charged for more than $5 on the hobby plan?
Railway's pricing has two components: a monthly subscription fee, and resource usage costs. While the Hobby plan includes $5 of resource usage per month, you are charged for any usage that exceeds this amount.
Learn more [here](/pricing/plans#included-usage).
##### Why is there an "applied balance" on my invoice?
When the amount due on your invoice is less than $0.50, and you do not have a credit balance, Railway marks the invoice as paid and registers the amount to your credit balance as a debit to be charged on a future invoice.
##### How do I view or upgrade my current plan?
Your current plan is listed in the Account Selector in the top left corner of your Dashboard. You can also view your active plan and upgrade options from the [Plans](https://railway.com/workspace/plans) page.
##### How do I cancel my subscription?
To cancel your active subscription, go to the "Active Plan" section of your [Billing](https://railway.com/workspace/billing) page and click `Cancel Plan`.
When you cancel your subscription, Railway will stop all deployments in your workspace to prevent further charges. Your plan will remain active until the end of your billing cycle.
##### How do I add or update billing information?
To add or update your Billing information, go to the [Billing](https://railway.com/workspace/billing) page. In the "Billing Info" section, you can add or update the following information:
- Payment Method
- Billing Email
- Billing Address
- Tax ID / VAT number
When Billing Information is added or updated, it will be reflected on all future invoices from Railway.
##### How is sales Tax/VAT handled?
Railway may collect applicable sales tax and VAT on your account based on your billing location and local tax requirements, where and when applicable. When assessed and collected, Sales Tax/VAT is explicitly outlined on your invoice.
To ensure accurate tax assessment, Workspace Admins must verify that their billing information, including Billing Address, Organization Name, and Tax ID (when applicable), is accurate. Organization Name and Tax ID are not required when using Railway for personal use.
To view and manage your subscription, visit the [billing section](https://railway.com/workspace/billing) of your workspace.
##### How do I remove my saved payment method from my account?
If your subscription is canceled and you have no pending invoices, you can remove your saved payment method by doing the following:
1. Go to the [billing page](https://railway.com/workspace/billing) for your workspace
2. Click "Delete" in the payment method section
##### What happens if the payment fails for my subscription?
If your subscription payment fails, we retry the payment method on file over several days. We also inform you of the payment failure, in case your payment method needs to be updated.
If payment continues to fail, we flag your services to be stopped and send you a warning.
If we do not receive payment, your services are stopped until all open invoices have been paid.
##### My services were stopped, what do I do?
Your [services](/overview/the-basics#services) may be stopped by Railway for the following reasons, along with their solutions -
- **Usage limits reached:** You've hit your [usage limits](/pricing/cost-control). Increase your usage limit, remove it entirely, or wait for the usage limit to reset.
- **Trial credits exhausted:** You've run out of [trial credits](/pricing/free-trial#how-does-the-trial-work). Consider upgrading to [a paid plan](/pricing/plans#plans) to continue using the service.
- **Failed payment:** Your payment method has failed. Update your payment method and [pay your outstanding invoice](https://railway.com/workspace/billing).
- **Unpaid invoice:** You have an outstanding invoice. [Pay your outstanding invoice](https://railway.com/workspace/billing).
Railway will automatically redeploy your services once the underlying issue is resolved, as long as it is resolved within a period of 30 days. After that, you will have to redeploy them manually from the Removed deployment's [3-dot menu](/deployments/reference#deployment-menu).
**Note:** Although Railway will remove your deployment for any of the above reasons, Railway will not remove the [volume](/overview/the-basics#volumes) attached to the service.
##### I am a freelancer or represent an agency. How do I manage my billing relationships with my clients?
Create a Pro plan on Railway and add the client to the workspace. If you run into issues when it's time to hand over your workload to your client, you can reach out to us over [Central Station](https://station.railway.com).
##### Why did I receive another invoice after cancelling my subscription?
You may receive an invoice containing charges for Resource Usage after you cancel your subscription. These are resource usages you have consumed in that billing cycle that we reserve the right to charge you for.
##### How do I request a refund?
Please refer to [Pricing -> Refunds](/pricing/refunds).
##### Requesting an invoice re-issuance
If you encounter "This invoice can no longer be paid on Stripe" error or need
your Tax ID added to a previous invoice, follow the steps below to get an
invoice reissued.
1. Go to your workspace's billing page at [https://railway.com/workspace/billing](https://railway.com/workspace/billing). Ensure you select the correct workspace using the Workspace Switcher in the top left corner.
2. Scroll to **Billing History**. For the invoice you want to reissue, click on the Gear icon next to it and select **Re-issue**.
3. Follow the instructions in the pop-up:
Before you re-issue an invoice, please ensure your [billing information is up-to-date](/pricing/faqs#how-do-i-add-or-update-billing-information).
Once your invoice has been re-issued, it will contain the latest billing
information, and appear in your **Billing History**.
If you do not receive the re-issued invoice within 24 hours, please reach
out to us at [station.railway.com](https://station.railway.com).
### Refunds
Source: https://docs.railway.com/pricing/refunds.md
Learn about Railway’s refund policy and how to request a refund if eligible.
Refunds are for new customers who no longer wish to use Railway after initially trying it out. Railway offers refunds at its sole discretion, in line with Railway's [Terms of Service](https://railway.com/legal/terms).
#### Requesting a refund
You can request for a refund in [Workspace Settings -> Billing](https://railway.com/workspace/billing) under **Billing History**:
If you do not see a refund button next to your invoice, you are ineligible for a refund. **This decision is final** and we are unable to issue refunds for invoices that have been deemed ineligible.
After a refund is issued,
- It may take up to 5~10 business days for the refund to be processed and reflected in your account
- Your subscription may be cancelled immediately by us
- Your services may be taken offline immediately
If you'd like to stop using Railway, please remove your projects and cancel your subscription immediately. See "[How do I view/manage/cancel my subscription?](/pricing/faqs#how-do-i-viewmanagecancel-my-subscription)" for further information.
#### FAQs
##### Why was my refund request denied?
Refunds are issued at Railway's sole discretion. If your refund request was denied, it may be due to one of the following reasons:
- Your invoice contains resource usage costs. We generally do not issue refunds for resource usage, as those were resources you have consumed (in a manner akin to how a utility company charges for electricity or water)
- You have received a refund from Railway in the past
- You have violated Railway's [Fair Use Policy](https://railway.com/legal/fair-use) and/or [Terms of Service](https://railway.com/legal/terms)
### Cost control
Source: https://docs.railway.com/pricing/cost-control.md
Optimize your Railway projects for budget-friendly billing by setting limits and activating serverless.
Railway provides controls over resource usage in the form of usage limits, resource limits, private networking, and serverless auto-sleeping of inactive services.
#### Usage limits
Usage Limits allow you to set a maximum limit on your usage for a billing cycle. If your resource usage for the billing cycle exceeds the limit you configured, we will shut down your workloads to prevent them from incurring further resource usage.
##### Configuring usage limits
Visit the Workspace Usage page to set the usage limits. Once you click the Set Usage Limits button, you will see a modal where you can set a Custom email alert and a Hard limit separately for **Compute Usage** and **Agent Usage**.
The link above takes you to the usage page for your personal account. If you want to set a usage limit for your workspace, you can use the account switcher in the top left corner of your dashboard to access the workspace's usage page. You must be a workspace admin to configure usage limits.
##### Compute vs. Agent usage limits
Compute and Agent usage are tracked and limited independently:
- Compute Usage covers CPU, memory, storage, and network egress for your services.
- Agent Usage covers [Railway Agent](/ai/railway-agent) LLM consumption.
Hitting the Compute hard limit takes your workloads offline but leaves the agent available. Hitting the Agent hard limit disables the agent but leaves your workloads running.
By default, Agent Usage has a hard limit of $5 on the Hobby plan and $20 on the Pro plan. You can raise or lower this limit at any time from the Workspace Usage page, but unlike the Compute limit, the Agent limit cannot be removed.
##### Custom email alert
You can think of this as a _soft limit_. When your resource usage reaches the specified amount, we will email you that this threshold has been met. Your resources will remain unaffected.
##### Hard limit
Once your resource usage hits the specified hard limit, all your workloads will be taken offline to prevent them from incurring further resource usage. Think of the hard limit as the absolute maximum amount you're willing to spend on your infrastructure.
We will send you multiple reminders as your usage approaches your hard limit:
1. When your usage reaches 75% of your hard limit
2. When your usage reaches 90% of your hard limit
3. When your usage reaches 100% of your hard limit and workloads have been taken down.
Setting a hard limit is a possibly destructive action as you're risking having all your resources shut down once your usage crosses the specified amount.
##### Usage limits FAQ
Yes, usage limits are available for all subscription plans.
No. You can leave the hard limit blank if you simply want to be notified at a particular amount of usage.
The minimum amount you can specify as the hard limit is $10.
To restart your resources, increase your usage limit or remove it entirely. Railway will automatically redeploy your stopped services once the limit is raised or removed. If automatic recovery fails for any service, you can manually redeploy from the deployment's [3-dot menu](/deployments#deployment-menu).
Railway will try to automatically restart your resources during the next billing cycle, but if automatic recovery fails for any service, you can manually redeploy from the deployment's [3-dot menu](/deployments#deployment-menu).
#### Replica limits
Replica limits allow you to limit the maximum amount of CPU and memory available to each replica.
To configure replica limits, navigate to your service's settings > Deploy > Replica Limits.
Setting replica limits too low will cause your service to crash.
Using replica limits makes sense in scenarios where:
1. You don't want to risk a high bill due to unexpected spikes in usage
2. You are okay with the service crashing if it exceeds the limit
#### Use private networking
Using [Private Networking](/networking/private-networking) when communicating with other services (such as databases) within your Railway project will help you avoid unnecessary Network Egress costs.
##### With databases
Communicate with your Railway database over private networking by using the `DATABASE_URL` environment variable, instead of `DATABASE_PUBLIC_URL`.
##### With other services
If your Railway services need to communicate with each other, you can find the service's private URL in the service settings:
Learn more about Railway's Private Networking [here](/networking/private-networking).
#### Enabling serverless
Enabling Serverless on a service tells Railway to stop a service when it is inactive, effectively reducing the overall cost to run it.
To enable Serverless, toggle the feature on within the service configuration pane in your project:
1. Navigate to your service's settings > Deploy > Serverless
2. Toggle "Enable Serverless"
3. To _disable_ Serverless, toggle the setting again
Read more about how Serverless works in the [Serverless page](/deployments/serverless).
### Committed spend
Source: https://docs.railway.com/pricing/committed-spend.md
Learn about Railway's committed spend tier system.
Railway offers committed spend tiers for customers with consistent usage needs. Instead of negotiated contract pricing, customers can commit to a specific monthly spend level to unlock additional features and services.
#### Available tiers
| Committed spend tier | Features |
| -------------------- | ------------------------------------------------------------------------------------ |
| $1000 | 90-day log history, HIPAA BAAs |
| $2000 | Single Sign-On, Role-based access control, 18 month Audit Logs retention |
| $5000 | Slack Connect channels, Critical level support tickets, Enterprise Resource Limits |
| $10000 | Dedicated instances |
#### How to subscribe
These tiers can only be accessed from a workspace on the Pro plan. To access a committed spend tier:
1. Upgrade your workspace to the [Pro plan](/pricing/plans) if you haven't already.
2. Navigate to your workspace Settings -> Plans page.
3. Scroll down to see Committed Spend and Enterprise tier options.
#### Feature definitions
##### 90-day log history
Extended log retention for better historical analysis and auditing.
##### HIPAA BAAs
HIPAA Business Associate Agreements for compliant health data handling. Requires a year commitment paid monthly.
##### Single sign-on
Allow workspace members to sign in using your organization’s Identity Provider (IdP), including Okta, Auth0, Microsoft Entra ID, Google Workspace, and more.
##### Role-based access control
Restrict access to sensitive environments like production. Only workspace admins can access restricted environments.
##### 18 month audit logs retention
Extended log retention for better historical analysis and auditing.
##### Enterprise Resource Limits
Higher per-replica resource limits at 48 vCPU / 48 GB RAM / 50 replicas per service. Up to 2,400 vCPU / 2,4 TB RAM per service.
##### Slack Connect channels
A private channel with the solutions team at Railway on Slack to facilitate better communication and support.
##### Critical level support tickets
Critical tickets allow you to page our support on-call directly for an immediate response.
##### Dedicated instances
Custom dedicated infrastructure for enhanced performance and control.
#### FAQs
##### What happens if my usage is less than the committed spend tier I am subscribed to?
We will add a line item to your invoice to make up for the difference and you will be billed the price of the committed spend tier you are on.
For example: If you're subscribed to the $2000 tier and your usage is $1400, we will add a $600 line item making your bill $2000.
##### How do I cancel my committed spend tier subscription?
You can cancel your commitment by going to your workspace billing page. Note: You will immediately lose access to the features attached to the tier upon cancelation.
##### My question isn't answered here, where can I speak to the team?
To learn more about committed spend tiers, please [contact our team](mailto:team@railway.com?subject=Business%20Class%20Support).
### AWS Marketplace
Source: https://docs.railway.com/pricing/aws-marketplace.md
Learn about Railway's AWS Marketplace offering and pricing.
Railway is available through the AWS Marketplace, allowing you to purchase and manage Railway through your AWS account.
#### Offering
For large Enterprises, Railway can be an option for large engineering teams to significantly reduce operational overhead.
#### Pricing structure
Pricing for Railway through AWS Marketplace is based on contract duration. You can pay upfront or in installments according to your contract terms with the vendor. The contract includes:
- A specified quantity of usage for the contract duration
- Usage-based pricing for any usage exceeding the entitled amount
- Additional charges applied on top of the contract price for overages
#### Contract terms
##### 12-month contract
The standard offering is a 12-month contract with the following terms:
- Base price: $10,000.00 per 12 months
- Overage rate: $1.00 per unit
- Private pricing agreements available through the Railway sales team
#### Refund policy
All fees are non-refundable and non-cancellable except as required by law.
#### Getting started
To purchase Railway through AWS Marketplace:
1. Visit the Railway listing on AWS Marketplace
2. Click "View purchase options"
3. Contact the Railway sales team
4. Complete the purchase through your AWS account
#### Support
For questions about AWS Marketplace purchases or to discuss private pricing agreements, [please contact the Railway sales team.](https://cal.com/team/railway/work-with-railway)
### Credits
Source: https://docs.railway.com/pricing/credits.md
Learn how credits apply to your Railway account if part of a promotion.
If you are part of a credit promotion for Railway, this page covers how to activate and use your credits. This does not include the referral program as that functions differently - please see information [referrals here](/access/accounts#referrals).
#### Eligibility
Credits and promotions only apply to new signups. If you already have an account, or signed up before navigating to the unique promotion link, the credits will not apply to you.
#### Activating Your Credits
To activate your credits:
1. Sign up for Railway using the unique link provided to you.
2. Navigate to the [Plans page](https://railway.com/workspace/plans) to upgrade your plan to Hobby. On the page, you will see the name of your promotion if it applies to your account. For more information on available plans, see the [Pricing Plans](/pricing/plans) docs.
3. Enter your credit card details. A credit card is required to cover any usage that exceeds your credit amount.
You will see the credits applied to your next invoice.
#### Viewing Your Credits
Once you have upgraded, you can view your credit and promotion details by navigating to [Workspace Settings > Billing](https://railway.com/workspace/billing). There you will find:
- Whether a promotion code applies to your account
- The credit value and duration of the promotion
## Enterprise
### Compliance
Source: https://docs.railway.com/enterprise/compliance.md
Learn about Railway's compliance standards and how we ensure security and regulatory adherence.
Railway is designed to be used by companies of all sizes. We understand that companies have different needs when it comes to compliance and security. We are happy to work with you to ensure that Railway meets your needs. We work with teams across regulated industries such as government, healthcare, and finance to ensure that Railway meets their needs.
Companies choose Railway so that they can speed up their development velocity while also maintaining their security and compliance posture.
We are happy to sign NDAs with your company to provide additional information about Railway's security and compliance practices. Please reach out to us at [team@railway.com](mailto:team@railway.com) to get started, or click [here](https://cal.com/team/railway/work-with-railway?duration=30) to book some time to chat.
You can request to view Railway's audit, compliance, security, and regulatory documents and processes on the [Trust Center at trust.railway.com](https://trust.railway.com).
Additionally, the Railway enterprise plan is the most secure and compliant option. [Read about the Railway enterprise plan here](https://railway.com/enterprise).
#### Certifications
We know that your businesses need to develop strong and lasting relationships with your vendors to build confidence that we can be trusted to deliver your workloads. Part of that is through certifications, audits, and continual refinement of Railway's practices. Railway aims to comply with all the distributions of workloads and privacy procedures.
##### SOC 2 type ii and SOC 3
Railway is SOC 2 Type II certified and SOC 3 certified.
Customers who are in the process of securing SOC 2 certification can request a copy of the Railway security audit on the [Trust Center](https://trust.railway.com).
##### HIPAA BAA
Railway follows a shared responsibility model for HIPAA compliance and PHI. Railway will make its best effort to advise your company on setting up encryption for your data, auditing the storage of keys, establishing access control, and ensuring secure storage of sensitive patient data. When a BAA is in effect, the Railway team will no longer be able to directly access your running workloads.
HIPAA BAA is an add-on with a paid monthly spend threshold. All pricing goes towards your [usage on Railway](/pricing/plans#committed-spend-tiers). Monthly thresholds for addons is found in the [committed spend pricing](/pricing/plans#committed-spend-tiers).
If your company needs a BAA, you can contact the Railway solutions team at [team@railway.com](mailto:team@railway.com), or click [here](https://cal.com/team/railway/work-with-railway?duration=30) to schedule some time to chat.
#### Privacy
Railway is committed to protecting the privacy of Railway's users. We understand that when working with user code and data, it is important to have a clear understanding of how we handle your data. Railway, on behalf of Railway's users, may remove offending workloads but at no point will a Railway team member modify your application without your expressed permission through an approved communication channel.
[Click here to see Railway's Privacy Policy.](https://railway.com/legal/privacy)
#### GDPR compliance - data processing agreement (DPA)
Railway provides a Data Processing Agreement (DPA) to help customers comply with GDPR requirements when processing personal data through the Railway platform. If you operate a business in the EU or process personal data of EU residents, you may need to execute a DPA with Railway to ensure compliance with GDPR Article 28 requirements for data processor relationships.
You can access and execute Railway's standard DPA through the self-service link: [Sign Railway's DPA](https://powerforms.docusign.net/0c38a448-eda3-4139-99d6-f9c0eef94154?env=na4&acct=c0c04fce-9579-4f79-b028-7a946a40077d&accountId=c0c04fce-9579-4f79-b028-7a946a40077d)
You can also review Railway's standard DPA terms at [railway.com/legal/dpa](https://railway.com/legal/dpa).
#### VAT tax ID and address
Customers in the EU may need to add their VAT Tax ID to their invoices for compliance and reporting purposes.
You can add your VAT Tax ID and address on Railway in your [Workspace settings](https://railway.com/workspace/billing) -> Billing -> Manage Subscription.
If you have multiple workspaces, you need to add your VAT Tax information to each respective Workspace's Subscription.
After adding your information, it will appear on your future invoices.
#### EU DORA
For European organizations in finance that need to comply with [EU Dora](https://www.eiopa.europa.eu/digital-operational-resilience-act-dora_en) - Railway is willing to provide documents after a click through NDA that describe disaster recovery procedures, uptime statistics, and IT controls for organizations to who need to submit compliance documents to local regulators. You can get information on the [Trust Page](https://trust.railway.com)
#### Deploy securely on Railway
If compliance is top of mind, the Railway enterprise plan will meet your needs. From product features like SSO, to higher capacity limits, to security audits, the Railway enterprise plan is made to satisfy even the largest organizations. [Read more about the Railway enterprise plan](https://railway.com/enterprise).
### Audit logs
Source: https://docs.railway.com/enterprise/audit-logs.md
Learn more about how Railway keeps a record of actions in workspaces.
Audit logs provide a record of actions performed within your Railway [workspace](/projects/workspaces). This includes changes to projects, services, deployments, variables, and workspace settings.
Audit logs can be accessed by workspace admins through the **Audit Logs** link in the workspace settings.
Audit logs help teams with:
- **Security:** Track who made changes to sensitive resources like environment variables, integrations, or workspace settings
- **Compliance:** Maintain records of all changes for regulatory requirements and internal policies
- **Troubleshooting:** Identify when and how changes were made to diagnose issues
- **Team Coordination:** Understand what changes team members are making across projects
- **Change Management:** Review the history of deployments and configuration changes
#### Accessing audit logs
Audit logs are available at the workspace level and can be accessed by workspace admins through the workspace settings page.
To view audit logs:
1. Navigate to your workspace dashboard
2. Click on **Audit Logs** in the sidebar
For more information about workspace roles and permissions, see the [Workspaces documentation](/projects/workspaces).
#### Log contents
Each audit log entry contains detailed information about the action that was performed:
- **Event Type:** The type of action that occurred (e.g., service created, variable updated, deployment triggered)
- **Timestamp:** When the action was performed
- **Workspace:** The workspace where the action occurred
- **Project:** The project affected by the action (if applicable)
- **Environment:** The environment affected by the action (if applicable)
- **Event Data:** Specific details about the change, such as resource data that was created, modified, or deleted
- **Actor:** Information about who or what performed the action
##### Actor types
Actions in audit logs can be performed by three types of actors:
- **User:** An action performed by a workspace or project member
- **Railway Staff:** An action performed by Railway's team (typically during support requests)
- **Railway System:** An automated action performed by Railway's platform (e.g., automatic updates, backups)
Historic events from before audit logs were released may not contain information about the actor.
#### Listing all audit logs event types
The complete documentation of all audit log event types and their descriptions can be retrieved using the [Railway GraphQL API](/integrations/api).
You can explore this information using the GraphiQL playground:
```graphql
{
auditLogEventTypeInfo {
eventType
description
}
}
```
This query returns all available event types in audit logs, along with a description of what each event represents.
#### Exporting audit logs via the API
You can export audit logs programmatically using the [Railway GraphQL API](/integrations/api).
Use the `auditLogs` query to retrieve audit log entries for a specific workspace. You can test this query in the GraphiQL playground:
```graphql
{
auditLogs(workspaceId: "YOUR_WORKSPACE_ID") {
edges {
node {
id
eventType
createdAt
projectId
environmentId
payload
context
}
}
pageInfo {
endCursor
hasNextPage
hasPreviousPage
startCursor
}
}
}
```
For more information on using the GraphQL API, see the [Public API Guide](/integrations/api).
#### Audit log retention
Audit logs are retained for different periods depending on your Railway plan:
| Plan | Retention Period |
| -------------------------- | ---------------- |
| **Free, Trial and Hobby** | 48 hours |
| **Pro** | 30 days |
| **Enterprise** | 18 months |
For longer retention periods or custom log export solutions, consider upgrading to a higher plan or [contact us](https://railway.com/enterprise) to discuss Enterprise options.
### SAML SSO
Source: https://docs.railway.com/enterprise/saml.md
Learn about how to configure and use SAML Single Sign-On (SSO) for your Railway workspace.
SAML SSO is available on [Railway Enterprise](/enterprise).
**SAML Single Sign-On (SSO)** allows workspace members to sign in using your organization’s Identity Provider (IdP), including Okta, Auth0, Microsoft Entra ID, Google Workspace, and more.
New users signing in with your Identity Provider are automatically added to your workspace as [workspace members](/projects/workspaces#managing-workspaces).
#### Configuring SAML SSO
To configure SAML SSO, go to your workspace’s People settings. You must be a workspace admin with access to your Identity Provider’s configuration panel.
1. Add your organization’s email domain(s) as [**Trusted Domains**](/projects/workspaces#trusted-domains).
2. In the **SAML Single Sign-On** section, click **Configure** and follow the guided setup to connect your Identity Provider to Railway.
3. Optionally, [enforce SAML SSO](#enforcing-saml-sso) to require members to log in through your Identity Provider.
Once configured, users can [login using SAML SSO](#login-using-sso) using their organization email. Existing users must update their Railway email if it differs from their Identity Provider email.
_If you’re a Railway Enterprise customer and don’t see the SAML settings in your workspace, please contact us._
#### Enforcing SAML SSO
Workspace admins can **enforce SAML SSO** to ensure all members access the workspace with your Identity Provider.
- **Enable enforcement** by toggling "Members need to login with SAML SSO."
- Only workspace admins already logged in with SAML SSO can enable enforcement.
- When enforcement is active, users not authenticated with SAML SSO can’t open the workspace or access its resources.
- Enforcement takes effect immediately. Active users without SAML authentication will be prompted to re-authenticate.
Note: Enforcement will not limit which login methods a user can use. Because Railway users can be members of multiple workspaces, they can still log in with other methods, but must use SAML SSO to access the SAML-enforced workspace.
#### Login using SSO
After SAML SSO is enabled, users can log in using their organization’s email by selecting _"Log in using Email"_ → _"Log in using SSO"_.
Alternatively, go directly to https://railway.com/login#login-saml.
Railway also supports IdP-initiated SSO, allowing users to access Railway directly from their Identity Provider’s dashboard.
#### Supported identity providers
We support all identity providers that use **SAML** or **OIDC**, including:
- Okta
- Microsoft Entra ID (Azure AD)
- Auth0
- Google
- JumpCloud
- ADP
- CAS
- ClassLink
- Cloudflare
- Ping Identity
- CyberArk
- Duo
- Keycloak
- LastPass
- Login.gov
- miniOrange
- NetIQ
- OneLogin
- Oracle
- Rippling
- Salesforce
- Shibboleth
- SimpleSAMLphp
- VMware Workspace
and any other provider compatible with **SAML** or **OIDC**.
#### SSO-related events
You can receive notifications when important SSO-related events were triggered:
- **SSO Connected:** when an Identity Provider is successfully connected to the workspace.
- **SSO Disconnected:** when the Identity Provider is disconnected from the workspace.
- **SSO Updated:** when [SAML enforcement](#enforcing-saml-sso) is enabled or disabled.
- **SAML Certificate requires renewal:** when the SAML certificate is nearing expiration or has expired. This event is triggered multiple times before and after expiration.
- **SAML Certificate renewed:** when the SAML certificate is successfully renewed.
### Environment RBAC
Source: https://docs.railway.com/enterprise/environment-rbac.md
Restrict access to sensitive environments like production with role-based access control.
Environment RBAC is available on [Railway Enterprise](https://railway.com/enterprise).
Environment RBAC (Role-Based Access Control) allows you to restrict access to sensitive environments like production. This ensures that only authorized team members can view or modify critical infrastructure.
#### How it works
When an environment is marked as restricted:
- **Non-admin members** can see that the environment exists but cannot access its resources
- **Restricted resources** include variables, logs, metrics, services, and configurations
- **Deployments** can still be triggered via git push, allowing developers to deploy without accessing sensitive data
This separation allows development teams to deploy code while keeping production secrets and configurations secure.
#### Enabling environment RBAC
Subscribe to a [committed spend plan](/pricing/committed-spend) to enable RBAC.
Once enabled for your workspace:
1. Go to **Project Settings → Environments**
2. Find the environment you want to restrict (e.g., `production`)
3. Toggle the **Restricted** switch
#### Role permissions
| Role | Can access restricted environments | Can toggle restriction |
| :--- | :---: | :---: |
| Admin | ✔️ | ✔️ |
| Member | ❌ | ❌ |
| Deployer | ❌ | ❌ |
##### Admin
Admins have full access to all environments, including restricted ones. They can:
- View and modify variables, services, and configurations
- Access logs and metrics
- Toggle the restricted status on any environment
##### Member
Members cannot access restricted environments. They can:
- See that the environment exists in the project
- Trigger deployments via git push
- Access non-restricted environments normally
##### Deployer
Deployers have the same restrictions as Members for restricted environments. They can:
- Trigger deployments via git push
- Cannot view variables, logs, or configurations in restricted environments
#### Use cases
##### Protecting production secrets
Keep production API keys, database credentials, and third-party service tokens hidden from developers who don't need access.
##### Compliance requirements
Meet security compliance requirements (SOC 2, HIPAA, etc.) by limiting access to production data and configurations.
##### Separation of duties
Allow developers to deploy code without having access to view or modify production infrastructure settings.
#### Best practices
1. **Restrict production by default** - Mark your production environment as restricted immediately after enabling the feature
2. **Limit admin count** - Only grant admin access to team members who need to manage production configurations
3. **Use staging for debugging** - Keep a non-restricted staging environment that mirrors production for debugging purposes
4. **Audit regularly** - Review who has admin access periodically to ensure it aligns with current team responsibilities
#### Related
- [Environments](/environments) - Learn about environment management
- [Project Members](/projects/project-members) - Manage team access and roles
- [Enterprise Features](https://railway.com/enterprise) - Explore other enterprise capabilities
### Guardrails
Source: https://docs.railway.com/enterprise/guardrails.md
Enforce workspace-level policies that restrict public networking and deployment sources.
Guardrails are available on eligible [committed spend plans](/pricing/committed-spend). Contact us to learn more.
Guardrails are workspace-level policies that restrict what members can do across every project in the workspace. A workspace admin toggles a policy once, and Railway enforces it in the dashboard and at the API level without any per-project configuration.
Three policies are available:
| Policy | What it restricts | Applies to |
|--------|-------------------|------------|
| Restrict generate domain | Generating `*.railway.app` service domains | Non-admin members |
| Restrict TCP proxy | Creating public TCP proxies | Non-admin members |
| Restrict deployments to approved sources | Deploying from sources outside approved GitHub organizations | All members, including admins |
#### Restrict public networking
Rolling Railway out to a large team means trusting that developers won't accidentally expose internal services to the public internet. The two public networking policies remove that risk:
- **Restrict generate domain** prevents non-admin members from generating public `*.railway.app` domains on their services
- **Restrict TCP proxy** prevents non-admin members from creating public TCP proxies
Workspace admins retain full access, so they can still generate domains and create TCP proxies where needed. Non-admin members see a banner in the service's networking settings explaining the restriction, and requests through the API are rejected.
While a policy is enabled, Railway also skips automatic generation for everyone, including admins:
- Services created from a template don't automatically get a service domain or TCP proxy
- New environments don't auto-generate service domains
Custom domains aren't restricted, and services remain reachable over [private networking](/networking/private-networking), so internal traffic between services is unaffected.
#### Restrict deployment sources
The **Restrict deployments to approved sources** policy blocks any deployment whose source can't be verified against an allowlist of approved GitHub organizations. Unlike the public networking policies, it applies to every workspace member, including admins. This makes it a hard boundary for the whole workspace rather than a per-role restriction.
When the policy is enabled:
- Deployments from repositories owned by an approved GitHub organization work normally
- Deployments from any other repository are blocked, including personal repositories
- CLI deploys with `railway up`, Docker image deploys, function services, and template deploys are blocked, because their source can't be verified against a GitHub organization
- Official Railway database templates (such as PostgreSQL, MySQL, Redis, and MongoDB) remain deployable
Railway enforces the policy when a deployment is created, when a service is created with a source, and when a service's source changes. Disconnecting a source from a service is always allowed. In the dashboard, the template, Docker image, and function options are disabled while the policy is active.
Railway matches repositories against the allowlist by GitHub organization ID rather than name, so renaming a GitHub organization doesn't break the policy.
**Note:** Enabling the policy doesn't affect existing deployments. Enforcement applies to new deployments, new services, and service source changes.
#### Configure guardrails
Guardrails are managed in workspace settings. Only workspace admins can view or change policies.
1. Navigate to your workspace settings and open **Guardrails**.
2. Toggle **Restrict generate domain** or **Restrict TCP proxy** to enable either public networking policy.
3. To restrict deployment sources, click **Add GitHub organization** under **Approved sources** and add an organization.
4. Toggle **Restrict deployments to approved sources** on.
The organization picker only lists GitHub organizations where Railway's GitHub app is installed and you're an organization admin.
The deployment source policy requires at least one approved organization before you can enable it, and the last approved organization can't be removed while the policy is enabled. Disable the policy first if you need to clear the allowlist.
Enabling or disabling a policy and updating the allowlist are recorded in the workspace [audit logs](/enterprise/audit-logs).
#### Related
- [Committed spend plans](/pricing/committed-spend)
- [Audit logs](/enterprise/audit-logs)
- [Environment RBAC](/enterprise/environment-rbac)
- [Public networking](/networking/public-networking)
- [TCP proxy](/networking/tcp-proxy)
## AI
### Railway Agent
Source: https://docs.railway.com/ai/railway-agent.md
Chat with the Railway Agent to manage services, diagnose failures, and ship fixes directly from the Railway dashboard.
The Railway Agent is a chat-based AI assistant built into the Railway dashboard. It can operate the platform on your behalf: creating and configuring services, inspecting deployments, diagnosing failures, and opening pull requests to fix broken builds.
#### What the agent can do
The agent has access to the same primitives you do, so it can act across your entire project. The agent can:
- Create services, set variables, connect databases, wire up networking, and adjust resource limits.
- List projects, environments, services, and deployments, and read logs or metrics.
- Walk through a failing deployment, read build and runtime logs, and explain what went wrong.
- Identify the cause of a failed deployment and open a pull request against your repository with a proposed fix.
#### Automatic deployment diagnosis
When a deployment fails, the agent can automatically investigate. It reads the build and runtime logs, correlates them with your service configuration and recent code changes, and produces a short explanation of the failure.
If the fix is in your code, the agent can open a pull request with the change so you can review and merge it.
#### Pricing
Usage of the Railway Agent is billed based on the underlying LLM tokens consumed, at the exact per-token rates published on anthropic.com/pricing, with no markup. See [Pricing](/pricing#railway-agent) for details.
---
### Agent integrations
Source: https://docs.railway.com/ai/agent-integrations.md
Bring the Railway Agent into your team chat — mention @Railway in Slack or Discord to work with your projects from the conversation.
Agent integrations are in beta. Breaking changes may occur.
The Railway Agent can join your team chat. Once installed, mention **@Railway** in Slack or Discord to ask about your projects, inspect deployments, read logs, and make changes — the same [Railway Agent](/ai/railway-agent) that runs in the dashboard, answering where your team already works.
#### Available integrations
- [Slack](/ai/agent-integrations/slack) — install the app to your Slack workspace and link it with `/railway-link`.
- [Discord](/ai/agent-integrations/discord) — add the app to your Discord server and link it with `/link workspace`.
#### How it works
Two connections make the agent available in a chat workspace:
1. **Your account** — each person links their Slack or Discord identity to their Railway account. The agent acts with *your* access, never someone else's.
2. **The workspace** — a Railway workspace admin links the Slack workspace or Discord server to a single Railway workspace. This decides which projects the agent can see and which workspace pays for usage.
Both are checked on every message. If you leave the Railway workspace, the agent stops responding to you immediately.
#### Managing connections
[Account Settings](https://railway.com/account) shows everything in one place:
- **Your account links** appear under Account Integrations, with a disconnect option for each.
- **Workspace connections** appear on the Slack and Discord cards as "Agent linked to *workspace*" rows. Workspace admins can remove a connection there — the agent stops responding in that server immediately. Removing the connection doesn't uninstall the app from Slack or Discord; do that from the chat platform's own settings.
To reconnect or point a server at a different Railway workspace, run the link command again — no need to reinstall.
#### Permissions and billing
- Linking a chat workspace requires **admin** on the Railway workspace, and so does removing the link.
- Using the agent requires being a **member** of the linked Railway workspace, re-checked on every message.
- Agent usage in chat is billed to the linked Railway workspace at the same rates as the dashboard agent. See [Pricing](/pricing#railway-agent) for details.
### Slack
Source: https://docs.railway.com/ai/agent-integrations/slack.md
Install the Railway Agent in your Slack workspace and work with your projects from chat.
Agent integrations are in beta. Breaking changes may occur.
Mention **@Railway** in Slack to ask the [Railway Agent](/ai/railway-agent) about your projects, inspect deployments, read logs, and make changes without leaving the conversation.
#### Set up
1. Go to [Account Settings](https://railway.com/account) → **Railway Agent Integrations** and click **Add to Slack**. Approve the install for your Slack workspace.
2. Mention **@Railway** in any channel. The first time, it replies with a link to connect your Slack identity to your Railway account — follow it.
3. A Railway workspace admin runs `/railway-link` in a channel (not a thread) and picks the Railway workspace to connect.
4. That's it — mention **@Railway** with a question.
Each teammate connects their own account (step 2); the workspace link (step 3) only needs to happen once. Run `/railway-link` again at any time to point the workspace at a different Railway workspace.
#### Channels
The agent can reply in any public channel. For private channels, invite it first with `/invite @Railway`.
#### Removing the integration
Workspace admins can remove the workspace connection from [Account Settings](https://railway.com/account) — see [Managing connections](/ai/agent-integrations#managing-connections). The agent stops responding in that Slack workspace immediately; uninstall the app itself from Slack's own admin settings.
### Discord
Source: https://docs.railway.com/ai/agent-integrations/discord.md
Install the Railway Agent in your Discord server and work with your projects from chat.
Agent integrations are in beta. Breaking changes may occur.
Mention **@Railway** in Discord to ask the [Railway Agent](/ai/railway-agent) about your projects, inspect deployments, read logs, and make changes without leaving the conversation.
#### Set up
1. Go to [Account Settings](https://railway.com/account) → **Railway Agent Integrations** and click **Add to Discord**. Authorize the app into your server.
2. Connect your Discord account to Railway under **Account Integrations** on the same page. If you skip this, the agent will prompt you the first time you mention it.
3. A Railway workspace admin runs `/link workspace` in the server and picks the Railway workspace to connect.
4. Mention **@Railway** with a question.
Each teammate connects their own account (step 2); the server link (step 3) only needs to happen once. Run `/link workspace` again at any time to point the server at a different Railway workspace.
#### Removing the integration
Workspace admins can remove the server connection from [Account Settings](https://railway.com/account) — see [Managing connections](/ai/agent-integrations#managing-connections). The agent stops responding in that server immediately; remove the app itself from Discord's own server settings.
### Agent skills
Source: https://docs.railway.com/ai/agent-skills.md
Agent skills for interacting with Railway directly from your AI coding assistant.
Agent skills for interacting with [Railway](https://railway.com) directly from your AI coding assistant.
#### What are agent skills?
Agent Skills are an open format for extending AI coding assistants with specialized knowledge and capabilities. They follow the [Agent Skills](https://agentskills.io) specification.
Skills are markdown files (`SKILL.md`) that contain:
- **Metadata** in YAML frontmatter
- **Instructions** with step-by-step guidance for the AI agent
- **Examples** showing expected behavior
When you ask your AI assistant something like "deploy to Railway" or "check my project status," the agent automatically selects the appropriate skill based on your intent and follows its instructions.
##### Supported tools
- Claude Code
- OpenAI Codex
- OpenCode
- Cursor
#### Installation
To install the Railway CLI and configure Railway agent support in one step:
```bash
curl -fsSL agents.railway.com | sh
```
This installs or reuses the Railway CLI, installs the `use-railway` skill, configures Railway MCP for detected tools, and checks Railway authentication. If `railway` is already on `PATH`, the installer reuses it without changing `PATH`. If you are not already logged in, run `railway login` after setup.
If the Railway CLI is already installed, you can run the agent setup directly:
```bash
railway setup agent
```
To install only the agent skills, use the [`railway skills`](/cli/skills) command:
```bash
railway skills install
```
You can also install via skills.sh:
```bash
npx skills add railwayapp/railway-skills
```
Supports Claude Code, OpenAI Codex, OpenCode, and Cursor. Re-run to update.
**Note:** For Claude Code, you can also install through the [Claude Code plugin marketplace](/ai/claude-code-plugin).
#### The use-railway skill
The repository ships one skill called `use-railway`. It uses a route-first design where intent routing is defined in the skill file and execution details are split into action-oriented references.
##### Workflow coverage
The `use-railway` skill covers the following areas:
- **Project and service setup** - Create projects, add services, scaffold code for deployment, and link existing projects
- **Deploy and release operations** - Push code to Railway, manage deployments, and handle the deployment lifecycle
- **Troubleshooting and recovery** - View build and deploy logs, redeploy, restart, or remove deployments
- **Environment config and variables** - Query and modify service configuration, environment variables, build/deploy commands, replicas, health checks, and restart policies
- **Feature flags** - List, inspect, create, update defaults, and delete project-scoped flags via MCP; read workspace-scoped flags
- **Bucket management** - Create, list, inspect, rename, and delete storage buckets, and view or reset S3-compatible credentials
- **Networking and domains** - Add Railway-provided domains, configure custom domains, and manage domain settings
- **Status and observability** - Check project status, query resource usage metrics (CPU, memory, network, disk), and monitor services
- **Projects and workspaces** - List projects, switch between projects, and manage project settings
- **Docs and community search** - Fetch Railway documentation and search Central Station for community threads and discussions
#### Source
The Railway agent skills are open-source and available on GitHub.
### Claude Code plugin
Source: https://docs.railway.com/ai/claude-code-plugin.md
Install the Railway plugin for Claude Code to manage your infrastructure with natural language.
The Railway plugin for Claude Code provides skills, hooks, and tooling for managing Railway projects and deployments directly from your terminal.
The plugin is distributed through Claude Code's plugin marketplace system and installs the [`use-railway`](/ai/agent-skills#the-use-railway-skill) agent skill along with supporting scripts and hooks.
#### Prerequisites
- Claude Code installed (version 1.0.33 or later)
- The [Railway CLI](/cli) installed and authenticated
#### Installation
From within Claude Code, add the Railway plugin marketplace:
```bash
/plugin marketplace add railwayapp/railway-skills
```
This registers the Railway marketplace and makes the plugin available to install.
Install the Railway plugin from the marketplace:
```bash
/plugin install railway@railway-skills
```
You can also browse and install through the interactive plugin manager by running `/plugin` and navigating to the **Discover** tab.
After installation, the plugin's skills are available in your Claude Code session. Ask your assistant to deploy services, check project status, manage environments, or perform any of the tasks covered by the [`use-railway` skill](/ai/agent-skills#the-use-railway-skill).
#### Update the plugin
To update to the latest version, refresh the marketplace and reinstall:
```bash
/plugin marketplace update railway-skills
```
You can also enable auto-updates for the marketplace through the `/plugin` interface under the **Marketplaces** tab.
#### What's included
The plugin installs the following components:
- **`use-railway` skill** - A route-first agent skill that covers project setup, deployments, troubleshooting, environment configuration, networking, observability, and more. See [Agent Skills](/ai/agent-skills) for the full list of capabilities. The skill includes action-oriented reference documents and a GraphQL API helper script for authenticated Railway API requests.
- **Auto-approve hook** - A `PreToolUse` hook that automatically approves Railway CLI commands and Railway API script calls, so Claude Code doesn't prompt for permission on every Railway operation.
#### Alternative installation
If you prefer to install the agent skill without the Claude Code plugin system, use the [`railway skills`](/cli/skills) command, which works across multiple AI coding assistants:
```bash
railway skills install
```
See [Agent Skills](/ai/agent-skills) for more details.
#### Source
The Railway Claude Code plugin is open-source and available on GitHub.
### MCP server
Source: https://docs.railway.com/ai/mcp-server.md
Connect AI coding agents to Railway via the Model Context Protocol — either through the Railway CLI locally or the hosted remote MCP endpoint.
The [Railway MCP Server](https://github.com/railwayapp/railway-mcp-server) is a [Model Context Protocol (MCP)](https://modelcontextprotocol.org) server that enables natural language interaction with your Railway projects and infrastructure. Ask your IDE or AI assistant to create projects, deploy templates, manage environments, pull variables, redeploy services, and more.
Railway offers two ways to connect:
* **Local MCP** — runs through the [Railway CLI](/cli) on your machine. Recommended for most coding-agent workflows since it shares the CLI's authentication and project context.
* **Remote MCP** — a hosted endpoint at `mcp.railway.com`. No local install or CLI required; clients authenticate through OAuth in the browser.
#### Quick start
Install the Railway CLI and configure agent support — skills, MCP, and authentication — in one command. Toggle the options to tailor the command to what you want set up:
If the CLI is already installed, skip the bootstrap and run:
```bash
railway setup agent # local MCP
railway setup agent --remote # remote MCP
```
Read on for per-editor manual configuration, the available tool list, and security considerations.
#### Per-editor configuration
If you'd rather wire up an editor by hand — or want to see exactly what `railway mcp install` writes — use the toggle to switch between the local stdio config and the remote HTTP config:
`railway mcp install` merges the Railway server entry into existing configs without removing other MCP servers. Re-run it any time to update.
#### Understanding MCP
The **Model Context Protocol (MCP)** defines a standard for how AI applications (hosts) can interact with external tools and data sources through a client-server architecture.
* **Hosts**: Applications such as Cursor, VS Code, Claude Code, or Windsurf that connect to MCP servers.
* **Clients**: The layer within hosts that maintains one-to-one connections with individual MCP servers.
* **Servers**: Standalone programs (like the Railway MCP Server) that expose tools and workflows for managing external systems.
The local Railway MCP Server translates natural language requests into CLI workflows powered by the [Railway CLI](/cli). The remote MCP server runs on Railway's infrastructure and authenticates via OAuth.
#### Prerequisites
* **Local MCP** — install and authenticate the [Railway CLI](/cli).
* **Remote MCP** — a [Railway account](https://railway.com/login). No local install required.
#### Example usage
* **Create and deploy a new app**
```text
Create a Next.js app in this directory and deploy it to Railway.
Also assign it a domain.
```
* **Deploy from a template**
```text
Deploy a Postgres database
```
* **Pull environment variables**
```text
Pull environment variables for my project and save them to a .env file
```
* **Debug a failing deployment** (remote-only `railway-agent` tool)
```text
Use the railway agent to figure out why my backend service is
crashing on deploy
```
* **Redeploy a service**
```text
Redeploy my api service in the production environment
```
* **Manage feature flags**
```text
List feature flags for project
```
```text
Set the checkout-v2 feature flag to true on project
```
#### Available MCP tools
The Railway MCP Server provides a curated set of tools. Your AI assistant calls these automatically based on the context of your request.
##### Local MCP
The local server runs through the Railway CLI and exposes a broader set of CRUD tools:
* **Status**
* `check-railway-status` — verify CLI installation and authentication
* **Projects & services**
* `list-projects`, `create-project-and-link`
* `list-services`, `link-service`
* `deploy` — deploy a service
* `deploy-template` — deploy from the [Railway Template Library](https://railway.com/deploy)
* **Environments**
* `create-environment`, `link-environment`
* **Configuration**
* `list-variables`, `set-variables`
* `generate-domain`
* **Observability**
* `get-logs`
##### Remote MCP
The remote server exposes a focused set of tools plus a powerful agent entry point. For anything complex, delegate to `railway-agent`.
* **Account**
* `whoami`
* **Projects**
* `list-projects`, `create-project`, `list-services`
* **Feature flags**
* `list-feature-flags`, `get-feature-flag`
* `set-feature-flag`, `delete-feature-flag` (admin; destructive delete is marked at the protocol level)
* **Deployments**
* `redeploy`
* `accept-deploy` — commit staged changes and deploy (destructive; clients prompt for confirmation)
* **Agent**
* `railway-agent` — hand a natural-language request to Railway's AI agent for multi-step operations like log analysis, debugging, and service configuration
#### Security considerations
The Railway MCP Server runs CLI commands or invokes Railway APIs on your behalf. Destructive operations are intentionally excluded from the local server's tool list, but you should still:
* **Review actions** requested by the LLM before approving them, especially destructive ones (`redeploy`, `accept-deploy`, `railway-agent`).
* **Restrict access** to ensure only trusted users can invoke the MCP server.
* **Avoid production risks** by limiting usage to non-critical environments where possible.
For the remote server specifically:
* **OAuth scoping.** When you consent, you choose which workspaces and projects the client can access. Tokens are short-lived and can be revoked from your Railway account settings.
* **Destructive actions** are marked at the protocol level. Clients that respect these hints will prompt for confirmation.
* **Project tokens are not accepted.** The remote MCP server requires a user identity for billing and audit trails.
#### Feature requests
The Railway MCP Server is a work in progress. We are actively adding more tools and features. If you have a feature request, leave your feedback on this [Central Station](https://station.railway.com/feedback/model-context-protocol-for-railway-railw-c040b796) post.
## Templates & open source
---
### Deploy
Source: https://docs.railway.com/templates/deploy.md
Learn how to deploy Railway templates.
Templates allow you to deploy a fully configured project that is automatically
connected to infrastructure.
You can find featured templates on the template marketplace.
#### Template deployment flow
To deploy a template -
- Find a template from the marketplace and click `Deploy Now`
- If necessary, configure the required variables, and click `Deploy`
- Upon deploy, you will be taken to your new project containing the template service(s)
- Services are deployed directly from the defined source in the template configuration
- After deploy, you can find the service source by going to the service's settings tab
- Should you need to make changes to the source code, you will need to [eject from the template repo](#eject-from-template-repository) to create your own copy. See next section for more detail.
_Note: You can also deploy templates into existing projects, by clicking `+ New` from your project canvas and selecting `Template`._
#### Getting help with a template
If you need help with a template you have deployed, you can ask the template creator directly:
1. Find the template page in the [marketplace](https://railway.com/templates)
2. Click **"Discuss this Template"** on the template details page
3. Your question will be posted to the template's queue where the creator can help
Template creators are notified when questions are posted and are incentivized to provide helpful responses through Railway's kickback program.
#### Eject from template repository
As of March 2024, the default behavior for deploying templates, is to attach to and deploy directly from the template repository. Therefore, you will not automatically get a copy of the repository on deploy. Follow the steps below to create a repository for yourself.
By default, services deployed from a template are attached to and deployed directly from the template repository. In some cases, you may want to have your own copy of the template repository.
Follow these steps to eject from the template repository and create a mirror in your own GitHub account.
1. In the [service settings](/overview/the-basics#service-settings), under Source, find the **Upstream Repo** setting
2. Click the `Eject` button
3. Select the appropriate GitHub organization to create the new repository
4. Click `Eject service`
#### Updatable templates
When you deploy any services from a template based on a GitHub repo, every time you visit the project in Railway, we will check to see if the project it is based on has been updated by its creator.
If it has received an upstream update, we will create a branch on the GitHub repo that was created when deploying the template, allowing for you to test it out within a PR deploy.
If you are happy with the changes, you can merge the pull request, and we will automatically deploy it to your production environment.
If you're curious, you can read more about how we built updatable templates in this blog post
_Note: This feature only works for services based on GitHub repositories. At this time, we do not have a mechanism to check for updates to Docker images from which services may be sourced._
### Create
Source: https://docs.railway.com/templates/create.md
Learn how to create reusable templates on Railway to enable effortless one-click deploys.
Creating a template allows you to capture your infrastructure in a reusable and distributable format.
By defining services, environment configuration, network settings, etc., you lay the foundation for others to deploy the same software stack with the click of a button.
If you [publish your template](/templates/publish-and-share) to the marketplace, you can earn kickbacks from usage, up to 25% for open source templates with active community support. Learn more about the [kickback program](/templates/kickbacks).
#### How to create a template
You can either create a template from scratch or base it off of an existing project.
##### Starting from scratch
To create a template from scratch, head over to your Templates page within your workspace settings and click on the `New Template` button.
- Add a service by clicking the `Add New` button in the top right-hand corner, or through the command palette (`CMD + K` -> `+ New Service`)
- Select the service source (GitHub repo or Docker Image)
- Configure the service variables and settings
- Once you've added your services, click `Create Template`
- You will be taken to your templates page where you can copy the template URL to share with others
Note that your template will not be available on the template marketplace, nor will be eligible for a kickback, until you [publish](/templates/publish-and-share) it.
##### Private repo support
It's now possible to specify a private GitHub repo when creating a template.
This feature is intended for use among [Workspaces](/projects/workspaces) and [Organizations](/projects/workspaces). Users supporting a subscriber base may also find this feature helpful to distribute closed-source code.
To deploy a template that includes a private repo, look for the `GitHub` panel in the `Account Integrations` section of [General Settings](https://railway.com/account). Then select the `Edit Scope` option to grant Railway access to the desired private repos.
If you do not see the `Edit Scope` option, you may still need to connect GitHub to your Railway account.
##### Private Docker images
If your template includes a private Docker image, you can provide your registry credentials without exposing them to users who deploy your template.
To set this up, add a service with a Docker image source in the template editor, then enter your registry credentials in the service settings. Railway encrypts and stores these credentials securely.
When users deploy your template, Railway automatically authenticates with your registry to pull the image. Users will only see that the service uses hidden registry credentials, not the credentials themselves.
To protect your credentials, SSH access is disabled and users cannot modify the Docker image source for services with hidden registry credentials.
##### Convert a project into a template
You can also convert an existing project into a ready-made Template for other users.
- From your project page, click `Settings` in the right-hand corner of the canvas
- Scroll down until you see **Generate Template from Project**
- Click `Create Template`
- You will be taken to the template composer page, where you should confirm the settings and finalize the template creation
#### Configuring services
Configuring services using the template composer is very similar to building a live project in the canvas.
Once you add a new service and select the source, you can configure the following to enable successful deploys for template users:
- **Variables tab**
- Add required [Variables](/variables).
_Use [reference variables](/variables#reference-variables) where possible for a better quality template_
- **Settings tab**
- Add a [Root Directory](/deployments/monorepo) (Helpful for monorepos)
- [Enable Public Networking](/networking/public-networking) with TCP Proxy or HTTP
- Set a custom [Start command](/deployments/start-command)
- Add a [Healthcheck Path](/deployments/healthchecks#configure-the-healthcheck-path)
- **Add a volume**
- To add a volume to a service, right-click on the service, select Attach Volume, and specify the [Volume mount path](/volumes)
##### Specifying a branch
To specify a particular GitHub branch to deploy, simply enter the full URL to the desired branch in the Source Repo configuration. For example -
- This will deploy the `main` branch: `https://github.com/railwayapp-templates/postgres-ssl`
- This will deploy the `new` branch: `https://github.com/railwayapp-templates/postgres-ssl/tree/new`
##### Template variable functions
Template variable functions allow you to dynamically generate variables (or parts of a variable) on demand when the template is deployed.
When a template is deployed, all template variable functions are executed and the result replaces the `${{ ... }}` in the variable.
Use template variables to generate a random password for a database, or to generate a random string for a secret.
The current template variable functions are:
1. `secret(length?: number, alphabet?: string)`: Generates a random secret (32 chars by default).
**Tip:** You can generate Hex or Base64 secrets by constructing the appropriate alphabet and length.
- `openssl rand -base64 16` →
```text
${{secret(22, "abcdefghijklmnopqrstuvwxyzABCDEFGHIJKLMNOPQRSTUVWXYZ0123456789+/")}}==
```
- `openssl rand -base64 32` →
```text
${{secret(43, "abcdefghijklmnopqrstuvwxyzABCDEFGHIJKLMNOPQRSTUVWXYZ0123456789+/")}}=
```
- `openssl rand -base64 64` →
```text
${{secret(86, "abcdefghijklmnopqrstuvwxyzABCDEFGHIJKLMNOPQRSTUVWXYZ0123456789+/")}}==
```
- `openssl rand -hex 16` →
```text
${{secret(32, "abcdef0123456789")}}
```
- `openssl rand -hex 32` →
```text
${{secret(64, "abcdef0123456789")}}
```
- `openssl rand -hex 64` →
```text
${{secret(128, "abcdef0123456789")}}
```
Or even generate a UUIDv4 string -
```text
${{secret(8, "0123456789abcdef")}}-${{secret(4, "0123456789abcdef")}}-4${{secret(3, "0123456789abcdef")}}-${{secret(1, "89ab")}}${{secret(3, "0123456789abcdef")}}-${{secret(12, "0123456789abcdef")}}
```
2. `randomInt(min?: number, max?: number)`: Generates a random integer between min and max (defaults to 0 and 100)
#### Managing your templates
You can see all of your templates on your Workspace's Template page. Templates are separated into Personal and Published templates.
You can edit, publish/unpublish and delete templates.
### Updates
Source: https://docs.railway.com/templates/updates.md
Learn how template updates work for authors and consumers.
Railway supports automatic update notifications for templates, allowing template authors to push changes to users who have deployed their templates.
#### For template authors
As a template author, you can push updates to all users who have deployed your template. When you merge changes to the root branch (typically `main` or `master`) of your template's GitHub repository, Railway will automatically detect these changes and notify users who have deployed your template that an update is available.
Users will receive a notification about the update and can choose to apply it to their deployment when they're ready.
**Best Practice**: Keep your template's changelog up to date and document breaking changes clearly so that consumers understand what's changing when they receive update notifications.
##### Requirements
- Your template must be based on a GitHub repository
- Updates are triggered when changes are merged to the root branch (`main` or `master`)
- Docker image-based templates cannot be automatically updated through this mechanism
##### Update workflow
1. Make changes to your template's GitHub repository
2. Merge changes to the root branch
3. Railway detects the changes automatically
4. Users who deployed your template receive an update notification
5. Users can choose when to apply the update
#### For template consumers
When you deploy any services from a template based on a GitHub repo, Railway will check to see if the template has been updated by its creator.
If an upstream update is available, you will receive a notification. You can then choose to apply the update to your deployment when you're ready.
##### How updates work
- Railway monitors the template's source repository for changes
- When updates are detected, you'll see a notification in your project
- Updates are opt-in, you control when to apply them
- Review the template author's changelog before updating to understand what's changing
##### Limitations
- This feature only works for services based on GitHub repositories
- At this time, there is no mechanism to check for updates to Docker images from which services may be sourced
If you're curious, you can read more about how we built updatable templates in this blog post.
### Best practices
Source: https://docs.railway.com/templates/best-practices.md
Learn the best practices for template creation.
Creating templates can get complex, but these best practices will help you create templates that are easy to use and maintain.
#### Checklist
Depending on the type of template, there are different things to consider:
- [Template and Service Icons](#template-and-service-icons)
- [Naming Conventions](#naming-conventions)
- [Private Networking](#private-networking)
- [Environment Variables](#environment-variables)
- [Health Checks](#health-checks)
- [Persistent Storage](#persistent-storage)
- [Authentication](#authentication)
- [Dry Code](#dry-code)
- [Workspace Naming](#workspace-naming)
- [Overview](#overview)
#### Template and service icons
Template and service icons are important for branding and recognition, as they give the template a more professional look and feel.
Always use 1:1 aspect ratio icons or logos with transparent backgrounds for both the template itself and the services the template includes.
Transparent backgrounds ensure logos integrate seamlessly with Railway's interface and provide a more polished, professional appearance.
#### Naming conventions
Naming conventions are important for readability and consistency; using proper names enhances the overall quality and credibility of your template.
Always follow the naming conventions for the software that the template is made for.
Example, if the template is for ClickHouse, the service and template name should be named `ClickHouse` with a capital C and H, since that is how the brand name is spelled.
For anything else, such as custom software:
- Use capital case.
- Avoid using special characters or dashes, space-delimited is the way to go.
- Prefer shorter names over longer names for better readability.
- Keep names concise while maintaining clarity.
#### Private networking
Private networking provides faster, free communication between services and reduces costs compared to routing traffic through the public internet.
Always configure service-to-service communication (such as backend to database connections) to use private network hostnames rather than public domains.
For more details, see the [private networking guide](/networking/private-networking) and [reference documentation](/networking/private-networking).
#### Environment variables
Properly set up environment variables are a great way to increase the usability of your template.
When using environment variables:
- Always include a description of what the variable is for.
- If a variable is optional, include a description explaining its purpose and what to set it to or where to find its value.
- For any secrets, passwords, keys, etc., use [template variable functions](/templates/create#template-variable-functions) to generate them, avoid hardcoding default credentials at all costs.
- Use [reference variables](/variables#referencing-another-services-variable) when possible for dynamic service configuration.
- When referencing a hostname, use the private network hostname rather than the public domain, e.g., `RAILWAY_PRIVATE_DOMAIN` rather than `RAILWAY_PUBLIC_DOMAIN`.
- Include helpful pre-built variables that the user may need, such as database connection strings, API keys, hostnames, ports, and so on.
#### Health checks
Health checks are important for ensuring that the service is running properly, before traffic is routed to it.
Although a health check might not be needed for all software, such as Discord bots, when it is applicable, it is a good idea to include a health check.
A readiness endpoint is the best option; if that's not possible, then a liveness endpoint should be used.
For more details, see the [healthchecks guide](/deployments/healthchecks) and [reference documentation](/deployments/healthchecks).
#### Persistent storage
Persistent storage is essential for templates that include databases, file servers, or other stateful services that need to retain data across deployments.
Always include a volume for these services.
Without persistent storage, data will be lost between redeployments, leading to unrecoverable data loss for template users.
When configuring the service, ensure the volume is mounted to the correct path. An incorrect mount path will prevent data from being stored in the volume.
Some examples of software that require persistent storage:
- **Databases:** PostgreSQL, MySQL, MongoDB, etc.
- **File servers:** Nextcloud, ownCloud, etc.
- **Other services:** Redis, RabbitMQ, etc.
The volume mount location depends entirely on where the software expects it to be mounted. Refer to the software's documentation for the correct mount path.
For more details, see the [volumes guide](/volumes) and [reference documentation](/volumes).
#### Authentication
Authentication is a common feature for many software applications, and it is crucial to properly configure it to prevent unauthorized access.
If the software provides a way to configure authentication, such as a username and password, or an API key, you should always configure it in the template.
For example, ClickHouse can operate without authentication, but authentication should always be configured so as not to leave the database open and unauthenticated to the public.
Passwords, API keys, etc. should be generated using [template variable functions](/templates/create#template-variable-functions), and not hardcoded.
#### Dry Code
This is most applicable to templates that deploy from GitHub.
When creating templates that deploy from GitHub, include only the essential files needed for deployment. Avoid unnecessary documentation, example files, or unused code and configurations that don't contribute to the core functionality.
A clean, minimal repository helps users quickly understand the template's structure and make customizations when needed.
#### Workspace naming
When users deploy a template, the template author appears as the name of the workspace that created and published it.
Since the author is publicly visible and shown with the template to the users, it is important to make sure the workspace name is professional and **accurately represents your relationship to the software**.
**Important:** Only use a company or organization name as your workspace name if you are officially authorized to represent that entity. Misrepresenting your affiliation is misleading to users and violates trust.
**If you are officially affiliated** with the software (e.g., you work for ClickHouse and are creating a ClickHouse template), then using the official company name "ClickHouse, Inc." is appropriate and helpful for users to identify official templates.
**If you are not officially affiliated** with the software, always use your own professional name as the workspace name.
**Note:** To transfer a template from one workspace to another, contact support.
#### Overview
The overview is the first thing users will see when they click on the template, so it is important to make it count.
The overview should include the following:
- **H1: Deploy and Host [X] with Railway**
What is X? Your description in roughly ~ 50 words.
- **H2: About Hosting [X]**
Roughly 100 word description what's involved in hosting/deploying X
- **H2: Common Use Cases**
In 3-5 bullets, what are the most common use cases for [X]?
- **H2: Dependencies for [X] Hosting**
In bullet form, what other technologies are incorporated in using this template besides [X]?
- **H3: Deployment Dependencies**
Include any external links relevant to the template.
- **H3: Implementation Details (Optional)**
Include any code snippets or implementation details. This section is optional. Exclude if nothing to add.
- **H3: Why Deploy [X] on Railway?**
Railway is a singular platform to deploy your infrastructure stack. Railway will host your infrastructure so you don't have to deal with configuration, while allowing you to vertically and horizontally scale it.
By deploying [X] on Railway, you are one step closer to supporting a complete full-stack application with minimal burden. Host your servers, databases, AI agents, and more on Railway.
### Publish and share
Source: https://docs.railway.com/templates/publish-and-share.md
Learn how to publish and share your Railway templates.
Once you create a template, you have the option to publish it. Publishing a template will add it to the template marketplace for other users to deploy.
#### Publishing a template
After you create your template, simply click the publish button and fill out the form to publish your template.
You can always publish your template by going to the Templates page in your Workspace settings and choose `Publish` next to the template you'd like to publish.
Optionally, you can add a demo project to your template. This will be used to showcase your template in a working project, and can be accessed by clicking on the `Live Demo` button in the template's overview page.
#### Sharing your templates
After you create your template, you may want to share your work with the public and let others clone your project. You are provided with the Template URL where your template can be found and deployed.
##### Deploy on Railway button
To complement your template, we also provide a `Deploy on Railway` button which you can include in your README or embed it into a website.

The button is located at [https://railway.com/button.svg](https://railway.com/button.svg).
###### Markdown
To render the button in Markdown, copy the following code and replace the template code with your desired template. If you'd like to help us attribute traffic to your template, replace `utm_campaign=generic` in the URL with your template name.
```md
[](https://railway.com/new/template/ZweBXA?utm_medium=integration&utm_source=button&utm_campaign=generic)
```
###### HTML
To render the button in HTML, copy the following code and replace the template code with your desired template. If you'd like to help us attribute traffic to your template, replace `utm_campaign=generic` in the URL with your template name.
```html
```
##### Examples
Here are some example templates from the template marketplace in button form:
|Icon|Template|Button|
|:--:|:------:|:----:|
||Node|[](https://railway.com/new/template/ZweBXA?utm_medium=integration&utm_source=button&utm_campaign=node)|
||Deno|[](https://railway.com/new/template/LsaSsU?utm_medium=integration&utm_source=button&utm_campaign=deno)|
||Bun|[](https://railway.com/new/template/gxxk5g?utm_medium=integration&utm_source=button&utm_campaign=bun)|
||Gin|[](https://railway.com/new/template/dTvvSf?utm_medium=integration&utm_source=button&utm_campaign=gin)|
||Flask|[](https://railway.com/new/template/zUcpux?utm_medium=integration&utm_source=button&utm_campaign=flask)|
#### Kickback program
If your published template is deployed into other users' projects, you are eligible for kickbacks based on your support engagement. Learn more about the [kickback program](/templates/kickbacks).
#### Template verification
Templates are verified when the creator and maintainer of the technology becomes a partner and reviews the template.
If you are or have a relationship with the creator, please reach out to us by submitting the form on the [partners page](https://railway.com/partners).
---
### Kickbacks
Source: https://docs.railway.com/templates/kickbacks.md
Earn revenue from your templates through Railway's kickback program.
If you publish a template, and it is deployed into other users' projects, you are eligible for a kickback of the usage cost incurred. You can receive kickback earnings in Railway Credits or with Cash Withdrawal.
Read more about the kickback program [here](https://railway.com/open-source-kickback).
#### Eligibility requirements
To be eligible for template kickbacks, your template must meet the following requirements:
- **Marketplace**: Your template must be published to the [template marketplace](https://railway.com/templates). Private and unpublished templates are not eligible.
- **Terms of Service**: Your project must abide by Railway's [Fair Use Policy](https://railway.com/legal/fair-use) and [Terms of Service](https://railway.com/legal/terms). Templates that violate Railway's Terms of Service may be removed and kickback payments deemed ineligible.
#### Kickback rates
- Templates receive a **15%** kickback of the usage costs incurred by users deploying your template.
- Support Bonus: Additional **10% (25% total)** when actively supporting users via your [Template Queue](https://station.railway.com/my-template-queue)
#### How earnings are calculated
Kickbacks are calculated based on the proportional resource usage cost of your template services.
For example, if a user pays $20 in platform fees, then incurs $200 of usage from your template, you are eligible for up to a $50 kickback (25% of $200 for an open source template with active support).
**Minimum Payout:** The minimum kickback payout is $0.01. Any kickback amount below this threshold will not be processed.
#### Supporting your template users
When users have questions about your template, they'll appear in your [Template Queue](https://station.railway.com/my-template-queue) in Central Station. You'll get an email when new questions come in, plus occasional reminders if questions are waiting.
Answering these questions earns you the additional 10% support bonus and helps users deploy your template successfully.
Manage notification preferences in your [account settings](https://railway.com/account/notifications) under "Template Queue Emails".
#### Open Source Partner Program
If you're the owner of a technology used in Railway templates, you can join the [Open Source & Technology Partners program](/templates/partners) to unlock extra perks like commission on templates using your technology, featured placement, and opens source product-management features.
#### Earnings and withdrawals
By default, your template kickbacks are automatically converted into Railway Credits. But we also offer cash withdrawals. Visit the `/earnings` tab inside your account settings for more details. There you can add your details and request a withdrawal.
Cash withdrawals are **not** supported in countries like **Brazil, China, and Russia**. A full list of supported countries is available on the earnings page.
##### Withdrawal FAQ
###### How do I start earning cash?
Simply flip the switch on the Earnings page marked `Direct Deposit to Railway Credits`. This will stop auto-depositing your earnings into the Railway credits system. You will then begin accruing cash in your `Available Balance`.
###### How do I request a withdrawal?
Follow the instructions inside the `Earnings` tab. We use Stripe Connect to handle withdrawals. After completing the onboarding process, you will be able to request a withdrawal.
###### Why is my country not supported?
Due to local regulations and compliance requirements, certain regions are not eligible for cash withdrawals. You can choose from the 130+ countries that are supported in the onboarding process.
###### Can I make manual withdrawals to credits too?
Yes! Choose `to Credits` in the dropdown and then make your withdrawal request.
###### I have earned a lot of kickbacks from a template, but this page says my available balance is $0. Why?
The current kickback method is to automatically apply your kickbacks as Railway credits. You can opt out of this if you wish to start accruing cash.
###### Can I still use the older, automatic-credits setting?
Yes. This behavior is enabled by default. You can opt out of it, and back in to it, at any time. Simply use the switch on the Earnings page marked `Direct Deposit to Railway Credits`.
###### What is the minimum and maximum withdrawal amount?
For now, withdrawals may be made in $100 - $10,000 increments.
###### What is the timeframe from withdrawal request to payout?
Withdrawals are usually processed instantly. Once processed, the funds will usually take up to 10 business days to reach your account. Depending on your region and bank, this may take longer.
###### What if there are no questions for my template?
If there are no questions, you will receive the full 25% kickback for your template.
### Private Docker images
Source: https://docs.railway.com/templates/private-docker-images.md
Create templates with private Docker images to distribute proprietary code through Railway and uniquely monetize.
Templates can include private Docker images, letting you distribute proprietary code without exposing your source. Users deploy your template and Railway handles authentication with your registry.
This is useful for:
- Maintainers who want to distribute solely through Railway to maximize earnings
- Products that are premium versions of open source projects
- Proprietary add-ons or plugins
#### Setting up private images
To add a private Docker image to your template:
1. In the template editor, add a service with a Docker image source
2. Enter your registry credentials in the service settings (username and password for Dockerhub, username and access token for Github registry)
3. Railway encrypts and stores the credentials securely
When users deploy your template, Railway authenticates with your registry to pull the image. Users see that the service uses hidden registry credentials, but cannot access the credentials themselves.
To protect your credentials, SSH access is disabled and users cannot modify the Docker image source for services with hidden registry credentials.
#### Combining with kickbacks
Private image templates are eligible for the same [kickback rates](/templates/kickbacks) as other templates. You earn commission when users deploy and run your private image templates.
For open source maintainers, make a hosted-only version of your tooling to capitalize on the commission you get from Railway templates.
### Metrics
Source: https://docs.railway.com/templates/metrics.md
Track deployments, earnings, and health metrics for your published templates.
Once you publish a template, you can track its performance through the Metrics tab. Access it from your Workspace Templates page by clicking Edit on any published template.
#### Overview stats
The metrics dashboard shows key stats for your template:
- **Deployments**: Total number of times your template has been deployed
- **Earnings**: Total earnings from your template
- **Support Health**: Percentage of user questions you've answered in your [Template Queue](https://station.railway.com/my-template-queue), and whether you are eligible for the support commission bonus
#### Extended metrics
*This section is under construction. Template metrics within Railway today are shown in aggregate, but we are planning to expand this view. In the meantime, please use the Gauge template documented below.*
To see time series on template volume and earnings, use the [Gauge Template Metrics](https://railway.com/deploy/gauge?referralCode=IFlm92) built by our community. Launch it within your workspace by following the instructions on the deploy page.
See the executive summary of your template earnings over time.
Understand per-template usage breakdowns.
### Open source technology partners
Source: https://docs.railway.com/templates/partners.md
Grow your open source projects and products on Railway.
Railway wants open source maintainers to succeed. If you maintain an open source project that people deploy on Railway, here's how Railway enables you to manage your open source product end-to-end and grow.
Apply at [railway.com/partners](https://railway.com/partners).
#### Earn commission
When users deploy your technology on Railway, you earn a percentage of the usage. The more your community grows on Railway, the more you earn.
- Base rate: 15% of usage from your verified templates
- Support bonus: +10% (25% total) when you answer user questions
See [Kickbacks](/templates/kickbacks) for details on earnings and withdrawals.
#### Manage your product
##### Community management
Your [Template Queue](https://station.railway.com/my-template-queue) in Central Station surfaces questions from users deploying your templates. While Central Station is our support platform, we are expanding it to be the platform for OSS maintainers to support their users. Answer questions to:
- Help users succeed with your technology
- Catch bugs and potential product improvements
- Build community around your project
- Earn the support bonus
##### Growth metrics
[Template metrics](/templates/metrics) show deployments, earnings, and support health for your published templates.
#### Monetize with private images
Want to offer a premium version alongside your open source project? [Private Docker images](/templates/private-docker-images) let you create templates with proprietary code that users can deploy without accessing your source.
If you choose to make these private images available only on Railway, you are guaranteed to get commission for your work through Railway's template marketplace and kickback program.
#### Ways to partner
Apply at [railway.com/partners](https://railway.com/partners). Your project must be open source or open-core. Once accepted, you'll be part of a thread with our team to guide you through onboarding.
##### Open source partnership
For open source maintainers who want to create and manage their own templates on Railway.
**Onboarding process:**
1. **Template verification**: Create a template (if you haven't already) following our [best practices guide](/templates/best-practices). Reply in your partner thread for us to review and verify it.
2. **Documentation**: Write a standalone guide in your documentation showing how to deploy your technology on Railway. Send us the page for any feedback.
3. **Social promotion**: Once your template is verified and the documentation page is live, we'll engage with any social promotion you do. Send us a link in your partner thread.
**What you get:**
- Verified template badge and featured placement
- Product management of your OSS tool with the template queue and metrics
- Monetization through regular template commission & private Docker images
##### Technology partnership
For open source technologies that already have community-created templates on Railway. Earn commission from all templates using your technology, not just ones you create.
**Additional benefits:**
- Commission on *all* templates using your technology (even ones you didn't create)
- A dedicated page for your technology on Railway for SEO and distribution ([example](https://railway.com/deploy/cms/directus))
- Extended co-marketing with Railway
You're listed as a "maintainer" on community templates you earn commission from.
**Onboarding process:**
1. **Template selection**: Reply in your partner thread with links to all templates that primarily feature your technology.
2. **Template verification**: We'll verify a small selection of templates as recommended ways to deploy on Railway. Let us know which ones you think are the best fit.
3. **Documentation**: Write a standalone guide in your documentation showing how to deploy the template(s) on Railway. Send it over and we'll provide feedback.
4. **Partner profile**: We'll create a partner profile for you with a dedicated page showing all templates using your technology.
5. **Social promotion**: Once the above are complete, we'll engage with any social promotion or co-marketing you'd like to do.
If you have any other questions, feel free to email partners@railway.com.
## Languages & frameworks
---
### Next.js
Source: https://docs.railway.com/guides/nextjs.md
Deploy a Next.js app with a Postgres database on Railway. Covers standalone output, one-click deploys, Dockerfile setup, database wiring, and pre-deploy migrations.
[Next.js](https://nextjs.org) is a React framework for building full-stack web applications. It handles server-side rendering, static generation, API routes, and routing.
This guide covers how to deploy a Next.js app to Railway and connect it to a Postgres database:
1. [One-click deploy from a template](#one-click-deploy-from-a-template).
2. [From a GitHub repository](#deploy-from-a-github-repo).
3. [Using the CLI](#deploy-from-the-cli).
4. [Using a Dockerfile](#use-a-dockerfile).
5. [Add a Postgres database](#add-a-postgres-database).
#### Create a Next.js App
**Note:** If you already have a Next.js app locally or on GitHub, you can skip this step and go straight to [Deploy the Next.js App to Railway](#deploy-the-nextjs-app-to-railway).
To create a new Next.js app, ensure that you have [Node](https://nodejs.org/en/learn/getting-started/how-to-install-nodejs) installed on your machine.
Run the following command in your terminal to create a new Next.js app:
```bash
npx create-next-app@latest helloworld
```
Follow the prompts to configure your app. The defaults work well for most projects.
##### Run the Next.js App locally
`cd` into the directory and start the development server:
```bash
cd helloworld
npm run dev
```
Open your browser and go to `http://localhost:3000` to see your app.
#### Deploy the Next.js App to Railway
Railway offers multiple ways to deploy your Next.js app, depending on your setup and preference.
##### One-Click Deploy from a Template
If you're looking for the fastest way to get started, the one-click deploy option is ideal.
Click the button below to begin:
[](https://railway.com/new/template/HRZqTF)
We highly recommend that [you eject from the template after deployment](/guides/deploy#eject-from-template-repository) to create a copy of the repo on your GitHub account.
**Note:** You can also choose from a variety of Next.js app templates created by the community.
##### Deploy from the CLI
1. **Install the Railway CLI**:
- Install the CLI and authenticate it using your Railway account.
2. **Initialize a Railway Project**:
- Run the command below in your Next.js app directory.
```bash
railway init
```
- Follow the prompts to name your project.
- After the project is created, click the provided link to view it in your browser.
3. **Configure for Standalone Output**:
Next.js needs to produce a standalone build for self-hosted deployment. Add the `output` option to your `next.config.ts` (or `next.config.js`) file:
**next.config.ts**
```typescript
import type { NextConfig } from "next";
const nextConfig: NextConfig = {
output: "standalone",
};
export default nextConfig;
```
Then update the start script in `package.json` to serve the standalone server:
**package.json**
```json
{
"scripts": {
"dev": "next dev",
"build": "next build",
"start": "node .next/standalone/server.js",
"lint": "next lint"
}
}
```
**Note:** Railway uses [Railpack](/builds/railpack) (or [Nixpacks](/builds/nixpacks)) to build and deploy your code with zero configuration. The Node provider will pick up the start script in `package.json` and use it to serve the app.
4. **Deploy the Application**:
- Use the command below to deploy your app:
```bash
railway up
```
- This command will scan, compress and upload your app's files to Railway. You'll see real-time deployment logs in your terminal.
- Once the deployment completes, go to **View logs** to check if the service is running successfully.
5. **Set Up a Public URL**:
- Navigate to the **Networking** section under the [Settings](/overview/the-basics#service-settings) tab of your new service.
- Click [Generate Domain](/networking/public-networking#railway-provided-domain) to create a public URL for your app.
##### Deploy from a GitHub Repo
To deploy a Next.js app to Railway directly from GitHub, follow the steps below:
1. **Create a New Project on Railway**:
- Go to Railway to create a new project.
2. **Configure for Standalone Output**:
- Follow [step 3 mentioned in the CLI guide](#deploy-from-the-cli) to set `output: "standalone"` and update the start script.
3. **Deploy from GitHub**:
- Select **Deploy from GitHub repo** and choose your repository.
- If your Railway account isn't linked to GitHub yet, you'll be prompted to do so.
4. **Deploy the App**:
- Click **Deploy** to start the deployment process.
- Once deployed, a Railway [service](/services) will be created for your app, but it won't be publicly accessible by default.
5. **Verify the Deployment**:
- Once the deployment completes, go to **View logs** to check if the server is running successfully.
6. **Set Up a Public URL**:
- Navigate to the **Networking** section under the [Settings](/overview/the-basics#service-settings) tab of your new service.
- Click [Generate Domain](/networking/public-networking#railway-provided-domain) to create a public URL for your app.
##### Use a Dockerfile
1. Create a `Dockerfile` in your Next.js app's root directory.
2. Add the content below to the `Dockerfile`:
```bash
FROM node:lts-alpine AS base
# Install dependencies
FROM base AS deps
WORKDIR /app
COPY package*.json ./
RUN npm ci
# Build the app
FROM base AS builder
WORKDIR /app
COPY --from=deps /app/node_modules ./node_modules
COPY . .
RUN npm run build
# Production image
FROM base AS runner
WORKDIR /app
ENV NODE_ENV=production
RUN addgroup --system --gid 1001 nodejs
RUN adduser --system --uid 1001 nextjs
COPY --from=builder /app/public ./public
COPY --from=builder --chown=nextjs:nodejs /app/.next/standalone ./
COPY --from=builder --chown=nextjs:nodejs /app/.next/static ./.next/static
USER nextjs
EXPOSE 3000
ENV PORT=3000
ENV HOSTNAME="0.0.0.0"
CMD ["node", "server.js"]
```
**Note:** This Dockerfile requires `output: "standalone"` in your `next.config.ts` as described in [step 3 of the CLI guide](#deploy-from-the-cli).
3. Either deploy via the CLI or from GitHub.
Railway automatically detects the `Dockerfile`, [and uses it to build and deploy the app.](/builds/dockerfiles)
**Note:** Railway also supports deployment from public and private Docker images.
#### Add a Postgres database
Next.js apps that use API routes or server actions often need a database. Railway lets you add Postgres to your project in a few clicks.
##### Provision the database
1. Open your project on Railway.
2. Click **+ New** on the project canvas and select **Database** → **PostgreSQL**.
3. Railway provisions the database and exposes connection variables (`DATABASE_URL`, `PGHOST`, `PGPORT`, `PGUSER`, `PGPASSWORD`, `PGDATABASE`) in the database service.
##### Connect your Next.js service to Postgres
1. Click on your Next.js service in the project canvas.
2. Go to the **Variables** tab.
3. Click **Add Reference Variable** and select `DATABASE_URL` from the Postgres service.
- This creates a [reference variable](/variables#referencing-another-services-variable) that stays in sync if the database credentials change.
4. Redeploy the service for the new variable to take effect.
Your app can now read `DATABASE_URL` from `process.env` to connect to Postgres. Most ORMs and query builders (Prisma, Drizzle, Knex) use this variable automatically.
##### Run migrations with a pre-deploy command
If your project uses an ORM that requires migrations (for example, Prisma or Drizzle), configure a [pre-deploy command](/deployments/pre-deploy-command) so migrations run before the new version starts serving traffic.
1. In your Next.js service on Railway, go to **Settings** → **Deploy** → **Pre-deploy Command**.
2. Set the command to your migration script. For example:
- **Prisma**: `npx prisma migrate deploy`
- **Drizzle**: `npx drizzle-kit migrate`
3. Railway runs this command in a separate container with access to your service's environment variables, including `DATABASE_URL`.
**Note:** The pre-deploy container does not have access to volumes. If your migration process requires file system state beyond what is in the build image, handle that in the build step instead.
#### Next steps
Explore these resources to learn how you can maximize your experience with Railway:
- [Choose between SSR, SSG, and ISR](/guides/ssr-ssg-isr) - Pick the right rendering strategy.
- [Manage environment variables](/guides/frontend-environment-variables) - Handle `NEXT_PUBLIC_` prefixed variables.
- [Deploy a full-stack Next.js app](/guides/fullstack-nextjs) - Add Postgres, workers, and file uploads.
- [PostgreSQL on Railway](/databases/postgresql)
- [Monitor your app](/observability)
- [Running a Cron Job](/cron-jobs)
- [Pre-deploy Command](/deployments/pre-deploy-command)
### Express
Source: https://docs.railway.com/guides/express.md
Learn how to deploy an Express app to Railway with one-click templates, GitHub, CLI, or Dockerfile. This guide covers setup, private networking, database integration, and deployment strategies.
[Express](https://expressjs.com) is a fast and flexible web application framework for Node.js that provides a simple and minimalistic approach to building web servers and APIs. It is known for its speed and unopinionated nature, allowing developers to structure their applications as they see fit while offering powerful features.
This guide covers how to deploy an Express app to Railway in four ways:
1. [One-click deploy from a template](#one-click-deploy-from-a-template).
2. [From a GitHub repository](#deploy-from-a-github-repo).
3. [Using the CLI](#deploy-from-the-cli).
4. [Using a Dockerfile](#use-a-dockerfile).
Now, let's create an Express app!
#### Create an Express app
**Note:** If you already have an Express app locally or on GitHub, you can skip this step and go straight to the [Deploy Express App to Railway](#deploy-the-express-app-to-railway).
To create a new Express app, ensure that you have [Node](https://nodejs.org/en/learn/getting-started/how-to-install-nodejs) installed on your machine.
Create a directory, `helloworld`, and `cd` into it.
Run the following command in your terminal to create a new Express app within the `helloworld` directory:
```bash
npx express-generator --view=pug
```
A new Express app will be provisioned for you in the `helloworld` directory using [pug](https://pugjs.org/api/getting-started.html) as the view engine.
##### Run the Express app locally
Run `npm install` to install all the dependencies.
Next, start the app by running the following command:
```bash
npm start
```
Launch your browser and navigate to `http://localhost:3000` to view the app.
If you'd prefer to run the app on a different port, simply use the command `PORT=8080 npm start` in the terminal.
Afterward, you can access the app at `http://localhost:8080`.
##### Add and configure database
**Note:** This app uses Postgres. If you don’t have it installed locally, you can either [install it](https://www.postgresql.org/download) or use a different Node.js database package of your choice.
1. Create a database named `expresshelloworld_dev`.
2. Install the [pg-promise](https://www.npmjs.com/package/pg-promise) package:
```bash
npm i pg-promise
```
3. Open the `routes/index.js` file and modify the content to the code below:
```js
const express = require("express");
const pgp = require("pg-promise")();
const db = pgp(
"postgres://username:password@127.0.0.1:5432/expresshelloworld_dev",
);
const router = express.Router();
/* GET home page. */
router.get("/", function (req, res, next) {
db.one("SELECT NOW()")
.then(function (data) {
// Render the page only after receiving the data
res.render("index", {
title: "Hello World, Railway!",
timeFromDB: data.now,
});
})
.catch(function (error) {
console.error("ERROR:", error);
// If there’s an error, send a 500 response and do not call res.render
res.status(500).send("Error querying the database");
});
});
module.exports = router;
```
The code above sets up a simple Express app with a route handler for the home page. It uses the `pg-promise` library to connect to a Postgres database and runs a query to fetch the current time from the database using `SELECT NOW()`. Upon receiving the data, it renders the index view with the fetched time, sending it to the client along with a title.
If an error occurs during the database query, the code catches the error, logs it, and sends a 500 status response to the client, indicating that there was an issue querying the database.
The page is only rendered after successfully receiving the database response to ensure proper handling of the data.
4. Open the `views/index.pug` file, and update it to display the `timeFromDB` value on the page.
```pug
extends layout
block content
h1= title
p Welcome to #{title}
p This is the time retrieved from the database:
p #{timeFromDB}
```
5. Run the app again to see your changes in action!
##### Prepare Express app for deployment
In the `routes/index.js` file, replace the hardcoded Postgres database URL with an environment variable:
```js
...
const db = pgp(process.env.DATABASE_URL);
...
```
This allows the app to dynamically pull the correct database configuration from Railway during deployment.
#### Deploy the Express app to Railway
Railway offers multiple ways to deploy your Express app, depending on your setup and preference.
##### One-click deploy from a template
If you’re looking for the fastest way to get started with Express, Pug and connected to a Postgres database, the one-click deploy option is ideal.
Click the button below to begin:
[](https://railway.com/deploy/BC51z6)
For Express API, here's another template you can begin with:
[](https://railway.com/deploy/Y6zLKF)
It is highly recommended that [you eject from the template after deployment](/templates/deploy#eject-from-template-repository) to create a copy of the repo on your GitHub account.
**Note:** You can also choose from a variety of Express app templates created by the community.
##### Deploy from the CLI
1. **Install the Railway CLI**:
- Install the CLI and authenticate it using your Railway account.
2. **Initialize a Railway Project**:
- Run the command below in your Express app directory.
```bash
railway init
```
- Follow the prompts to name your project.
- After the project is created, click the provided link to view it in your browser.
3. **Add a Postgres Database Service**:
- Run `railway add -d postgres`.
- Hit **Enter** to add it to your project.
- A database service will be added to your Railway project.
4. **Add a Service and Environment Variable**:
- Run `railway add`.
- Select `Empty Service` from the list of options.
- In the `Enter a service name` prompt, enter `app-service`.
- In the `Enter a variable` prompt, enter `DATABASE_URL=${{Postgres.DATABASE_URL}}`.
- The value, `${{Postgres.DATABASE_URL}}`, references the URL of your new Postgres database. Learn more about [referencing service variables](/variables#referencing-another-services-variable).
**Note:** Explore the [Railway CLI reference](/cli#add) for a variety of options.
5. **Deploy the Application**:
- Run `railway up` to deploy your app.
- This command will scan, compress and upload your app's files to Railway. You’ll see real-time deployment logs in your terminal.
- Once the deployment is complete, proceed to generate a domain for the app service.
6. **Set Up a Public URL**:
- Run `railway domain` to generate a public URL for your app.
- Visit the new URL to see your app live in action!
##### Deploy from a GitHub repo
To deploy an Express app to Railway directly from GitHub, follow the steps below:
1. **Create a New Project on Railway**:
- Go to Railway to create a new project.
2. **Deploy from GitHub**:
- Select **Deploy from GitHub repo** and choose your repository.
- If your Railway account isn’t linked to GitHub yet, you’ll be prompted to do so.
3. **Add Environment Variables and Provision a Database Service**:
- Click **Add Variables**, but hold off on adding anything just yet. First, proceed with the next step.
- Right-click on the Railway project canvas or click the **Create** button, then select **Database** and choose **Add PostgreSQL**.
- This will create and deploy a new PostgreSQL database for your project.
- Once the database is deployed, you can return to adding the necessary environment variables:
- `DATABASE_URL`: Set the value to `${{Postgres.DATABASE_URL}}` (this references the URL of your new Postgres database). Learn more about [referencing service variables](/variables#referencing-another-services-variable).
4. **Deploy the App Service**:
- Click **Deploy** on the Railway project canvas to apply your changes.
5. **Verify the Deployment**:
- Once the deployment completes, go to [**View logs**](/observability/logs#build--deploy-panel) to check if the server is running successfully.
**Note:** During the deployment process, Railway will automatically [detect that it's a Node.js app via Railpack](https://railpack.com/languages/node).
6. **Set Up a Public URL**:
- Navigate to the **Networking** section under the [Settings](/overview/the-basics#service-settings) tab of your new service.
- Click [Generate Domain](/networking/public-networking#railway-provided-domain) to create a public URL for your app.
##### Use a Dockerfile
1. Create a `Dockerfile` in the Express app's root directory.
2. Add the content below to the `Dockerfile`:
```bash
# Use the Node official image
# https://hub.docker.com/_/node
FROM node:lts
# Create and change to the app directory.
WORKDIR /app
# Copy local code to the container image
COPY . ./
# Install packages
RUN npm ci
# Serve the app
CMD ["npm", "run", "start"]
```
3. Either deploy via the CLI or from GitHub.
Railway automatically detects the `Dockerfile`, [and uses it to build and deploy the app.](/builds/dockerfiles)
**Note:** Railway supports also deployment from public and private Docker images.
This guide covers the main deployment options on Railway. Choose the approach that suits your setup, and start deploying your Express apps seamlessly!
#### Next steps
Explore these resources to learn how you can maximize your experience with Railway:
- [Add a Database Service](/databases/build-a-database-service)
- [Monitor your app](/observability)
### Hono
Source: https://docs.railway.com/guides/hono.md
Learn how to deploy a Hono app to Railway with this step-by-step guide. It covers quick setup, community templates, Dockerfile and other deployment strategies.
Hono is a lightweight, ultrafast web framework built for any JavaScript runtime, including Node.js, Bun, Deno, and Cloudflare Workers.
This guide covers how to deploy a Hono app on Railway in three ways:
1. [From a GitHub repository](#deploy-from-a-github-repo).
2. [Using the CLI](#deploy-from-the-cli).
3. [Using a Dockerfile](#use-a-dockerfile).
**Note:** You can also choose from a variety of Hono app templates created by the community.
#### Deploy from a GitHub repo
To deploy a Hono app on Railway directly from GitHub, follow the steps below:
1. Create a Hono app that uses the Node.js adapter (`@hono/node-server`).
- If you already have a GitHub repo you want to deploy, you can skip this step.
- Make sure your app reads the port from `process.env.PORT` with a fallback (e.g., `3000`).
2. Create a New Project.
3. Click **Deploy from GitHub repo**.
4. Select your Hono GitHub repo.
- Railway requires a valid GitHub account to be linked. If your Railway account isn't associated with one, you will be prompted to link it.
5. Click **Deploy Now**.
Once the deployment is successful, a Railway [service](/services) will be created for you. By default, this service will not be publicly accessible.
To set up a publicly accessible URL for the service, navigate to the **Networking** section in the [Settings](/overview/the-basics#service-settings) tab of your new service and click on [Generate Domain](/networking/public-networking#railway-provided-domain).
**Note:** [Railpack](/builds/railpack) will detect your Node.js app and build it automatically. If you need more control over the build, you can also use [Nixpacks](/builds/nixpacks) or a [Dockerfile](#use-a-dockerfile).
#### Deploy from the CLI
1. Install and authenticate with the CLI.
2. Navigate to your Hono app directory.
- You can skip this step if you already have an app directory or repo on your machine that you want to deploy.
3. Run `railway init` within the app directory to create a new project.
4. Run `railway up` to deploy.
- The CLI will now scan, compress and upload your Hono app files to Railway's backend for deployment.
#### Use a Dockerfile
1. Navigate to your Hono app directory.
- You can skip this step if you already have an app directory or repo on your machine that you want to deploy.
2. Create a `Dockerfile` in the app's root directory.
3. Add the content below to the `Dockerfile`:
```docker
FROM node:20-alpine
WORKDIR /app
COPY package*.json ./
RUN npm install
COPY . ./
RUN npm run build
ENTRYPOINT ["node", "dist/index.js"]
```
4. Either deploy via the CLI or from GitHub.
Railway automatically detects the `Dockerfile`, [and uses it to build and deploy the app.](/builds/dockerfiles)
**Note:** Railway supports also deployment from public and private Docker images.
#### Next steps
Explore these resources to learn more about Railway:
- [Add a Database Service](/databases/build-a-database-service)
- [Monitor your app](/observability)
- [Running a Cron Job](/cron-jobs)
### Fastify
Source: https://docs.railway.com/guides/fastify.md
Learn how to deploy a Fastify app to Railway with this step-by-step guide. It covers quick setup, one-click deploys, Dockerfile and other deployment strategies.
Fastify is a high-performance, low-overhead web framework for Node.js, designed to deliver an exceptional developer experience.
This guide covers how to deploy a Fastify app on Railway in four ways:
1. [One-click deploy from a template](#one-click-deploy-from-a-template).
2. [From a GitHub repository](#deploy-from-a-github-repo).
3. [Using the CLI](#deploy-from-the-cli).
4. [Using a Dockerfile](#use-a-dockerfile).
#### One-click deploy from a template
[](https://railway.com/new/template/ZZ50Bj)
It is highly recommended that [you eject from the template after deployment](/templates/deploy#eject-from-template-repository) to create a copy of the repo on your GitHub account.
**Note:** You can also choose from a variety of Fastify app templates created by the community.
#### Deploy from a GitHub repo
To deploy a Fastify app on Railway directly from GitHub, follow the steps below:
1. Fork the basic fastify GitHub repo.
- If you already have a GitHub repo you want to deploy, you can skip this step.
2. Create a New Project.
3. Click **Deploy from GitHub repo**.
4. Select the `fastify` repo or your own GitHub repo.
- Railway requires a valid GitHub account to be linked. If your Railway account isn't associated with one, you will be prompted to link it.
5. Click **Deploy Now**.
Once the deployment is successful, a Railway [service](/services) will be created for you. By default, this service will not be publicly accessible.
To set up a publicly accessible URL for the service, navigate to the **Networking** section in the [Settings](/overview/the-basics#service-settings) tab of your new service and click on [Generate Domain](/networking/public-networking#railway-provided-domain).
**Note:** Railway requires that Fastify's `.listen` method for the `host` be set to `::`. This allows the app to be available over the public and private network.
You can find this in the sample Fastify GitHub repo.
If you don’t set it correctly, you may encounter a 502 error page.
#### Deploy from the CLI
1. Install and authenticate with the CLI.
2. Clone the forked fastify GitHub repo and `cd` into the directory.
- You can skip this step if you already have an app directory or repo on your machine that you want to deploy.
3. Run `railway init` within the app directory to create a new project.
4. Run `railway up` to deploy.
- The CLI will now scan, compress and upload your fastify app files to Railway's backend for deployment.
#### Use a Dockerfile
1. Clone the forked `fastify` repo and `cd` into the directory.
- You can skip this step if you already have an app directory or repo on your machine that you want to deploy.
2. Create a `Dockerfile` in the `fastify` or app's root directory.
3. Add the content below to the `Dockerfile`:
```bash
# Use the Node.js 18 alpine official image
# https://hub.docker.com/_/node
FROM node:18-alpine
# Create and change to the app directory.
WORKDIR /app
# Copy local code to the container image.
COPY . .
# Install project dependencies
RUN npm ci
# Run the web service on container startup.
CMD ["npm", "start"]
```
4. Either deploy via the CLI or from GitHub.
Railway automatically detects the `Dockerfile`, [and uses it to build and deploy the app.](/builds/dockerfiles)
**Note:** Railway supports also deployment from public and private Docker images.
#### Next steps
Explore these resources to learn how you can maximize your experience with Railway:
- [Add a CDN using Amazon CloudFront to your Fastify app](/guides/add-a-cdn-using-cloudfront)
- [Add a Database Service](/databases/build-a-database-service)
- [Monitor your app](/observability)
### Nest.js
Source: https://docs.railway.com/guides/nest.md
Learn how to deploy a NestJS app to Railway with this step-by-step guide. It covers quick setup, database integration, one-click deploys and other deployment strategies.
[Nest](https://nestjs.com) is a modern Node.js framework designed to create efficient, reliable, and scalable server-side applications. Built on top of powerful HTTP server frameworks, it uses Express as the default but also offers seamless support for Fastify for enhanced performance and flexibility.
This guide covers how to deploy a Nest app to Railway in four ways:
1. [One-click deploy from a template](#one-click-deploy-from-a-template).
2. [From a GitHub repository](#deploy-from-a-github-repo).
3. [Using the CLI](#deploy-from-the-cli).
4. [Using a Dockerfile](#use-a-dockerfile).
Now, let's go ahead and create a Nest app!
#### Create a Nest app
**Note:** If you already have a Nest app locally or on GitHub, you can skip this step and go straight to the [Deploy Nest App to Railway](#deploy-the-nest-app-to-railway).
To create a new Nest app, ensure that you have [Node](https://nodejs.org/en/learn/getting-started/how-to-install-nodejs) and [NestJS](https://docs.nestjs.com/#installation) installed on your machine.
Run the following command in your terminal to create a new Nest app:
```bash
nest new helloworld
```
A new Nest app will be provisioned for you in the `helloworld` directory.
##### Run the Nest app locally
Next, start the app locally by running the following command:
```bash
npm run start
```
Launch your browser and navigate to `http://localhost:3000` to view the app.
If you'd prefer to run the app on a different port, simply use the command `PORT=8080 npm run start` in the terminal.
Afterward, you can access the app at `http://localhost:8080`.
##### Add and configure database
**Note:** This app uses Postgres. If you don’t have it installed locally, you can either [install it](https://www.postgresql.org/download) or use a different Node.js database package of your choice.
1. Create a database named `nestjshelloworld_dev`.
2. Install the following packages:
```bash
npm i @nestjs/typeorm typeorm pg
```
- typeorm is an ORM library for Typescript and JavaScript.
- pg is for communicating with Postgres database.
3. Open the `src/app.module.ts` file and modify the content to the code below:
```js
import { Module } from "@nestjs/common";
import { AppController } from "./app.controller";
import { AppService } from "./app.service";
import { TypeOrmModule } from "@nestjs/typeorm";
@Module({
imports: [
TypeOrmModule.forRoot({
type: "postgres",
host: "localhost",
port: 5432,
username: "username",
password: "password",
database: "nestjshelloworld_dev",
entities: [],
synchronize: true,
}),
],
controllers: [AppController],
providers: [AppService],
})
export class AppModule {}
```
Start the app using the command, `npm run start:dev`. The code above tries to connect to the database once the app is started. If any of the credentials are wrong, you will see a warning stating that the app can't connect to the database.
4. Open `src/app.service.ts` file and modify the content to return `Hello World, Welcome to Railway!`.
```js
import { Injectable } from "@nestjs/common";
@Injectable()
export class AppService {
getHello(): string {
return "Hello World, Welcome to Railway!";
}
}
```
5. Run the app again to see your changes in action!
##### Prepare NestJS app for deployment
In the `src/app.module.ts` file, replace the hardcoded Postgres database credentials with environment variables:
```js
import { Module } from "@nestjs/common";
import { AppController } from "./app.controller";
import { AppService } from "./app.service";
import { TypeOrmModule } from "@nestjs/typeorm";
@Module({
imports: [
TypeOrmModule.forRoot({
type: "postgres",
host: process.env.DB_HOST,
port: 5432,
username: process.env.DB_USERNAME,
password: process.env.DB_PASSWORD,
database: process.env.DB_DATABASE,
entities: [],
synchronize: true,
}),
],
controllers: [AppController],
providers: [AppService],
})
export class AppModule {}
```
This allows the app to dynamically pull the correct database configuration from Railway during deployment.
#### Deploy the Nest app to Railway
Railway offers multiple ways to deploy your Nest app, depending on your setup and preference.
##### One-click deploy from a template
If you’re looking for the fastest way to get started with Nest connected to a Postgres database, the one-click deploy option is ideal.
Click the button below to begin:
[](https://railway.com/deploy/nvnuEH)
It is highly recommended that [you eject from the template after deployment](/templates/deploy#eject-from-template-repository) to create a copy of the repo on your GitHub account.
**Note:** You can also choose from a variety of Nest app templates created by the community.
##### Deploy from the CLI
1. **Install the Railway CLI**:
- Install the CLI and authenticate it using your Railway account.
2. **Initialize a Railway Project**:
- Run the command below in your Nest app directory.
```bash
railway init
```
- Follow the prompts to name your project.
- After the project is created, click the provided link to view it in your browser.
3. **Add a Postgres Database Service**:
- Run `railway add -d postgres`.
- Hit **Enter** to add it to your project.
- A database service will be added to your Railway project.
4. **Add a Service and Environment Variable**:
- Run `railway add`.
- Select `Empty Service` from the list of options.
- In the `Enter a service name` prompt, enter `app-service`.
- In the `Enter a variable` prompt, enter
- `DB_DATABASE=${{Postgres.PGDATABASE}}`.
- `DB_USERNAME=${{Postgres.PGUSER}}`
- `DB_PASSWORD=${{Postgres.PGPASSWORD}}`
- `DB_HOST=${{Postgres.PGHOST}}`
- The Postgres values references the credentials of your new Postgres database. Learn more about [referencing service variables](/variables#referencing-another-services-variable).
**Note:** Explore the [Railway CLI reference](/cli#add) for a variety of options.
5. **Deploy the Application**:
- Run `railway up` to deploy your app.
- This command will scan, compress and upload your app's files to Railway. You’ll see real-time deployment logs in your terminal.
- Once the deployment is complete, proceed to generate a domain for the app service.
6. **Set Up a Public URL**:
- Run `railway domain` to generate a public URL for your app.
- Visit the new URL to see your app live in action!
##### Deploy from a GitHub repo
To deploy a Nest app to Railway directly from GitHub, follow the steps below:
1. **Create a New Project on Railway**:
- Go to Railway to create a new project.
2. **Deploy from GitHub**:
- Select **Deploy from GitHub repo** and choose your repository.
- If your Railway account isn’t linked to GitHub yet, you’ll be prompted to do so.
3. **Add Environment Variables and Provision a Database Service**:
- Click **Add Variables**, but hold off on adding anything just yet. First, proceed with the next step.
- Right-click on the Railway project canvas or click the **Create** button, then select **Database** and choose **Add PostgreSQL**.
- This will create and deploy a new PostgreSQL database for your project.
- Once the database is deployed, you can return to adding the necessary environment variables:
- `DB_DATABASE=${{Postgres.PGDATABASE}}`.
- `DB_USERNAME=${{Postgres.PGUSER}}`
- `DB_PASSWORD=${{Postgres.PGPASSWORD}}`
- `DB_HOST=${{Postgres.PGHOST}}`
- The Postgres values references the credentials of your new Postgres database. Learn more about [referencing service variables](/variables#referencing-another-services-variable).
4. **Deploy the App Service**:
- Click **Deploy** on the Railway project canvas to apply your changes.
5. **Verify the Deployment**:
- Once the deployment completes, go to [**View logs**](/observability/logs#build--deploy-panel) to check if the server is running successfully.
**Note:** During the deployment process, Railway will automatically [detect that it’s a Node.js app via Railpack](https://railpack.com/languages/node).
6. **Set Up a Public URL**:
- Navigate to the **Networking** section under the [Settings](/overview/the-basics#service-settings) tab of your new service.
- Click [Generate Domain](/networking/public-networking#railway-provided-domain) to create a public URL for your app.
##### Use a Dockerfile
1. Create a `Dockerfile` in the Nest app's root directory.
2. Add the content below to the `Dockerfile`:
```bash
# Use the Node official image
# https://hub.docker.com/_/node
FROM node:lts
# Create and change to the app directory.
WORKDIR /app
# Copy local code to the container image
COPY . ./
# Install packages
RUN npm ci
# Serve the app
CMD ["npm", "run", "start:prod"]
```
3. Either deploy via the CLI or from GitHub.
Railway automatically detects the `Dockerfile`, [and uses it to build and deploy the app.](/builds/dockerfiles)
**Note:** Railway supports also deployment from public and private Docker images.
This guide covers the main deployment options on Railway. Choose the approach that suits your setup, and start deploying your Nest apps seamlessly!
#### Next steps
Explore these resources to learn how you can maximize your experience with Railway:
- [Add a Database Service](/databases/build-a-database-service)
- [Monitor your app](/observability)
### Remix
Source: https://docs.railway.com/guides/remix.md
Learn how to deploy a Remix app to Railway with this step-by-step guide. It covers quick setup, one-click deploys, Dockerfile and other deployment strategies.
[Remix](https://remix.run) is a full-stack web framework that empowers you to build fast, elegant, and resilient user experiences by focusing on the interface and working seamlessly with web standards. Your users will enjoy every moment spent with your product.
This guide covers how to deploy a Remix app to Railway in four ways:
1. [One-click deploy from a template](#one-click-deploy-from-a-template).
2. [From a GitHub repository](#deploy-from-a-github-repo).
3. [Using the CLI](#deploy-from-the-cli).
4. [Using a Dockerfile](#use-a-dockerfile).
Now, let's create a Remix app!
#### Create a Remix app
**Note:** If you already have a Remix app locally or on GitHub, you can skip this step and go straight to the [Deploy Remix App on Railway](#deploy-the-remix-app-to-railway).
To create a new Remix app, ensure that you have [Node](https://nodejs.org/en/learn/getting-started/how-to-install-nodejs) installed on your machine.
Run the following command in your terminal to create a new Remix app:
```bash
npx create-remix@latest
```
Follow the prompts by giving a directory name, like `helloworld`, where you want your app to be set up. When asked, select **Yes** to automatically install all the necessary dependencies.
A new Remix app will be provisioned for you in the `helloworld` directory.
##### Run the Remix app locally
Start the Vite development server by running the following command:
```bash
npm run dev
```
Open your browser and go to `http://localhost:5173` to see your app.
#### Deploy the Remix app to Railway
Railway offers multiple ways to deploy your Remix app, depending on your setup and preference.
##### One-click deploy from a template
If you’re looking for the fastest way to get started, the one-click deploy option is ideal.
Click the button below to begin:
[](https://railway.com/new/template/remix)
It is highly recommended that [you eject from the template after deployment](/templates/deploy#eject-from-template-repository) to create a copy of the repo on your GitHub account.
**Note:** You can also choose from a variety of Remix app templates created by the community.
##### Deploy from the CLI
1. **Install the Railway CLI**:
- Install the CLI and authenticate it using your Railway account.
2. **Initialize a Railway Project**:
- Run the command below in your Vue app directory.
```bash
railway init
```
- Follow the prompts to name your project.
- After the project is created, click the provided link to view it in your browser.
3. **Deploy the Application**:
- Use the command below to deploy your app:
```bash
railway up
```
- This command will scan, compress and upload your app's files to Railway. You’ll see real-time deployment logs in your terminal.
- Once the deployment completes, go to **View logs** to check if the service is running successfully.
4. **Set Up a Public URL**:
- Navigate to the **Networking** section under the [Settings](/overview/the-basics#service-settings) tab of your new service.
- Click [Generate Domain](/networking/public-networking#railway-provided-domain) to create a public URL for your app.
##### Deploy from a GitHub repo
To deploy a Remix app to Railway directly from GitHub, follow the steps below:
1. **Create a New Project on Railway**:
- Go to Railway to create a new project.
2. **Deploy from GitHub**:
- Select **Deploy from GitHub repo** and choose your repository.
- If your Railway account isn’t linked to GitHub yet, you’ll be prompted to do so.
3. **Deploy the App**:
- Click **Deploy** to start the deployment process.
- Once the deployed, a Railway [service](/services) will be created for your app, but it won’t be publicly accessible by default.
4. **Verify the Deployment**:
- Once the deployment completes, go to **View logs** to check if the server is running successfully.
5. **Set Up a Public URL**:
- Navigate to the **Networking** section under the [Settings](/overview/the-basics#service-settings) tab of your new service.
- Click [Generate Domain](/networking/public-networking#railway-provided-domain) to create a public URL for your app.
##### Use a Dockerfile
1. Create a `Dockerfile` in the `helloworld` or Remix app's root directory.
2. Add the content below to the `Dockerfile`:
```bash
# Use the Node alpine official image
# https://hub.docker.com/_/node
FROM node:lts-alpine
# Create and change to the app directory.
WORKDIR /app
# Copy the files to the container image
COPY package*.json ./
# Install packages
RUN npm ci
# Copy local code to the container image.
COPY . ./
# Build the app.
RUN npm run build
# Serve the app
CMD ["npm", "run", "start"]
```
3. Either deploy via the CLI or from GitHub.
Railway automatically detects the `Dockerfile`, [and uses it to build and deploy the app.](/builds/dockerfiles)
**Note:** Railway supports also deployment from public and private Docker images.
This guide covers the main deployment options on Railway. Choose the approach that suits your setup, and start deploying your Remix apps seamlessly!
#### Next steps
Explore these resources to learn how you can maximize your experience with Railway:
- [Choose between SSR, SSG, and ISR](/guides/ssr-ssg-isr) - Pick the right rendering strategy.
- [Manage environment variables](/guides/frontend-environment-variables) - Handle environment variables in Remix loaders.
- [Add a Database Service](/databases/build-a-database-service)
- [Monitor your app](/observability)
### Nuxt
Source: https://docs.railway.com/guides/nuxt.md
Learn how to deploy a Nuxt app to Railway with this step-by-step guide. It covers quick setup, one-click deploys, Dockerfile and other deployment strategies.
[Nuxt](https://nuxt.com) is a Vue.js framework that makes web development intuitive and powerful. You can create performant and production-grade full-stack web apps and websites with confidence.
Nuxt is known as **The Intuitive Vue Framework** because it simplifies building Vue.js applications with features like server-side rendering and easy routing.
This guide covers how to deploy a Nuxt app to Railway in four ways:
1. [One-click deploy from a template](#one-click-deploy-from-a-template).
2. [From a GitHub repository](#deploy-from-a-github-repo).
3. [Using the CLI](#deploy-from-the-cli).
4. [Using a Dockerfile](#use-a-dockerfile).
Now, let's create a Nuxt app!
#### Create a Nuxt app
**Note:** If you already have a Nuxt app locally or on GitHub, you can skip this step and go straight to the [Deploy Nuxt App on Railway](#deploy-the-nuxt-app-to-railway).
To create a new Nuxt app, ensure that you have [Node](https://nodejs.org/en/learn/getting-started/how-to-install-nodejs) installed on your machine.
Run the following command in your terminal to create a new Nuxt app:
```bash
npx nuxi@latest init helloworld
```
A new Nuxt app will be provisioned for you in the `helloworld` directory.
##### Run the Nuxt app locally
Next, `cd` into the directory and start the development server by running the following command:
```bash
npm run dev
```
Open your browser and go to `http://localhost:3000` to see your app.
#### Deploy the Nuxt app to Railway
Railway offers multiple ways to deploy your Nuxt app, depending on your setup and preference.
##### One-click deploy from a template
If you’re looking for the fastest way to get started, the one-click deploy option is ideal.
Click the button below to begin:
[](https://railway.com/new/template/lQQgLR)
It is highly recommended that [you eject from the template after deployment](/templates/deploy#eject-from-template-repository) to create a copy of the repo on your GitHub account.
**Note:** You can also choose from a variety of Nuxt app templates created by the community.
##### Deploy from the CLI
1. **Install the Railway CLI**:
- Install the CLI and authenticate it using your Railway account.
2. **Initialize a Railway Project**:
- Run the command below in your Vue app directory.
```bash
railway init
```
- Follow the prompts to name your project.
- After the project is created, click the provided link to view it in your browser.
3. **Modify Package.json Config**:
- By default, Nuxt doesn't add a start script in the `package.json` file. You'll need to add that to instruct Railway on how to run your app.
- Add `"start":"node .output/server/index.mjs"` to the `package.json` file.
**package.json**
```bash
{
"name": "nuxt-app",
"private": true,
"type": "module",
"scripts": {
"build": "nuxt build",
"dev": "nuxt dev",
"start": "node .output/server/index.mjs",
"generate": "nuxt generate",
"preview": "nuxt preview",
"postinstall": "nuxt prepare"
},
"dependencies": {
"nuxt": "^3.13.0",
"vue": "latest",
"vue-router": "latest"
}
}
```
**Note:** Railway uses [Railpack](/builds/railpack) to build and deploy your code with zero configuration. Railpack will pick up the start script in the `package.json` file and use it to serve the app.
4. **Deploy the Application**:
- Use the command below to deploy your app:
```bash
railway up
```
- This command will scan, compress and upload your app's files to Railway. You’ll see real-time deployment logs in your terminal.
- Once the deployment completes, go to **View logs** to check if the service is running successfully.
5. **Set Up a Public URL**:
- Navigate to the **Networking** section under the [Settings](/overview/the-basics#service-settings) tab of your new service.
- Click [Generate Domain](/networking/public-networking#railway-provided-domain) to create a public URL for your app.
##### Deploy from a GitHub repo
To deploy a Nuxt app to Railway directly from GitHub, follow the steps below:
1. **Create a New Project on Railway**:
- Go to Railway to create a new project.
2. **Modify Package.json Config**:
- Follow [step 3 mentioned in the CLI guide](#deploy-from-the-cli)
3. **Deploy from GitHub**:
- Select **Deploy from GitHub repo** and choose your repository.
- If your Railway account isn’t linked to GitHub yet, you’ll be prompted to do so.
4. **Deploy the App**:
- Click **Deploy** to start the deployment process.
- Once the deployed, a Railway [service](/services) will be created for your app, but it won’t be publicly accessible by default.
5. **Verify the Deployment**:
- Once the deployment completes, go to **View logs** to check if the server is running successfully.
6. **Set Up a Public URL**:
- Navigate to the **Networking** section under the [Settings](/overview/the-basics#service-settings) tab of your new service.
- Click [Generate Domain](/networking/public-networking#railway-provided-domain) to create a public URL for your app.
##### Use a Dockerfile
1. Create a `Dockerfile` in the `helloworld` or Nuxt app's root directory.
2. Add the content below to the `Dockerfile`:
```bash
# Use the Node alpine official image
# https://hub.docker.com/_/node
FROM node:lts-alpine AS build
# Create and change to the app directory.
WORKDIR /app
# Copy the files to the container image
COPY package*.json ./
# Install packages
RUN npm ci
# Copy local code to the container image.
COPY . ./
# Build the app.
RUN npm run build
# Copy files to the container image.
COPY --from=build /app ./
# Serve the app
CMD ["npm", "run", "start"]
```
3. Either deploy via the CLI or from GitHub.
Railway automatically detects the `Dockerfile`, [and uses it to build and deploy the app.](/builds/dockerfiles)
**Note:** Railway supports also deployment from public and private Docker images.
This guide covers the main deployment options on Railway. Choose the approach that suits your setup, and start deploying your Nuxt apps seamlessly!
#### Next steps
Explore these resources to learn how you can maximize your experience with Railway:
- [Choose between SSR, SSG, and ISR](/guides/ssr-ssg-isr) - Pick the right rendering strategy.
- [Manage environment variables](/guides/frontend-environment-variables) - Handle `NUXT_PUBLIC_` prefixed variables.
- [Add a Database Service](/databases/build-a-database-service)
- [Monitor your app](/observability)
### Astro
Source: https://docs.railway.com/guides/astro.md
Learn how to deploy an Astro app to Railway with this step-by-step guide. It covers quick setup, server side rendering, one-click deploys, Dockerfile and other deployment strategies.
[Astro](https://astro.build) is the web framework for content-driven websites. It's a JavaScript framework optimized for building fast, content-driven websites. It also supports every major UI framework, allowing you to bring in your existing components and benefit from Astro's optimized client build performance.
This guide covers how to deploy an Astro app to Railway in four ways:
1. [One-click deploy from a template](#one-click-deploy-from-a-template).
2. [From a GitHub repository](#deploy-from-a-github-repo).
3. [Using the CLI](#deploy-from-the-cli).
4. [Using a Dockerfile](#use-a-dockerfile).
Now, let's create an Astro app!
#### Create an Astro app
**Note:** If you already have an Astro app locally or on GitHub, you can skip this step and go straight to the [Deploy Astro Apps on Railway](#deploy-the-astro-app-to-railway).
To create a new Astro app, ensure that you have [Node](https://nodejs.org/en/learn/getting-started/how-to-install-nodejs) installed on your machine.
Run the following command in your terminal to create a new Astro app:
```bash
npm create astro@latest
```
Follow the prompts and provide a directory name, such as `blog`, where you'd like to set up your app.
When prompted to choose how you'd like to start your project, select **Use blog template**. For TypeScript, choose **Yes**.
For the remaining options, select the defaults and press Enter. All necessary dependencies will then be installed.
A new Astro app will be provisioned for you in the `blog` directory.
##### Run the Astro app locally
Enter your project directory using `cd blog`.
Start the local dev server by running the following command:
```bash
npm run dev
```
Open your browser and go to `http://localhost:4321` to see your app.
##### Enable server side rendering (SSR)
Astro has several [SSR adapters](https://docs.astro.build/en/guides/server-side-rendering/). These adapters are used to run your project on the server and handle SSR requests.
Add the Node adapter to enable SSR in your blog project.
Run the command below in your terminal:
```bash
npx astro add node
```
Select **Yes** at the prompt to proceed. The Node adapter will be installed, and your Astro config file will be updated accordingly.
Open up the `astro.config.mjs` file:
```js
// @ts-check
import { defineConfig } from "astro/config";
import mdx from "@astrojs/mdx";
import sitemap from "@astrojs/sitemap";
import node from "@astrojs/node";
// https://astro.build/config
export default defineConfig({
site: "https://example.com",
integrations: [mdx(), sitemap()],
output: "server",
adapter: node({
mode: "standalone",
}),
});
```
In the config file, `output` is set to `server`, meaning every page in the app is server-rendered by default.
For mostly static sites, set `output` to `hybrid`. This allows you to add `export const prerender = false` to any file that needs to be server-rendered on demand.
##### Modify start script and Astro config
Astro builds your project into a `dist` directory. In `standalone` mode, a server starts when the server entry point is executed, which is by default located at `./dist/server/entry.mjs`.
In this mode, the server handles file serving as well as page and API routes.
Open up the `package.json` file and modify the start script from `astro dev` to `node ./dist/server/entry.mjs`.
```js
{
"name": "astroblog",
"type": "module",
"version": "0.0.1",
"scripts": {
"dev": "astro dev",
"start": "node ./dist/server/entry.mjs",
"build": "astro check && astro build",
"preview": "astro preview",
"astro": "astro"
},
"dependencies": {
"@astrojs/check": "^0.9.4",
"@astrojs/mdx": "^3.1.8",
"@astrojs/node": "^8.3.4",
"@astrojs/rss": "^4.0.9",
"@astrojs/sitemap": "^3.2.1",
"astro": "^4.16.6",
"typescript": "^5.6.3"
}
}
```
Open the `astro.config.mjs` file and configure the server to run on host `0.0.0.0` by adding the following block inside the `defineConfig` function.
```js
...
server: {
host: '0.0.0.0'
},
```
Your app needs to listen on either `0.0.0.0` or `::` to accept traffic. If not configured properly, you'll encounter a 502 error.
#### Deploy the Astro app to Railway
Railway offers multiple ways to deploy your Astro app, depending on your setup and preference.
##### One-click deploy from a template
If you’re looking for the fastest way to get started, the one-click deploy option is ideal.
Click the button below to begin:
[](https://railway.com/new/template/astro-starter)
It is highly recommended that [you eject from the template after deployment](/templates/deploy#eject-from-template-repository) to create a copy of the repo on your GitHub account.
**Note:** You can also choose from a variety of Astro app templates created by the community.
##### Deploy from the CLI
1. **Install the Railway CLI**:
- Install the CLI and authenticate it using your Railway account.
2. **Initialize a Railway Project**:
- Run the command below in your Vue app directory.
```bash
railway init
```
- Follow the prompts to name your project.
- After the project is created, click the provided link to view it in your browser.
3. **Deploy the Application**:
- Use the command below to deploy your app:
```bash
railway up
```
- This command will scan, compress and upload your app's files to Railway. You’ll see real-time deployment logs in your terminal.
- Once the deployment completes, go to **View logs** to check if the service is running successfully.
4. **Set Up a Public URL**:
- Navigate to the **Networking** section under the [Settings](/overview/the-basics#service-settings) tab of your new service.
- Click [Generate Domain](/networking/public-networking#railway-provided-domain) to create a public URL for your app.
##### Deploy from a GitHub repo
To deploy an Astro app to Railway directly from GitHub, follow the steps below:
1. **Create a New Project on Railway**:
- Go to Railway to create a new project.
2. **Deploy from GitHub**:
- Select **Deploy from GitHub repo** and choose your repository.
- If your Railway account isn’t linked to GitHub yet, you’ll be prompted to do so.
3. **Deploy the App**:
- Click **Deploy** to start the deployment process.
- Once the deployed, a Railway [service](/services) will be created for your app, but it won’t be publicly accessible by default.
4. **Verify the Deployment**:
- Once the deployment completes, go to **View logs** to check if the server is running successfully.
5. **Set Up a Public URL**:
- Navigate to the **Networking** section under the [Settings](/overview/the-basics#service-settings) tab of your new service.
- Click [Generate Domain](/networking/public-networking#railway-provided-domain) to create a public URL for your app.
##### Use a Dockerfile
1. Create a `Dockerfile` in the `blog` or Astro app's root directory.
2. Add the content below to the `Dockerfile`:
```bash
# Use the Node alpine official image
# https://hub.docker.com/_/node
FROM node:lts-alpine
# Create and change to the app directory.
WORKDIR /app
# Copy the files to the container image
COPY package*.json ./
# Install packages
RUN npm ci
# Copy local code to the container image.
COPY . ./
# Build the app.
RUN npm run build
# Serve the app
CMD ["npm", "run", "start"]
```
3. Either deploy via the CLI or from GitHub.
Railway automatically detects the `Dockerfile`, [and uses it to build and deploy the app.](/builds/dockerfiles)
**Note:** Railway supports also deployment from public and private Docker images.
This guide covers the main deployment options on Railway. Choose the approach that suits your setup, and start deploying your Astro apps seamlessly!
#### Next steps
Explore these resources to learn how you can maximize your experience with Railway:
- [Choose between SSR, SSG, and ISR](/guides/ssr-ssg-isr) - Pick the right rendering strategy.
- [Manage environment variables](/guides/frontend-environment-variables) - Handle `PUBLIC_` prefixed variables.
- [Add a Database Service](/databases/build-a-database-service)
- [Monitor your app](/observability)
### SvelteKit
Source: https://docs.railway.com/guides/sveltekit.md
Learn how to deploy a Sveltekit app to Railway with this step-by-step guide. It covers quick setup, adapter configuration, one-click deploys and other deployment strategies.
[SvelteKit](https://svelte.dev/docs/kit/introduction) is a framework for rapidly developing robust, performant web applications using Svelte.
This guide covers how to deploy a SvelteKit app to Railway in four ways:
1. [One-click deploy from a template](#one-click-deploy-from-a-template).
2. [From a GitHub repository](#deploy-from-a-github-repo).
3. [Using the CLI](#deploy-from-the-cli).
4. [Using a Dockerfile](#use-a-dockerfile).
Now, let's create a SvelteKit app!
#### Create a SvelteKit app
**Note:** If you already have a SvelteKit app locally or on GitHub, you can skip this step and go straight to the [Deploy SvelteKit App to Railway](#deploy-sveltekit-app-to-railway).
To create a new SvelteKit app, ensure that you have [Node](https://nodejs.org/en/learn/getting-started/how-to-install-nodejs) installed on your machine.
Run the following command in your terminal to create a new SvelteKit app using [Vite](https://vite.dev/guide/#scaffolding-your-first-vite-project):
```bash
npx sv create svelteapp
```
Follow the prompts:
1. Select the `SvelteKit demo` template.
2. Add typechecking with Typescript.
3. Add prettier, eslint, and tailwindcss.
4. No tailwindcss plugins. Hit enter and move on.
5. Select `npm` as the package manager to install dependencies.
A new SvelteKit app will be provisioned for you in the `svelteapp` directory.
##### Run the SvelteKit app locally
Next, `cd` into the directory and start the Vite development server by running the following command:
```bash
npm run dev
```
Open your browser and go to `http://localhost:5173` to see the app. You can play the demo game by visiting the `/sverdle` route.
##### Prepare SvelteKit app for deployment
First, enable the SvelteKit Node adapter.
[SvelteKit adapters](https://svelte.dev/docs/kit/adapters) are plugins that take the built app as input and generate output for deployment. These adapters are used to run your project on deployment platforms.
Let's add the Node adapter to the app. Run the command below in your terminal:
```bash
npm i -D @sveltejs/adapter-node
```
Once it is installed, add the adapter to the app's `svelte.config.js` file.
The `svelte.config.js` file should look like this:
```js
import adapter from "@sveltejs/adapter-node";
import { vitePreprocess } from "@sveltejs/vite-plugin-svelte";
/** @type {import('@sveltejs/kit').Config} */
const config = {
// Consult https://svelte.dev/docs/kit/integrations
// for more information about preprocessors
preprocess: vitePreprocess(),
kit: {
// adapter-auto only supports some environments, see https://svelte.dev/docs/kit/adapter-auto for a list.
// If your environment is not supported, or you settled on a specific environment, switch out the adapter.
// See https://svelte.dev/docs/kit/adapters for more information about adapters.
adapter: adapter(),
},
};
export default config;
```
Next, add the start script to the `package.json` file.
Svelte builds your project into a `build` directory. The server starts when the server entry point is executed, which is by default located at `build/index.js`.
Open up the `package.json` file and add the start script. Set it to `node build/index.js` like so:
```js
{
"name": "svelteapp",
"version": "0.0.1",
"type": "module",
"scripts": {
"dev": "vite dev",
"build": "vite build",
"start": "node build/index.js",
"preview": "vite preview",
"check": "svelte-kit sync && svelte-check --tsconfig ./tsconfig.json",
"check:watch": "svelte-kit sync && svelte-check --tsconfig ./tsconfig.json --watch",
"format": "prettier --write .",
"lint": "prettier --check . && eslint ."
},
"devDependencies": {
"@fontsource/fira-mono": "^5.0.0",
"@neoconfetti/svelte": "^2.0.0",
"@sveltejs/adapter-auto": "^3.0.0",
"@sveltejs/adapter-node": "^5.2.9",
"@sveltejs/kit": "^2.0.0",
"@sveltejs/vite-plugin-svelte": "^4.0.0",
"@types/eslint": "^9.6.0",
"autoprefixer": "^10.4.20",
"eslint": "^9.7.0",
"eslint-config-prettier": "^9.1.0",
"eslint-plugin-svelte": "^2.36.0",
"globals": "^15.0.0",
"prettier": "^3.3.2",
"prettier-plugin-svelte": "^3.2.6",
"prettier-plugin-tailwindcss": "^0.6.5",
"svelte": "^5.0.0",
"svelte-check": "^4.0.0",
"tailwindcss": "^3.4.9",
"typescript": "^5.0.0",
"typescript-eslint": "^8.0.0",
"vite": "^5.0.3"
}
}
```
_package.json_
Now you're ready to deploy!
#### Deploy the SvelteKit app to Railway
Railway offers multiple ways to deploy your SvelteKit app, depending on your setup and preference.
##### One-click deploy from a template
If you’re looking for the fastest way to get started, the one-click deploy option is ideal.
Click the button below to begin:
[](https://railway.com/new/template/svelte-kit)
It is highly recommended that [you eject from the template after deployment](/templates/deploy#eject-from-template-repository) to create a copy of the repo on your GitHub account.
**Note:** You can also choose from a variety of Svelte app templates created by the community.
##### Deploy from the CLI
1. **Install the Railway CLI**:
- Install the CLI and authenticate it using your Railway account.
2. **Initialize a Railway Project**:
- Run the command below in your SvelteKit app directory.
```bash
railway init
```
- Follow the prompts to name your project.
- After the project is created, click the provided link to view it in your browser.
3. **Deploy the Application**:
- Use the command below to deploy your app:
```bash
railway up
```
- This command will scan, compress and upload your app's files to Railway. You’ll see real-time deployment logs in your terminal.
- Once the deployment completes, go to **View logs** to check if the service is running successfully.
4. **Set Up a Public URL**:
- Navigate to the **Networking** section under the [Settings](/overview/the-basics#service-settings) tab of your new service.
- Click [Generate Domain](/networking/public-networking#railway-provided-domain) to create a public URL for your app.
##### Deploy from a GitHub repo
To deploy a SvelteKit app to Railway directly from GitHub, follow the steps below:
1. **Create a New Project on Railway**:
- Go to Railway to create a new project.
2. **Deploy from GitHub**:
- Select **Deploy from GitHub repo** and choose your repository.
- If your Railway account isn’t linked to GitHub yet, you’ll be prompted to do so.
3. **Deploy the App**:
- Click **Deploy** to start the deployment process.
- Once the deployed, a Railway [service](/services) will be created for your app, but it won’t be publicly accessible by default.
4. **Verify the Deployment**:
- Once the deployment completes, go to [**View logs**](/observability/logs#build--deploy-panel) to check if the server is running successfully.
5. **Set Up a Public URL**:
- Navigate to the **Networking** section under the [Settings](/overview/the-basics#service-settings) tab of your new service.
- Click [Generate Domain](/networking/public-networking#railway-provided-domain) to create a public URL for your app.
##### Use a Dockerfile
1. Create a `Dockerfile` in the SvelteKit app's root directory.
2. Add the content below to the `Dockerfile`:
```bash
# Use the Node alpine official image
# https://hub.docker.com/_/node
FROM node:lts-alpine
# Create and change to the app directory.
WORKDIR /app
# Copy the files to the container image
COPY package*.json ./
# Install packages
RUN npm ci
# Copy local code to the container image.
COPY . ./
# Build the app.
RUN npm run build
# Serve the app
CMD ["npm", "run", "start"]
```
3. Either deploy via the CLI or from GitHub.
Railway automatically detects the `Dockerfile`, [and uses it to build and deploy the app.](/builds/dockerfiles)
**Note:** Railway supports also deployment from public and private Docker images.
This guide covers the main deployment options on Railway. Choose the approach that suits your setup, and start deploying your SvelteKit apps seamlessly!
#### Next steps
Explore these resources to learn how you can maximize your experience with Railway:
- [Choose between SSR, SSG, and ISR](/guides/ssr-ssg-isr) - Pick the right rendering strategy.
- [Manage environment variables](/guides/frontend-environment-variables) - Handle `PUBLIC_` prefixed variables.
- [Add a Database Service](/databases/build-a-database-service)
- [Monitor your app](/observability)
### Bun
Source: https://docs.railway.com/guides/bun.md
Learn how to deploy a Bun app to Railway with this step-by-step guide. It covers one-click deploys, Dockerfile setup, and other deployment strategies.
Bun is a fast all-in-one JavaScript runtime and toolkit designed as a drop-in replacement for Node.js.
This guide covers how to deploy a Bun app on Railway in four ways:
1. [One-click deploy from a template](#one-click-deploy-from-a-template).
2. [From a GitHub repository](#deploy-from-a-github-repo).
3. [Using the CLI](#deploy-from-the-cli).
4. [Using a Dockerfile](#use-a-dockerfile).
#### One-click deploy from a template
[](https://railway.com/new/template/bun-starter)
It is highly recommended that [you eject from the template after deployment](/templates/deploy#eject-from-template-repository) to create a copy of the repo on your GitHub account.
**Note:** You can also choose from a variety of Bun templates created by the community.
#### Deploy from a GitHub repo
To deploy a Bun app on Railway directly from GitHub, follow the steps below:
1. Create a New Project.
2. Click **Deploy from GitHub repo**.
3. Select your Bun GitHub repo.
- Railway requires a valid GitHub account to be linked. If your Railway account isn't associated with one, you will be prompted to link it.
4. Click **Deploy Now**.
**Note:** [Railpack](/builds/railpack) does not yet detect Bun projects automatically. Add a `Dockerfile` to your repo for Railway to build and deploy your app.
Once the deployment is successful, a Railway [service](/services) will be created for you. By default, this service will not be publicly accessible.
To set up a publicly accessible URL for the service, navigate to the **Networking** section in the [Settings](/overview/the-basics#service-settings) tab of your new service and click on [Generate Domain](/networking/public-networking#railway-provided-domain).
#### Deploy from the CLI
1. Install and authenticate with the CLI.
2. `cd` into your Bun app directory.
3. Run `railway init` within the app directory to create a new project.
4. Run `railway up` to deploy.
**Note:** [Railpack](/builds/railpack) does not yet detect Bun projects automatically. Add a `Dockerfile` to your repo for Railway to build and deploy your app.
#### Use a Dockerfile
1. Create a `Dockerfile` in your app's root directory.
2. Add the content below to the `Dockerfile`:
```docker
FROM oven/bun:1-alpine
WORKDIR /app
COPY package.json bun.lockb ./
RUN bun install --frozen-lockfile
COPY . ./
ENTRYPOINT ["bun", "run", "src/index.ts"]
```
3. Either deploy via the CLI or from GitHub.
Railway automatically detects the `Dockerfile`, [and uses it to build and deploy the app.](/builds/dockerfiles)
**Note:** Railway supports also deployment from public and private Docker images.
#### Next steps
Explore these resources to learn more about Railway:
- [Add a Database Service](/databases/build-a-database-service)
- [Monitor your app](/observability)
- [Running a Cron Job](/cron-jobs)
### React
Source: https://docs.railway.com/guides/react.md
Learn how to deploy a React app to Railway with this step-by-step guide. It covers quick setup, caddy server setup, one-click deploys and other deployment strategies.
[React](https://react.dev), also known as React.js or ReactJS, is a popular JavaScript library developed by Meta for building user interfaces, especially for web and native applications.
React simplifies the process of creating interactive and dynamic UIs by breaking them down into reusable components.
This guide covers how to deploy a React app to Railway in four ways:
1. [One-click deploy from a template](#one-click-deploy-from-a-template).
2. [From a GitHub repository](#deploy-from-a-github-repo).
3. [Using the CLI](#deploy-from-the-cli).
4. [Using a Dockerfile](#use-a-dockerfile).
Now, let's create a React app!
#### Create a React app
**Note:** If you already have a React app locally or on GitHub, you can skip this step and go straight to the [Deploy React App on Railway](#deploy-the-react-app-to-railway).
To create a new React app, ensure that you have [Node](https://nodejs.org/en/learn/getting-started/how-to-install-nodejs) installed on your machine.
Run the following command in your terminal to create a new React app using [Vite](https://vite.dev/guide/#scaffolding-your-first-vite-project):
```bash
npm create vite@latest helloworld -- --template react
```
A new React app will be provisioned for you in the `helloworld` directory.
##### Run the React app locally
Next, `cd` into the directory and install the dependencies.
```bash
npm install
```
Start the Vite development server by running the following command:
```bash
npm run dev
```
Open your browser and go to `http://localhost:5173` to see your app.
#### Deploy the React app to Railway
Railway offers multiple ways to deploy your React app, depending on your setup and preference.
##### One-click deploy from a template
If you’re looking for the fastest way to get started, the one-click deploy option is ideal. It sets up a React app with [Caddy](https://caddyserver.com) to serve the dist folder.
Click the button below to begin:
[](https://railway.com/new/template/NeiLty)
It is highly recommended that [you eject from the template after deployment](/templates/deploy#eject-from-template-repository) to create a copy of the repo on your GitHub account.
**Note:** You can also choose from a variety of React app templates created by the community.
##### Deploy from the CLI
1. **Install the Railway CLI**:
- Install the CLI and authenticate it using your Railway account.
2. **Initialize a Railway Project**:
- Run the command below in your React app directory.
```bash
railway init
```
- Follow the prompts to name your project.
- After the project is created, click the provided link to view it in your browser.
3. **Deploy the Application**:
- Use the command below to deploy your app:
```bash
railway up
```
- This command will scan, compress and upload your app's files to Railway. You’ll see real-time deployment logs in your terminal.
- Once the deployment completes, go to **View logs** to check if the service is running successfully.
4. **Set Up a Public URL**:
- Navigate to the **Networking** section under the [Settings](/overview/the-basics#service-settings) tab of your new service.
- Click [Generate Domain](/networking/public-networking#railway-provided-domain) to create a public URL for your app.
##### Deploy from a GitHub repo
To deploy a React app to Railway directly from GitHub, follow the steps below:
1. **Create a New Project on Railway**:
- Go to Railway to create a new project.
2. **Deploy from GitHub**:
- Select **Deploy from GitHub repo** and choose your repository.
- If your Railway account isn’t linked to GitHub yet, you’ll be prompted to do so.
3. **Deploy the App**:
- Click **Deploy** to start the deployment process.
- Once the deployed, a Railway [service](/services) will be created for your app, but it won’t be publicly accessible by default.
4. **Verify the Deployment**:
- Once the deployment completes, go to **View logs** to check if the server is running successfully.
5. **Set Up a Public URL**:
- Navigate to the **Networking** section under the [Settings](/overview/the-basics#service-settings) tab of your new service.
- Click [Generate Domain](/networking/public-networking#railway-provided-domain) to create a public URL for your app.
##### Use a Dockerfile
1. Create a `Dockerfile` in the `helloworld` or React app's root directory.
2. Add the content below to the `Dockerfile`:
```bash
# Use the Node alpine official image
# https://hub.docker.com/_/node
FROM node:lts-alpine AS build
# Set config
ENV NPM_CONFIG_UPDATE_NOTIFIER=false
ENV NPM_CONFIG_FUND=false
# Create and change to the app directory.
WORKDIR /app
# Copy the files to the container image
COPY package*.json ./
# Install packages
RUN npm ci
# Copy local code to the container image.
COPY . ./
# Build the app.
RUN npm run build
# Use the Caddy image
FROM caddy
# Create and change to the app directory.
WORKDIR /app
# Copy Caddyfile to the container image.
COPY Caddyfile ./
# Copy local code to the container image.
RUN caddy fmt Caddyfile --overwrite
# Copy files to the container image.
COPY --from=build /app/dist ./dist
# Use Caddy to run/serve the app
CMD ["caddy", "run", "--config", "Caddyfile", "--adapter", "caddyfile"]
```
The `Dockerfile` will use Caddy to serve the React app.
3. Add a `Caddyfile` to the app's root directory:
```bash
# global options
{
admin off # there's no need for the admin api in railway's environment
persist_config off # storage isn't persistent anyway
auto_https off # railway handles https for us, this would cause issues if left enabled
# runtime logs
log {
format json # set runtime log format to json mode
}
# server options
servers {
trusted_proxies static private_ranges 100.0.0.0/8 # trust railway's proxy
}
}
# site block, listens on the $PORT environment variable, automatically assigned by railway
:{$PORT:3000} {
# access logs
log {
format json # set access log format to json mode
}
# health check for railway
rewrite /health /*
# serve from the 'dist' folder (Vite builds into the 'dist' folder)
root * dist
# enable gzipping responses
encode gzip
# serve files from 'dist'
file_server
# if path doesn't exist, redirect it to 'index.html' for client side routing
try_files {path} /index.html
}
```
4. Either deploy via the CLI or from GitHub.
Railway automatically detects the `Dockerfile`, [and uses it to build and deploy the app.](/builds/dockerfiles)
**Note:** Railway supports also deployment from public and private Docker images.
This guide covers the main deployment options on Railway. Choose the approach that suits your setup, and start deploying your React apps seamlessly!
#### Next steps
Explore these resources to learn how you can maximize your experience with Railway:
- [Configure SPA routing](/guides/spa-routing-configuration) - Set up Caddy fallback for client-side routing.
- [Manage environment variables](/guides/frontend-environment-variables) - Handle `VITE_` prefixed variables.
- [Add a Database Service](/databases/build-a-database-service)
- [Monitor your app](/observability)
### Vue
Source: https://docs.railway.com/guides/vue.md
Learn how to deploy a Vue app to Railway with this step-by-step guide. It covers quick setup, caddy server setup, one-click deploys, Dockerfile and other deployment strategies.
[Vue](https://vuejs.org), also known as Vue.js or VueJS, is a popular JavaScript library for building snappy, performant and versatile user interfaces for web applications.
Vue prides itself as **The Progressive JavaScript Framework**.
This guide covers how to deploy a Vue app to Railway in four ways:
1. [One-click deploy from a template](#one-click-deploy-from-a-template).
2. [From a GitHub repository](#deploy-from-a-github-repo).
3. [Using the CLI](#deploy-from-the-cli).
4. [Using a Dockerfile](#use-a-dockerfile).
Now, let's create a Vue app!
#### Create a Vue app
**Note:** If you already have a Vue app locally or on GitHub, you can skip this step and go straight to the [Deploy Vue App on Railway](#deploy-the-vue-app-to-railway).
To create a new Vue app, ensure that you have [Node](https://nodejs.org/en/learn/getting-started/how-to-install-nodejs) installed on your machine.
Run the following command in your terminal to create a new Vue app using [Vite](https://vite.dev/guide/#scaffolding-your-first-vite-project):
```bash
npm create vue@latest
```
You'll be presented with choices for different options in the prompts. Give the app a name, `helloworld` and answer `Yes` to the other options or select what you want.
A new Vue app will be provisioned for you in the `helloworld` directory.
##### Run the Vue app locally
Next, `cd` into the directory and install the dependencies.
```bash
npm install
```
Start the Vite development server by running the following command:
```bash
npm run dev
```
Open your browser and go to `http://localhost:5173` to see your app.
#### Deploy the Vue app to Railway
Railway offers multiple ways to deploy your Vue app, depending on your setup and preference.
##### One-click deploy from a template
If you’re looking for the fastest way to get started, the one-click deploy option is ideal. It sets up a Vue app with [Caddy](https://caddyserver.com) to serve the dist folder.
Click the button below to begin:
[](https://railway.com/new/template/Qh0OAU)
It is highly recommended that [you eject from the template after deployment](/templates/deploy#eject-from-template-repository) to create a copy of the repo on your GitHub account.
**Note:** You can also choose from a variety of Vue app templates created by the community.
##### Deploy from the CLI
1. **Install the Railway CLI**:
- Install the CLI and authenticate it using your Railway account.
2. **Initialize a Railway Project**:
- Run the command below in your Vue app directory.
```bash
railway init
```
- Follow the prompts to name your project.
- After the project is created, click the provided link to view it in your browser.
3. **Deploy the Application**:
- Use the command below to deploy your app:
```bash
railway up
```
- This command will scan, compress and upload your app's files to Railway. You’ll see real-time deployment logs in your terminal.
- Once the deployment completes, go to **View logs** to check if the service is running successfully.
4. **Set Up a Public URL**:
- Navigate to the **Networking** section under the [Settings](/overview/the-basics#service-settings) tab of your new service.
- Click [Generate Domain](/networking/public-networking#railway-provided-domain) to create a public URL for your app.
##### Deploy from a GitHub repo
To deploy a Vue app to Railway directly from GitHub, follow the steps below:
1. **Create a New Project on Railway**:
- Go to Railway to create a new project.
2. **Deploy from GitHub**:
- Select **Deploy from GitHub repo** and choose your repository.
- If your Railway account isn’t linked to GitHub yet, you’ll be prompted to do so.
3. **Deploy the App**:
- Click **Deploy** to start the deployment process.
- Once the deployed, a Railway [service](/services) will be created for your app, but it won’t be publicly accessible by default.
4. **Verify the Deployment**:
- Once the deployment completes, go to **View logs** to check if the server is running successfully.
5. **Set Up a Public URL**:
- Navigate to the **Networking** section under the [Settings](/overview/the-basics#service-settings) tab of your new service.
- Click [Generate Domain](/networking/public-networking#railway-provided-domain) to create a public URL for your app.
##### Use a Dockerfile
1. Create a `Dockerfile` in the `helloworld` or Vue app's root directory.
2. Add the content below to the `Dockerfile`:
```bash
# Use the Node alpine official image
# https://hub.docker.com/_/node
FROM node:lts-alpine AS build
# Set config
ENV NPM_CONFIG_UPDATE_NOTIFIER=false
ENV NPM_CONFIG_FUND=false
# Create and change to the app directory.
WORKDIR /app
# Copy the files to the container image
COPY package*.json ./
# Install packages
RUN npm ci
# Copy local code to the container image.
COPY . ./
# Build the app.
RUN npm run build
# Use the Caddy image
FROM caddy
# Create and change to the app directory.
WORKDIR /app
# Copy Caddyfile to the container image.
COPY Caddyfile ./
# Copy local code to the container image.
RUN caddy fmt Caddyfile --overwrite
# Copy files to the container image.
COPY --from=build /app/dist ./dist
# Use Caddy to run/serve the app
CMD ["caddy", "run", "--config", "Caddyfile", "--adapter", "caddyfile"]
```
The `Dockerfile` will use Caddy to serve the Vue app.
3. Add a `Caddyfile` to the app's root directory:
```bash
# global options
{
admin off # there's no need for the admin api in railway's environment
persist_config off # storage isn't persistent anyway
auto_https off # railway handles https for us, this would cause issues if left enabled
# runtime logs
log {
format json # set runtime log format to json mode
}
# server options
servers {
trusted_proxies static private_ranges 100.0.0.0/8 # trust railway's proxy
}
}
# site block, listens on the $PORT environment variable, automatically assigned by railway
:{$PORT:3000} {
# access logs
log {
format json # set access log format to json mode
}
# health check for railway
rewrite /health /*
# serve from the 'dist' folder (Vite builds into the 'dist' folder)
root * dist
# enable gzipping responses
encode gzip
# serve files from 'dist'
file_server
# if path doesn't exist, redirect it to 'index.html' for client side routing
try_files {path} /index.html
}
```
4. Either deploy via the CLI or from GitHub.
Railway automatically detects the `Dockerfile`, [and uses it to build and deploy the app.](/builds/dockerfiles)
**Note:** Railway supports also deployment from public and private Docker images.
This guide covers the main deployment options on Railway. Choose the approach that suits your setup, and start deploying your Vue apps seamlessly!
#### Next steps
Explore these resources to learn how you can maximize your experience with Railway:
- [Configure SPA routing](/guides/spa-routing-configuration) - Set up Caddy fallback for client-side routing.
- [Manage environment variables](/guides/frontend-environment-variables) - Handle `VITE_` prefixed variables.
- [Add a Database Service](/databases/build-a-database-service)
- [Monitor your app](/observability)
### Angular
Source: https://docs.railway.com/guides/angular.md
Learn how to deploy an Angular app to Railway with this step-by-step guide. It covers quick setup, caddy server setup, one-click deploys, Dockerfile and other deployment strategies.
[Angular](https://angular.dev) is a JavaScript web framework that empowers developers to build fast and reliable applications. It is designed to work at any scale, keep large teams productive and is proven in some of Google's largest web apps such as [Google fonts](https://fonts.google.com) and [Google Cloud](https://console.cloud.google.com).
This guide covers how to deploy an Angular app to Railway in four ways:
1. [One-click deploy from a template](#one-click-deploy-from-a-template)
2. [From a GitHub repository](#deploy-from-a-github-repo)
3. [Using the CLI](#deploy-from-the-cli)
4. [Using a Dockerfile](#use-a-dockerfile)
Now, let's create an Angular app!
#### Create an Angular app
**Note:** If you already have an Angular app locally or on GitHub, you can skip this step and go straight to the [Deploy Angular App on Railway](#deploy-the-angular-app-to-railway).
To create a new Angular app, ensure that you have [Node](https://nodejs.org/en/learn/getting-started/how-to-install-nodejs) and [Angular CLI](https://angular.dev/installation#install-angular-cli) installed on your machine.
Run the following command in your terminal to create a new Angular app:
```bash
ng new gratitudeapp
```
You'll be presented with some config options in the prompts for your project.
- Select `CSS`
- Select `Yes` for enabling Server-Side Rendering (SSR) and Static Site Generation (SSG)
- Select `Yes` for enabling Server Routing and App Engine APIs (Developer Preview)
##### Run the Angular app locally
Next, `cd` into the directory and run the app.
```bash
npm start
```
Open your browser and go to `http://localhost:4200` to see your app.
#### Modify start script
Before deploying, update the `package.json` file.
Angular builds the project into the `dist` directory. For server-side rendered apps, the server starts with the command: `node dist/gratitudeapp/server/server.mjs` as defined in the scripts section below:
```js
"scripts": {
"ng": "ng",
"start": "ng serve",
"build": "ng build",
"watch": "ng build --watch --configuration development",
"test": "ng test",
"serve:ssr:gratitudeapp": "node dist/gratitudeapp/server/server.mjs"
},
```
- The development server starts with `npm start`.
- The production server runs with `npm run serve:ssr:gratitudeapp`.
Since Railway relies on the `build` and `start` scripts to automatically build and launch applications, update the `start` script to ensure it runs the production server correctly.
Your scripts section should look like this:
```js
...
"scripts": {
"ng": "ng",
"dev": "ng serve",
"build": "ng build",
"watch": "ng build --watch --configuration development",
"test": "ng test",
"start": "node dist/gratitudeapp/server/server.mjs"
},
...
```
Now you're good to go!
#### Deploy the Angular app to Railway
Railway offers multiple ways to deploy your Angular app, depending on your setup and preference.
##### One-click deploy from a template
If you’re looking for the fastest way to get started, the one-click deploy option is ideal.
Click the button below to begin:
[](https://railway.com/new/template/A5t142)
It is highly recommended that [you eject from the template after deployment](/templates/deploy#eject-from-template-repository) to create a copy of the repo on your GitHub account.
**Note:** You can also choose from a variety of Angular app templates created by the community.
##### Deploy from the CLI
1. **Install the Railway CLI**:
- Install the CLI and authenticate it using your Railway account.
2. **Initialize a Railway Project**:
- Run the command below in your Angular app directory.
```bash
railway init
```
- Follow the prompts to name your project.
- After the project is created, click the provided link to view it in your browser.
3. **Deploy the Application**:
- Use the command below to deploy your app:
```bash
railway up
```
- This command will scan, compress and upload your app's files to Railway. You’ll see real-time deployment logs in your terminal.
- Once the deployment completes, go to **View logs** to check if the service is running successfully.
4. **Set Up a Public URL**:
- Navigate to the **Networking** section under the [Settings](/overview/the-basics#service-settings) tab of your new service.
- Click [Generate Domain](/networking/public-networking#railway-provided-domain) to create a public URL for your app.
##### Deploy from a GitHub repo
To deploy an Angular app to Railway directly from GitHub, follow the steps below:
1. **Create a New Project on Railway**:
- Go to Railway to create a new project.
2. **Deploy from GitHub**:
- Select **Deploy from GitHub repo** and choose your repository.
- If your Railway account isn’t linked to GitHub yet, you’ll be prompted to do so.
3. **Deploy the App**:
- Click **Deploy** to start the deployment process.
- Once the deployed, a Railway [service](/services) will be created for your app, but it won’t be publicly accessible by default.
4. **Verify the Deployment**:
- Once the deployment completes, go to **View logs** to check if the server is running successfully.
5. **Set Up a Public URL**:
- Navigate to the **Networking** section under the [Settings](/overview/the-basics#service-settings) tab of your new service.
- Click [Generate Domain](/networking/public-networking#railway-provided-domain) to create a public URL for your app.
##### Use a Dockerfile
1. Create a `Dockerfile` in the `gratitudeapp` or Angular app's root directory.
2. Add the content below to the `Dockerfile`:
```dockerfile
# Use the Node alpine official image
# https://hub.docker.com/_/node
FROM node:lts-alpine
# Create and change to the app directory.
WORKDIR /app
# Copy the files to the container image
COPY package*.json ./
# Install packages
RUN npm ci
# Copy local code to the container image.
COPY . ./
# Build the app.
RUN npm run build
# Serve the app
CMD ["npm", "run", "start"]
```
3. Either deploy via the CLI or from GitHub.
Railway automatically detects the `Dockerfile`, [and uses it to build and deploy the app.](/builds/dockerfiles)
**Note:** Railway supports also deployment from public and private Docker images.
This guide covers the main deployment options on Railway. Choose the approach that suits your setup, and start deploying your Angular apps seamlessly!
#### Next steps
Explore these resources to learn how you can maximize your experience with Railway:
- [Configure SPA routing](/guides/spa-routing-configuration) - Set up Caddy fallback for client-side routing.
- [Manage environment variables](/guides/frontend-environment-variables) - Handle Angular environment files.
- [Add a Database Service](/databases/build-a-database-service)
- [Monitor your app](/observability)
### Solid
Source: https://docs.railway.com/guides/solid.md
Learn how to deploy a SolidJS app to Railway with this step-by-step guide. It covers quick setup, one-click deploys and other deployment strategies.
[SolidJS](https://www.solidjs.com) is a modern JavaScript library for building responsive and high-performing user interfaces for web applications.
It uses fine-grained reactivity, meaning it updates only when the data your app actually depends on changes. This minimizes unnecessary work, leading to faster load times and a seamless user experience.
This guide covers how to deploy a Solid app to Railway in four ways:
1. [One-click deploy from a template](#one-click-deploy-from-a-template).
2. [From a GitHub repository](#deploy-from-a-github-repo).
3. [Using the CLI](#deploy-from-the-cli).
4. [Using a Dockerfile](#use-a-dockerfile).
Now, let's create a Solid app!
#### Create a Solid app
**Note:** If you already have a Solid app locally or on GitHub, you can skip this step and go straight to the [Deploy Solid App on Railway](#deploy-the-solid-app-to-railway).
To create a new Solid app, ensure that you have [Node](https://nodejs.org/en/learn/getting-started/how-to-install-nodejs) installed on your machine.
Run the following command in your terminal to create a new Solid app from a template:
```bash
npx degit solidjs/templates/js solidjsapp
```
A new Solid app will be provisioned for you in the `solidjsapp` directory.
##### Run the Solid app locally
Next, `cd` into the directory and install the dependencies.
```bash
npm install
```
Start the Vite development server by running the following command:
```bash
npm run dev
```
Open your browser and go to `http://localhost:3000` to see your app.
#### Deploy the Solid app to Railway
Railway offers multiple ways to deploy your Solid app, depending on your setup and preference.
##### One-click deploy from a template
If you’re looking for the fastest way to get started, the one-click deploy option is ideal.
Click the button below to begin:
[](https://railway.com/new/template/w5OSVq)
It is highly recommended that [you eject from the template after deployment](/templates/deploy#eject-from-template-repository) to create a copy of the repo on your GitHub account.
##### Deploy from the CLI
1. **Install the Railway CLI**:
- Install the CLI and authenticate it using your Railway account.
2. **Initialize a Railway Project**:
- Run the command below in your Solid app directory.
```bash
railway init
```
- Follow the prompts to name your project.
- After the project is created, click the provided link to view it in your browser.
3. **Deploy the Application**:
- Use the command below to deploy your app:
```bash
railway up
```
- This command will scan, compress and upload your app's files to Railway. You’ll see real-time deployment logs in your terminal.
- Once the deployment completes, go to **View logs** to check if the service is running successfully.
4. **Set Up a Public URL**:
- Navigate to the **Networking** section under the [Settings](/overview/the-basics#service-settings) tab of your new service.
- Click [Generate Domain](/networking/public-networking#railway-provided-domain) to create a public URL for your app.
##### Deploy from a GitHub repo
To deploy a Solid app to Railway directly from GitHub, follow the steps below:
1. **Create a New Project on Railway**:
- Go to Railway to create a new project.
2. **Deploy from GitHub**:
- Select **Deploy from GitHub repo** and choose your repository.
- If your Railway account isn’t linked to GitHub yet, you’ll be prompted to do so.
3. **Deploy the App**:
- Click **Deploy** to start the deployment process.
- Once deployed, a Railway [service](/services) will be created for your app, but it won’t be publicly accessible by default.
4. **Verify the Deployment**:
- Once the deployment completes, go to **View logs** to check if the server is running successfully.
5. **Set Up a Public URL**:
- Navigate to the **Networking** section under the [Settings](/overview/the-basics#service-settings) tab of your new service.
- Click [Generate Domain](/networking/public-networking#railway-provided-domain) to create a public URL for your app.
##### Use a Dockerfile
1. Create a `Dockerfile` in the `solidjsapp` or Solid app's root directory.
2. Add the content below to the `Dockerfile`:
```dockerfile
# Use the Node alpine official image
# https://hub.docker.com/_/node
FROM node:lts-alpine AS build
# Set config
ENV NPM_CONFIG_UPDATE_NOTIFIER=false
ENV NPM_CONFIG_FUND=false
# Create and change to the app directory.
WORKDIR /app
# Copy the files to the container image
COPY package*.json ./
# Install packages
RUN npm ci
# Copy local code to the container image.
COPY . ./
# Build the app.
RUN npm run build
# Use the Caddy image
FROM caddy
# Create and change to the app directory.
WORKDIR /app
# Copy Caddyfile to the container image.
COPY Caddyfile ./
# Copy local code to the container image.
RUN caddy fmt Caddyfile --overwrite
# Copy files to the container image.
COPY --from=build /app/dist ./dist
# Use Caddy to run/serve the app
CMD ["caddy", "run", "--config", "Caddyfile", "--adapter", "caddyfile"]
```
The `Dockerfile` will use Caddy to serve the Solid app.
3. Add a `Caddyfile` to the app's root directory:
```bash
{
# global options
admin off # there's no need for the admin api in railway's environment
persist_config off # storage isn't persistent anyway
auto_https off # railway handles https for us, this would cause issues if left enabled
# runtime logs
log {
format json # set runtime log format to json mode
}
# server options
servers {
trusted_proxies static private_ranges 100.0.0.0/8 # trust railway's proxy
}
}
# site block, listens on the $PORT environment variable, automatically assigned by railway
:{$PORT:3000} {
# access logs
log {
format json # set access log format to json mode
}
# health check for railway
rewrite /health /*
# serve from the 'dist' folder (Vite builds into the 'dist' folder)
root * dist
# enable gzipping responses
encode gzip
# serve files from 'dist'
file_server
# if path doesn't exist, redirect it to 'index.html' for client side routing
try_files {path} /index.html
}
```
4. Either deploy via the CLI or from GitHub.
Railway automatically detects the `Dockerfile`, [and uses it to build and deploy the app.](/builds/dockerfiles)
**Note:** Railway supports also deployment from public and private Docker images.
This guide covers the main deployment options on Railway. Choose the approach that suits your setup, and start deploying your Solid apps seamlessly!
#### Next steps
Explore these resources to learn how you can maximize your experience with Railway:
- [Configure SPA routing](/guides/spa-routing-configuration) - Set up Caddy fallback for client-side routing.
- [Manage environment variables](/guides/frontend-environment-variables) - Handle `VITE_` prefixed variables.
- [Add a Database Service](/databases/build-a-database-service)
- [Monitor your app](/observability)
### Sails
Source: https://docs.railway.com/guides/sails.md
Learn how to deploy a Sails app to Railway with this step-by-step guide. It covers quick setup, database integration, the Boring JavaScript stack, one-click deploys and other deployment strategies.
[Sails](https://sailsjs.com) is a MVC framework for Node.js. It is designed to emulate the familiar MVC pattern of frameworks like Ruby on Rails, but with support for the requirements of modern apps: data-driven APIs with a scalable, service-oriented architecture.
Sails makes it easy to build custom, enterprise-grade Node.js apps.
#### Create a Sails app
**Note:** If you already have a Sails app locally or on GitHub, you can skip this step and go straight to the [Deploy Sails App on Railway](#deploy-sails-app-on-railway).
To create a new Sails app, ensure that you have [Node](https://nodejs.org/en/learn/getting-started/how-to-install-nodejs) installed on your machine.
Run the following command in your terminal to install Sails:
```bash
npm install sails -g
```
Next, run the command below to create a new Sails app
```bash
sails new workapp
```
Select `Web App` as the template for your new Sails app. Once the dependencies have been installed, `cd` into the `workapp` directory and run `sails lift` to start your app.
Open your browser and go to `http://localhost:1337` to see your app.
Now, let's deploy to Railway!
#### Deploy Sails app on Railway
Railway offers multiple ways to deploy your Sails app, depending on your setup and preference. Choose any of the following methods:
1. [One-click deploy from a template](#one-click-deploy-from-a-template).
2. [Using the CLI](#deploy-from-the-cli).
3. [From a GitHub repository](#deploy-from-a-github-repo).
#### One-click deploy from a template
If you’re looking for the fastest way to get started, the one-click deploy option is ideal. It sets up a Sails app along with a Postgres database and Redis.
Click the button below to begin:
[](https://railway.com/new/template/t3sAEH)
After deploying, it is recommended that you [eject from the template](/templates/deploy#eject-from-template-repository) to create a copy of the repository under your own GitHub account. This will give you full control over the source code and project.
#### Deploy from the CLI
To deploy the Sails app using the Railway CLI, please follow the steps:
1. **Install the Railway CLI**:
- Install the CLI and authenticate it using your Railway account.
2. **Initialize a Railway Project**:
- Run the command below in your Sails app directory.
```bash
railway init
```
- Follow the prompts to name your project.
- After the project is created, click the provided link to view it in your browser.
3. **Modify Sails Config**:
- Open up `config/env/production.js` file and make some changes:
- Set `http.trustProxy` to `true` because your app will be behind a proxy.
- Set `session.cookie.secure` to `true`
- Add this function to the `socket` object just after the `onlyAllowOrigins` array:
```js
beforeConnect: function(handshake, proceed) {
// Send back `true` to allow the socket to connect.
// (Or send back `false` to reject the attempt.)
return proceed(undefined, false);
},
```
**Note:** This is only added because sockets aren't needed now. If you do need sockets, skip this step and add your public app URL to the `onlyAllowOrigins` array. The function simply rejects socket connection attempts.
4. **Deploy the Application**:
- Use the command below to deploy your app:
```bash
railway up
```
- This command will scan, compress and upload your app's files to Railway. You’ll see real-time deployment logs in your terminal.
- **Note:** You'll come across an error about how the default `sails-disk` adapter and `connect.session()` MemoryStore is not designed for use as a production database, don’t worry. You’ll fix this in the next step.
5. **Add PostgreSQL & Redis Database Services**:
- Run `railway add`.
- Select `PostgreSQL` by pressing space
- Select `Redis` by also pressing space and hit **Enter** to add both database services to your project.
6. **Modify Sails Database Config**:
- Open up the `config/env/production.js` file and make some changes to let your app know what database to connect to and where to save sessions:
- In the `datastores:` section,
- Add `adapter: 'sails-postgresql'`,
- Add `url: process.env.DATABASE_URL`
- In the `session:` section,
- Add `adapter: '@sailshq/connect-redis'`,
- Add `url: process.env.REDIS_URL`,
- Run `npm install sails-postgresql --save` to add the new adapter to your app locally.
7. **Configure Environment Variables on Railway**:
- Go to your app service **Variables** section and add the following:
- `DATABASE_URL`: Set the value to `${{Postgres.DATABASE_URL}}` (this references the URL of your new Postgres database). Learn more about [referencing service variables](/variables#referencing-another-services-variable).
- `REDIS_URL`: Set the value to `${{Redis.REDIS_URL}}` (this references the URL of your new Redis Database)
- Use the **Raw Editor** to add any other required environment variables in one go.
8. **Redeploy the Service**:
- Click **Deploy** on the Railway dashboard to apply your changes.
9. **Upload Local Changes**:
- Run `railway up` to upload all the changes you made locally and redeploy your service.
10. **Verify the Deployment**:
- Once the deployment completes, go to **View logs** to check if the server is running successfully.
11. **Set Up a Public URL**:
- Navigate to the **Networking** section under the [Settings](/overview/the-basics#service-settings) tab of your new service.
- Click [Generate Domain](/networking/public-networking#railway-provided-domain) to create a public URL for your app.
#### Deploy from a GitHub repo
To deploy the Sails app to Railway, start by pushing the app to a GitHub repo. Once that’s set up, follow the steps below to complete the deployment process.
1. **Create a New Project on Railway**:
- Go to Railway to create a new project.
2. **Deploy from GitHub**:
- Select **Deploy from GitHub repo** and choose your repository.
- If your Railway account isn’t linked to GitHub yet, you’ll be prompted to do so.
3. **Add Environment Variables**:
- Click **Add Variables** and configure all the necessary environment variables for your app.
4. **Deploy the App**:
- Click **Deploy** to start the deployment process.
- Once the deployed, a Railway [service](/services) will be created for your app, but it won’t be publicly accessible by default.
5. **Add a Database Service**:
- Right-click on the Railway project canvas or click the **Create** button.
- Select **Database**.
- Select **Add PostgreSQL** from the available databases.
- This will create and deploy a new Postgres database service for your project.
6. **Add a Redis Database Service**:
- Right-click on the Railway project canvas or click the **Create** button.
- Select **Database**.
- Select **Add Redis** from the available databases.
- This will create and deploy a new Redis database service for your project.
7. **Configure Environment Variables**:
- Go to your app service **Variables** section and add the following:
- `DATABASE_URL`: Set the value to `${{Postgres.DATABASE_URL}}` (this references the URL of your new Postgres database). Learn more about [referencing service variables](/variables#referencing-another-services-variable).
- `REDIS_URL`: Set the value to `${{Redis.REDIS_URL}}` (this references the URL of your new Redis Database)
- Use the **Raw Editor** to add any other required environment variables in one go.
8. **Modify Sails Config**:
- Follow [steps 3 & 5 mentioned in the CLI guide](#deploy-from-the-cli).
9. **Redeploy the Service**:
- Click **Deploy** on the Railway dashboard to apply your changes.
10. **Verify the Deployment**:
- Once the deployment completes, go to **View logs** to check if the server is running successfully.
11. **Set Up a Public URL**:
- Navigate to the **Networking** section under the [Settings](/overview/the-basics#service-settings) tab of your new service.
- Click [Generate Domain](/networking/public-networking#railway-provided-domain) to create a public URL for your app.
This guide covers the main deployment options on Railway. Choose the approach that suits your setup, and start deploying your Sails apps effortlessly!
Here’s how your setup should look:
By following these steps, you’ll have a fully functional Sails app. If you run into any issues or need to make adjustments, check the logs and revisit your environment variable configurations.
#### The boring JavaScript stack Sails starter
If you're a fan of [The Boring JavaScript Stack](https://github.com/sailscastshq/boring-stack), there’s a one-click deploy option for you.
Simply click the button below to get started:
[](https://railway.com/new/template/ia84_3)
**Note:** After deploying, it is recommended to [eject from the template](/templates/deploy#eject-from-template-repository) to create your own GitHub repository. This will give you full control over the project and source code.
#### Next steps
Explore these resources to learn how you can maximize your experience with Railway:
- [Monitoring](/observability)
- [Deployments](/deployments)
### Gatsby
Source: https://docs.railway.com/guides/gatsby.md
Deploy a Gatsby static site to Railway with Caddy. Covers one-click template deployment, CLI deploys, GitHub deploys, and Dockerfile setup.
[Gatsby](https://www.gatsbyjs.com) is a React-based static site generator that builds fast websites from data sources like Markdown, CMSes, and APIs. Gatsby produces a directory of static HTML, CSS, and JavaScript files that can be served by any web server.
This guide covers how to deploy a Gatsby app to Railway in three ways:
1. [From a GitHub repository](#deploy-from-a-github-repo).
2. [Using the CLI](#deploy-from-the-cli).
3. [Using a Dockerfile](#use-a-dockerfile).
#### Create a Gatsby app
**Note:** If you already have a Gatsby app locally or on GitHub, skip to [Deploy the Gatsby app to Railway](#deploy-the-gatsby-app-to-railway).
Ensure [Node](https://nodejs.org/en/learn/getting-started/how-to-install-nodejs) is installed, then create a new Gatsby site:
```bash
npm init gatsby my-gatsby-site
```
Follow the prompts to choose your preferred options.
##### Run the Gatsby app locally
```bash
cd my-gatsby-site
npm run develop
```
Open `http://localhost:8000` to see your site.
#### Deploy the Gatsby app to Railway
Railway offers multiple ways to deploy your Gatsby app. Gatsby builds produce static files in the `public/` directory, so all deployment methods use a web server (Caddy) to serve those files.
##### Deploy from the CLI
1. **Install the Railway CLI**:
- Install the CLI and authenticate it using your Railway account.
2. **Initialize a Railway Project**:
- Run the command below in your Gatsby app directory.
```bash
railway init
```
- Follow the prompts to name your project.
- After the project is created, click the provided link to view it in your browser.
3. **Deploy the Application**:
- Use the command below to deploy your app:
```bash
railway up
```
- This command will scan, compress and upload your app's files to Railway. You'll see real-time deployment logs in your terminal.
- Once the deployment completes, go to **View logs** to check if the service is running successfully.
4. **Set Up a Public URL**:
- Navigate to the **Networking** section under the [Settings](/overview/the-basics#service-settings) tab of your new service.
- Click [Generate Domain](/networking/public-networking#railway-provided-domain) to create a public URL for your app.
##### Deploy from a GitHub repo
To deploy a Gatsby app to Railway directly from GitHub:
1. **Create a New Project on Railway**:
- Go to Railway to create a new project.
2. **Deploy from GitHub**:
- Select **Deploy from GitHub repo** and choose your repository.
- If your Railway account isn't linked to GitHub yet, you'll be prompted to do so.
3. **Deploy the App**:
- Click **Deploy** to start the deployment process.
- Once deployed, a Railway [service](/services) will be created for your app, but it won't be publicly accessible by default.
4. **Verify the Deployment**:
- Once the deployment completes, go to **View logs** to check if the server is running successfully.
5. **Set Up a Public URL**:
- Navigate to the **Networking** section under the [Settings](/overview/the-basics#service-settings) tab of your new service.
- Click [Generate Domain](/networking/public-networking#railway-provided-domain) to create a public URL for your app.
##### Use a Dockerfile
1. Create a `Dockerfile` in your Gatsby app's root directory.
2. Add the content below to the `Dockerfile`:
```dockerfile
FROM node:lts-alpine AS build
ENV NPM_CONFIG_UPDATE_NOTIFIER=false
ENV NPM_CONFIG_FUND=false
WORKDIR /app
COPY package*.json ./
RUN npm ci
COPY . ./
RUN npm run build
FROM caddy
WORKDIR /app
COPY Caddyfile ./
RUN caddy fmt Caddyfile --overwrite
COPY --from=build /app/public ./public
CMD ["caddy", "run", "--config", "Caddyfile", "--adapter", "caddyfile"]
```
The `Dockerfile` uses a multi-stage build: Node builds the site, then Caddy serves the `public/` directory.
3. Add a `Caddyfile` to the app's root directory:
```
{
admin off
persist_config off
auto_https off
log {
format json
}
servers {
trusted_proxies static private_ranges 100.0.0.0/8
}
}
:{$PORT:3000} {
log {
format json
}
rewrite /health /*
root * public
encode gzip
file_server
try_files {path} /index.html
}
```
Note that the root directive points to `public` (Gatsby's build output directory) instead of `dist`.
4. Either deploy via the CLI or from GitHub.
Railway automatically detects the `Dockerfile`, [and uses it to build and deploy the app.](/builds/dockerfiles)
**Note:** Railway also supports deployment from public and private Docker images.
#### Client-side routes
Gatsby supports [client-only routes](https://www.gatsbyjs.com/docs/how-to/routing/client-only-routes-in-gatsby/) for pages that handle routing in the browser. The `try_files {path} /index.html` directive in the Caddyfile ensures these routes work correctly on refresh. For more details on configuring this, see [Configure SPA Routing](/guides/spa-routing-configuration).
#### Build memory
Gatsby builds can be memory-intensive for large sites with many pages or image processing. If the build fails with an out-of-memory error, increase the Node.js heap size:
```
NODE_OPTIONS=--max-old-space-size=4096
```
Add this as a [service variable](/variables) in Railway.
#### Next steps
- [Configure SPA routing](/guides/spa-routing-configuration) - Details on Caddy and Nginx fallback routing.
- [Manage environment variables](/guides/frontend-environment-variables) - Handle `GATSBY_` prefixed variables.
- [Add a Database Service](/databases/build-a-database-service)
- [Monitor your app](/observability)
### TanStack Start
Source: https://docs.railway.com/guides/tanstack-start.md
Deploy a TanStack Start full-stack React application to Railway. Covers GitHub deploys, CLI deploys, Dockerfile setup, and Vinxi server configuration.
[TanStack Start](https://tanstack.com/start) is a full-stack React framework built on TanStack Router. It provides file-based routing, server functions, SSR, and streaming out of the box. TanStack Start uses Vinxi as its server runtime, which builds on Nitro.
This guide covers how to deploy a TanStack Start app to Railway in three ways:
1. [From a GitHub repository](#deploy-from-a-github-repo).
2. [Using the CLI](#deploy-from-the-cli).
3. [Using a Dockerfile](#use-a-dockerfile).
#### Create a TanStack Start app
**Note:** If you already have a TanStack Start app locally or on GitHub, skip to [Deploy the TanStack Start app to Railway](#deploy-the-tanstack-start-app-to-railway).
Ensure [Node](https://nodejs.org/en/learn/getting-started/how-to-install-nodejs) is installed, then create a new project:
```bash
npx @tanstack/create-start@latest my-app
```
Follow the prompts to choose your preferred options.
##### Run the app locally
```bash
cd my-app
npm install
npm run dev
```
Open `http://localhost:3000` to see your app.
#### Deploy the TanStack Start app to Railway
TanStack Start builds a Node.js server that handles SSR, server functions, and static asset serving. It deploys as a standard Node service on Railway.
##### Deploy from the CLI
1. **Install the Railway CLI**:
- Install the CLI and authenticate it using your Railway account.
2. **Initialize a Railway Project**:
- Run the command below in your TanStack Start app directory.
```bash
railway init
```
- Follow the prompts to name your project.
- After the project is created, click the provided link to view it in your browser.
3. **Deploy the Application**:
- Use the command below to deploy your app:
```bash
railway up
```
- This command will scan, compress and upload your app's files to Railway. You'll see real-time deployment logs in your terminal.
- Once the deployment completes, go to **View logs** to check if the service is running successfully.
4. **Set Up a Public URL**:
- Navigate to the **Networking** section under the [Settings](/overview/the-basics#service-settings) tab of your new service.
- Click [Generate Domain](/networking/public-networking#railway-provided-domain) to create a public URL for your app.
##### Deploy from a GitHub repo
1. **Create a New Project on Railway**:
- Go to Railway to create a new project.
2. **Deploy from GitHub**:
- Select **Deploy from GitHub repo** and choose your repository.
- If your Railway account isn't linked to GitHub yet, you'll be prompted to do so.
3. **Deploy the App**:
- Click **Deploy** to start the deployment process.
- Once deployed, a Railway [service](/services) will be created for your app, but it won't be publicly accessible by default.
4. **Verify the Deployment**:
- Once the deployment completes, go to **View logs** to check if the server is running successfully.
5. **Set Up a Public URL**:
- Navigate to the **Networking** section under the [Settings](/overview/the-basics#service-settings) tab of your new service.
- Click [Generate Domain](/networking/public-networking#railway-provided-domain) to create a public URL for your app.
##### Use a Dockerfile
If Railpack does not detect the start command correctly, use a Dockerfile:
```dockerfile
FROM node:lts-alpine AS build
WORKDIR /app
COPY package*.json ./
RUN npm ci
COPY . ./
RUN npm run build
FROM node:lts-alpine
WORKDIR /app
COPY --from=build /app/.output ./.output
COPY --from=build /app/package*.json ./
EXPOSE 3000
CMD ["node", ".output/server/index.mjs"]
```
TanStack Start (via Vinxi/Nitro) builds into a `.output` directory. The server entry point is `.output/server/index.mjs`.
Deploy via the CLI or from GitHub. Railway automatically detects the `Dockerfile` and [uses it to build and deploy the app](/builds/dockerfiles).
#### Port configuration
TanStack Start's Vinxi server listens on port 3000 by default. To make it respect Railway's `PORT` variable, check your `app.config.ts`:
```typescript
// app.config.ts
import { defineConfig } from '@tanstack/react-start/config';
export default defineConfig({
server: {
port: Number(process.env.PORT) || 3000,
},
});
```
If the server does not bind to the correct port, set a [custom start command](/deployments/start-command):
```bash
PORT=$PORT node .output/server/index.mjs
```
#### Server functions
TanStack Start server functions run on the Node.js server, not in the browser. They can access environment variables, databases, and other server-side resources:
```typescript
// app/routes/api/hello.ts
import { createAPIFileRoute } from '@tanstack/react-start/api';
export const Route = createAPIFileRoute('/api/hello')({
GET: async () => {
const dbUrl = process.env.DATABASE_URL; // server-only
return Response.json({ message: 'Hello from Railway' });
},
});
```
Server functions have access to all Railway [service variables](/variables). Only variables with the `VITE_` prefix are available in client-side code, since TanStack Start uses Vite. See [Manage environment variables in frontend builds](/guides/frontend-environment-variables) for details.
#### Add a Postgres database
1. In your Railway project, click **+ New**, then **Database**, then **PostgreSQL**.
2. Add the connection string to your TanStack Start service:
```
DATABASE_URL=${{Postgres.DATABASE_URL}}
```
Use an ORM like Prisma or Drizzle to query the database from server functions and loaders.
#### Next steps
- [Manage environment variables](/guides/frontend-environment-variables) - Handle `VITE_` prefixed variables in TanStack Start.
- [Choose between SSR, SSG, and ISR](/guides/ssr-ssg-isr) - Understand rendering strategies.
- [Add a Database Service](/databases/build-a-database-service)
- [Monitor your app](/observability)
---
### FastAPI
Source: https://docs.railway.com/guides/fastapi.md
Learn how to deploy a FastAPI app to Railway with this step-by-step guide. It covers quick setup, one-click deploys, Dockerfile and other deployment strategies.
FastAPI is a modern, fast (high-performance), web framework for building APIs with Python based on standard Python type hints.
This guide covers how to deploy a FastAPI app on Railway in four ways:
1. [One-click deploy from a template](#one-click-deploy-from-a-template).
2. [From a GitHub repository](#deploy-from-a-github-repo).
3. [Using the CLI](#deploy-from-the-cli).
4. [Using a Dockerfile](#use-a-dockerfile).
#### One-click deploy from a template
[](https://railway.com/deploy/-NvLj4)
It is highly recommended that [you eject from the template after deployment](/templates/deploy#eject-from-template-repository) to create a copy of the repo on your GitHub account.
**Note:** You can also choose from a variety of FastAPI app templates created by the community.
#### Deploy from a GitHub repo
To deploy a FastAPI app on Railway directly from GitHub, follow the steps below:
1. Fork the basic FastAPI GitHub repo.
- If you already have a GitHub repo you want to deploy, you can skip this step.
2. Create a New Project.
3. Click **Deploy from GitHub repo**.
4. Select the `fastapi` or your own GitHub repo.
- Railway requires a valid GitHub account to be linked. If your Railway account isn't associated with one, you will be prompted to link it.
5. Click **Deploy Now**.
Once the deployment is successful, a Railway [service](/services) will be created for you. By default, this service will not be publicly accessible.
To set up a publicly accessible URL for the service, navigate to the **Networking** section in the [Settings](/overview/the-basics#service-settings) tab of your new service and click on [Generate Domain](/networking/public-networking#railway-provided-domain).
The FastAPI app is run via a Hypercorn server as defined by the `startCommand` in the railway.json file in the GitHub repository.
Railway makes it easy to define deployment configurations for your services directly in your project using a railway.toml or railway.json file, alongside your code.
#### Deploy from the CLI
1. Install and authenticate with the CLI.
2. Clone the forked fastapi GitHub repo and `cd` into the directory.
- You can skip this step if you already have an app directory or repo on your machine that you want to deploy.
3. Run `railway init` within the app directory to create a new project.
4. Run `railway up` to deploy.
- The CLI will now scan, compress and upload your fastapi app files to Railway's backend for deployment.
#### Use a Dockerfile
**Note:** If you already have an app directory or repo on your machine that you want to deploy, you can skip the first two steps.
1. Clone the forked `fastapi` repo and `cd` into the directory.
2. Delete the `railway.json` file.
3. Create a `Dockerfile` in the `fastapi` or app's root directory.
4. Add the content below to the `Dockerfile`:
```bash
# Use the Python 3 alpine official image
# https://hub.docker.com/_/python
FROM python:3-alpine
# Create and change to the app directory.
WORKDIR /app
# Copy local code to the container image.
COPY . .
# Install project dependencies
RUN pip install --no-cache-dir -r requirements.txt
# Run the web service on container startup.
CMD ["hypercorn", "main:app", "--bind", "::"]
```
5. Either deploy via the CLI or from GitHub.
Railway automatically detects the `Dockerfile`, [and uses it to build and deploy the app.](/builds/dockerfiles)
**Note:** Railway supports also deployment from public and private Docker images.
#### Next steps
Explore these resources to learn how you can maximize your experience with Railway:
- [Add a Database Service](/databases/build-a-database-service)
- [Monitor your app](/observability)
- [Running a Cron Job](/cron-jobs)
### Flask
Source: https://docs.railway.com/guides/flask.md
Learn how to deploy a Flask app to Railway with this step-by-step guide. It covers quick setup, one-click deploys, Dockerfile and other deployment strategies.
[Flask](https://flask.palletsprojects.com/en/stable) is a Python micro framework for building web applications.
This guide covers how to deploy a Flask app to Railway in four ways:
1. [One-click deploy from a template](#one-click-deploy-from-a-template).
2. [Using the CLI](#deploy-from-the-cli).
3. [From a GitHub repository](#deploy-from-a-github-repo).
4. [Using a Dockerfile](#use-a-dockerfile).
Now, let's create a Flask app!
#### Create a Flask app
**Note:** If you already have a Flask app locally or on GitHub, you can skip this step and go straight to the [Deploy Flask App to Railway](#deploy-flask-app-to-railway).
To create a new Flask app, ensure that you have [Python](https://www.python.org/downloads) and [Flask](https://flask.palletsprojects.com/en/stable/installation/#install-flask) installed on your machine.
Follow the steps blow to set up the project in a directory.
Create a project directory and `cd` into it.
```bash
mkdir flaskproject
cd flaskproject
```
Create a virtual environment
```bash
python -m venv env
```
Activate the virtual environment
```bash
source env/bin/activate
```
**Note:** For windows developers, run it as `env\Scripts\activate` in your terminal.
Install Flask
```bash
python -m pip install flask
```
Now create a new file, `helloworld.py` in the `flaskproject` directory. Add the following content to it:
```python
import os
from flask import Flask
app = Flask(__name__)
@app.route('/')
def hello():
return 'Hello world, welcome to Railway!'
```
1. `from flask import Flask`:
- This line imports the Flask class from the Flask framework, which is used to create and manage a web application.
2. `app = Flask(__name__)`:
- This line creates an instance of the Flask class and assigns it to the app variable.
- The `__name__` argument helps Flask identify the location of the application. It's useful for determining resource paths and error reporting.
3. `@app.route('/')`:
- The `@app.route('/')` decorator sets up a URL route for the app. When the root URL `(/)` is accessed, Flask will execute the function immediately below this decorator.
4. `def hello():`
- The `hello` function returns a plain text message, _"Hello world, welcome to Railway!"_, which is displayed in the browser when the root URL of the app is accessed.
##### Run the Flask app locally
To run the application, use the `flask` command.
```bash
flask --app helloworld run
```
Open your browser and go to `http://127.0.0.1:5000` to see the app running with a local development server.
##### Prepare the Flask app for deployment
1. Run the following command to install a production web server, [gunicorn](https://gunicorn.org):
```bash
pip install gunicorn
```
Next, run the following command to serve the app with gunicorn:
```bash
gunicorn main:app
```
2. Open your browser and go to `http://127.0.0.1:8000` to see the app running with a production server.
Create a `requirements.txt` file to store the dependencies of the packages needed to run the app.
```bash
pip freeze > requirements.txt
```
**Note:** It's only safe to run the command above in a virtual environment, else it will freeze all python packages installed on your system.
3. Set the start command in your Railway service settings to `gunicorn main:app`. See [Start Command](/deployments/start-command) for more info.
With these changes, your Flask app is now ready to be deployed to Railway!
#### Deploy Flask app to Railway
Railway offers multiple ways to deploy your Flask app, depending on your setup and preference. Choose any of the following methods:
1. [One-click deploy from a template](#one-click-deploy-from-a-template).
2. [Using the CLI](#deploy-from-the-cli).
3. [From a GitHub repository](#deploy-from-a-github-repo).
#### One-click deploy from a template
[](https://railway.com/deploy/zUcpux)
It is highly recommended that [you eject from the template after deployment](/templates/deploy#eject-from-template-repository) to create a copy of the repo on your GitHub account.
**Note:** You can also choose from a variety of Flask app templates created by the community.
#### Deploy from the CLI
1. **Install the Railway CLI**:
- Install the CLI and authenticate it using your Railway account.
2. **Initialize a Railway Project**:
- Run the command below in your Flask app directory.
```bash
railway init
```
- Follow the prompts to name your project.
- After the project is created, click the provided link to view it in your browser.
3. **Deploy the Application**:
- Use the command below to deploy your app:
```bash
railway up
```
- This command will scan, compress and upload your app's files to Railway. You’ll see real-time deployment logs in your terminal.
4. **Verify the Deployment**:
- Once the deployment completes, go to [**View logs**](/observability/logs#build--deploy-panel) to check if the server is running successfully.
5. **Set Up a Public URL**:
- Navigate to the **Networking** section under the [Settings](/overview/the-basics#service-settings) tab of your new service.
- Click [Generate Domain](/networking/public-networking#railway-provided-domain) to create a public URL for your app.
#### Deploy from a GitHub repo
To deploy a Flask app to Railway directly from GitHub, follow the steps below:
1. **Create a New Project on Railway**:
- Go to Railway to create a new project.
2. **Deploy from GitHub**:
- Select **Deploy from GitHub repo** and choose your repository.
- If your Railway account isn’t linked to GitHub yet, you’ll be prompted to do so.
3. **Deploy the App Service**:
- Click **Deploy** on the Railway project canvas to apply your changes.
4. **Verify the Deployment**:
- Once the deployment completes, go to [**View logs**](/observability/logs#build--deploy-panel) to check if the server is running successfully.
**Note:** During the deployment process, Railway will automatically [detect that it's a Python app via Railpack](https://railpack.com/languages/python).
5. **Set Up a Public URL**:
- Navigate to the **Networking** section under the [Settings](/overview/the-basics#service-settings) tab of your new service.
- Click [Generate Domain](/networking/public-networking#railway-provided-domain) to create a public URL for your app.
#### Use a Dockerfile
1. Create a `Dockerfile` in the app's root directory.
2. Add the content below to the `Dockerfile`:
```docker
# Use the Python 3 official image
# https://hub.docker.com/_/python
FROM python:3
# Run in unbuffered mode
ENV PYTHONUNBUFFERED=1
# Create and change to the app directory.
WORKDIR /app
# Copy local code to the container image.
COPY . ./
# Install project dependencies
RUN pip install --no-cache-dir -r requirements.txt
# Run the web service on container startup.
CMD ["gunicorn", "main:app"]
```
3. Either deploy via the CLI or from GitHub.
Railway automatically detects the `Dockerfile`, [and uses it to build and deploy the app.](/builds/dockerfiles)
**Note:** Railway supports also deployment from public and private Docker images.
#### Next steps
Explore these resources to learn how you can maximize your experience with Railway:
- [Add a Database Service](/databases/build-a-database-service)
- [Monitor your app](/observability)
- [Running a Cron Job](/cron-jobs)
### Django
Source: https://docs.railway.com/guides/django.md
Learn how to deploy a Python Django app to Railway with this step-by-step guide. It covers quick setup, database integration, private networking, Celery, one-click deploys and other deployment strategies.
[Django](https://www.djangoproject.com) is a powerful Python web framework that simplifies web development by providing ready-to-use tools for rapid development and clean design.
It’s free, open-source, and comes with a range of features to streamline tasks like authentication, routing, and database management, so developers can focus on building their applications without handling everything from scratch.
#### Create a Django app
**Note:** If you already have a Django app locally or on GitHub, you can skip this step and go straight to the [Deploy Django App on Railway](#deploy-django-app-on-railway).
To create a new Django app, ensure that you have [Python](https://www.python.org/downloads/) and [Django](https://docs.djangoproject.com/en/5.1/intro/install/) installed on your machine.
Follow the steps below to set up the project in a directory.
Create a virtual environment
```bash
python -m venv env
```
Activate the virtual environment
```bash
source env/bin/activate
```
**Note:** For windows developers, run it as `env\Scripts\activate` in your terminal.
Install Django
```bash
python -m pip install django
```
Once everything is set up, run the following command in your terminal to provision a new Django project:
```bash
django-admin startproject liftoff
```
This command will create a new Django project named `liftoff`.
Next, `cd` into the directory and run `python manage.py runserver` to start your project.
Open your browser and go to `http://127.0.0.1:8000` to see the project. You'll see the Django welcome page with a "The install worked successfully! Congratulations!" paragraph.
**Note:** You'll see a red notice about unapplied migration(s). You can ignore them for now. You'll run them when you deploy the project.
Now that your app is running locally, let’s move on to make some changes and install some dependencies before deployment.
#### Configure database, static files & dependencies
1. Install the following packages within the `liftoff` directory, where you can see the `manage.py` file.
```bash
python -m pip install gunicorn whitenoise psycopg[binary,pool]
```
[whitenoise](https://whitenoise.readthedocs.io/en/stable/index.html) is a Python package for serving static files directly from your web app. It serves compressed content and sets far-future cache headers on content that won't change.
[gunicorn](https://gunicorn.org) is a production ready web server.
[psycopg](https://www.psycopg.org/psycopg3/docs) is a Python package that allows Django to work with PostgreSQL.
2. Import the `os` module:
Open the `liftoff/settings.py` file located in the inner `liftoff` directory (the one containing the main project settings).
At the top of the file, add the following line to import the `os` module, placing it just before the `Path` import:
```python
import os
from pathlib import Path
```
3. Configure the database and run migrations:
A fresh Django project uses SQLite by default, but you need to switch to PostgreSQL.
Create a database named `liftoff_dev` in your local Postgres instance.
Open the `liftoff/settings.py` file. In the Database section, replace the existing configuration with:
```python
# Database
# https://docs.djangoproject.com/en/5.1/ref/settings/#databases
# Set default values for the environment variables if they’re not already set
os.environ.setdefault("PGDATABASE", "liftoff_dev")
os.environ.setdefault("PGUSER", "username")
os.environ.setdefault("PGPASSWORD", "")
os.environ.setdefault("PGHOST", "localhost")
os.environ.setdefault("PGPORT", "5432")
DATABASES = {
'default': {
'ENGINE': 'django.db.backends.postgresql',
'NAME': os.environ["PGDATABASE"],
'USER': os.environ["PGUSER"],
'PASSWORD': os.environ["PGPASSWORD"],
'HOST': os.environ["PGHOST"],
'PORT': os.environ["PGPORT"],
}
}
```
Replace the values of `PGUSER`, `PGPASSWORD` with your local credentials.
Run `python manage.py migrate` in your terminal to apply the database migrations. Once it completes successfully, check your database. You should see the auth and other Django tables created.
4. Static files configuration:
Configure Django to serve static files using [WhiteNoise](https://whitenoise.readthedocs.io/en/stable/index.html).
Open `liftoff/settings.py` and configure the static files settings:
```python
STATIC_URL = 'static/'
STATIC_ROOT = BASE_DIR / "staticfiles"
STATICFILES_DIRS = [BASE_DIR / "static"]
```
Add the WhiteNoise middleware in the **MIDDLEWARE** section, just below the [security middleware](https://docs.djangoproject.com/en/5.1/ref/middleware/#module-django.middleware.security):
```python
MIDDLEWARE = [
'django.middleware.security.SecurityMiddleware',
'whitenoise.middleware.WhiteNoiseMiddleware',
'django.contrib.sessions.middleware.SessionMiddleware',
'django.middleware.common.CommonMiddleware',
'django.middleware.csrf.CsrfViewMiddleware',
'django.contrib.auth.middleware.AuthenticationMiddleware',
'django.contrib.messages.middleware.MessageMiddleware',
'django.middleware.clickjacking.XFrameOptionsMiddleware',
]
```
5. Update `ALLOWED_HOSTS` settings:
```python
ALLOWED_HOSTS = ["*"]
```
This setting represents the list of all the host/domain names your Django project can serve.
6. Create a **static** folder:
Inside your `liftoff` directory, create a static folder where all static assets will reside.
7. Create a `requirements.txt` file:
To track all the dependencies for deployment, create a `requirements.txt` file:
```bash
pip freeze > requirements.txt
```
**Note:** It's only safe to run the command above in a virtual environment, else it will freeze all python packages installed on your system.
With these changes, your Django app is now ready to be deployed to Railway!
#### Deploy Django app on Railway
Railway offers multiple ways to deploy your Django app, depending on your setup and preference. Choose any of the following methods:
1. [One-click deploy from a template](#one-click-deploy-from-a-template).
2. [Using the CLI](#deploy-from-the-cli).
3. [From a GitHub repository](#deploy-from-a-github-repo).
#### One-click deploy from a template
If you’re looking for the fastest way to get started, the one-click deploy option is ideal. It sets up a Django app along with a Postgres database.
Click the button below to begin:
[](https://railway.com/new/template/GB6Eki)
After deploying, it is recommended that you [eject from the template](/templates/deploy#eject-from-template-repository) to create a copy of the repository under your own GitHub account. This will give you full control over the source code and project.
#### Deploy from the CLI
To deploy the Django app using the Railway CLI, please follow the steps:
1. **Install the Railway CLI**:
- Install the CLI and authenticate it using your Railway account.
2. **Initialize a Railway Project**:
- Run the command below in your Django app directory.
```bash
railway init
```
- Follow the prompts to name your project.
- After the project is created, click the provided link to view it in your browser.
3. **Deploy the Application**:
- Use the command below to deploy your app:
```bash
railway up
```
- This command will scan, compress and upload your app's files to Railway. You’ll see real-time deployment logs in your terminal.
**Note:** You'll encounter an error about the PGDATABASE environment not set. Don't worry, you'll fix that in the next steps.
4. **Add a Database Service**:
- Run `railway add`.
- Select `PostgreSQL` by pressing space and hit **Enter** to add it to your project.
- A database service will be added to your Railway project.
5. **Configure Environment Variables**:
- Go to your app service **Variables** section and add the following:
- `PGDATABASE`: Set the value to `${{Postgres.PGDATABASE}}` (this references the Postgres database name). Learn more about [referencing service variables](/variables#referencing-another-services-variable).
- `PGUSER`: Set the value to `${{Postgres.PGUSER}}`
- `PGPASSWORD`: Set the value to `${{Postgres.PGPASSWORD}}`
- `PGHOST`: Set the value to `${{Postgres.PGHOST}}`
- `PGPORT`: Set the value to `${{Postgres.PGPORT}}`
- Use the **Raw Editor** to add any other required environment variables in one go.
6. **Redeploy the App Service**:
- Click **Deploy** on the app service on the Railway dashboard to apply your changes.
7. **Verify the Deployment**:
- Once the deployment completes, go to **View logs** to check if the server is running successfully.
8. **Set Up a Public URL**:
- Navigate to the **Networking** section under the [Settings](/overview/the-basics#service-settings) tab of your new service.
- Click [Generate Domain](/networking/public-networking#railway-provided-domain) to create a public URL for your app.
#### Deploy from a GitHub repo
To deploy the Django app to Railway, start by pushing the app to a GitHub repo. Once that’s set up, follow the steps below to complete the deployment process.
1. **Create a New Project on Railway**:
- Go to Railway to create a new project.
2. **Deploy from GitHub**:
- Select **Deploy from GitHub repo** and choose your repository.
- If your Railway account isn’t linked to GitHub yet, you’ll be prompted to do so.
3. **Add Environment Variables**:
- Click **Add Variables** and configure all the necessary environment variables for your app.
- `PGDATABASE`: Set the value to `${{Postgres.PGDATABASE}}` (this references the Postgres database name). Learn more about [referencing service variables](/variables#referencing-another-services-variable).
- `PGUSER`: Set the value to `${{Postgres.PGUSER}}`
- `PGPASSWORD`: Set the value to `${{Postgres.PGPASSWORD}}`
- `PGHOST`: Set the value to `${{Postgres.PGHOST}}`
- `PGPORT`: Set the value to `${{Postgres.PGPORT}}`
**Note:** The Postgres Database service isn't set up yet. You'll add that soon.
4. **Add a Database Service**:
- Right-click on the Railway project canvas or click the **Create** button.
- Select **Database**.
- Select **Add PostgreSQL** from the available databases.
- This will create and deploy a new Postgres database service for your project.
5. **Deploy the App**:
- Click **Deploy** to start the deployment process and apply all changes.
- Once deployed, a Railway [service](/services) will be created for your app, but it won’t be publicly accessible by default.
6. **Verify the Deployment**:
- Once the deployment completes, go to **View logs** to check if the server is running successfully.
**Note:** During the deployment process, Railway will automatically detect that it’s a Django app.
7. **Set Up a Public URL**:
- Navigate to the **Networking** section under the [Settings](/overview/the-basics#service-settings) tab of your new service.
- Click [Generate Domain](/networking/public-networking#railway-provided-domain) to create a public URL for your app.
This guide covers the main deployment options on Railway. Choose the approach that suits your setup, and start deploying your Django apps effortlessly!
**Note:** The next step shows how to configure and run your Django app along with Celery and Celery beat.
#### Set up database, migrations, celery beat and celery
This setup deploys your Django app on Railway, ensuring that your database, scheduled tasks (crons)--Celery Beat, and queue workers (Celery) are all fully operational.
The deployment structure follows a "majestic monolith" architecture, where the entire Django app is managed as a single codebase but split into four separate services on Railway:
- **App Service**: Handles HTTP requests and user interactions.
- **Cron Service**: Manages scheduled tasks (e.g., sending emails or running reports) using Celery Beat.
- **Worker Service**: Processes background jobs from the queue using Celery.
- **Database Service**: Stores and retrieves your application's data.
_My Monolith Django app_
**Note:** This guide follows the assumption that you have installed Celery and Celery Beat in your app, the broker uses Redis and you already have a Postgres database service provisioned for your app as shown earlier.
Please follow these steps to get it setup on Railway:
1. Create a Redis Database service on the Project Canvas by clicking the **Create** button. Then select **Database** and choose **Add Redis**.
- Click on **Deploy**.
2. Create a new service on the Project Canvas by clicking the **Create** button. Then select **Empty service**.
- Name the service **App Service**, and click on **Settings** to configure it.
- **Note:** If you followed the guide from the beginning, simply rename the existing service to **App Service**.
- Connect your GitHub repo to the **Source Repo** in the **Source** section.
- Go to the top of the service and click on **Variables**.
- Add all the necessary environment variables required for the Django app especially the ones listed below.
- `REDIS_URL`: Set the value to `${{Postgres.REDIS_URL}}`
- `PGUSER`: Set the value to `${{Postgres.PGUSER}}`
- `PGPASSWORD`: Set the value to `${{Postgres.PGPASSWORD}}`
- `PGHOST`: Set the value to `${{Postgres.PGHOST}}`
- `PGPORT`: Set the value to `${{Postgres.PGPORT}}`
- `PGDATABASE`: Set the value to `${{Postgres.PGDATABASE}}` (this references the Postgres database name). Learn more about [referencing service variables](/variables#referencing-another-services-variable).
- Click **Deploy**.
3. Create a new service on the Project Canvas by clicking the **Create** button. Then select **Empty service**.
- Name the service **Cron Service**, and click on **Settings**.
- Connect your GitHub repo to the **Source Repo** in the **Source** section.
- Add `celery -A liftoff beat -l info --concurrency=3` to the **Custom Start Command** in the **Deploy** section.
- _Note:_ `liftoff` is the name of the app. You can find the app name in your Django project’s main folder, typically in the directory containing `settings.py`.
- The `--concurrency=3` option here means it can process up to 3 tasks in parallel. You can adjust the [concurrency level](https://docs.celeryq.dev/en/latest/userguide/workers.html#concurrency) based on your system resources. The higher the level, the more memory and resources it consumes.
- Head back to the top of the service and click on **Variables**.
- Add all the necessary environment variables especially those highlighted already in step 2.
- Click **Deploy**.
4. Create a new service again on the Project Canvas.
- Name the service **Worker Service**, and click on **Settings**.
- Connect your GitHub repo to the **Source Repo** in the **Source** section.
- Add `celery -A liftoff worker -l info --concurrency=3` to the **Custom Start Command** in the **Deploy** section.
- _Note:_ `liftoff` is the name of the app. You can find the app name in your Django project’s main folder, typically in the directory containing `settings.py`.
- The `--concurrency=3` option here means it can process up to 3 tasks in parallel. You can adjust the [concurrency level](https://docs.celeryq.dev/en/latest/userguide/workers.html#concurrency) based on your system resources. The higher the level, the more memory and resources it consumes.
- Head back to the top of the service and click on **Variables**.
- Add all the necessary environment variables especially those highlighted already in step 2.
- Click **Deploy**.
At this point, you should have all services deployed and connected to the Postgres and Redis Database service:
- **Cron Service**: This service should run Celery Beat Scheduler to manage scheduled tasks.
- **Worker Service**: This service should be running Celery and ready to process jobs from the queue.
- **App Service**: This service should be running and is the only one that should have a public domain, allowing users to access your application.
**Note:** There is a [community template](https://railway.com/deploy/yZDfUu) available that demonstrates this deployment approach. You can easily deploy this template and then connect it to your own GitHub repository for your application.
#### Next steps
Explore these resources to learn how you can maximize your experience with Railway:
- [Monitoring](/observability)
- [Deployments](/deployments)
---
### Laravel
Source: https://docs.railway.com/guides/laravel.md
Learn how to deploy a Laravel app to Railway with this step-by-step guide. It covers quick setup, private networking, database integration, one-click deploys and other deployment strategies.
[Laravel](https://laravel.com) is a PHP framework designed for web artisans who value simplicity and elegance in their code. It stands out for its clean and expressive syntax, and offers built-in tools to handle many common tasks found in modern web applications, making development smoother and more enjoyable.
This guide covers how to deploy a Laravel app on Railway in three ways:
1. [One-click deploy from a template](#one-click-deploy-from-a-template).
2. [From a GitHub repository](#deploy-from-a-github-repo).
3. [Using the CLI](#deploy-from-the-cli).
#### One-click deploy from a template
[](https://railway.com/new/template/fWEWWf)
This template sets up a basic Laravel application along with a Postgres database on Railway. You can also choose from a variety of Laravel app templates created by the community.
It is highly recommended that [you eject from the template after deployment](/templates/deploy#eject-from-template-repository) to create a copy of the repo on your GitHub account.
#### Deploy from a GitHub repo
To deploy a Laravel app on GitHub to Railway, follow the steps below:
1. Create a New Project.
2. Click **Deploy from GitHub repo**.
3. Select your GitHub repo.
- Railway requires a valid GitHub account to be linked. If your Railway account isn't associated with one, you will be prompted to link it.
4. Click **Add Variables**.
- Add all your app environment variables.
5. Click **Deploy**.
Once the deployment is successful, a Railway [service](/services) will be created for you. By default, this service will not be publicly accessible.
**Note:** Railway will automatically [detect that it's a Laravel app and run it via php-fpm and Caddy](https://railpack.com/languages/php).
To set up a publicly accessible URL for the service, navigate to the **Networking** section in the [Settings](/overview/the-basics#service-settings) tab of your new service and click on [Generate Domain](/networking/public-networking#railway-provided-domain).
**Note**: [Jump to the **Set Up Database, Migrations, Crons and Workers** section](#deploy-via-custom-scripts) to learn how to run your Laravel app along with a Postgres(or MySQL) database, cron jobs, and workers.
#### Deploy from the CLI
If you have your Laravel app locally, you can follow these steps:
1. Install and authenticate with the Railway CLI.
2. Run `railway init` within your Laravel app root directory to create a new project on Railway.
- Follow the steps in the prompt to give your project a name.
3. Run `railway up` to deploy.
- The CLI will now scan, compress and upload your Laravel app files to Railway's backend for deployment.
- Your terminal will display real-time logs as your app is being deployed on Railway.
4. Once the deployment is successful, click on **View logs** on the recent deployment on the dashboard.
- You'll see that the server is running. However you'll also see logs prompting you to add your env variables.
5. Click on the **Variables** section of your service on the Railway dashboard.
6. Click on **Raw Editor** and add all your app environment variables.
7. Click on **Deploy** to redeploy your app.
To set up a publicly accessible URL for the service, navigate to the **Networking** section in the [Settings](/overview/the-basics#service-settings) tab of your new service and click on [Generate Domain](/networking/public-networking#railway-provided-domain).
**Note:** The next step shows how to run your Laravel app along with a database, migrations, cron jobs, and workers.
#### Set up database, migrations, crons and workers
This setup deploys your Laravel app on Railway, ensuring that your database, scheduled tasks (crons), and queue workers are all fully operational.
The deployment structure follows a "majestic monolith" architecture, where the entire Laravel app is managed as a single codebase but split into four separate services on Railway:
- **App Service**: Handles HTTP requests and user interactions.
- **Cron Service**: Manages scheduled tasks (e.g., sending emails or running reports).
- **Worker Service**: Processes background jobs from the queue.
- **Database Service**: Stores and retrieves your application's data.
_My Majestic Monolith Laravel app_
Please follow these steps to get started:
1. Create four bash scripts in the `railway` directory of your Laravel app: `init-app.sh`, `run-worker.sh`, and `run-cron.sh`.
These scripts will contain the commands needed to deploy and run the app, worker, and cron services for your Laravel app on Railway.
- Add the content below to the `railway/init-app.sh` file:
**Note:** You can add any additional commands to the script that you want to run each time your app service is built.
```bash
#!/bin/bash
# Make sure this file has executable permissions, run `chmod +x railway/init-app.sh`
# Exit the script if any command fails
set -e
# Run migrations
php artisan migrate --force
# Clear cache
php artisan optimize:clear
# Cache the various components of the Laravel application
php artisan config:cache
php artisan event:cache
php artisan route:cache
php artisan view:cache
```
- Add the content below to the `railway/run-worker.sh` file:
```bash
#!/bin/bash
# Make sure this file has executable permissions, run `chmod +x railway/run-worker.sh`
# This command runs the queue worker.
# An alternative is to use the php artisan queue:listen command
php artisan queue:work
```
- Add the content below to the `railway/run-cron.sh` file:
```bash
#!/bin/bash
# Make sure this file has executable permissions, run `chmod +x railway/run-cron.sh`
# This block of code runs the Laravel scheduler every minute
while [ true ]
do
echo "Running the scheduler..."
php artisan schedule:run --verbose --no-interaction &
sleep 60
done
```
2. Create a Postgres Database service on the Project Canvas.
- Click on **Deploy**.
3. Create a new service on the Project Canvas.
- Name the service **App service**, and click on **Settings** to configure it.
- Connect your GitHub repo to the **Source Repo** in the **Source** section.
- Add `npm run build` to the **Custom Build Command** in the **Build** section.
- Add `chmod +x ./railway/init-app.sh && sh ./railway/init-app.sh` to the **Pre-Deploy Command** in the **Deploy** section.
- Head back to the top of the service and click on **Variables**.
- Add all the necessary environment variables required for the Laravel app especially the ones listed below.
- `APP_KEY`: Set the value to what you get from the `php artisan key:generate` command.
- `DB_CONNECTION`: Set the value to `pgsql`.
- `QUEUE_CONNECTION`: Set the value to `database`.
- `DB_URL`: Set the value to `${{Postgres.DATABASE_URL}}` (this references the URL of your new Postgres database). Learn more about [referencing service variables](/variables#referencing-another-services-variable).
- Click **Deploy**.
4. Create a new service on the Project Canvas.
- Name the service **cron service**, and click on **Settings**.
- Connect your GitHub repo to the **Source Repo** in the **Source** section.
- Add `chmod +x ./railway/run-cron.sh && sh ./railway/run-cron.sh` to the **Custom Start Command** in the **Deploy** section.
- Head back to the top of the service and click on **Variables**.
- Add all the necessary environment variables especially those highlighted already in step 3.
- Click **Deploy**.
5. Create a new service again on the Project Canvas.
- Name the service **worker service**, and click on **Settings**.
- Connect your GitHub repo to the **Source Repo** in the **Source** section.
- Add `chmod +x ./railway/run-worker.sh && sh ./railway/run-worker.sh` to the **Custom Start Command** in the **Deploy** section.
- Head back to the top of the service and click on **Variables**.
- Add all the necessary environment variables especially those highlighted already in step 3.
- Click **Deploy**.
At this point, you should have all three services deployed and connected to the Postgres Database service:
- **Cron Service**: This service should run the Laravel Scheduler to manage scheduled tasks.
- **Worker Service**: This service should be running and ready to process jobs from the queue.
- **App Service**: This service should be running and is the only one that should have a public domain, allowing users to access your application.
_App service_
**Note:** There is a [community template](https://railway.com/deploy/Gkzn4k) available that demonstrates this deployment approach. You can easily deploy this template and then connect it to your own GitHub repository for your application.
#### Logging
Laravel, by default, writes logs to a directory on disk. However, on Railway’s ephemeral filesystem, this setup won’t persist logs.
To ensure logs and errors appear in Railway’s console or with `railway logs`, update the following environment variables:
- `LOG_CHANNEL`: Set the value to `stderr`.
- `LOG_STDERR_FORMATTER`: Set the value to `\Monolog\Formatter\JsonFormatter` in order to have [Structured logs](/observability/logs#structured-logs).
You can set variables via the Railway dashboard or CLI as shown:
```bash
railway variables --set "LOG_CHANNEL=stderr" --set "LOG_STDERR_FORMATTER=\Monolog\Formatter\JsonFormatter"
```
#### Can I deploy with Laravel sail?
You may be thinking about using [Laravel Sail](https://laravel.com/docs/11.x/sail), which is the standard approach for deploying Laravel applications with Docker. At its core, Sail relies on a `docker-compose.yml` file to manage the environment.
However, it's important to note that Railway currently does not support Docker Compose.
#### Next steps
Explore these resources to learn how you can maximize your experience with Railway:
- [Monitoring](/observability)
- [Deployments](/deployments)
### Symfony
Source: https://docs.railway.com/guides/symfony.md
Learn how to deploy a Symfony app to Railway with this step-by-step guide. It covers quick setup, database integration, cron and workers, one-click deploys and other deployment strategies.
[Symfony](https://symfony.com) is a PHP web framework composed of a set of decoupled and reusable components all working together in harmony to create websites and web applications.
This guide covers how to deploy a Symfony app to Railway in three ways:
1. [One-click deploy from a template](#one-click-deploy-from-a-template).
2. [From a GitHub repository](#deploy-from-a-github-repo).
3. [Using the CLI](#deploy-from-the-cli).
Now, let's create a Symfony app!
#### Create a Symfony app
**Note:** If you already have a Symfony app locally or on GitHub, you can skip this step and go straight to the [Deploy Symfony App to Railway](#deploy-the-symfony-app-to-railway).
To create a new Symfony app, ensure that you have [Composer](https://getcomposer.org/download/), [PHP](https://www.php.net/manual/en/install.php) and [Symfony](https://symfony.com/download) installed on your machine.
Run the following command in your terminal to create a new Symfony app:
```bash
symfony new --webapp apphelloworld
```
A new Symfony app will be provisioned for you in the `apphelloworld` directory.
##### Run the Symfony app locally
To start your app, run:
```bash
symfony server:start
```
Once the app is running, open your browser and navigate to `http://localhost:8000` to view it in action.
#### Deploy the Symfony app to Railway
Railway offers multiple ways to deploy your Symfony app, depending on your setup and preference.
#### One-click deploy from a template
[](https://railway.com/new/template/4tnH_D)
This template sets up a starter Symfony application along with a Postgres database on Railway. You can also choose from a variety of Symfony app templates created by the community.
It is highly recommended that [you eject from the template after deployment](/templates/deploy#eject-from-template-repository) to create a copy of the repo on your GitHub account.
#### Deploy from the CLI
If you have your Symfony app locally, you can follow these steps:
1. **Install the Railway CLI**:
- Install the CLI and authenticate it using your Railway account.
2. **Initialize a Railway Project**:
- Run the command below in your Symfony app directory.
```bash
railway init
```
- Follow the prompts to name your project.
- After the project is created, click the provided link to view it in your browser.
3. **Add a Postgres Database Service**:
- Run `railway add -d postgres`.
- Hit **Enter** to add it to your project.
- A database service will be added to your Railway project.
4. **Add a Service and Environment Variable**:
- Run `railway add`.
- Select `Empty Service` from the list of options.
- In the `Enter a service name` prompt, enter `app-service`.
- In the `Enter a variable` prompt, enter `DATABASE_URL=${{Postgres.DATABASE_URL}}`.
- The value, `${{Postgres.DATABASE_URL}}`, references the URL of your new Postgres database. Learn more about [referencing service variables](/variables#referencing-another-services-variable).
- Set the other environment variables: - `APP_ENV=prod` - This setting informs Symfony that the app is running in a production environment, optimizing it for performance. - `APP_SECRET=secret` where _secret_ is your generated app secret. - `COMPOSER_ALLOW_SUPERUSER="1"` - This is necessary to allow Composer to run as root, enabling the plugins that Symfony requires during installation. - `RAILPACK_PHP_ROOT_DIR="/app/public"` - This ensures the Nginx configuration points to the correct [root directory path to serve the app](https://railpack.com/languages/php).
**Note:** Explore the [Railway CLI reference](/cli#add) for a variety of options.
5. **Deploy the Application**:
- Run `railway up` to deploy your app.
- This command will scan, compress and upload your app's files to Railway. You’ll see real-time deployment logs in your terminal.
- Once the deployment is complete, proceed to generate a domain for the app service.
6. **Set Up a Public URL**:
- Run `railway domain` to generate a public URL for your app.
- Visit the new URL to see your app live in action!
#### Deploy from a GitHub repo
To deploy a Symfony app to Railway directly from GitHub, follow the steps below:
1. **Create a New Project on Railway**:
- Go to Railway to create a new project.
2. **Deploy from GitHub**:
- Select **Deploy from GitHub repo** and choose your repository.
- If your Railway account isn’t linked to GitHub yet, you’ll be prompted to do so.
3. **Add Environment Variables and Provision a Database Service**:
- Click **Add Variables**, but hold off on adding anything just yet. First, proceed with the next step.
- Right-click on the Railway project canvas or click the **Create** button, then select **Database** and choose **Add PostgreSQL**.
- This will create and deploy a new PostgreSQL database for your project.
- Once the database is deployed, you can return to adding the necessary environment variables:
- `DATABASE_URL`: Set the value to `${{Postgres.DATABASE_URL}}` (this references the URL of your new Postgres database). Learn more about [referencing service variables](/variables#referencing-another-services-variable).
- `APP_ENV=prod` - This setting informs Symfony that the app is running in a production environment, optimizing it for performance.
- `APP_SECRET=secret` where _secret_ is your generated app secret.
- `COMPOSER_ALLOW_SUPERUSER="1"` - This is necessary to allow Composer to run as root, enabling the plugins that Symfony requires during installation.
- `RAILPACK_PHP_ROOT_DIR="/app/public"` - This ensures the Nginx configuration points to the correct [root directory path to serve the app](https://railpack.com/languages/php).
4. **Deploy the App Service**:
- Click **Deploy** on the Railway project canvas to apply your changes.
5. **Verify the Deployment**:
- Once the deployment completes, go to [**View logs**](/observability/logs#build--deploy-panel) to check if the server is running successfully.
**Note:** During the deployment process, Railway will automatically [detect that it’s a PHP app via Railpack](https://railpack.com/languages/php).
6. **Set Up a Public URL**:
- Navigate to the **Networking** section under the [Settings](/overview/the-basics#service-settings) tab of your new service.
- Click [Generate Domain](/networking/public-networking#railway-provided-domain) to create a public URL for your app.
**Note:** The next step shows how to run your Symfony app along with a database, migrations, cron jobs, and workers.
#### Set up database, migrations, crons and workers
This setup deploys your Symfony app on Railway, ensuring that your database, scheduled tasks (crons), and queue workers are all fully operational.
The deployment structure follows a "majestic monolith" architecture, where the entire Symfony app is managed as a single codebase but split into four separate services on Railway:
- **App Service**: Handles HTTP requests and user interactions.
- **Cron Service**: Manages scheduled tasks (e.g., sending emails or running reports).
- **Worker Service**: Processes background jobs from the queue.
- **Database Service**: Stores and retrieves your application's data.
_My Majestic Monolith Symfony app_
Please follow these steps to get started:
1. Create three bash scripts in the root directory of your Symfony app: `run-app.sh`, `run-worker.sh`, and `run-cron.sh`.
These scripts will contain the commands needed to deploy and run the app, worker, and cron services for your Symfony app on Railway.
- Add the content below to the `run-app.sh` file:
**Note:** This is required to start your app service after the build phase is complete. This script will execute the migrations and then start the Nginx server.
```bash
#!/bin/bash
# Make sure this file has executable permissions, run `chmod +x run-app.sh`
# Run migrations, process the Nginx configuration template and start Nginx
php bin/console doctrine:migrations:migrate --no-interaction && node /assets/scripts/prestart.mjs /assets/nginx.template.conf /nginx.conf && (php-fpm -y /assets/php-fpm.conf & nginx -c /nginx.conf)
```
- Add the content below to the `run-worker.sh` file. This script will run the queue worker:
```bash
#!/bin/bash
# Make sure this file has executable permissions, run `chmod +x run-worker.sh`
# This command runs the queue worker.
php bin/console messenger:consume async --time-limit=3600 --memory-limit=128M &
```
- Symfony doesn't natively include a scheduler. So, please install the [CronBundle](https://github.com/Cron/Symfony-Bundle) to define and run scheduled tasks. With that set up, add the content below to the `run-cron.sh` file:
```bash
#!/bin/bash
# Make sure this file has executable permissions, run `chmod +x run-cron.sh`
# This block of code runs the scheduler every minute
while [ true ]
do
echo "Running the scheduler..."
php bin/console cron:start [--blocking] --no-interaction &
sleep 60
done
```
2. Create a Postgres Database service on the Project Canvas.
- Click on **Deploy**.
3. Create a new service on the Project Canvas.
- Name the service **App Service**, and click on **Settings** to configure it.
- Connect your GitHub repo to the **Source Repo** in the **Source** section.
- Add `chmod +x ./run-app.sh && sh ./run-app.sh` to the **Custom Start Command** in the **Deploy** section.
- Head back to the top of the service and click on **Variables**.
- Add all the necessary environment variables required for the Symfony app especially the ones listed below.
- `APP_ENV=prod`
- `APP_SECRET=secret` where _secret_ is your generated app secret.
- `COMPOSER_ALLOW_SUPERUSER="1"` - This is necessary to allow Composer to run as root, enabling the plugins that Symfony requires during installation.
- `RAILPACK_PHP_ROOT_DIR="/app/public"` - This ensures the Nginx configuration points to the correct [root directory path to serve the app](https://railpack.com/languages/php).
- `DATABASE_URL=${{Postgres.DATABASE_URL}}` (this references the URL of your Postgres database).
- Click **Deploy**.
4. Create a new service on the Project Canvas.
- Name the service **Cron Service**, and click on **Settings**.
- Connect your GitHub repo to the **Source Repo** in the **Source** section.
- Add `chmod +x ./run-cron.sh && sh ./run-cron.sh` to the **Custom Start Command** in the **Deploy** section.
- Head back to the top of the service and click on **Variables**.
- Add all the necessary environment variables especially those highlighted already in step 3.
- Click **Deploy**.
5. Create a new service again on the Project Canvas.
- Name the service **Worker Service**, and click on **Settings**.
- Connect your GitHub repo to the **Source Repo** in the **Source** section.
- Add `chmod +x ./run-worker.sh && sh ./run-worker.sh` to the **Custom Start Command** in the **Deploy** section.
- Head back to the top of the service and click on **Variables**.
- Add all the necessary environment variables especially those highlighted already in step 3.
- Click **Deploy**.
At this point, you should have all three services deployed and connected to the Postgres Database service:
- **Cron Service**: This service should run the cron bundler Scheduler to manage scheduled tasks.
- **Worker Service**: This service should be running and ready to process jobs from the queue.
- **App Service**: This service should be running and is the only one that should have a public domain, allowing users to access your application.
_App service_
**Note:** There is a [community template](https://railway.com/deploy/4tnH_D) available that demonstrates this deployment approach. You can easily deploy this template and then connect it to your own GitHub repository for your application.
#### Next steps
Explore these resources to learn how you can maximize your experience with Railway:
- [Monitoring](/observability)
- [Deployments](/deployments)
---
### Rails
Source: https://docs.railway.com/guides/rails.md
Learn how to deploy a Rails app to Railway with this step-by-step guide. It covers quick setup, database integration, cron and sidekiq setups, one-click deploys and other deployment strategies.
Rails is a Ruby full-stack framework designed to compress the complexity of modern web apps. It ships with all the tools needed to build amazing web apps on both the front and back end.
#### Create a Rails app
**Note:** If you already have a Rails app locally or on GitHub, you can skip this step and go straight to the [Deploy Ruby on Rails App on Railway](#deploy-ruby-on-rails-app-on-railway).
To create a new Rails app, ensure that you have [Ruby](https://www.ruby-lang.org/en/documentation/installation) and [Rails](https://guides.rubyonrails.org/getting_started.html#creating-a-new-rails-project-installing-rails-installing-rails) installed on your machine. Once everything is set up, run the following command in your terminal:
```bash
rails new blog --database=postgresql
```
This command will create a new Rails app named `blog` with PostgreSQL as the database config. Now, let’s create a simple "Hello World" page to ensure everything is working correctly.
1. **Generate a Controller**: Run the following command to create a new controller named `HelloWorld` with an `index` action:
```bash
rails g controller HelloWorld index
```
This will generate the necessary files for the controller, along with a view, route, and test files.
2. **Update the Routes File**: Open the `config/routes.rb` file and modify it to set the root route to the `hello_world#index` action:
```ruby
Rails.application.routes.draw do
get "hello_world/index"
# Define your application routes per the DSL in https://guides.rubyonrails.org/routing.html
# Reveal health status on /up that returns 200 if the app boots with no exceptions, otherwise 500.
# Can be used by load balancers and uptime monitors to verify that the app is live.
get "up" => "rails/health#show", as: :rails_health_check
# Render dynamic PWA files from app/views/pwa/*
get "service-worker" => "rails/pwa#service_worker", as: :pwa_service_worker
get "manifest" => "rails/pwa#manifest", as: :pwa_manifest
# Defines the root path route ("/")
root "hello_world#index"
end
```
3. **Modify the View**: Open the `app/views/hello_world/index.html.erb` file and replace its content with the following:
```ruby
Hello World
This is a Rails app running on Railway
```
4. **Run the Application Locally**: Start the Rails server by running:
```bash
bin/rails server
```
Open your browser and go to `http://localhost:3000` to see your "Hello World" page in action.
Now that your app is running locally, let’s move on to deploying it to Railway!
#### Deploy Ruby on Rails app on Railway
Railway offers multiple ways to deploy your Rails app, depending on your setup and preference. Choose any of the following methods:
1. [One-click deploy from a template](#one-click-deploy-from-a-template).
2. [Using the CLI](#deploy-from-the-cli).
3. [From a GitHub repository](#deploy-from-a-github-repo).
#### One-click deploy from a template
If you’re looking for the fastest way to get started, the one-click deploy option is ideal. It sets up a Rails app along with a Postgres database and Redis.
Click the button below to begin:
[](https://railway.com/new/template/sibk1f)
After deploying, it is recommended that you [eject from the template](/templates/deploy#eject-from-template-repository) to create a copy of the repository under your own GitHub account. This will give you full control over the source code and project.
#### Deploy from the CLI
To deploy the Rails app using the Railway CLI, please follow the steps:
1. **Install the Railway CLI**:
- Install the CLI and authenticate it using your Railway account.
2. **Initialize a Railway Project**:
- Run the command below in your Rails app directory.
```bash
railway init
```
- Follow the prompts to name your project.
- After the project is created, click the provided link to view it in your browser.
3. **Deploy the Application**:
- Use the command below to deploy your app:
```bash
railway up
```
- This command will scan, compress and upload your app's files to Railway. You’ll see real-time deployment logs in your terminal.
- **Note:** If you see an error about a missing `secret_key_base` for the production environment, don’t worry. You’ll fix this in the next step.
4. **Add a Database Service**:
- Run `railway add`.
- Select `PostgreSQL` by pressing space and hit **Enter** to add it to your project.
- A database service will be added to your Railway project.
5. **Configure Environment Variables**:
- Go to your app service **Variables** section and add the following:
- `SECRET_KEY_BASE` or `RAILS_MASTER_KEY`: Set the value to the key from your local app's `config/master.key`.
- `DATABASE_URL`: Set the value to `${{Postgres.DATABASE_PUBLIC_URL}}` (this references the URL of your new Postgres database). Learn more about [referencing service variables](/variables#referencing-another-services-variable).
- Use the **Raw Editor** to add any other required environment variables in one go.
6. **Redeploy the Service**:
- Click **Deploy** on the Railway dashboard to apply your changes.
7. **Verify the Deployment**:
- Once the deployment completes, go to **View logs** to check if the server is running successfully.
**Note:** If your app has a `Dockerfile` (which newer Rails apps typically include by default), Railway will [automatically detect and use it to build](/builds/dockerfiles) your app. If not, Railway will still handle the deployment process for you.
8. **Set Up a Public URL**:
- Navigate to the **Networking** section under the [Settings](/overview/the-basics#service-settings) tab of your new service.
- Click [Generate Domain](/networking/public-networking#railway-provided-domain) to create a public URL for your app.
#### Deploy from a GitHub repo
To deploy the Rails app to Railway, start by pushing the app to a GitHub repo. Once that’s set up, follow the steps below to complete the deployment process.
1. **Create a New Project on Railway**:
- Go to Railway to create a new project.
2. **Deploy from GitHub**:
- Select **Deploy from GitHub repo** and choose your repository.
- If your Railway account isn’t linked to GitHub yet, you’ll be prompted to do so.
3. **Add Environment Variables**:
- Click **Add Variables** and configure all the necessary environment variables for your app.
- E.g `RAILS_ENV`: Set the value to `production`.
- E.g `SECRET_KEY_BASE` or `RAILS_MASTER_KEY`: Set the value to the key from your app's `config/master.key`.
4. **Deploy the App**:
- Click **Deploy** to start the deployment process.
- Once the deployed, a Railway [service](/services) will be created for your app, but it won’t be publicly accessible by default.
5. **Add a Database Service**:
- Right-click on the Railway project canvas or click the **Create** button.
- Select **Database**.
- Select **Add PostgreSQL** from the available databases.
- This will create and deploy a new Postgres database service for your project.
6. **Configure Environment Variables**:
- Go to your app service **Variables** section and add the following:
- `DATABASE_URL`: Set the value to `${{Postgres.DATABASE_URL}}` (this references the URL of your new Postgres database). Learn more about [referencing service variables](/variables#referencing-another-services-variable).
- Use the **Raw Editor** to add any other required environment variables in one go.
7. **Prepare Database and Start Server**:
- Go to your app service **Settings** section.
- In the **Deploy** section, set `bin/rails db:prepare && bin/rails server -b ::` as the **Custom Start Command**. This command will run your database migrations and start the server.
8. **Redeploy the Service**:
- Click **Deploy** on the Railway dashboard to apply your changes.
9. **Verify the Deployment**:
- Once the deployment completes, go to **View logs** to check if the server is running successfully.
**Note:** During the deployment process, Railway will automatically [detect that it’s a Rails app](https://railpack.com/languages/ruby).
10. **Set Up a Public URL**:
- Navigate to the **Networking** section under the [Settings](/overview/the-basics#service-settings) tab of your new service.
- Click [Generate Domain](/networking/public-networking#railway-provided-domain) to create a public URL for your app.
This guide covers the main deployment options on Railway. Choose the approach that suits your setup, and start deploying your Rails apps effortlessly!
Next, this guide covers how to set up workers and cron jobs for your Rails app on Railway.
#### Set up workers & cron jobs with sidekiq
Sidekiq is a powerful and efficient background job processor for Ruby apps, and it integrates seamlessly with Rails. Follow the instructions below to configure and run Sidekiq in your Rails app on Railway:
1. **Install Sidekiq**
- Start by adding `sidekiq` and `sidekiq-cron` to your Rails app. In your terminal, run the following command:
```bash
bundle add sidekiq
bundle add sidekiq-cron
```
2. **Add a Redis Database Service**
- Sidekiq uses Redis as a job queue. To set this up:
- Right-click on the Railway project canvas or click the **Create** button.
- Select **Database**.
- Select **Add Redis** from the available databases.
- This will create and deploy a new Redis service for your app.
3. **Create and Configure a Worker Service**
- Now, set up a separate service to run your Sidekiq workers.
- Create a new **Empty Service** and name it **Worker Service**.
- Go to the **Settings** tab of this service to configure it.
- In the **Source** section, connect your GitHub repository to the **Source Repo**.
- Under the **Build** section, set `bundle install` as the **Custom Build Command**. This installs the necessary dependencies.
- In the **Deploy** section, set `bundle exec sidekiq` as the **Custom Start Command**. This command will start Sidekiq and begin processing jobs.
- Click on **Variables** at the top of the service settings.
- Add the following environment variables:
- `RAILS_ENV`: Set the value to `production`.
- `SECRET_KEY_BASE` or `RAILS_MASTER_KEY`: Set this to the value of your Rails app’s secret key.
- `REDIS_URL`: Set this to `${{Redis.REDIS_URL}}` to reference the Redis database URL. This tells Sidekiq where to find the job queue. Learn more about [referencing service variables](/variables#referencing-another-services-variable).
- Include any other environment variables your app might need.
- Click **Deploy** to apply the changes and start the deployment.
4. **Verify the Deployment**:
- Once the deployment is complete, click on **View Logs**. If everything is set up correctly, you should see Sidekiq starting up and processing any queued jobs.
5. **Confirm All Services Are Connected**:
- At this stage, your application should have the following services set up and connected:
- **App Service**: Running the main Rails application.
- **Worker Service**: Running Sidekiq to process background jobs.
- **Postgres Service**: The database for your Rails app.
- **Redis Service**: Used by Sidekiq to manage background jobs
Here’s how your setup should look:
By following these steps, you’ll have a fully functional Rails app with background job processing using Sidekiq on Railway. If you run into any issues or need to make adjustments, check the logs and revisit your environment variable configurations.
#### Setting up tailwindcss
[TailwindCSS](https://tailwindcss.com/docs/) is a utility-first CSS framework that ships with the latest version of Rails. It eliminates the need to write custom CSS from scratch.
You can add TailwindCSS to your Rails app in two ways:
1. **During app creation**: Add the `--css tailwind` flag when creating a new Rails app:
```bash
rails new myapp --css tailwind
```
2. **To an existing app**: Add the `tailwindcss-rails` gem to your `Gemfile` and run the installer:
```bash
bundle add tailwindcss-rails
bin/rails tailwindcss:install
```
##### Running tailwindcss in development
During development, you need the TailwindCSS watcher to automatically compile your styles as you make changes.
You can run it in two ways:
**Option 1**: As a standalone process alongside your Rails server:
```bash
bin/rails tailwindcss:watch
```
**Option 2**: Integrated with Puma by adding this to your `config/puma.rb` file:
```ruby
plugin :tailwindcss
```
This automatically starts the watcher when you run `bin/rails server`.
##### Fixing tailwindcss in production
When deploying to Railway, you may encounter this error:
```
sh: 1: watchman: not found
Bun v1.2.20 (Linux x64 baseline)
path: "/rails/app/assets/builds/tailwind.css",
code: "EACCES"
syscall: "open",
errno: -13,
```
This happens because the compiled CSS file isn't available in production. The TailwindCSS watcher can't run during deployment due to file permission restrictions.
**The solution**: Precompile your assets before deployment.
Choose one of these two approaches:
**Option 1: Precompile in Dockerfile**
Add this line to your `Dockerfile` before the final `FROM base` stage (usually after building dependencies but before copying to the final image):
```dockerfile
RUN SECRET_KEY_BASE_DUMMY=1 ./bin/rails assets:precompile
```
This compiles your TailwindCSS during the Docker build process.
**Option 2: Precompile via railway.json**
Add a `preDeployCommand` to your `railway.json` file:
```json
{
"$schema": "https://railway.com/railway.schema.json",
"deploy": {
"preDeployCommand": "bundle exec rails db:prepare && bundle exec rails assets:precompile"
}
}
```
This runs asset compilation automatically before each deployment.
**Recommendation**: Option 1 (Dockerfile) is generally preferred because it includes compiled assets in your Docker image, making deployments faster and more reliable.
#### Setting up solidqueue
[SolidQueue](https://github.com/rails/solid_queue) is a database-backed queuing backend for Active Job. Unlike Sidekiq,
it doesn't require Redis or any additional infrastructure beyond your existing database.
This makes it an excellent choice for simplifying your deployment architecture.
For complete installation instructions, refer to the [official SolidQueue documentation](https://github.com/rails/solid_queue?tab=readme-ov-file#installation).
##### Deployment options
SolidQueue can be configured in three different ways on Railway:
###### Option 1: separate database (recommended for high volume)
Use a dedicated PostgreSQL database for SolidQueue jobs. This isolates job processing from your application data.
Setup steps:
1. Create a new service for SolidQueue (similar to the Sidekiq worker service)
2. Add a separate PostgreSQL database service
3. Connect the SolidQueue service to this database
4. Set the database URL in your SolidQueue service environment variables
This approach is identical to the [Sidekiq setup](#set-up-workers--cron-jobs-with-sidekiq), but you'll use `bin/jobs` instead of `bundle exec sidekiq` as your start command.
###### Option 2: single database mode (recommended for most apps)
Share your existing PostgreSQL database between your main app and SolidQueue. This is simpler and works well for most applications.
Setup steps:
1. Follow the [single database configuration guide](https://github.com/rails/solid_queue?tab=readme-ov-file#single-database-configuration)
2. Create a new empty service in your Railway project
3. Connect it to the same PostgreSQL database your main app uses
4. Set the start command to `bin/jobs`
**Note**: To use the `bin/jobs` command with a shared `railway.json` configuration file, see the [Using the same railway.json for multiple services](#using-the-same-railway-json-for-multiple-services) section.
###### Option 3: run within puma (simplest setup)
Run SolidQueue in the same process as your main Rails application. This is the simplest option and requires no additional services.
Add this line to your `config/puma.rb` file:
```ruby
plugin :solid_queue
```
This starts SolidQueue automatically when Puma boots, similar to the TailwindCSS plugin.
**Trade-off**: While this is the easiest setup, running jobs in the same process as your web server can impact request performance under heavy job loads.
For production apps with significant background processing, consider using a separate service (Options 1 or 2).
#### Using the same railway.json for multiple services
When running multiple services from the same repository (e.g., a web server and a worker service), you may encounter conflicts with the `startCommand` setting in `railway.json`.
##### The problem
If your `railway.json` specifies a start command like `bundle exec rails server`, every service will try to use that command.
This prevents worker services from running their own commands like `bundle exec sidekiq` or `bin/jobs`.
##### The solution
Remove the `startCommand` from your `railway.json` file and configure it individually for each service instead.
**Steps:**
1. Remove any `startCommand` entries from your `railway.json` file
2. For each service, manually set the start command in the Railway dashboard:
- Go to the service's **Settings** tab
- Navigate to the **Deploy** section
- Set the **Custom Start Command**
This approach is explained in detail in step 3 of [Set Up Workers & Cron Jobs with Sidekiq](#set-up-workers--cron-jobs-with-sidekiq).
##### Example configuration
You can still use `railway.json` for shared settings like build configuration and pre-deploy commands.
Here's a recommended configuration that works across multiple services:
```json
{
"$schema": "https://railway.com/railway.schema.json",
"build": {
"builder": "DOCKERFILE",
"dockerfilePath": "Dockerfile"
},
"deploy": {
"preDeployCommand": "bundle exec rails db:prepare"
}
}
```
**What this does:**
- `build`: Tells Railway to use your Dockerfile for all services
- `preDeployCommand`: Runs database migrations before deployment (useful for both web and worker services)
- No `startCommand`: Allows each service to define its own start command
**Service-specific start commands** (set in Railway dashboard):
- **Web Service**: `bin/rails server -b ::`
- **Worker Service (Sidekiq)**: `bundle exec sidekiq`
- **Worker Service (SolidQueue)**: `bin/jobs`
This setup gives you the flexibility to run different processes from the same codebase while sharing common configuration.
Explore these resources to learn how you can maximize your experience with Railway:
- [Monitoring](/observability)
- [Deployments](/deployments)
---
### Gin
Source: https://docs.railway.com/guides/gin.md
Learn how to deploy a Gin app to Railway with this step-by-step guide. It covers quick setup, one-click deploys, Dockerfile and other deployment strategies.
[Gin](https://gin-gonic.com) is a high-performance web framework for Go (Golang) that provides a martini-like API while being significantly faster (up to 40 times) due to its use of `httprouter`. It's designed for developers seeking both speed and productivity.
This guide covers how to deploy a Gin app on Railway in four ways:
1. [One-click deploy from a template](#one-click-deploy-from-a-template).
2. [From a GitHub repository](#deploy-from-a-github-repo).
3. [Using the CLI](#deploy-from-the-cli).
4. [Using a Dockerfile](#use-a-dockerfile).
#### One-click deploy from a template
[](https://railway.com/new/template/dTvvSf)
It is highly recommended that [you eject from the template after deployment](/templates/deploy#eject-from-template-repository) to create a copy of the repo on your GitHub account.
**Note:** You can also choose from a variety of Gin app templates created by the community.
#### Deploy from a GitHub repo
To deploy a Gin app on Railway directly from GitHub, follow the steps below:
1. Fork the basic Gin GitHub repo.
- If you already have a GitHub repo you want to deploy, you can skip this step.
2. Create a New Project.
3. Click **Deploy from GitHub repo**.
4. Select the `gin` or your own GitHub repo.
- Railway requires a valid GitHub account to be linked. If your Railway account isn't associated with one, you will be prompted to link it.
5. Click **Deploy Now**.
Once the deployment is successful, a Railway [service](/services) will be created for you. By default, this service will not be publicly accessible.
To set up a publicly accessible URL for the service, navigate to the **Networking** section in the [Settings](/overview/the-basics#service-settings) tab of your new service and click on [Generate Domain](/networking/public-networking#railway-provided-domain).
#### Deploy from the CLI
1. Install and authenticate with the CLI.
2. Clone the forked gin GitHub repo and `cd` into the directory.
- You can skip this step if you already have an app directory or repo on your machine that you want to deploy.
3. Run `railway init` within the app directory to create a new project.
4. Run `railway up` to deploy.
- The CLI will now scan, compress and upload your gin app files to Railway's backend for deployment.
#### Use a Dockerfile
1. Clone the forked `gin` repo and `cd` into the directory.
- You can skip this step if you already have an app directory or repo on your machine that you want to deploy.
2. Create a `Dockerfile` in the `gin` or app's root directory.
3. Add the content below to the `Dockerfile`:
```docker
# Use the Go 1.23 alpine official image
# https://hub.docker.com/_/golang
FROM golang:1.23-alpine
# Create and change to the app directory.
WORKDIR /app
# Copy go mod and sum files
COPY go.mod go.sum ./
# Copy local code to the container image.
COPY . ./
# Install project dependencies
RUN go mod download
# Build the app
RUN go build -o app
# Run the service on container startup.
ENTRYPOINT ["./app"]
```
4. Either deploy via the CLI or from GitHub.
Railway automatically detects the `Dockerfile`, [and uses it to build and deploy the app.](/builds/dockerfiles)
**Note:** Railway supports also deployment from public and private Docker images.
#### Next steps
Explore these resources to learn how you can maximize your experience with Railway:
- [Add a Database Service](/databases/build-a-database-service)
- [Monitor your app](/observability)
- [Running a Cron Job](/cron-jobs)
### Go Fiber
Source: https://docs.railway.com/guides/go-fiber.md
Learn how to deploy a Go Fiber app to Railway with this step-by-step guide. It covers quick setup, one-click deploys, Dockerfile and other deployment strategies.
Fiber is an Express-inspired web framework for Go, built on top of Fasthttp for high performance.
This guide covers how to deploy a Fiber app on Railway in four ways:
1. [One-click deploy from a template](#one-click-deploy-from-a-template).
2. [From a GitHub repository](#deploy-from-a-github-repo).
3. [Using the CLI](#deploy-from-the-cli).
4. [Using a Dockerfile](#use-a-dockerfile).
#### One-click deploy from a template
[](https://railway.com/new/template/go-fiber)
It is highly recommended that [you eject from the template after deployment](/templates/deploy#eject-from-template-repository) to create a copy of the repo on your GitHub account.
**Note:** You can also choose from a variety of Fiber app templates created by the community.
#### Deploy from a GitHub repo
To deploy a Fiber app on Railway directly from GitHub, follow the steps below:
1. Fork the basic Go Fiber GitHub repo.
- If you already have a GitHub repo you want to deploy, you can skip this step.
2. Create a New Project.
3. Click **Deploy from GitHub repo**.
4. Select the `go-fiber` or your own GitHub repo.
- Railway requires a valid GitHub account to be linked. If your Railway account isn't associated with one, you will be prompted to link it.
5. Click **Deploy Now**.
Once the deployment is successful, a Railway [service](/services) will be created for you. By default, this service will not be publicly accessible.
To set up a publicly accessible URL for the service, navigate to the **Networking** section in the [Settings](/overview/the-basics#service-settings) tab of your new service and click on [Generate Domain](/networking/public-networking#railway-provided-domain).
#### Deploy from the CLI
1. Install and authenticate with the CLI.
2. Clone the forked Go Fiber GitHub repo and `cd` into the directory.
- You can skip this step if you already have an app directory or repo on your machine that you want to deploy.
3. Run `railway init` within the app directory to create a new project.
4. Run `railway up` to deploy.
- The CLI will now scan, compress and upload your Fiber app files to Railway's backend for deployment.
#### Use a Dockerfile
1. Clone the forked `go-fiber` repo and `cd` into the directory.
- You can skip this step if you already have an app directory or repo on your machine that you want to deploy.
2. Create a `Dockerfile` in the `go-fiber` or app's root directory.
3. Add the content below to the `Dockerfile`:
```docker
# Use the Go 1.23 alpine official image
# https://hub.docker.com/_/golang
FROM golang:1.23-alpine
# Create and change to the app directory.
WORKDIR /app
# Copy go mod and sum files
COPY go.mod go.sum ./
# Copy local code to the container image.
COPY . ./
# Install project dependencies
RUN go mod download
# Build the app
RUN go build -o app
# Run the service on container startup.
ENTRYPOINT ["./app"]
```
4. Either deploy via the CLI or from GitHub.
Railway automatically detects the `Dockerfile`, [and uses it to build and deploy the app.](/builds/dockerfiles)
**Note:** Railway supports also deployment from public and private Docker images.
#### Next steps
Explore these resources to learn more about Railway:
- [Add a Database Service](/databases/build-a-database-service)
- [Monitor your app](/observability)
- [Running a Cron Job](/cron-jobs)
### Beego
Source: https://docs.railway.com/guides/beego.md
Learn how to deploy a Beego app to Railway with this step-by-step guide. It covers quick setup, private networking, database integration, one-click deploys and other deployment strategies.
[Beego](https://github.com/beego/beego) is a high-performance, open-source web framework designed for building robust applications in Go (Golang). It is used for rapid development of enterprise apps, including RESTful APIs, web apps and backend services.
This guide covers how to deploy a Beego app to Railway in four ways:
1. [One-click deploy from a template](#one-click-deploy-from-a-template).
2. [From a GitHub repository](#deploy-from-a-github-repo).
3. [Using the CLI](#deploy-from-the-cli).
4. [Using a Dockerfile](#use-a-dockerfile).
Now, let's create a Beego app!
#### Create a Beego app
**Note:** If you already have a Beego app locally or on GitHub, you can skip this step and go straight to the [Deploy Beego App to Railway](#deploy-the-beego-app-to-railway).
To create a new Beego app, ensure that you have [Go](https://go.dev/dl) and [Bee tool](https://doc.meoying.com/en-US/beego/developing/#manual-installation) installed on your machine.
Run the following command in your terminal to create a new Beego app and install all dependencies:
```bash
bee new helloworld
cd helloworld
go mod tidy
```
A new Beego app will be provisioned for you in the `helloworld` directory.
##### Configure database
Run `go get github.com/lib/pq` in your terminal to install the Go Postgres driver.
Create a database, `helloworld_dev` in your local Postgres instance.
Open the `main.go` file and modify the content to the code below:
```go
package main
import (
"fmt"
_ "helloworld/routers"
_ "github.com/lib/pq"
"github.com/beego/beego/v2/client/orm"
beego "github.com/beego/beego/v2/server/web"
)
// Users -
type Users struct {
ID int `orm:"column(id)"`
FirstName string `orm:"column(first_name)"`
LastName string `orm:"column(last_name)"`
}
func init() {
// set default database
orm.RegisterDriver("postgres", orm.DRPostgres)
// set default database
orm.RegisterDataBase("default", "postgres", "postgres://unicodeveloper:@localhost/helloworld_dev?sslmode=disable")
// register model
orm.RegisterModel(new(Users))
// create table
orm.RunSyncdb("default", false, true)
}
func main() {
o := orm.NewOrm()
// Create a slice of Users to insert
users := []Users{
{FirstName: "John", LastName: "Doe"},
{FirstName: "Jane", LastName: "Doe"},
{FirstName: "Railway", LastName: "Deploy Beego"},
}
// Iterate over the slice and insert each user
for _, user := range users {
id, err := o.Insert(&user)
if err != nil {
fmt.Printf("Failed to insert user %s %s: %v\n", user.FirstName, user.LastName, err)
} else {
fmt.Printf("Inserted user ID: %d, Name: %s %s\n", id, user.FirstName, user.LastName)
}
}
beego.Run()
}
```
Replace this `postgres://username:@localhost/helloworld_dev?sslmode=disable` with the appropriate URL for your local Postgres database.
**Code Summary**:
- The Users struct defines the schema for the users table in the database.
- The `init()` function registers the Postgres driver, registers the Users model, and automatically creates the users table in the database. If any errors occur while inserting users, they are logged.
- The `main()` function creates an ORM instance, defines sample user data (first name and last name), inserts the data into the users table, and starts the Beego web server to serve your app.
##### Run the Beego app locally
To start your app, run:
```bash
bee run
```
Once the app is running, open your browser and navigate to `http://localhost:8080` to view it in action.
In your terminal, you’ll see logs indicating that the user data is being inserted. Head over to your database, and you should see the users table populated with the seeded data.
##### Prepare Beego app for deployment
1. Open the `conf/app.conf` file and add an environment variable, `DATABASE_URL` to it.
```go
db_url = ${DATABASE_URL}
```
2. Head over to the `main.go` file and make some modifications to the way the Postgres database url is retrieved. The `init()` function should look like this:
```go
func init() {
// set default database
orm.RegisterDriver("postgres", orm.DRPostgres)
// set default database
dbURL, err := beego.AppConfig.String("db_url")
if err != nil {
log.Fatal("Error getting database URL: ", err)
}
orm.RegisterDataBase("default", "postgres", dbURL)
// register model
orm.RegisterModel(new(Users))
// create table
orm.RunSyncdb("default", false, true)
}
```
#### Deploy the Beego app to Railway
Railway offers multiple ways to deploy your Beego app, depending on your setup and preference.
##### One-click deploy from a template
If you’re looking for the fastest way to get started, the one-click deploy option is ideal.
Click the button below to begin:
[](https://railway.com/new/template/CPq9Ry)
It is highly recommended that [you eject from the template after deployment](/templates/deploy#eject-from-template-repository) to create a copy of the repo on your GitHub account.
**Note:** You can also choose from a variety of Beego app templates created by the community.
##### Deploy from the CLI
1. **Install the Railway CLI**:
- Install the CLI and authenticate it using your Railway account.
2. **Initialize a Railway Project**:
- Run the command below in your Beego app directory.
```bash
railway init
```
- Follow the prompts to name your project.
- After the project is created, click the provided link to view it in your browser.
3. **Add a Postgres Database Service**:
- Run `railway add -d postgres`.
- Hit **Enter** to add it to your project.
- A database service will be added to your Railway project.
4. **Add a Service and Environment Variable**:
- Run `railway add`.
- Select `Empty Service` from the list of options.
- In the `Enter a service name` prompt, enter `app-service`.
- In the `Enter a variable` prompt, enter `DATABASE_URL=${{Postgres.DATABASE_URL}}`.
- The value, `${{Postgres.DATABASE_URL}}`, references the URL of your new Postgres database. Learn more about [referencing service variables](/variables#referencing-another-services-variable).
**Note:** Explore the [Railway CLI reference](/cli#add) for a variety of options.
5. **Deploy the Application**:
- Run `railway up` to deploy your app.
- This command will scan, compress and upload your app's files to Railway. You’ll see real-time deployment logs in your terminal.
- Once the deployment is complete, proceed to generate a domain for the app service.
6. **Set Up a Public URL**:
- Run `railway domain` to generate a public URL for your app.
- Visit the new URL to see your app live in action!
##### Deploy from a GitHub repo
To deploy a Beego app to Railway directly from GitHub, follow the steps below:
1. **Create a New Project on Railway**:
- Go to Railway to create a new project.
2. **Deploy from GitHub**:
- Select **Deploy from GitHub repo** and choose your repository.
- If your Railway account isn’t linked to GitHub yet, you’ll be prompted to do so.
3. **Add Environment Variables and Provision a Database Service**:
- Click **Add Variables**, but hold off on adding anything just yet. First, proceed with the next step.
- Right-click on the Railway project canvas or click the **Create** button, then select **Database** and choose **Add PostgreSQL**.
- This will create and deploy a new PostgreSQL database for your project.
- Once the database is deployed, you can return to adding the necessary environment variables:
- `DATABASE_URL`: Set the value to `${{Postgres.DATABASE_URL}}` (this references the URL of your new Postgres database). Learn more about [referencing service variables](/variables#referencing-another-services-variable).
4. **Deploy the App Service**:
- Click **Deploy** on the Railway project canvas to apply your changes.
5. **Verify the Deployment**:
- Once the deployment completes, go to [**View logs**](/observability/logs#build--deploy-panel) to check if the server is running successfully.
**Note:** During the deployment process, Railway will automatically [detect that it’s a Go app](https://railpack.com/languages/golang).
6. **Set Up a Public URL**:
- Navigate to the **Networking** section under the [Settings](/overview/the-basics#service-settings) tab of your new service.
- Click [Generate Domain](/networking/public-networking#railway-provided-domain) to create a public URL for your app.
##### Use a Dockerfile
1. Create a `Dockerfile` in the Beego app's root directory.
2. Add the content below to the `Dockerfile`:
```docker
# Use the Go 1.22 official image
# https://hub.docker.com/_/golang
FROM golang:1.22
# Create and change to the app directory.
WORKDIR /app
# Copy local code to the container image.
COPY . ./
# Install project dependencies
RUN go mod download
# Build the app
RUN go build -o app
# Run the service on container startup.
ENTRYPOINT ["./app"]
```
3. Either deploy via the CLI or from GitHub.
Railway automatically detects the `Dockerfile`, [and uses it to build and deploy the app.](/builds/dockerfiles)
**Note:** Railway supports also deployment from public and private Docker images.
This guide covers the main deployment options on Railway. Choose the approach that suits your setup, and start deploying your Beego apps seamlessly!
#### Next steps
Explore these resources to learn how you can maximize your experience with Railway:
- [Add a Database Service](/databases/build-a-database-service)
- [Monitor your app](/observability)
---
### Axum
Source: https://docs.railway.com/guides/axum.md
Learn how to deploy an Axum app to Railway with this step-by-step guide. It covers quick setup, one-click deploys, GitHub, Dockerfile and other deployment strategies.
[Axum](https://docs.rs/axum/latest/axum) is a web framework for Rust that focuses on ergonomics and modularity. It is designed to work with [tokio](https://docs.rs/tokio/1.40.0/x86_64-unknown-linux-gnu/tokio/index.html) and [hyper](https://docs.rs/hyper/1.4.1/x86_64-unknown-linux-gnu/hyper/index.html).
This guide covers how to deploy an Axum app to Railway in four ways:
1. [One-click deploy from a template](#one-click-deploy-from-a-template).
2. [From a GitHub repository](#deploy-from-a-github-repo).
3. [Using the CLI](#deploy-from-the-cli).
4. [Using a Dockerfile](#use-a-dockerfile).
Now, let's create an Axum app! 🚀
#### Create an Axum app
**Note:** If you already have an Axum app locally or on GitHub, you can skip this step and go straight to the [Deploy Axum App to Railway](#deploy-the-axum-app-to-railway).
To create a new Axum app, ensure that you have [Rust](https://www.rust-lang.org/tools/install) installed on your machine.
Run the following command in your terminal to create a new Axum app:
```bash
cargo new helloworld --bin
```
The command creates a new binary-based Cargo project in a `helloworld` directory.
Next, `cd` into the directory and add `axum` and `tokio` as dependencies by running the following command:
```bash
cargo add axum
cargo add tokio --features full
```
This will add `axum` and `tokio` as dependencies, with `tokio` configured to use the "full" feature, which includes its complete set of capabilities. You’ll find both dependencies listed in your `Cargo.toml` file.
These dependencies are required to create a bare minimum axum application.
##### Modify the application file
Next, open the app in your IDE and navigate to the `src/main.rs` file.
Replace the content with the code below:
```rust
use axum::{
routing::get,
Router,
};
#[tokio::main]
async fn main() {
// build your application with a single route
let app = Router::new().route("/", get(root));
// Get the port number from the environment, default to 3000
let port: u16 = std::env::var("PORT")
.unwrap_or_else(|_| "3000".to_string()) // Get the port as a string or default to "3000"
.parse() // Parse the port string into a u16
.expect("Failed to parse PORT");
// Create a socket address (IPv6 binding)
let address = SocketAddr::from(([0, 0, 0, 0, 0, 0, 0, 0], port));
let listener = tokio::net::TcpListener::bind(&address).await.unwrap();
// Run the app with hyper, listening on the specified address
axum::serve(listener, app).await.unwrap();
}
// basic handler that responds with a static string
async fn root() -> &'static str {
"Hello World, from Axum!"
}
```
The code above sets up a simple web server using the Axum framework and the Tokio async runtime. The server listens on the port gotten from the environment variable, `PORT` and defaults to `3000` if there's none set.
It defines one route, `/`, which is mapped to a handler function called `root`. When a GET request is made to the root path, the handler responds with the static string "Hello World, from Axum!".
The Router from Axum is used to configure the route, and `tokio::net::TcpListener` binds the server to listen for connections on all available network interfaces (address `0.0.0.0`).
The asynchronous runtime, provided by the `#[tokio::main]` macro, ensures the server can handle requests efficiently. The `axum::serve` function integrates with the Hyper server to actually process requests.
##### Run the Axum app locally
Run the following command in the `helloworld` directory via the terminal:
```bash
cargo run
```
All the dependencies will be installed and your app will be launched.
Open your browser and go to `http://localhost:3000` to see your app.
#### Deploy the Axum app to Railway
Railway offers multiple ways to deploy your Axum app, depending on your setup and preference.
##### One-click deploy from a template
If you’re looking for the fastest way to get started, the one-click deploy option is ideal.
Click the button below to begin:
[](https://railway.com/new/template/5HAMxu)
It is highly recommended that [you eject from the template after deployment](/templates/deploy#eject-from-template-repository) to create a copy of the repo on your GitHub account.
**Note:** You can also choose from a variety of Axum templates created by the community.
##### Deploy from the CLI
1. **Install the Railway CLI**:
- Install the CLI and authenticate it using your Railway account.
2. **Initialize a Railway Project**:
- Run the command below in your Axum app directory.
```bash
railway init
```
- Follow the prompts to name your project.
- After the project is created, click the provided link to view it in your browser.
3. **Deploy the Application**:
- Use the command below to deploy your app:
```bash
railway up
```
- This command will scan, compress and upload your app's files to Railway. You’ll see real-time deployment logs in your terminal.
4. **Verify the Deployment**:
- Once the deployment completes, go to **View logs** to check if the server is running successfully.
**Note:** During the deployment process, Railway will automatically [detect that it’s a Rust app](https://railpack.com/languages/rust).
5. **Set Up a Public URL**:
- Navigate to the **Networking** section under the [Settings](/overview/the-basics#service-settings) tab of your new service.
- Click [Generate Domain](/networking/public-networking#railway-provided-domain) to create a public URL for your app.
##### Deploy from a GitHub repo
To deploy an Axum app to Railway directly from GitHub, follow the steps below:
1. **Create a New Project on Railway**:
- Go to Railway to create a new project.
2. **Deploy from GitHub**:
- Select **Deploy from GitHub repo** and choose your repository.
- If your Railway account isn’t linked to GitHub yet, you’ll be prompted to do so.
3. **Deploy the App**:
- Click **Deploy** to start the deployment process.
- Once the deployed, a Railway [service](/services) will be created for your app, but it won’t be publicly accessible by default.
4. **Verify the Deployment**:
- Once the deployment completes, go to **View logs** to check if the server is running successfully.
**Note:** During the deployment process, Railway will automatically [detect that it’s a Rust app](https://railpack.com/languages/rust).
5. **Set Up a Public URL**:
- Navigate to the **Networking** section under the [Settings](/overview/the-basics#service-settings) tab of your new service.
- Click [Generate Domain](/networking/public-networking#railway-provided-domain) to create a public URL for your app.
##### Use a Dockerfile
1. Create a `Dockerfile` in the `helloworld` or Axum app's root directory.
2. Add the content below to the `Dockerfile`:
```docker
FROM lukemathwalker/cargo-chef:latest-rust-1 AS chef
# Create and change to the app directory.
WORKDIR /app
FROM chef AS planner
COPY . ./
RUN cargo chef prepare --recipe-path recipe.json
FROM chef AS builder
COPY --from=planner /app/recipe.json recipe.json
# Build dependencies - this is the caching Docker layer!
RUN cargo chef cook --release --recipe-path recipe.json
# Build application
COPY . ./
RUN cargo build --release
CMD ["./target/release/helloworld"]
```
3. Either deploy via the CLI or from GitHub.
Railway automatically detects the `Dockerfile`, [and uses it to build and deploy the app.](/builds/dockerfiles)
**Note:** Railway supports also deployment from public and private Docker images.
This guide covers the main deployment options on Railway. Choose the approach that suits your setup, and start deploying your Axum apps seamlessly!
#### Next steps
Explore these resources to learn how you can maximize your experience with Railway:
- [Add a Database Service](/databases/build-a-database-service)
- [Monitor your app](/observability)
### Actix Web
Source: https://docs.railway.com/guides/actix-web.md
Learn how to deploy an Actix Web app to Railway with this step-by-step guide. It covers quick setup, Dockerfile and other deployment strategies.
Actix Web is a powerful, pragmatic, and fast web framework for Rust.
This guide covers how to deploy an Actix Web app on Railway in three ways:
1. [From a GitHub repository](#deploy-from-a-github-repo).
2. [Using the CLI](#deploy-from-the-cli).
3. [Using a Dockerfile](#use-a-dockerfile).
**Note:** You can also choose from a variety of Actix Web templates created by the community.
#### Deploy from a GitHub repo
To deploy an Actix Web app on Railway directly from GitHub, follow the steps below:
1. Create a New Project.
2. Click **Deploy from GitHub repo**.
3. Select your Actix Web GitHub repo.
- Railway requires a valid GitHub account to be linked. If your Railway account isn't associated with one, you will be prompted to link it.
4. Click **Deploy Now**.
Once the deployment is successful, a Railway [service](/services) will be created for you. By default, this service will not be publicly accessible.
To set up a publicly accessible URL for the service, navigate to the **Networking** section in the [Settings](/overview/the-basics#service-settings) tab of your new service and click on [Generate Domain](/networking/public-networking#railway-provided-domain).
**Note:** Railpack auto-detects Rust apps and builds them automatically. Learn more about Rust support in Railpack.
#### Deploy from the CLI
1. Install and authenticate with the CLI.
2. `cd` into your Actix Web app directory.
- You can skip this step if you are already in the app directory.
3. Run `railway init` within the app directory to create a new project.
4. Run `railway up` to deploy.
- The CLI will now scan, compress and upload your Actix Web app files to Railway's backend for deployment.
#### Use a Dockerfile
1. Create a `Dockerfile` in the app's root directory.
2. Add the content below to the `Dockerfile`:
```docker
FROM lukemathwalker/cargo-chef:latest-rust-1 AS chef
WORKDIR /app
FROM chef AS planner
COPY . ./
RUN cargo chef prepare --recipe-path recipe.json
FROM chef AS builder
COPY --from=planner /app/recipe.json recipe.json
RUN cargo chef cook --release --recipe-path recipe.json
COPY . ./
RUN cargo build --release
CMD ["./target/release/app"]
```
3. Either deploy via the CLI or from GitHub.
Railway automatically detects the `Dockerfile`, [and uses it to build and deploy the app.](/builds/dockerfiles)
**Note:** Railway supports also deployment from public and private Docker images.
#### Next steps
Explore these resources to learn more about Railway:
- [Add a Database Service](/databases/build-a-database-service)
- [Monitor your app](/observability)
- [Running a Cron Job](/cron-jobs)
### Rocket
Source: https://docs.railway.com/guides/rocket.md
Learn how to deploy a Rust Rocket app to Railway with this step-by-step guide. It covers quick setup, one-click deploys, Dockerfile and other deployment strategies.
[Rocket](https://rocket.rs) is a web framework for Rust that makes it simple to write fast, type-safe, secure web applications with incredible usability, productivity and performance.
This guide covers how to deploy a Rocket app to Railway in four ways:
1. [One-click deploy from a template](#one-click-deploy-from-a-template).
2. [From a GitHub repository](#deploy-from-a-github-repo).
3. [Using the CLI](#deploy-from-the-cli).
4. [Using a Dockerfile](#use-a-dockerfile).
Now, let's create a Rocket app! 🚀
#### Create a Rocket app
**Note:** If you already have a Rocket app locally or on GitHub, you can skip this step and go straight to the [Deploy Rocket App to Railway](#deploy-the-rocket-app-to-railway).
To create a new Rocket app, ensure that you have [Rust](https://www.rust-lang.org/tools/install) installed on your machine.
Run the following command in your terminal to create a new Rust app:
```bash
cargo new helloworld --bin
```
The command creates a new binary-based Cargo project in a `helloworld` directory.
Next, `cd` into the directory and add Rocket as a dependency by running the following command:
```bash
cargo add rocket
```
This will add Rocket as a dependency, and you’ll see it listed in your `Cargo.toml` file.
##### Modify the application file
Next, open the app in your IDE and navigate to the `src/main.rs` file.
Replace the content with the code below:
```rust
#[macro_use]
extern crate rocket;
#[get("/")]
fn index() -> &'static str {
"Hello world, Rocket!"
}
#[launch]
fn rocket() -> _ {
rocket::build().mount("/", routes![index])
}
```
The code above uses the Rocket framework to create a basic web server that responds to HTTP requests. It defines a simple route using the `#[get("/")]` macro, which tells Rocket to handle GET requests to the root URL `(/)`.
The `index()` function is the handler for this route and returns a static string, **"Hello world, Rocket!"**, which will be sent as the response when the root URL is accessed.
The `#[launch]` attribute on the `rocket()` function marks it as the entry point to launch the application. Inside `rocket()`, the server is built with `rocket::build()` and the index route is mounted to the root path `/` using `mount()`.
When the application runs, it listens for incoming requests and serves the "Hello world, Rocket!" response for requests made to the root URL, demonstrating a simple routing and response mechanism in Rocket.
##### Run the Rocket app locally
Run the following command in the `helloworld` directory via the terminal:
```bash
cargo run
```
All the dependencies will be installed and your app will be launched.
Open your browser and go to `http://localhost:8000` to see your app.
#### Deploy the Rocket app to Railway
Railway offers multiple ways to deploy your Rocket app, depending on your setup and preference.
##### One-click deploy from a template
If you’re looking for the fastest way to get started, the one-click deploy option is ideal.
Click the button below to begin:
[](https://railway.com/new/template/FkW8oU)
It is highly recommended that [you eject from the template after deployment](/templates/deploy#eject-from-template-repository) to create a copy of the repo on your GitHub account.
**Note:** You can also choose from a variety of Rocket templates created by the community.
##### Deploy from the CLI
1. **Install the Railway CLI**:
- Install the CLI and authenticate it using your Railway account.
2. **Initialize a Railway Project**:
- Run the command below in your Rocket app directory.
```bash
railway init
```
- Follow the prompts to name your project.
- After the project is created, click the provided link to view it in your browser.
3. **Deploy the Application**:
- Use the command below to deploy your app:
```bash
railway up
```
- This command will scan, compress and upload your app's files to Railway. You’ll see real-time deployment logs in your terminal.
4. **Set Up a Public URL**:
- Navigate to the **Networking** section under the [Settings](/overview/the-basics#service-settings) tab of your new service.
- Click [Generate Domain](/networking/public-networking#railway-provided-domain) to create a public URL for your app.
**Note:** You'll come across a 502 error where your application doesn't respond. You'll fix that in the next step.
5. **Configure Rocket app to accept non-local connections**:
- Rocket apps need to be configured to accept external connections by listening on the correct address, which is typically `0.0.0.0`. You can easily do this by setting the address through the environment variable.
Run the following command to set the Rocket address to `0.0.0.0`:
`bash
railway variables --set "ROCKET_ADDRESS=0.0.0.0"
`
6. **Redeploy the Service**:
- Run `railway up` again to trigger a redeployment of the service.
7. **Verify the Deployment**:
- Once the deployment completes, go to **View logs** to check if the server is running successfully. Access your public URL again and you should see your app working well.
##### Deploy from a GitHub repo
To deploy a Rocket app to Railway directly from GitHub, follow the steps below:
1. **Create a New Project on Railway**:
- Go to Railway to create a new project.
2. **Deploy from GitHub**:
- Select **Deploy from GitHub repo** and choose your repository.
- If your Railway account isn’t linked to GitHub yet, you’ll be prompted to do so.
3. **Add Environment Variables**:
- Click **Add Variables**, then add `ROCKET_ADDRESS` with the value `0.0.0.0`. This allows your Rocket app to accept external connections by listening on `0.0.0.0`.
4. **Deploy the App**:
- Click **Deploy** to start the deployment process.
- Once the deployed, a Railway [service](/services) will be created for your app, but it won’t be publicly accessible by default.
5. **Verify the Deployment**:
- Once the deployment completes, go to **View logs** to check if the server is running successfully.
**Note:** During the deployment process, Railway will automatically [detect that it’s a Rust app](https://railpack.com/languages/rust).
6. **Set Up a Public URL**:
- Navigate to the **Networking** section under the [Settings](/overview/the-basics#service-settings) tab of your new service.
- Click [Generate Domain](/networking/public-networking#railway-provided-domain) to create a public URL for your app.
##### Use a Dockerfile
1. Create a `Dockerfile` in the `helloworld` or Rocket app's root directory.
2. Add the content below to the `Dockerfile`:
```docker
FROM lukemathwalker/cargo-chef:latest-rust-1 AS chef
# Create and change to the app directory.
WORKDIR /app
FROM chef AS planner
COPY . ./
RUN cargo chef prepare --recipe-path recipe.json
FROM chef AS builder
COPY --from=planner /app/recipe.json recipe.json
# Build dependencies - this is the caching Docker layer!
RUN cargo chef cook --release --recipe-path recipe.json
# Build application
COPY . ./
RUN cargo build --release
CMD ["./target/release/helloworld"]
```
3. Either deploy via the CLI or from GitHub.
Railway automatically detects the `Dockerfile`, [and uses it to build and deploy the app.](/builds/dockerfiles)
**Note:** Railway supports also deployment from public and private Docker images.
This guide covers the main deployment options on Railway. Choose the approach that suits your setup, and start deploying your Rocket apps seamlessly!
#### Next steps
Explore these resources to learn how you can maximize your experience with Railway:
- [Add a Database Service](/databases/build-a-database-service)
- [Monitor your app](/observability)
---
### Spring Boot
Source: https://docs.railway.com/guides/spring-boot.md
Learn how to deploy a Spring Boot app to Railway with this step-by-step guide. It covers quick setup, one-click deploys, Dockerfile and other deployment strategies.
[Spring Boot](https://spring.io/projects/spring-boot) is a Java framework designed to simplify the creation of stand-alone, production-ready Spring applications that are easy to run right out of the box.
This guide covers how to deploy a Spring Boot app to Railway in four ways:
1. [One-click deploy from a template](#one-click-deploy-from-a-template).
2. [From a GitHub repository](#deploy-from-a-github-repo).
3. [Using the CLI](#deploy-from-the-cli).
4. [Using a Dockerfile](#use-a-dockerfile).
Now, let's create a Spring Boot app!
#### Create a Spring Boot app
**Note:** If you already have a Spring Boot app locally or on GitHub, you can skip this step and go straight to the [Deploy Spring Boot App to Railway](#deploy-the-spring-boot-app-to-railway).
To create a new Spring Boot app, ensure that you have [JDK](https://www.oracle.com/java/technologies/downloads/) installed on your machine.
Go to [start.spring.io](https://start.spring.io) to initialize a new Spring Boot app. Select the options below to customize and generate your starter app.
- Project: Maven
- Language: Java
- Spring Boot: 3.3.4
- Project Metadata:
- Group: com.railwayguide
- Artifact: helloworld
- Name: helloworld
- Description: Demo project for Railway Guide
- Package name: com.railwayguide.helloworld
- Packaging: jar
- Java: 17
- Dependencies:
- Click the **Add Dependencies** button and search for **Spring Web**. Select it.
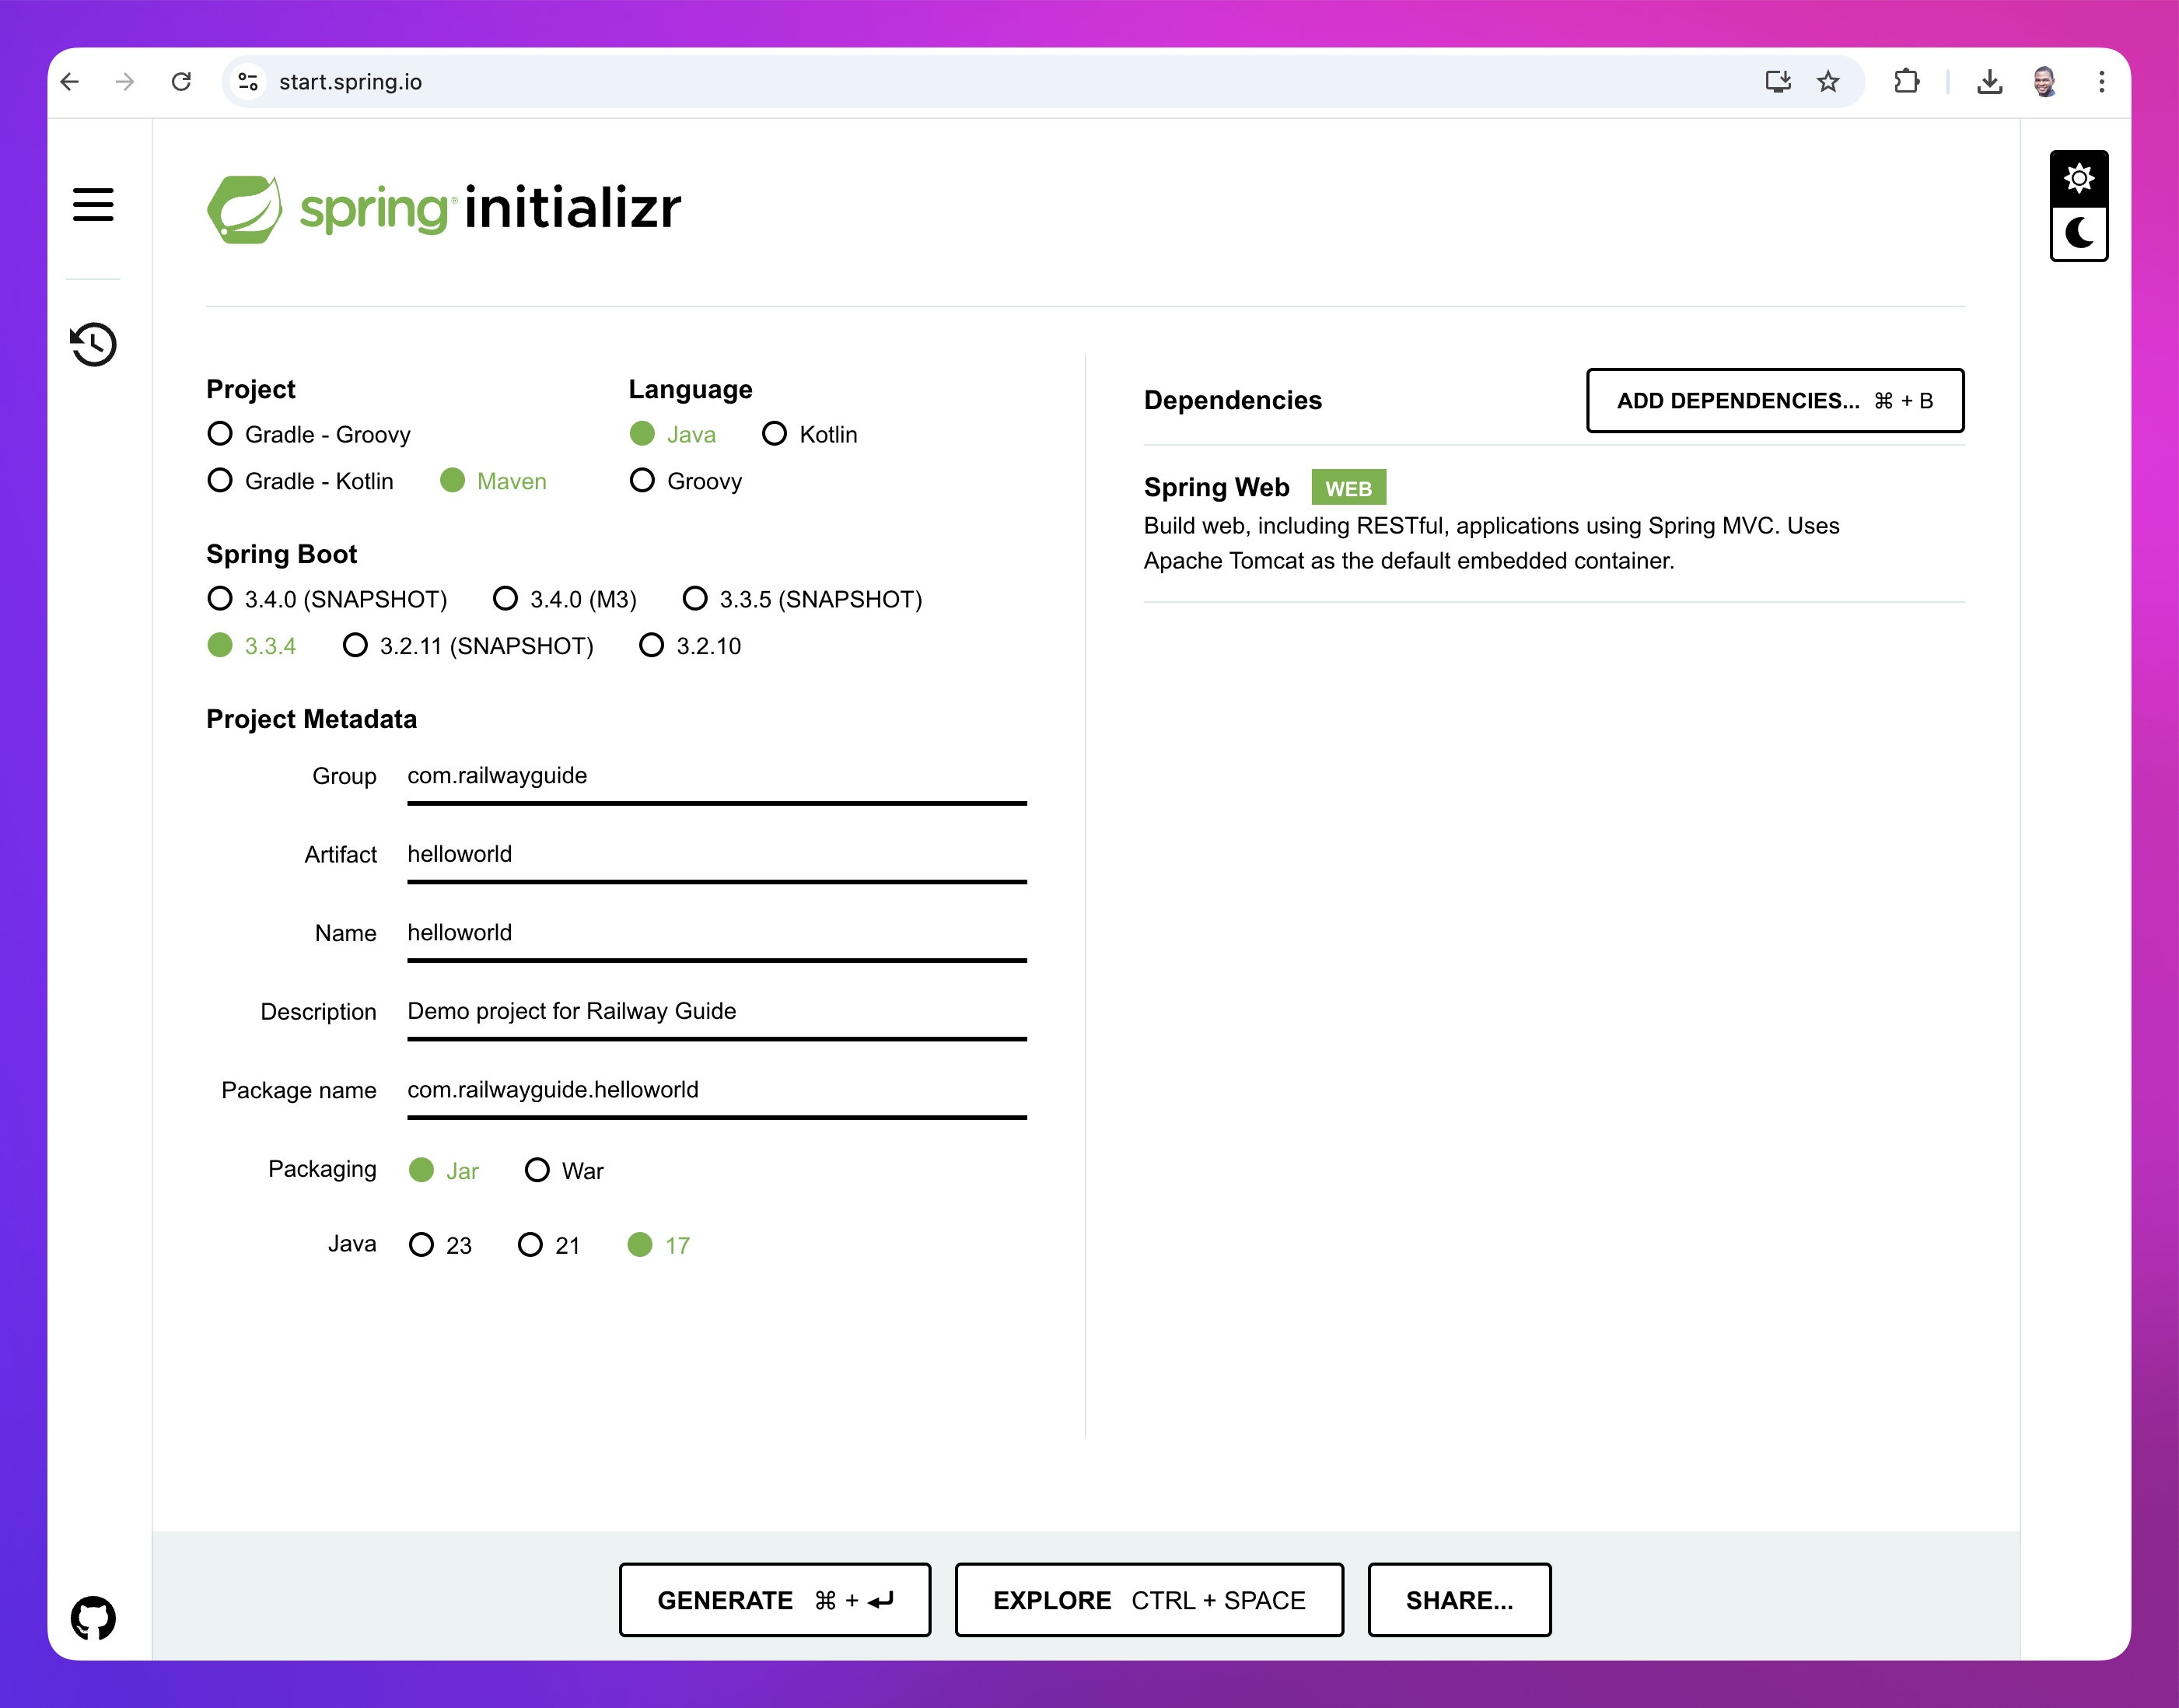
_Config to initialize your new app_
Now, click on the **Generate** button, download the zipped file and unpack it into a folder on your machine.
##### Modify the application file
Next, open the app in your IDE and navigate to the `src/main/java/com/railwayguide/helloworld/HelloWorldApplication.java` file.
Replace the content with the code below:
```java
package com.railwayguide.helloworld;
import org.springframework.boot.SpringApplication;
import org.springframework.boot.autoconfigure.SpringBootApplication;
import org.springframework.web.bind.annotation.GetMapping;
import org.springframework.web.bind.annotation.RestController;
@SpringBootApplication
@RestController
public class HelloworldApplication {
public static void main(String[] args) {
SpringApplication.run(HelloworldApplication.class, args);
}
@GetMapping("/")
public String hello() {
return String.format("Hello world from Java Spring Boot!");
}
}
```
A `hello()` method was added that returns the response: `Hello world from Java Spring Boot!`.
The `@RestController` annotation designates this class as a web controller, while `@GetMapping("/")` maps the `hello()` method to handle requests sent to the root URL, `/`.
##### Run the Spring Boot app locally
Next, `cd` into the `helloworld` directory via the terminal and run the following Maven command:
```bash
./mvnw spring-boot:run
```
**Note:** This is a Maven wrapper for Linux and macOS, which uses a bundled version of Maven from **.mvn/wrapper/maven-wrapper.jar** instead of relying on the system-installed version.
Open your browser and go to `http://localhost:8080` to see your app.
#### Deploy the Spring Boot app to Railway
Railway offers multiple ways to deploy your Spring Boot app, depending on your setup and preference.
##### One-click deploy from a template
If you’re looking for the fastest way to get started, the one-click deploy option is ideal.
Click the button below to begin:
[](https://railway.com/new/template/-NFGrr)
It is highly recommended that [you eject from the template after deployment](/templates/deploy#eject-from-template-repository) to create a copy of the repo on your GitHub account.
**Note:** You can also choose from a variety of Spring Boot app templates created by the community.
##### Deploy from the CLI
1. **Install the Railway CLI**:
- Install the CLI and authenticate it using your Railway account.
2. **Initialize a Railway Project**:
- Run the command below in your Spring Boot app directory.
```bash
railway init
```
- Follow the prompts to name your project.
- After the project is created, click the provided link to view it in your browser.
3. **Deploy the Application**:
- Use the command below to deploy your app:
```bash
railway up
```
- This command will scan, compress and upload your app's files to Railway. You’ll see real-time deployment logs in your terminal.
- Once the deployment completes, go to **View logs** to check if the service is running successfully.
4. **Set Up a Public URL**:
- Navigate to the **Networking** section under the [Settings](/overview/the-basics#service-settings) tab of your new service.
- Click [Generate Domain](/networking/public-networking#railway-provided-domain) to create a public URL for your app.
##### Deploy from a GitHub repo
To deploy a Spring Boot app to Railway directly from GitHub, follow the steps below:
1. **Create a New Project on Railway**:
- Go to Railway to create a new project.
2. **Deploy from GitHub**:
- Select **Deploy from GitHub repo** and choose your repository.
- If your Railway account isn’t linked to GitHub yet, you’ll be prompted to do so.
3. **Deploy the App**:
- Click **Deploy** to start the deployment process.
- Once the deployed, a Railway [service](/services) will be created for your app, but it won’t be publicly accessible by default.
4. **Verify the Deployment**:
- Once the deployment completes, go to **View logs** to check if the server is running successfully.
**Note:** During the deployment process, Railway will automatically [detect that it’s a Java app](https://railpack.com/languages/java).
5. **Set Up a Public URL**:
- Navigate to the **Networking** section under the [Settings](/overview/the-basics#service-settings) tab of your new service.
- Click [Generate Domain](/networking/public-networking#railway-provided-domain) to create a public URL for your app.
##### Use a Dockerfile
1. Create a `Dockerfile` in the `helloworld` or Spring Boot app's root directory.
2. Add the content below to the `Dockerfile`:
```bash
# Use the Eclipse temurin alpine official image
# https://hub.docker.com/_/eclipse-temurin
FROM eclipse-temurin:21-jdk-alpine
# Create and change to the app directory.
WORKDIR /app
# Copy local code to the container image.
COPY . ./
# Build the app.
RUN ./mvnw -DoutputFile=target/mvn-dependency-list.log -B -DskipTests clean dependency:list install
# Run the app by dynamically finding the JAR file in the target directory
CMD ["sh", "-c", "java -jar target/*.jar"]
```
3. Either deploy via the CLI or from GitHub.
Railway automatically detects the `Dockerfile`, [and uses it to build and deploy the app.](/builds/dockerfiles)
**Note:** Railway supports also deployment from public and private Docker images.
This guide covers the main deployment options on Railway. Choose the approach that suits your setup, and start deploying your Spring Boot apps seamlessly!
#### Next steps
Explore these resources to learn how you can maximize your experience with Railway:
- [Add a Database Service](/databases/build-a-database-service)
- [Monitor your app](/observability)
---
### Ktor
Source: https://docs.railway.com/guides/ktor.md
Learn how to deploy a Ktor app to Railway with this step-by-step guide. It covers quick setup, CLI deploys, Dockerfile and other deployment strategies.
Ktor is an asynchronous framework for creating connected applications in Kotlin, built by JetBrains.
**Note:** There is no official Railway template for Ktor yet. You can check the community for Ktor templates.
This guide covers how to deploy a Ktor app on Railway in three ways:
1. [From a GitHub repository](#deploy-from-a-github-repo).
2. [Using the CLI](#deploy-from-the-cli).
3. [Using a Dockerfile](#use-a-dockerfile).
#### Deploy from a GitHub repo
To deploy a Ktor app on Railway directly from GitHub, follow the steps below:
1. Create a New Project.
2. Click **Deploy from GitHub repo**.
3. Select your Ktor GitHub repo.
- Railway requires a valid GitHub account to be linked. If your Railway account isn't associated with one, you will be prompted to link it.
4. Click **Deploy Now**.
Railway uses Railpack to detect and build Gradle projects automatically.
**Note:** Your Ktor app needs to bind to `0.0.0.0` and read the port from the `PORT` environment variable. You can do this in `application.conf`:
```
ktor {
deployment {
port = ${?PORT}
port = 8080
}
}
```
Or programmatically:
```kotlin
embeddedServer(Netty, port = System.getenv("PORT")?.toInt() ?: 8080)
```
Once the deployment is successful, a Railway [service](/services) will be created for you. By default, this service will not be publicly accessible.
To set up a publicly accessible URL for the service, navigate to the **Networking** section in the [Settings](/overview/the-basics#service-settings) tab of your new service and click on [Generate Domain](/networking/public-networking#railway-provided-domain).
#### Deploy from the CLI
1. Install and authenticate with the CLI.
2. `cd` into your Ktor project directory.
- You can skip this step if you are already in your app directory.
3. Run `railway init` within the app directory to create a new project.
4. Run `railway up` to deploy.
- The CLI will now scan, compress and upload your Ktor app files to Railway's backend for deployment.
#### Use a Dockerfile
1. Create a `Dockerfile` in your Ktor app's root directory.
2. Add the content below to the `Dockerfile`:
```docker
FROM gradle:8-jdk21 AS build
WORKDIR /app
COPY . ./
RUN gradle buildFatJar --no-daemon
FROM eclipse-temurin:21-jre-alpine
WORKDIR /app
COPY --from=build /app/build/libs/*-all.jar app.jar
ENTRYPOINT ["java", "-jar", "app.jar"]
```
3. Either deploy via the CLI or from GitHub.
Railway automatically detects the `Dockerfile`, [and uses it to build and deploy the app.](/builds/dockerfiles)
**Note:** Railway supports also deployment from public and private Docker images.
#### Next steps
Explore these resources to learn how you can maximize your experience with Railway:
- [Add a Database Service](/databases/build-a-database-service)
- [Monitor your app](/observability)
- [Running a Cron Job](/cron-jobs)
---
### ASP.NET Core
Source: https://docs.railway.com/guides/aspnet-core.md
Learn how to deploy an ASP.NET Core app to Railway with this step-by-step guide. It covers deployment from GitHub, the CLI, and using a Dockerfile.
ASP.NET Core is a cross-platform framework for building web applications and APIs with C# and .NET.
This guide covers how to deploy an ASP.NET Core app on Railway in three ways:
1. [From a GitHub repository](#deploy-from-a-github-repo).
2. [Using the CLI](#deploy-from-the-cli).
3. [Using a Dockerfile](#use-a-dockerfile).
**Note:** [Railpack](/builds/railpack) does not yet support .NET, so a Dockerfile is required for all deployment methods.
You can also explore .NET templates created by the community.
#### Deploy from a GitHub repo
To deploy an ASP.NET Core app on Railway directly from GitHub, follow the steps below:
1. Create a New Project.
2. Click **Deploy from GitHub repo**.
3. Select your GitHub repo.
- Railway requires a valid GitHub account to be linked. If your Railway account isn't associated with one, you will be prompted to link it.
4. Click **Deploy Now**.
**Note:** ASP.NET Core apps require a `Dockerfile` for deployment on Railway, since [Railpack](/builds/railpack) does not yet support .NET.
Once the deployment is successful, a Railway [service](/services) will be created for you. By default, this service will not be publicly accessible.
To set up a publicly accessible URL for the service, navigate to the **Networking** section in the [Settings](/overview/the-basics#service-settings) tab of your new service and click on [Generate Domain](/networking/public-networking#railway-provided-domain).
#### Deploy from the CLI
1. Install and authenticate with the CLI.
2. `cd` into your ASP.NET Core app directory.
3. Run `railway init` within the app directory to create a new project.
4. Run `railway up` to deploy.
- The CLI will now scan, compress and upload your app files to Railway's backend for deployment.
**Note:** ASP.NET Core apps require a `Dockerfile` for deployment on Railway, since [Railpack](/builds/railpack) does not yet support .NET.
#### Use a Dockerfile
1. `cd` into your ASP.NET Core app directory.
2. Create a `Dockerfile` in the app's root directory.
3. Add the content below to the `Dockerfile`:
```docker
FROM mcr.microsoft.com/dotnet/sdk:9.0 AS build
WORKDIR /app
COPY *.csproj ./
RUN dotnet restore
COPY . ./
RUN dotnet publish -c Release -o out
FROM mcr.microsoft.com/dotnet/aspnet:9.0
WORKDIR /app
COPY --from=build /app/out ./
ENTRYPOINT ["dotnet", "App.dll"]
```
**Note:** Replace `App.dll` with the actual assembly name of your project (e.g., `MyWebApp.dll`).
4. Either deploy via the CLI or from GitHub.
Railway automatically detects the `Dockerfile`, [and uses it to build and deploy the app.](/builds/dockerfiles)
**Note:** Railway supports also deployment from public and private Docker images.
##### Port configuration
ASP.NET Core apps need to bind to `0.0.0.0` and read the `PORT` environment variable. By default, Kestrel binds to `localhost`, which will not work on Railway.
Set the `ASPNETCORE_URLS` environment variable in your Railway service settings:
```
ASPNETCORE_URLS=http://+:${PORT}
```
Alternatively, configure the port in your `Program.cs`:
```csharp
builder.WebHost.UseUrls($"http://0.0.0.0:{Environment.GetEnvironmentVariable("PORT") ?? "8080"}");
```
#### Next steps
Explore these resources to learn how you can maximize your experience with Railway:
- [Add a Database Service](/databases/build-a-database-service)
- [Monitor your app](/observability)
- [Running a Cron Job](/cron-jobs)
---
### Play
Source: https://docs.railway.com/guides/play.md
Learn how to deploy a Scala Play app to Railway with this step-by-step guide. It covers quick setup, database integration, one-click deploys and other deployment strategies.
[Play](https://www.playframework.com) is a high velocity and productive web framework for Java and Scala. It is based on a lightweight, stateless, web-friendly architecture and features predictable and minimal resource consumption (CPU, memory, threads) for highly-scalable applications thanks to its reactive model, based on Pekko Streams.
This guide covers how to deploy a Scala Play app to Railway in four ways:
1. [One-click deploy from a template](#one-click-deploy-from-a-template).
2. [From a GitHub repository](#deploy-from-a-github-repo).
3. [Using the CLI](#deploy-from-the-cli).
4. [Using a Dockerfile](#use-a-dockerfile).
Now, let's create a Play app!
#### Create a Play app
**Note:** If you already have a Play app locally or on GitHub, you can skip this step and go straight to the [Deploy Play App to Railway](#deploy-the-play-app-to-railway).
To create a new Scala Play app, ensure that you have [JDK](https://www.oracle.com/java/technologies/downloads/) and [sbt](https://www.scala-sbt.org/download/) installed on your machine.
Run the following command in your terminal to create a new Play app:
```bash
sbt new
```
A list of templates will be shown to select from. Select the `playframework/play-scala-seed.g8` template.
- Give it a name, `helloworld`.
- Give it an organization name, `com.railwayguide`
- Hit Enter for the rest to use the latest versions of play, scala and sbt scaffold.
A new Scala Play app will be provisioned in the `helloworld` directory.
##### Modify Scala Play views and set up database config
_Step 1_ : Modify the Index File
Open the project in your editor. Head over to the `app/views/index.scala.html` file.
Modify it to the following:
```scala
@()
@main("Welcome to Play") {
Welcome to Play!
Hello World, Railway!
}
```
This change adds a new heading, which you'll see when you run the app locally.
_Step 2_ : Run the App Locally
- Now, let’s run the app locally to verify your changes. You should see the new headers appear in the browser.
_Step 3_ : Add PostgreSQL Driver as a Dependency
Play doesn’t provide built-in database drivers, so you need to add the PostgreSQL JDBC driver manually to your project.
In your `build.sbt`, add the following dependency:
```scala
libraryDependencies += "org.postgresql" % "postgresql" % "42.7.4" // Always use the latest stable version
```
_Step 4_ : Configure PostgreSQL in application.conf
Next, configure the PostgreSQL database connection in `conf/application.conf`:
```scala
# Default database configuration using PostgreSQL
db.default.driver = org.postgresql.Driver
db.default.url = "jdbc:postgresql://username:password@127.0.0.1:5432/scala_play" # Replace with correct credentials
```
Make sure to replace `username` and `password` with your PostgreSQL credentials.
_Step 5_ : Update Project Dependencies
To download the PostgreSQL driver and any updated dependencies, run the following:
```bash
sbt update
```
_Step 6_ : Add Database Migration Tool (Flyway)
Play doesn’t include built-in support for database migrations, so Flyway will be used.
1. Install Flyway Plugin: Open your `project/plugin.sbt` and add the Flyway plugin:
```scala
addSbtPlugin("io.github.davidmweber" % "flyway-sbt" % "7.4.0")
```
2. Configure Flyway in `build.sbt`: Enable Flyway and configure the database connection in your `build.sbt`:
```scala
name := """helloworld"""
organization := "com.railwayguide"
version := "1.0-SNAPSHOT"
executableScriptName := "main"
lazy val root = (project in file(".")).enablePlugins(PlayScala).enablePlugins(FlywayPlugin)
scalaVersion := "2.13.15"
libraryDependencies += guice
libraryDependencies += "org.scalatestplus.play" %% "scalatestplus-play" % "7.0.1" % Test
libraryDependencies += "org.postgresql" % "postgresql" % "42.7.4" // Latest version
flywayUrl := "jdbc:postgresql://127.0.0.1:5432/scala_play?user=" # Replace with correct credentials
flywayLocations := Seq("filesystem:src/main/resources/db/migration")
```
Replace `username` with your database username.
_Step 7_ : Create the Migration Files
1. **Create Migration Folder**: Create the folder structure for your migration files:
```bash
src/main/resources/db/migration
```
2. **Create Migration SQL File**: In `src/main/resources/db/migration`, create a schema migration file called `V1_0__create_employees_table.sql` with the following content:
```sql
CREATE TABLE employee (
id VARCHAR(20) PRIMARY KEY,
first_name VARCHAR(30),
last_name VARCHAR(30),
email VARCHAR(30),
admin BOOLEAN
);
```
_Step 8_ : Run Database Migrations
Once your migration file is in place, run the Flyway migration with the following command:
```bash
sbt flywayMigrate
```
This will apply the migration and create the employee table in your PostgreSQL database.
Check your database to confirm that the employee table has been successfully created. You can use a database tool like psql or any PostgreSQL client to view the table.
##### Run the Play app locally
Next, run `sbt run` in the terminal to build the project, install all the dependencies and start the embedded [Pekko](https://pekko.apache.org) HTTP server.
Open your browser and go to `http://localhost:9000` to see the app.
##### Prepare Scala Play app for deployment
1. **Set Application Secret**:
- Open up the `application.conf` file and add the following to it to set the app's secret.
```scala
play.http.secret.key=${?APPLICATION_SECRET}
```
2. **Set Database URL**:
- Open up the `application.conf` file and add the following to it to ensure the `DATABASE_URL` is read from the environment variable.
```scala
db.default.url="jdbc:${?DATABASE_URL}"
```
3. **Set Allowed Hosts**:
- By default, Play ships with a list of [default Allowed Hosts filter](https://www.playframework.com/documentation/3.0.x/resources/confs/play-filters-helpers/reference.conf). This is the list of allowed valid hosts = ["localhost", ".local", "127.0.0.1"]. You need to add an option to allow Railway hosts, `[".up.railway.app"]`.
- Add the following to the `application.conf` file:
`scala
play.filters.hosts.allowed=[".up.railway.app"]
`
**Note:** Railway provided domains end in `.up.railway.app`. Once you add your custom domain, please update the allowed hosts to the new URL.
4. **Add sbt-native-packager sbt plugin**:
- Add the `sbt-native-packager` sbt plugin to `project/plugins.sbt`
```scala
addSbtPlugin("com.github.sbt" % "sbt-native-packager" % "x.x.x")
```
- Enable the `JavaAppPackaging` plugin in `build.sbt` and set the `executableScriptName` to `main`. Your `build.sbt` should be looking like this now:
```scala
name := """helloworld"""
organization := "com.railwayguide"
version := "1.0-SNAPSHOT"
executableScriptName := "main"
lazy val root = (project in file(".")).enablePlugins(PlayScala).enablePlugins(JavaAppPackaging).enablePlugins(FlywayPlugin)
scalaVersion := "2.13.15"
libraryDependencies += guice
libraryDependencies += "org.scalatestplus.play" %% "scalatestplus-play" % "7.0.1" % Test
libraryDependencies += "org.postgresql" % "postgresql" % "42.7.4" // Always use the latest stable version
flywayUrl := sys.env.getOrElse("DATABASE_URL", "jdbc:postgresql://127.0.0.1:5432/scala_play?user=username")
flywayLocations := Seq("filesystem:src/main/resources/db/migration")
```
- Run `sbt update` to install the `sbt-native-packager` and update the dependencies.
Now you're ready to deploy to Railway!
#### Deploy the Play app to Railway
Railway offers multiple ways to deploy your Scala app, depending on your setup and preference.
##### One-click deploy from a template
If you’re looking for the fastest way to get started, the one-click deploy option is ideal.
Click the button below to begin:
[](https://railway.com/new/template/my9q_q)
It is highly recommended that [you eject from the template after deployment](/templates/deploy#eject-from-template-repository) to create a copy of the repo on your GitHub account.
**Note:** You can also choose from a variety of Scala app templates created by the community.
##### Deploy from the CLI
1. **Install the Railway CLI**:
- Install the CLI and authenticate it using your Railway account.
2. **Initialize a Railway Project**:
- Run the command below in your Luminus app directory.
```bash
railway init
```
- Follow the prompts to name your project.
- After the project is created, click the provided link to view it in your browser.
3. **Add a Postgres Database Service**:
- Run `railway add -d postgres`.
- Hit **Enter** to add it to your project.
- A database service will be added to your Railway project.
4. **Add a Service and Environment Variable**:
- Run `railway add`.
- Select `Empty Service` from the list of options.
- In the `Enter a service name` prompt, enter `app-service`.
- In the `Enter a variable` prompt, enter `APPLICATION_SECRET=` where `` is the secret generated from running `playGenerateSecret` in your terminal.
- In the `Enter a variable` prompt, enter `DATABASE_URL=${{Postgres.DATABASE_URL}}`.
- The value, `${{Postgres.DATABASE_URL}}`, references the URL of your new Postgres database. Learn more about [referencing service variables](/variables#referencing-another-services-variable).
**Note:** Explore the [Railway CLI reference](/cli#add) for a variety of options.
5. **Deploy the Application**:
- Run `railway up` to deploy your app.
- This command will scan, compress and upload your app's files to Railway. You’ll see real-time deployment logs in your terminal.
- Once the deployment is complete, proceed to generate a domain for the app service.
6. **Set Up a Public URL**:
- Run `railway domain` to generate a public URL for your app.
- Visit the new URL to see your app live in action!
##### Deploy from a GitHub repo
To deploy a Scala Play app to Railway directly from GitHub, follow the steps below:
1. **Create a New Project on Railway**:
- Go to Railway to create a new project.
2. **Deploy from GitHub**:
- Select **Deploy from GitHub repo** and choose your repository.
- If your Railway account isn’t linked to GitHub yet, you’ll be prompted to do so.
3. **Add Environment Variables and Provision a Database Service**:
- Click **Add Variables**, but hold off on adding anything just yet. First, proceed with the next step.
- Right-click on the Railway project canvas or click the **Create** button, then select **Database** and choose **Add PostgreSQL**.
- This will create and deploy a new PostgreSQL database for your project.
- Once the database is deployed, you can return to adding the necessary environment variables:
- `DATABASE_URL`: Set the value to `${{Postgres.DATABASE_URL}}` (this references the URL of your new Postgres database). Learn more about [referencing service variables](/variables#referencing-another-services-variable).
- `APPLICATION_SECRET`: Set the value to the generated app secret.
4. **Deploy the App Service**:
- Click **Deploy** on the Railway project canvas to apply your changes.
5. **Verify the Deployment**:
- Once the deployment completes, go to [**View logs**](/observability/logs#build--deploy-panel) to check if the server is running successfully.
**Note:** During the deployment process, Railway will automatically detect that it’s a Scala app.
6. **Set Up a Public URL**:
- Navigate to the **Networking** section under the [Settings](/overview/the-basics#service-settings) tab of your new service.
- Click [Generate Domain](/networking/public-networking#railway-provided-domain) to create a public URL for your app.
##### Use a Dockerfile
1. Create a `Dockerfile` in the Play app's root directory.
2. Add the content below to the `Dockerfile`:
```bash
# Use the Scala sbt official image
# https://hub.docker.com/r/sbtscala/scala-sbt/tags
FROM sbtscala/scala-sbt:eclipse-temurin-21.0.5_11_1.10.5_3.5.2
# Create and change to the app directory.
WORKDIR /app
# Copy local code to the container image.
COPY . ./
# Build the app.
RUN sbt stage
# Run the app
CMD ["./target/universal/stage/bin/main"]
```
3. Either deploy via the CLI or from GitHub.
Railway automatically detects the `Dockerfile`, [and uses it to build and deploy the app.](/builds/dockerfiles)
**Note:** Railway supports also deployment from public and private Docker images.
This guide covers the main deployment options on Railway. Choose the approach that suits your setup, and start deploying your Scala apps seamlessly!
#### Next steps
Explore these resources to learn how you can maximize your experience with Railway:
- [Add a Database Service](/databases/build-a-database-service)
- [Monitor your app](/observability)
---
### Phoenix
Source: https://docs.railway.com/guides/phoenix.md
Learn how to deploy a Phoenix app to Railway with this step-by-step guide. It covers quick setup, ecto setup, database integration, one-click deploys and other deployment strategies.
[Phoenix](https://phoenixframework.org) is popular Elixir framework designed for building scalable, maintainable, and high-performance web applications. It is known for its ability to handle real-time features efficiently, like WebSockets, while leveraging Elixir's concurrency model, which is built on the Erlang Virtual Machine (BEAM).
#### Create a Phoenix app
**Note:** If you already have a Phoenix app locally or on GitHub, you can skip this step and go straight to the [Deploy Phoenix App on Railway](#deploy-phoenix-app-on-railway).
To create a new Phoenix app, ensure that you have [Elixir](https://elixir-lang.org/install.html) and [Hex package manager](https://hexdocs.pm/phoenix/installation.html) installed on your machine. Once everything is set up, run the following command in your terminal to install the Phoenix application generator:
```bash
mix archive.install hex phx_new
```
Next, run the following command:
```bash
mix phx.new helloworld
```
Select `Y` to install all dependencies.
This command will create a new Phoenix app named `helloworld` with some optional dependencies such as:
- [Ecto](https://hexdocs.pm/phoenix/ecto.html) for communicating with a database such as PostgreSQL, MySQL etc
- [Phoenix live view](https://hexdocs.pm/phoenix_live_view) for building realtime & interactive web apps.
- [Phoenix HTML and Tailwind CSS](https://hexdocs.pm/phoenix_html/Phoenix.HTML.html) for HTML apps.
##### Configure database
Next, navigate into the `helloworld` directory using the `cd` command.
Open up the `config/dev.exs` file. You'll notice that a new Phoenix app is already set up with PostgreSQL settings. It assumes the database has a `postgres` user with the right permissions and a default password of `postgres`. Update the username and password to match your local PostgreSQL account credentials.
**Note**: If you prefer using a different database, like MySQL, you can easily switch the database adapter in the `mix.exs` file. Simply remove the `Postgrex` dependency and add `MyXQL` instead. For detailed instructions, check out this [guide on using other databases](https://hexdocs.pm/phoenix/ecto.html#using-other-databases) in Phoenix.
The default database name is set to `helloworld_dev`, but feel free to change it to whatever you'd prefer.
Next, create the database for your app by running the following command:
```bash
mix ecto.create
```
A database will be created for your app.
##### Run the Phoenix app locally
Start the app by running the following command:
```bash
mix phx.server
```
By default, Phoenix accepts requests on port `4000`.
Open your browser and go to `http://localhost:4000` to see your app.
Now that your app is running locally, let’s move on to deploying it to Railway!
##### Prepare your Phoenix app for deployment
Railpack auto-detects Elixir apps, installs Erlang, compiles dependencies, and deploys assets automatically.
Set the start command in your Railway service settings to `mix ecto.setup && mix phx.server`. See [Start Command](/deployments/start-command) for more info.
Also set the `MIX_ENV` environment variable to `prod` in your service variables.
Now you're ready to deploy!
#### Deploy Phoenix app to Railway
Railway offers multiple ways to deploy your Phoenix app, depending on your setup and preference. Choose any of the following methods:
1. [One-click deploy from a template](#one-click-deploy-from-a-template).
2. [Using the CLI](#deploy-from-the-cli).
3. [From a GitHub repository](#deploy-from-a-github-repo).
#### One-click deploy from a template
If you’re looking for the fastest way to get started, the one-click deploy option is ideal. It sets up a Phoenix app along with a Postgres database.
Click the button below to begin:
[](https://railway.com/new/template/0LSBzw)
After deploying, it is recommended that you [eject from the template](/templates/deploy#eject-from-template-repository) to create a copy of the repository under your own GitHub account. This will give you full control over the source code and project.
#### Deploy from the CLI
To deploy the Phoenix app using the Railway CLI, please follow the steps:
1. **Install the Railway CLI**:
- Install the CLI and authenticate it using your Railway account.
2. **Initialize a Railway Project**:
- Run the command below in your Phoenix app directory.
```bash
railway init
```
- Follow the prompts to name your project.
- After the project is created, click the provided link to view it in your browser.
3. **Deploy the Application**:
- Use the command below to deploy your app:
```bash
railway up
```
- This command will scan, compress and upload your app's files to Railway. You’ll see real-time deployment logs in your terminal.
**Note:** You might encounter an error––`warning: the VM is running with native name encoding of latin1 which` `may cause Elixir to malfunction as it expects utf8....`. Don’t worry, you’ll address this in the next step.
4. **Add a Database Service**:
- Run `railway add`.
- Select `PostgreSQL` by pressing space and hit **Enter** to add it to your project.
- A database service will be added to your Railway project.
5. **Configure Environment Variables**:
- Go to your app service **Variables** section and add the following:
- `SECRET_KEY_BASE` : Set the value to the your app's secret key. You can run `mix phx.gen.secret` locally to generate one.
- `LANG`and `LC_CTYPE`: Set both values to `en_US.UTF-8`. This sets your app's locale and gets rid of the _native name encoding of latin1_ warning.
- `DATABASE_URL`: Set the value to `${{Postgres.DATABASE_URL}}` (this references the URL of your new Postgres database). Learn more about [referencing service variables](/variables#referencing-another-services-variable).
- `ECTO_IPV6`: Set the value to `true` to enable your Phoenix app to connect to the database through the [IPv6 private network](/networking/private-networking#listen-on-ipv6).
- Use the **Raw Editor** to add any other required environment variables in one go.
6. **Redeploy the Service**:
- Click **Deploy** on the Railway Project Canvas to apply your changes.
7. **Verify the Deployment**:
- Once the deployment completes, go to [**View logs**](/observability/logs#build--deploy-panel) to check if the server is running successfully.
8. **Set Up a Public URL**:
- Navigate to the **Networking** section under the [Settings](/overview/the-basics#service-settings) tab of your new service.
- Click [Generate Domain](/networking/public-networking#railway-provided-domain) to create a public URL for your app.
#### Deploy from a GitHub repo
To deploy the Phoenix app to Railway, start by pushing the app to a GitHub repo. Once that’s set up, follow the steps below to complete the deployment process.
1. **Create a New Project on Railway**:
- Go to Railway to create a new project.
2. **Deploy from GitHub**:
- Select **Deploy from GitHub repo** and choose your repository.
- If your Railway account isn’t linked to GitHub yet, you’ll be prompted to do so.
3. **Add Environment Variables and Provision a Database Service**:
- Click **Add Variables**, but hold off on adding anything just yet. First, proceed with the next step.
- Right-click on the Railway project canvas or click the **Create** button, then select **Database** and choose **Add PostgreSQL**. This will create and deploy a new PostgreSQL database for your project.
- Once the database is deployed, you can return to adding the necessary environment variables:
- `SECRET_KEY_BASE` : Set the value to the your app's secret key. You can run `mix phx.gen.secret` locally to generate one.
- `LANG`and `LC_CTYPE`: Set both values to `en_US.UTF-8` to ensure proper locale settings and avoid the _native name encoding of latin1 warning_.
- `DATABASE_URL`: Set the value to `${{Postgres.DATABASE_URL}}` (this references the URL of your new Postgres database). Learn more about [referencing service variables](/variables#referencing-another-services-variable).
- `ECTO_IPV6`: Set the value to `true` to enable your Phoenix app to connect to the database through the [IPv6 private network](/networking/private-networking#listen-on-ipv6).
4. **Deploy the App Service**:
- Click **Deploy** on the Railway project canvas to apply your changes.
5. **Verify the Deployment**:
- Once the deployment completes, go to [**View logs**](/observability/logs#build--deploy-panel) to check if the server is running successfully.
**Note:** During the deployment process, Railway will automatically [detect that it’s an Elixir app](https://railpack.com/languages/elixir).
6. **Set Up a Public URL**:
- Navigate to the **Networking** section under the [Settings](/overview/the-basics#service-settings) tab of your new service.
- Click [Generate Domain](/networking/public-networking#railway-provided-domain) to create a public URL for your app.
This guide covers the main deployment options on Railway. Choose the approach that suits your setup, and start deploying your Phoenix apps effortlessly!
#### Want to deploy livebook?
[Livebook](https://livebook.dev), an interactive notebook tool built specifically for Elixir, provides a powerful and intuitive environment for exploring data, running code, and documenting insights, all in one place. It’s perfect for experimenting with Elixir code, prototyping, and sharing live documentation.
Click the button below to deploy an instance of Livebook quickly.
[](https://railway.com/new/template/4uLt1s)
#### Next steps
Explore these resources to learn how you can maximize your experience with Railway:
- [Deploy Phoenix with Distillery](/guides/phoenix-distillery)
- [Monitoring](/observability)
- [Deployments](/deployments)
### Phoenix + Distillery
Source: https://docs.railway.com/guides/phoenix-distillery.md
Learn how to deploy a Phoneix app with Distillery to Railway with this step-by-step guide. It covers quick setup, ecto setup, database integration, one-click deploys and other deployment strategies.
[Phoenix](https://phoenixframework.org) is popular Elixir framework designed for building scalable, maintainable, and high-performance web applications. It is known for its ability to handle real-time features efficiently, like WebSockets, while leveraging Elixir's concurrency model, which is built on the Erlang Virtual Machine (BEAM).
In this guide, you'll learn how to deploy Phoenix apps with [Distillery](https://hexdocs.pm/distillery/home.html) to Railway.
#### Create a Phoenix app with Distillery
**Note:** If you already have a Phoenix app locally or on GitHub, you can skip this step and go straight to the [Deploy Phoenix App with Distillery to Railway](#deploy-phoenix-app-on-railway).
To create a new Phoenix app, ensure that you have [Elixir](https://elixir-lang.org/install.html) and [Hex package manager](https://hexdocs.pm/phoenix/installation.html) installed on your machine. Once everything is set up, run the following command in your terminal to install the Phoenix application generator:
```bash
mix archive.install hex phx_new
```
Next, run the following command:
```bash
mix phx.new helloworld_distillery
```
Select `Y` to install all dependencies.
This command will create a new Phoenix app named `helloworld_distillery` with some optional dependencies such as:
- [Ecto](https://hexdocs.pm/phoenix/ecto.html) for communicating with a database such as PostgreSQL, MySQL etc
- [Phoenix live view](https://hexdocs.pm/phoenix_live_view) for building realtime & interactive web apps.
- [Phoenix HTML and Tailwind CSS](https://hexdocs.pm/phoenix_html/Phoenix.HTML.html) for HTML apps.
##### Configure database
Next, navigate into the `helloworld` directory using the `cd` command.
Open up the `config/dev.exs` file. You'll notice that a new Phoenix app is already set up with PostgreSQL settings. It assumes the database has a `postgres` user with the right permissions and a default password of `postgres`. Update the username and password to match your local PostgreSQL account credentials.
**Note**: If you prefer using a different database, like MySQL, you can easily switch the database adapter in the `mix.exs` file. Simply remove the `Postgrex` dependency and add `MyXQL` instead. For detailed instructions, check out this [guide on using other databases](https://hexdocs.pm/phoenix/ecto.html#using-other-databases) in Phoenix.
The default database name is set to `helloworld_dev`, but feel free to change it to whatever you'd prefer.
Next, create the database for your app by running the following command:
```bash
mix ecto.create
```
A database will be created for your app.
##### Add and configure Distillery
1. Open up the `mix.exs` file and add Distillery to the deps function:
```elixir
defp deps do
[ ...,
{:distillery, "~> 2.1"},
...,
]
end
```
Now, run `mix deps.get` to update your dependencies.
2. Open up `config/prod.exs` file and update the endpoint section to the following:
```elixir
config :helloworld_distillery, HelloworldDistilleryWeb.Endpoint,
cache_static_manifest: "priv/static/cache_manifest.json",
server: true,
root: ".",
version: Application.spec(:phoenix_distillery, :vsn)
```
`server` configures the endpoint to boot the Cowboy application http endpoint on start.
`root` configures the application root for serving static files
`version` ensures that the asset cache will be busted on versioned application upgrades.
3. Initialize your Distillery release by running the following command:
```bash
mix distillery.init
```
This will create the `rel/config.exs` and `rel/vm.args` files. A `rel/plugins` directory will be created too.
4. Create a Mix config file at `rel/config/config.exs`. Here, a mix config provider is being created. Add the following to it:
```elixir
import Config
port = String.to_integer(System.get_env("PORT") || "4000")
default_secret_key_base = :crypto.strong_rand_bytes(43) |> Base.encode64
config :helloworld_distillery, HelloworldDistilleryWeb.Endpoint,
http: [port: port],
url: [host: "localhost", port: port],
secret_key_base: System.get_env("SECRET_KEY_BASE") || default_secret_key_base
```
Now, update the `rel/config.exs` file to use your new provider. In the `environment :prod` part of the file, replace with the following:
```elixir
environment :prod do
set include_erts: true
set include_src: false
set cookie: :"Jo2*~U0C1x!*E}!o}W*(mx=pzd[XWG[bW)T~_Kjy3eJuEJ;M&!eqj7AUR1*9Vw]!"
set config_providers: [
{Distillery.Releases.Config.Providers.Elixir, ["${RELEASE_ROOT_DIR}/etc/config.exs"]}
]
set overlays: [
{:copy, "rel/config/config.exs", "etc/config.exs"}
]
end
```
5. Finally, let's configure Ecto to fetch the database credentials from the runtime environment variables.
Open the `lib/helloworld_distillery/repo.ex` file and modify it to this:
```elixir
defmodule HelloworldDistillery.Repo do
use Ecto.Repo,
otp_app: :helloworld_distillery,
adapter: Ecto.Adapters.Postgres,
pool_size: 10
def init(_type, config) do
{:ok, Keyword.put(config, :url, System.get_env("DATABASE_URL"))}
end
end
```
##### Build the release with Distillery
To build the release, run the following command:
```bash
npm run deploy --prefix assets && MIX_ENV=prod mix do phx.digest, distillery.release --env=prod
```
###### Handling errors
If you encounter the following error after running the command:
```bash
==> Invalid application `:sasl`! The file sasl.app does not exist or cannot be loaded.
```
You need to modify your `mix.exs` file to include `:sasl`. Open the file and add `:sasl` to the `extra_applications` list in the `application` function:
```elixir
def application do
[
mod: {HelloworldDistillery.Application, []},
extra_applications: [:logger, :runtime_tools, :sasl]
]
end
```
After saving your changes, try running the command again as a super user to prevent access errors:
```bash
sudo npm run deploy --prefix assets && MIX_ENV=prod mix do phx.digest, distillery.release --env=prod
```
**Additional Errors**
If you encounter this error:
```bash
Failed to archive release: _build/prod/rel/helloworld_distillery/releases/RELEASES: no such file or directory
```
You’ll need to create the `RELEASES` directory manually. Once created, run the command again.
###### Successful build
Upon a successful build, you should see output similar to the following:
```bash
...
==> Packaging release..
Release successfully built!
To start the release you have built, you can use one of the following tasks:
# start a shell, like 'iex -S mix'
> _build/prod/rel/helloworld_distillery/bin/helloworld_distillery console
# start in the foreground, like 'mix run --no-halt'
> _build/prod/rel/helloworld_distillery/bin/helloworld_distillery foreground
# start in the background, must be stopped with the 'stop' command
> _build/prod/rel/helloworld_distillery/bin/helloworld_distillery start
If you started a release elsewhere, and wish to connect to it:
# connects a local shell to the running node
> _build/prod/rel/helloworld_distillery/bin/helloworld_distillery remote_console
# connects directly to the running node's console
> _build/prod/rel/helloworld_distillery/bin/helloworld_distillery attach
For a complete listing of commands and their use:
> _build/prod/rel/helloworld_distillery/bin/helloworld_distillery help
```
##### Test the release with Distillery locally
Now, test your release locally. First, create your database by running the following command:
```bash
mix ecto.create
```
Next, export the necessary environment variables by running:
```bash
export DATABASE_URL=postgresql://username:password@127.0.0.1:5432/helloworld_distillery
export SECRET_KEY_BASE=
```
With the environment set up, you can start the release with:
```bash
_build/prod/rel/helloworld_distillery/bin/helloworld_distillery foreground
```
Once your app is running, open your browser and visit `http://localhost:4000` to see it in action.
With your app up and running locally, let's move on to deploying the release to Railway!
##### Prepare app for deployment
Since Distillery requires custom build phases, set the following in your Railway service settings:
- **Build command**: `mix local.hex --force && mix local.rebar --force && mix deps.get --only prod && mix compile && mkdir -p _build/prod/rel/helloworld_distillery/releases/RELEASES && mix do phx.digest, distillery.release --env=prod`
- **Start command**: `mix ecto.setup && _build/prod/rel/helloworld_distillery/bin/helloworld_distillery foreground`
Also set the `MIX_ENV` environment variable to `prod` in your service variables.
See [Start Command](/deployments/start-command) and [Build Command](/builds/build-and-start-commands#build-command) for more info.
**Tip:** For Distillery builds, you may also consider using a [Dockerfile](/builds/dockerfiles) for full control over the build process.
#### Deploy Phoenix app to Railway
Railway offers multiple ways to deploy your Phoenix app, depending on your setup and preference. Choose any of the following methods:
1. [One-click deploy from a template](#one-click-deploy-from-a-template).
2. [Using the CLI](#deploy-from-the-cli).
3. [From a GitHub repository](#deploy-from-a-github-repo).
#### One-click deploy from a template
If you’re looking for the fastest way to get started, the one-click deploy option is ideal. It sets up a Phoenix app with Distillery along with a Postgres database.
Click the button below to begin:
[](https://railway.com/new/template/_qWFnI)
After deploying, it is recommended that you [eject from the template](/templates/deploy#eject-from-template-repository) to create a copy of the repository under your own GitHub account. This will give you full control over the source code and project.
#### Deploy from the CLI
To deploy the Phoenix app using the Railway CLI, please follow the steps:
1. **Install the Railway CLI**:
- Install the CLI and authenticate it using your Railway account.
2. **Initialize a Railway Project**:
- Run the command below in your Phoenix app directory.
```bash
railway init
```
- Follow the prompts to name your project.
- After the project is created, click the provided link to view it in your browser.
3. **Deploy the Application**:
- Use the command below to deploy your app:
```bash
railway up
```
- This command will scan, compress and upload your app's files to Railway. You’ll see real-time deployment logs in your terminal.
**Note:** You might encounter an error––`warning: the VM is running with native name encoding of latin1 which` `may cause Elixir to malfunction as it expects utf8....`. Don’t worry, you’ll address this in the next step.
4. **Add a Database Service**:
- Run `railway add`.
- Select `PostgreSQL` by pressing space and hit **Enter** to add it to your project.
- A database service will be added to your Railway project.
5. **Configure Environment Variables**:
- Go to your app service **Variables** section and add the following:
- `SECRET_KEY_BASE` : Set the value to the your app's secret key. You can run `mix phx.gen.secret` locally to generate one.
- `LANG`and `LC_CTYPE`: Set both values to `en_US.UTF-8`. This sets your app's locale and gets rid of the _native name encoding of latin1_ warning.
- `DATABASE_URL`: Set the value to `${{Postgres.DATABASE_URL}}` (this references the URL of your new Postgres database). Learn more about [referencing service variables](/variables#referencing-another-services-variable).
- `ECTO_IPV6`: Set the value to `true` to enable your Phoenix app to connect to the database through the [IPv6 private network](/networking/private-networking#listen-on-ipv6).
- Use the **Raw Editor** to add any other required environment variables in one go.
6. **Redeploy the Service**:
- Click **Deploy** on the Railway Project Canvas to apply your changes.
7. **Verify the Deployment**:
- Once the deployment completes, go to [**View logs**](/observability/logs#build--deploy-panel) to check if the server is running successfully.
8. **Set Up a Public URL**:
- Navigate to the **Networking** section under the [Settings](/overview/the-basics#service-settings) tab of your new service.
- Click [Generate Domain](/networking/public-networking#railway-provided-domain) to create a public URL for your app.
#### Deploy from a GitHub repo
To deploy the Phoenix app to Railway, start by pushing the app to a GitHub repo. Once that’s set up, follow the steps below to complete the deployment process.
1. **Create a New Project on Railway**:
- Go to Railway to create a new project.
2. **Deploy from GitHub**:
- Select **Deploy from GitHub repo** and choose your repository.
- If your Railway account isn’t linked to GitHub yet, you’ll be prompted to do so.
3. **Add Environment Variables and Provision a Database Service**:
- Click **Add Variables**, but hold off on adding anything just yet. First, proceed with the next step.
- Right-click on the Railway project canvas or click the **Create** button, then select **Database** and choose **Add PostgreSQL**. This will create and deploy a new PostgreSQL database for your project.
- Once the database is deployed, you can return to adding the necessary environment variables:
- `SECRET_KEY_BASE` : Set the value to the your app's secret key. You can run `mix phx.gen.secret` locally to generate one.
- `LANG`and `LC_CTYPE`: Set both values to `en_US.UTF-8` to ensure proper locale settings and avoid the _native name encoding of latin1 warning_.
- `DATABASE_URL`: Set the value to `${{Postgres.DATABASE_URL}}` (this references the URL of your new Postgres database). Learn more about [referencing service variables](/variables#referencing-another-services-variable).
- `ECTO_IPV6`: Set the value to `true` to enable your Phoenix app to connect to the database through the [IPv6 private network](/networking/private-networking#listen-on-ipv6).
4. **Deploy the App Service**:
- Click **Deploy** on the Railway project canvas to apply your changes.
5. **Verify the Deployment**:
- Once the deployment completes, go to [**View logs**](/observability/logs#build--deploy-panel) to check if the server is running successfully.
**Note:** During the deployment process, Railway will automatically [detect that it’s an Elixir app](https://railpack.com/languages/elixir).
6. **Set Up a Public URL**:
- Navigate to the **Networking** section under the [Settings](/overview/the-basics#service-settings) tab of your new service.
- Click [Generate Domain](/networking/public-networking#railway-provided-domain) to create a public URL for your app.
This guide covers the main deployment options on Railway. Choose the approach that suits your setup, and start deploying your Phoenix apps with Distillery effortlessly!
#### Next steps
Explore these resources to learn how you can maximize your experience with Railway:
- [Monitoring](/observability)
- [Deployments](/deployments)
---
### Luminus
Source: https://docs.railway.com/guides/luminus.md
Learn how to deploy your Clojure Luminus app to Railway with this step-by-step guide. It covers quick setup, database integration, one-click deploys and other deployment strategies.
[Luminus](https://luminusweb.com) is a Clojure micro-framework based on a set of lightweight libraries. It aims to provide a robust, scalable, and easy to use platform. With Luminus you can focus on developing your app the way you want without any distractions.
This guide covers how to deploy a Luminus app to Railway in four ways:
1. [One-click deploy from a template](#one-click-deploy-from-a-template).
2. [From a GitHub repository](#deploy-from-a-github-repo).
3. [Using the CLI](#deploy-from-the-cli).
4. [Using a Dockerfile](#use-a-dockerfile).
Now, let's create a Luminus app!
#### Create a Luminus app
**Note:** If you already have a Luminus app locally or on GitHub, you can skip this step and go straight to the [Deploy Luminus App to Railway](#deploy-luminus-app-to-railway).
To create a new Luminus app, ensure that you have [JDK](https://www.oracle.com/java/technologies/downloads/) and [Leiningen](https://leiningen.org/#install) installed on your machine.
Run the following command in your terminal to create a new Luminus app with Postgres and a production ready server:
```bash
lein new luminus helloworld +postgres +immutant
```
A new Luminus app will be provisioned for you in the `helloworld` directory with support for PostgreSQL as the database and configures [Immutant](https://github.com/immutant/immutant) as the web server, which is production-ready and optimized for Clojure applications.
**Note:** If you use MySQL or another database, you can pass it as an option when trying to create a new app.
##### Run the Luminus app locally
Open `dev-config.edn` and add your Postgres database URL like so:
```clojure
:database-url "postgresql://username:password@127.0.0.1:5432/helloworld_dev"
```
- `username:password` is your database user and password.
- `helloworld_dev` is the database you have created locally.
Next, run `lein run migrate` to run the database migrations.
Finally, run `lein run` to launch your app!
Open your browser and go to `http://localhost:3000` to see the app.
##### Prepare Clojure Luminus app for deployment
1. Add the `cheshire` library to your dependencies. `cheshire` is a popular JSON encoding/decoding library in Clojure.
Open your `project.clj` file and ensure you have the following under `:dependencies`:
```clojure
...
[cheshire "5.10.0"]
```
Run the command below in your terminal to ensure it is installed:
```bash
lein deps
```
2. Set the start command in your Railway service settings to:
```
java -jar $(find ./target -name '*.jar' ! -name '*SNAPSHOT*') migrate && java -jar $(find ./target -name '*.jar' ! -name '*SNAPSHOT*')
```
See [Start Command](/deployments/start-command) for more info.
The command searches for all `.jar` files in the `target` directory (where the standalone JAR file is located after the build), excludes any file with "SNAPSHOT" in its name, and passes the selected file to `java -jar` to run. It starts by running the JAR file with the `migrate` option to apply database migrations. Once migrations are complete, it reruns the JAR file to launch the application.
#### Deploy the Luminus app to Railway
Railway offers multiple ways to deploy your Clojure app, depending on your setup and preference.
##### One-click deploy from a template
If you’re looking for the fastest way to get started, the one-click deploy option is ideal.
Click the button below to begin:
[](https://railway.com/new/template/DsDYI2)
It is highly recommended that [you eject from the template after deployment](/templates/deploy#eject-from-template-repository) to create a copy of the repo on your GitHub account.
**Note:** You can also choose from a variety of Clojure app templates created by the community.
##### Deploy from the CLI
1. **Install the Railway CLI**:
- Install the CLI and authenticate it using your Railway account.
2. **Initialize a Railway Project**:
- Run the command below in your Luminus app directory.
```bash
railway init
```
- Follow the prompts to name your project.
- After the project is created, click the provided link to view it in your browser.
3. **Add a Postgres Database Service**:
- Run `railway add -d postgres`.
- Hit **Enter** to add it to your project.
- A database service will be added to your Railway project.
4. **Add a Service and Environment Variable**:
- Run `railway add`.
- Select `Empty Service` from the list of options.
- In the `Enter a service name` prompt, enter `app-service`.
- In the `Enter a variable` prompt, enter `DATABASE_URL=${{Postgres.DATABASE_URL}}`.
- The value, `${{Postgres.DATABASE_URL}}`, references the URL of your new Postgres database. Learn more about [referencing service variables](/variables#referencing-another-services-variable).
**Note:** Explore the [Railway CLI reference](/cli#add) for a variety of options.
5. **Deploy the Application**:
- Run `railway up` to deploy your app.
- This command will scan, compress and upload your app's files to Railway. You’ll see real-time deployment logs in your terminal.
- Once the deployment is complete, proceed to generate a domain for the app service.
6. **Set Up a Public URL**:
- Run `railway domain` to generate a public URL for your app.
- Visit the new URL to see your app live in action!
##### Deploy from a GitHub repo
To deploy a Clojure Luminus app to Railway directly from GitHub, follow the steps below:
1. **Create a New Project on Railway**:
- Go to Railway to create a new project.
2. **Deploy from GitHub**:
- Select **Deploy from GitHub repo** and choose your repository.
- If your Railway account isn’t linked to GitHub yet, you’ll be prompted to do so.
3. **Add Environment Variables and Provision a Database Service**:
- Click **Add Variables**, but hold off on adding anything just yet. First, proceed with the next step.
- Right-click on the Railway project canvas or click the **Create** button, then select **Database** and choose **Add PostgreSQL**.
- This will create and deploy a new PostgreSQL database for your project.
- Once the database is deployed, you can return to adding the necessary environment variables:
- `DATABASE_URL`: Set the value to `${{Postgres.DATABASE_URL}}` (this references the URL of your new Postgres database). Learn more about [referencing service variables](/variables#referencing-another-services-variable).
4. **Deploy the App Service**:
- Click **Deploy** on the Railway project canvas to apply your changes.
5. **Verify the Deployment**:
- Once the deployment completes, go to [**View logs**](/observability/logs#build--deploy-panel) to check if the server is running successfully.
**Note:** During the deployment process, Railway will automatically detect that it’s a Clojure app.
6. **Set Up a Public URL**:
- Navigate to the **Networking** section under the [Settings](/overview/the-basics#service-settings) tab of your new service.
- Click [Generate Domain](/networking/public-networking#railway-provided-domain) to create a public URL for your app.
##### Use a Dockerfile
1. Create a `Dockerfile` in the Luminus app's root directory.
2. Add the content below to the `Dockerfile`:
```bash
# Use the Clojure official image
# https://hub.docker.com/_/clojure
FROM clojure:temurin-23-lein-bookworm
# Create and change to the app directory.
WORKDIR /app
# Copy local code to the container image.
COPY . ./
# Build the app.
RUN lein uberjar
# Run the app by dynamically finding the standalone JAR file in the target/uberjar directory
CMD ["sh", "-c", "java -jar $(find target/uberjar -name '*.jar' ! -name '*SNAPSHOT*')"]
```
3. Either deploy via the CLI or from GitHub.
Railway automatically detects the `Dockerfile`, [and uses it to build and deploy the app.](/builds/dockerfiles)
**Note:** Railway supports also deployment from public and private Docker images.
This guide covers the main deployment options on Railway. Choose the approach that suits your setup, and start deploying your Clojure apps seamlessly!
#### Next steps
Explore these resources to learn how you can maximize your experience with Railway:
- [Add a Database Service](/databases/build-a-database-service)
- [Monitor your app](/observability)
## CLI
### Global options
Source: https://docs.railway.com/cli/global-options.md
Flags available across multiple Railway CLI commands.
Global options are flags that can be used with multiple Railway CLI commands.
#### Service
The `--service` option, shorthand `-s`, specifies which service to target. You can use either the service name or service ID.
```bash
railway logs --service backend
railway up --service api
railway variable list -s my-service
```
#### Environment
The `--environment` option, shorthand `-e`, specifies which environment to target. You can use either the environment name or environment ID.
```bash
railway logs --environment staging
railway up --environment production
railway variable list -e dev
```
#### JSON output
The `--json` option outputs results in JSON format, useful for scripting and automation.
```bash
railway status --json
railway variable list --json
railway logs --json
```
#### Skip confirmation
The `--yes` option, shorthand `-y`, skips confirmation prompts. Use this in scripts or CI/CD pipelines where interactive input isn't possible.
```bash
railway down --yes
railway redeploy -y
railway environment delete staging --yes
```
#### Help
The `--help` option, shorthand `-h`, displays help information for any command.
```bash
railway --help
railway up --help
railway logs -h
```
#### Version
The `--version` option displays the current Railway CLI version.
```bash
railway --version
```
### Deploying
Source: https://docs.railway.com/cli/deploying.md
Learn how to deploy your applications to Railway using the CLI.
The Railway CLI provides deployment capabilities for both local development workflows and automated CI/CD pipelines.
#### Quick deploy
The simplest way to deploy is with `railway up`:
```bash
# Link to your project first (if not already linked)
railway link
# Deploy the current directory
railway up
```
This command scans, compresses, and uploads your app's files to Railway. You'll see real-time deployment logs in your terminal.
Railway will build your code using [Railpack](/builds/railpack) or your [Dockerfile](/builds/dockerfiles), then deploy it.
#### Deployment modes
##### Attached mode (default)
By default, `railway up` streams build and deployment logs to your terminal:
```bash
railway up
```
This is useful for watching the build process and catching errors immediately.
##### Detached mode
Use `-d` or `--detach` to return immediately after uploading:
```bash
railway up -d
```
The deployment continues in the background. Check status in the dashboard or with `railway logs`.
##### CI mode
Use `-c` or `--ci` to stream only build logs and exit when the build completes:
```bash
railway up --ci
```
This is ideal for CI/CD pipelines where you want to see the build output but don't need to wait for deployment logs. Use `--json` to output logs in JSON format (also implies CI mode).
#### Targeting services and environments
##### Deploy to a specific service
If your project has multiple services, the CLI will prompt you to choose. You can also specify directly:
```bash
railway up --service my-api
```
##### Deploy to a specific environment
```bash
railway up --environment staging
```
##### Deploy to a specific project
Use `-p` or `--project` to deploy to a project without linking:
```bash
railway up --project --environment production
```
**Note:** When using `--project`, the `--environment` flag is required.
#### CI/CD integration
##### Using project tokens
For automated deployments, use a [Project Token](/integrations/api#project-token) instead of interactive login. Project tokens are scoped to a specific environment and can only perform deployment-related actions.
```bash
RAILWAY_TOKEN=XXXXXXXX-XXXX-XXXX-XXXX-XXXXXXXXXXXX railway up
```
Some actions you can perform with a project token:
- Deploying code - `railway up`
- Redeploying a deployment - `railway redeploy`
- Viewing build and deployment logs - `railway logs`
##### GitHub actions
Railway makes deployment status available to GitHub, so you can trigger actions after deployments complete.
###### Post-deployment actions
Use the `deployment_status` event to run commands after Railway deploys your app:
```yaml
name: Post-Deployment Actions
on:
deployment_status:
states: [success]
jobs:
post-deploy:
runs-on: ubuntu-latest
if: github.event.deployment_status.state == 'success'
steps:
- name: Run post-deploy actions
if: github.event.deployment.environment == 'production'
run: |
echo "Production deployment succeeded"
# Add your post-deploy commands here
```
See the [GitHub Actions Post-Deploy guide](/guides/github-actions-post-deploy) for more details.
###### PR environments with GitHub actions
Create Railway environments automatically for pull requests:
```yaml
name: Manage PR environments (Railway)
on:
pull_request:
types: [opened, closed]
env:
RAILWAY_API_TOKEN: ${{ secrets.RAILWAY_API_TOKEN }}
LINK_PROJECT_ID: "your-project-id"
DUPLICATE_FROM_ID: "environment-to-duplicate"
jobs:
pr_opened:
if: github.event.action == 'opened'
runs-on: ubuntu-latest
container: ghcr.io/railwayapp/cli:latest
steps:
- name: Link to project
run: railway link --project ${{ env.LINK_PROJECT_ID }} --environment ${{ env.DUPLICATE_FROM_ID }}
- name: Create Railway Environment for PR
run: railway environment new pr-${{ github.event.pull_request.number }} --copy ${{ env.DUPLICATE_FROM_ID }}
pr_closed:
if: github.event.action == 'closed'
runs-on: ubuntu-latest
container: ghcr.io/railwayapp/cli:latest
steps:
- name: Link to project
run: railway link --project ${{ env.LINK_PROJECT_ID }} --environment ${{ env.DUPLICATE_FROM_ID }}
- name: Delete Railway Environment for PR
run: railway environment delete pr-${{ github.event.pull_request.number }} || true
```
**Note:** If you are using a workspace project, ensure the token is scoped to your account, not a specific workspace.
See the [GitHub Actions PR Environment guide](/guides/github-actions-pr-environment) for the complete setup.
#### Redeploying
Redeploy the current deployment without uploading new code:
```bash
railway redeploy
```
This is useful for:
- Applying environment variable changes
- Restarting a crashed service
- Triggering a fresh build with the same code
#### Deploying a specific path
You can specify a path to deploy:
```bash
railway up ./backend
```
By default, Railway uses your project root as the archive base. Use `--path-as-root` to use the specified path as the archive root instead:
```bash
railway up ./backend --path-as-root
```
When running `railway up` from a subdirectory without a path argument, Railway still deploys from the project root. To deploy only a specific directory permanently, configure a [root directory](/deployments/monorepo#root-directory) in your service settings.
#### Ignoring files
By default, Railway respects your `.gitignore` file. To include ignored files in your deployment:
```bash
railway up --no-gitignore
```
#### Verbose output
For debugging deployment issues:
```bash
railway up --verbose
```
#### Related
- [CLI Reference](/cli) - Complete CLI command documentation
- [GitHub Autodeploys](/deployments/github-autodeploys) - Automatic deployments from GitHub
- [GitHub Actions Post-Deploy](/guides/github-actions-post-deploy) - Run actions after deployment
- [GitHub Actions PR Environment](/guides/github-actions-pr-environment) - Create environments for PRs
### Telemetry
Source: https://docs.railway.com/cli/telemetry.md
What the Railway CLI collects and how to opt out.
The Railway CLI collects usage telemetry to help improve the developer experience.
#### What is collected
| Field | Description |
|-------|-------------|
| Command name | The command that was run (e.g. `up`, `deploy`) |
| Subcommand name | The subcommand, if any (e.g. `list` in `variable list`) |
| Duration | How long the command took to execute, in milliseconds |
| Success | Whether the command completed successfully |
| Error message | A truncated error message if the command fails |
| OS | The operating system (e.g. `linux`, `macos`, `windows`) |
| Architecture | The CPU architecture (e.g. `x86_64`, `aarch64`) |
| CLI version | The version of the Railway CLI |
| CI | Whether the command was run in a CI environment |
No project source code, or environment variable values are collected.
#### Opting out
Set either environment variable to `1` to disable telemetry:
```bash
export DO_NOT_TRACK=1
# or
export RAILWAY_NO_TELEMETRY=1
```
`DO_NOT_TRACK` follows the [Console Do Not Track](https://consoledonottrack.com/) convention. `RAILWAY_NO_TELEMETRY` is a Railway-specific alternative.
### add
Source: https://docs.railway.com/cli/add.md
Add a service to your project.
Add a new service to your Railway project. You can add databases, GitHub repos, Docker images, or empty services.
#### Usage
```bash
railway add [OPTIONS]
```
#### Options
| Flag | Description |
|------|-------------|
| `-d, --database ` | Add a database (postgres, mysql, redis, mongo) |
| `-s, --service [NAME]` | Create an empty service (optionally with a name) |
| `-r, --repo ` | Create a service from a GitHub repo |
| `-i, --image ` | Create a service from a Docker image |
| `-v, --variables ` | Environment variables to set on the service |
| `--verbose` | Enable verbose logging |
| `--json` | Output in JSON format |
#### Examples
##### Interactive mode
```bash
railway add
```
Prompts you to select what type of service to add.
##### Add a database
```bash
railway add --database postgres
```
Add multiple databases at once:
```bash
railway add --database postgres --database redis
```
##### Add from GitHub repo
```bash
railway add --repo user/my-repo
```
##### Add from Docker image
```bash
railway add --image nginx:latest
```
##### Create an empty service
```bash
railway add --service
```
With a specific name:
```bash
railway add --service my-api
```
##### Add with environment variables
```bash
railway add --service api --variables "PORT=3000" --variables "NODE_ENV=production"
```
#### Behavior
When you add a service, it's automatically linked to your current directory. For databases, the new service is automatically deployed.
#### Related
- [railway service](/cli/service)
- [railway link](/cli/link)
### agent
Source: https://docs.railway.com/cli/agent.md
Interact with the Railway Agent to manage your project using natural language.
Interact with the Railway Agent directly from the CLI. Ask questions about your project, create resources, debug issues, and more using natural language. Starts an interactive session by default, or send a single prompt with the `-p` flag.
#### Usage
```bash
railway agent [OPTIONS]
```
#### Options
| Flag | Description |
|------|-------------|
| `-p, --prompt ` | Send a single prompt (omit for interactive mode) |
| `--json` | Output response as JSON |
| `--list` | List existing agent threads for the current environment |
| `--thread-id ` | Continue an existing chat thread (replays recent history) |
| `-s, --service ` | Service to scope the conversation to (name or ID) |
| `-e, --environment ` | Environment to use (defaults to linked environment) |
#### Examples
##### Start an interactive session
```bash
railway agent
```
##### Show logs for your project
```bash
railway agent -p "show me the logs for my project"
```
##### Create a database
```bash
railway agent -p "create a PostgreSQL database in this project"
```
##### Debug a failing service
```bash
railway agent -p "help me debug why my backend service is failing"
```
##### Check deployment status
```bash
railway agent -p "what's the status of my latest deployment?"
```
##### Investigate resource usage
```bash
railway agent -p "show me the memory and CPU usage for my services"
```
##### Scope to a specific service
```bash
railway agent -p "check the logs for errors" --service backend
```
##### Get configuration help
```bash
railway agent -p "what environment variables are set on my project?"
```
##### JSON output for scripting
```bash
railway agent -p "list my services and their status" --json
```
##### List previous conversations
```bash
railway agent --list
```
Returns the agent threads tied to the current environment, with their thread IDs, titles, and last-updated timestamps. Add `--json` for a machine-readable list.
##### Continue a previous conversation
```bash
railway agent --thread-id
```
When you resume a thread, the agent replays the recent message history before dropping you into interactive mode, so you can pick up where you left off. Pair with `--list` to find the thread ID you want.
#### Interactive mode
When run without `-p`, the agent starts an interactive session where you can have a back-and-forth conversation:
```
$ railway agent
Railway Agent (type 'exit' or Ctrl+C to quit)
> You: what services do I have?
Railway Agent: You have 3 services...
> You: show me the logs for the backend
Railway Agent: Here are the recent logs...
> You: exit
```
The agent maintains context within the session, so follow-up questions understand previous messages.
#### JSON output
Use `--json` to get a structured response for scripting and automation:
```bash
railway agent -p "list my services" --json
```
Returns a JSON object with:
```json
{
"threadId": "abc-123",
"response": "You have 3 services...",
"toolCalls": [
{
"toolName": "environmentStatusTool",
"args": { ... },
"result": { ... },
"isError": false
}
]
}
```
#### Authentication
The agent command requires user authentication via `railway login`. Project access tokens (`RAILWAY_TOKEN`) are not supported.
#### Related
- [railway logs](/cli/logs)
- [railway status](/cli/status)
- [railway deploy](/cli/deploy)
### autoupdate
Source: https://docs.railway.com/cli/autoupdate.md
Manage Railway CLI auto-update preferences.
Manage auto-update preferences for the Railway CLI on your local machine.
The command controls whether the CLI can automatically download or run updates
for the installed binary. It doesn't change any project, environment, or
service settings.
#### Usage
```bash
railway autoupdate
```
#### Subcommands
| Subcommand | Aliases | Description |
|------------|---------|-------------|
| `enable` | `on` | Enable automatic updates |
| `disable` | `off` | Disable automatic updates |
| `status` | | Show current auto-update status |
| `skip` | | Skip the current pending version |
#### Examples
##### Show auto-update status
```bash
railway autoupdate status
```
Shows whether automatic updates are enabled, disabled by local preference,
disabled by environment, or disabled in CI.
##### Enable automatic updates
```bash
railway autoupdate enable
```
Enables automatic updates unless they are disabled by `RAILWAY_NO_AUTO_UPDATE`
or by a CI environment.
##### Disable automatic updates
```bash
railway autoupdate disable
```
Disables future automatic updates. You can still update the CLI manually with
`railway upgrade`.
##### Skip a pending update
```bash
railway autoupdate skip
```
Skips the current pending version. Automatic updates resume when a newer version
is released.
#### Related
- [railway upgrade](/cli/upgrade)
- [railway docs](/cli/docs)
### bucket
Source: https://docs.railway.com/cli/bucket.md
Manage project buckets.
Manage storage buckets for your project.
#### Usage
```bash
railway bucket [OPTIONS]
```
#### Aliases
- `railway buckets`
##### Global options
| Flag | Description |
|------|-------------|
| `-e, --environment ` | Environment name or ID |
| `-b, --bucket ` | Bucket name or ID (used by `delete`, `info`, `credentials`, `rename`) |
```bash
railway bucket -b my-bucket -e production info
```
##### Subcommands
| Subcommand | Aliases | Description |
|------------|---------|-------------|
| [`list`](#list-buckets) | `ls` | List buckets |
| [`create`](#create-a-bucket) | `add`, `new` | Create a new bucket |
| [`delete`](#delete-a-bucket) | `remove`, `rm` | Delete a bucket |
| [`info`](#show-bucket-info) | `show`, `get` | Show bucket details |
| [`credentials`](#show-or-reset-credentials) | `creds` | Show or reset S3-compatible credentials |
| [`rename`](#rename-a-bucket) | `mv` | Rename a bucket |
#### List buckets
List all buckets deployed in the current environment.
```bash
railway bucket list
```
| Flag | Description |
|------|-------------|
| `--json` | Output in JSON format |
Default output:
```plaintext
my-bucket
another-bucket
```
With `--json`:
```json
[
{
"id": "bucket-id",
"name": "my-bucket"
},
{
"id": "another-bucket-id",
"name": "another-bucket"
}
]
```
#### Create a bucket
Create a new bucket and deploy it to the target environment. An optional name can be passed as a positional argument; if omitted, the API assigns a default.
```bash
railway bucket create my-bucket --region sjc
```
| Flag | Description |
|------|-------------|
| `-r, --region ` | Bucket region. Prompted interactively if omitted. |
| `--json` | Output in JSON format |
Available regions:
| Code | Location |
|------|----------|
| `sjc` | US West, California |
| `iad` | US East, Virginia |
| `ams` | EU West, Amsterdam |
| `sin` | Asia Pacific, Singapore |
Default output:
```plaintext
Created bucket my-bucket (sjc)
```
If the environment has unmerged [staged changes](/deployments/staged-changes), the operation is staged instead of committed directly. This applies to `create`, `delete`, and any other config-patching subcommand:
```plaintext
Created bucket my-bucket (sjc) and staged it for production (use 'railway environment edit' to commit)
```
With `--json`:
```json
{
"id": "bucket-id",
"name": "my-bucket",
"region": "sjc",
"staged": false,
"committed": true
}
```
#### Delete a bucket
Delete a bucket from the target environment. Requires confirmation unless `--yes` is passed.
```bash
railway bucket delete
railway bucket delete --yes
```
| Flag | Description |
|------|-------------|
| `-y, --yes` | Skip confirmation |
| `--2fa-code ` | 2FA code for verification |
| `--json` | Output in JSON format |
Default output:
```plaintext
Deleted bucket my-bucket
```
If the environment has unmerged [staged changes](/deployments/staged-changes), the deletion is staged instead of committed directly:
```plaintext
Staged deletion of bucket my-bucket for production (use 'railway environment edit' to commit)
```
With `--json`:
```json
{
"id": "bucket-id",
"name": "my-bucket",
"staged": false,
"committed": true
}
```
#### Show bucket info
Display bucket instance details including storage size, object count, and region.
```bash
railway bucket info
```
| Flag | Description |
|------|-------------|
| `--json` | Output in JSON format |
Default output:
```plaintext
Name: my-bucket
Bucket ID: bucket-id
Environment: production
Region: sjc
Storage: 1.2 GB
Objects: 3,456
```
With `--json`:
```json
{
"id": "bucket-id",
"name": "my-bucket",
"environmentId": "environment-id",
"environment": "production",
"region": "sjc",
"storageBytes": 1200000000,
"storage": "1.2 GB",
"objects": 3456
}
```
#### Show or reset credentials
Display S3-compatible credentials for the selected bucket. The default output uses `AWS_*=value` lines suitable for `eval` or piping into `.env` files. Pass `--reset` to invalidate existing credentials and generate new ones.
```bash
railway bucket credentials
railway bucket credentials --reset --yes
```
| Flag | Description |
|------|-------------|
| `--reset` | Reset S3 credentials (invalidates existing credentials) |
| `-y, --yes` | Skip confirmation when resetting (requires `--reset`) |
| `--2fa-code ` | 2FA code for verification when resetting (requires `--reset`) |
| `--json` | Output in JSON format |
Default output:
```plaintext
AWS_ENDPOINT_URL=https://storage.railway.app
AWS_ACCESS_KEY_ID=your-access-key
AWS_SECRET_ACCESS_KEY=your-secret-key
AWS_S3_BUCKET_NAME=my-bucket-abc123
AWS_DEFAULT_REGION=auto
AWS_S3_URL_STYLE=virtual
```
When `--reset` is used without `--json`, only a confirmation message is printed:
```plaintext
Credentials reset for my-bucket
```
To view the new credentials after resetting, run `railway bucket credentials` again or use `--reset --json`.
With `--json` (both with and without `--reset`):
```json
{
"endpoint": "https://storage.railway.app",
"accessKeyId": "your-access-key",
"secretAccessKey": "your-secret-key",
"bucketName": "my-bucket-abc123",
"region": "auto",
"urlStyle": "virtual"
}
```
#### Rename a bucket
Rename a bucket. Prompts for the new name interactively, or accepts `--name`.
```bash
railway bucket rename
railway bucket rename --name new-name
```
| Flag | Description |
|------|-------------|
| `-n, --name ` | New bucket name. Prompted interactively if omitted. |
| `--json` | Output in JSON format |
Default output:
```plaintext
Renamed my-bucket -> new-name
```
With `--json`:
```json
{
"id": "bucket-id",
"name": "new-name"
}
```
#### Related
- [Storage buckets](/storage-buckets)
### cdn
Source: https://docs.railway.com/cli/cdn.md
Manage CDN caching for a service.
Manage CDN caching settings for a service.
CDN caching requires an applied public domain. Add a Railway-provided or custom
domain before you enable CDN caching.
#### Usage
```bash
railway cdn [OPTIONS]
```
#### Subcommands
| Subcommand | Description |
|------------|-------------|
| `status` | Show CDN settings for a service |
| `enable` | Enable CDN caching |
| `disable` | Disable CDN caching |
| `update` | Update CDN caching settings |
| `purge` | Purge cached content |
#### Options
| Flag | Description |
|------|-------------|
| `-s, --service ` | Service name or ID |
| `-e, --environment ` | Environment to use |
| `-p, --project ` | Project ID to use |
| `--json` | Output in JSON format |
#### Examples
##### Show CDN settings
```bash
railway cdn status --service web
```
Shows whether CDN caching is available and enabled for the selected service.
##### Enable CDN caching
```bash
railway cdn enable --service web
```
Enables CDN caching with Railway's default settings.
##### Configure HTML caching and TTL
```bash
railway cdn update \
--html-caching force \
--default-ttl 4h
```
Sets HTML caching to `force` and the fallback TTL to 4 hours.
##### Configure stale-while-revalidate
```bash
railway cdn update --no-swr
```
Disables honoring `stale-while-revalidate` directives from your service.
##### Configure purge on deploy
```bash
railway cdn update --purge-on-deploy all
```
Clears all cached content after each successful deploy.
##### Purge cached HTML
```bash
railway cdn purge html
```
Clears cached HTML responses and leaves static assets in place.
##### Purge all cached content
```bash
railway cdn purge all
```
Clears all cached content for the service.
##### Disable CDN caching
```bash
railway cdn disable --service web
```
Disables CDN caching for the selected service.
#### Options for `update`
Use `railway cdn update` with one or more setting flags.
| Flag | Description |
|------|-------------|
| `--html-caching ` | Controls when HTML responses are cached |
| `--default-ttl ` | Fallback TTL: `30m`, `1h`, `2h`, `4h`, `12h`, `1d`, or matching seconds |
| `--swr` | Honor `stale-while-revalidate` directives |
| `--no-swr` | Ignore `stale-while-revalidate` directives |
| `--purge-on-deploy ` | Configure automatic cache purge after successful deploys |
#### Arguments for `purge`
| Argument | Description |
|----------|-------------|
| `` | Cache scope to purge |
#### Related
- [CDN](/networking/cdn)
- [Domains](/networking/domains)
- [railway domain](/cli/domain)
- [railway service](/cli/service)
### completion
Source: https://docs.railway.com/cli/completion.md
Generate shell completion scripts.
Generate shell completion scripts for the Railway CLI.
#### Usage
```bash
railway completion
```
#### Supported shells
- `bash`
- `zsh`
- `fish`
- `powershell`
- `elvish`
#### Examples
##### Bash
```bash
railway completion bash > /etc/bash_completion.d/railway
```
Or add to your `~/.bashrc`:
```bash
source <(railway completion bash)
```
##### Zsh
```bash
railway completion zsh > "${fpath[1]}/_railway"
```
Or add to your `~/.zshrc`:
```bash
source <(railway completion zsh)
```
##### Fish
```bash
railway completion fish > ~/.config/fish/completions/railway.fish
```
##### PowerShell
```powershell
railway completion powershell >> $PROFILE
```
#### Related
- [railway upgrade](/cli/upgrade)
### connect
Source: https://docs.railway.com/cli/connect.md
Connect to a database's shell.
Connect to a database's interactive shell (psql for Postgres, mongosh for MongoDB, etc.).
#### Usage
```bash
railway connect [SERVICE_NAME] [OPTIONS]
```
#### Options
| Flag | Description |
|------|-------------|
| `-e, --environment ` | Environment to pull variables from (defaults to linked environment) |
| `--ssh` | Tunnel to the database over SSH instead of a public TCP proxy. Auto-enabled when the service has no public proxy URL |
| `--no-ssh` | Force the public TCP proxy path and never fall back to SSH. Conflicts with `--ssh` |
| `--tunnel-only` | Open the local tunnel without launching a database client; prints connection details for external tools and holds the tunnel open until Ctrl+C. Implies `--ssh` |
| `-P, --port ` | Local port to bind for the SSH tunnel (defaults to an ephemeral port) |
#### Supported databases
| Database | Client Required |
|----------|-----------------|
| PostgreSQL | `psql` |
| MySQL | `mysql` |
| Redis | `redis-cli` |
| MongoDB | `mongosh` |
#### Examples
##### Connect to database (interactive)
```bash
railway connect
```
Prompts you to select a database service if multiple exist.
##### Connect to specific database
```bash
railway connect postgres
```
##### Connect to database in specific environment
```bash
railway connect postgres --environment staging
```
##### Point an external GUI client (TablePlus, DBeaver, pgAdmin, ...) at the database
```bash
railway connect postgres --tunnel-only
```
Opens a local SSH tunnel to the database and prints the host, port, user, password, database, and full connection URL, then holds the tunnel open until Ctrl+C. Use this when you want to point a GUI client at the database instead of an interactive shell.
#### Requirements
- The appropriate database client must be installed on your machine, unless using `--tunnel-only`
- If the database has no public [TCP Proxy](/networking/tcp-proxy), `railway connect` automatically tunnels over SSH instead — no public URL required
#### How it works
1. Detects the database type from the service's image
2. Fetches connection variables (`DATABASE_PUBLIC_URL`, `REDIS_PUBLIC_URL`, etc.)
3. If the service has a public TCP Proxy and `--ssh`/`--tunnel-only` weren't passed, launches the appropriate database client directly against it
4. Otherwise, opens a local SSH tunnel into the service and either launches the database client against the tunnel, or — with `--tunnel-only` — prints the connection details for an external client and holds the tunnel open
#### Related
- [railway ssh](/cli/ssh)
- [railway run](/cli/run)
### delete
Source: https://docs.railway.com/cli/delete.md
Delete a project.
Permanently delete a Railway project.
#### Usage
```bash
railway delete [OPTIONS]
```
#### Aliases
- `railway rm`
- `railway remove`
#### Options
| Flag | Description |
|------|-------------|
| `-p, --project ` | Project to delete |
| `-y, --yes` | Skip confirmation dialog |
| `--2fa-code ` | 2FA code for verification (if 2FA is enabled) |
| `--json` | Output in JSON format |
#### Examples
##### Interactive deletion
```bash
railway delete
```
Prompts you to select a project and confirm deletion.
##### Delete specific project
```bash
railway delete --project my-old-project
```
##### Skip confirmation
```bash
railway delete --project my-old-project --yes
```
##### With 2FA Code
```bash
railway delete --project my-project --yes --2fa-code 123456
```
#### Warning
This action is **permanent** and cannot be undone. All services, deployments, and data within the project will be deleted.
#### Related
- [railway init](/cli/init)
- [railway list](/cli/list)
### deploy
Source: https://docs.railway.com/cli/deploy.md
Provision a template into your project.
Deploy a template into your Railway project.
**Note:** This command deploys pre-built templates (like databases). To deploy your own code, use [railway up](/cli/up) instead.
#### Usage
```bash
railway deploy [OPTIONS]
```
#### Options
| Flag | Description |
|------|-------------|
| `-t, --template ` | The template code to deploy |
| `-v, --variable ` | Environment variables for the template |
#### Examples
##### Deploy a template (interactive)
```bash
railway deploy
```
##### Deploy PostgreSQL
```bash
railway deploy --template postgres
```
##### Deploy with variables
```bash
railway deploy --template postgres --variable "POSTGRES_USER=admin"
```
##### Deploy multiple templates
```bash
railway deploy --template postgres --template redis
```
##### Service-specific variables
Prefix variables with the service name:
```bash
railway deploy --template my-app --variable "Backend.PORT=3000"
```
#### Template codes
Common template codes:
- `postgres` - PostgreSQL database
- `mysql` - MySQL database
- `redis` - Redis database
- `mongo` - MongoDB database
Find more templates at [railway.com/deploy](https://railway.com/deploy).
#### Related
- [railway add](/cli/add)
- [Templates](/templates)
### deployment
Source: https://docs.railway.com/cli/deployment.md
Manage deployments.
List and manage deployments for your services.
#### Usage
```bash
railway deployment [OPTIONS]
```
#### Aliases
- `railway deployments`
#### Subcommands
| Subcommand | Aliases | Description |
|------------|---------|-------------|
| `list` | `ls` | List deployments with IDs, statuses, and timestamps |
| `up` | `deploy` | Upload and deploy (same as `railway up`) |
| `redeploy` | | Redeploy latest deployment (same as `railway redeploy`) |
#### Examples
##### List deployments
```bash
railway deployment list
```
Output:
```
Recent Deployments
7422c95b-c604-46bc-9de4-b7a43e1fd53d | SUCCESS | 2024-01-15 10:30:00 PST
a1b2c3d4-e5f6-7890-abcd-ef1234567890 | FAILED | 2024-01-15 09:15:00 PST
...
```
##### List more deployments
```bash
railway deployment list --limit 50
```
##### List deployments for specific service
```bash
railway deployment list --service backend
```
##### List deployments in JSON format
```bash
railway deployment list --json
```
Useful for scripting:
```bash
# Get the latest deployment ID
railway deployment list --json --limit 1 | jq -r '.[0].id'
```
##### Use deployment ID with logs
```bash
# Get deployment ID from list
railway deployment list
# View logs for specific deployment
railway logs 7422c95b-c604-46bc-9de4-b7a43e1fd53d
```
#### Options for `list`
| Flag | Description |
|------|-------------|
| `-s, --service ` | Service to list deployments for (defaults to linked service) |
| `-e, --environment ` | Environment to list deployments from (defaults to linked environment) |
| `--limit ` | Maximum number of deployments to show (default: 20, max: 1000) |
| `--json` | Output in JSON format |
#### Deployment statuses
| Status | Description |
|--------|-------------|
| `SUCCESS` | Deployment completed successfully |
| `FAILED` | Deployment failed |
| `CRASHED` | Deployment crashed after starting |
| `BUILDING` | Deployment is being built |
| `DEPLOYING` | Deployment is being deployed |
| `INITIALIZING` | Deployment is initializing |
| `WAITING` | Deployment is waiting |
| `QUEUED` | Deployment is queued |
| `REMOVED` | Deployment was removed |
| `REMOVING` | Deployment is being removed |
#### Related
- [railway up](/cli/up)
- [railway redeploy](/cli/redeploy)
- [railway logs](/cli/logs)
### dev
Source: https://docs.railway.com/cli/dev.md
Run Railway services locally.
Run your Railway services locally using Docker Compose, with automatic environment variable injection and HTTPS support.
**Note:** This is an experimental feature. The API may change without notice.
#### Usage
```bash
railway dev [COMMAND] [OPTIONS]
```
#### Aliases
- `railway develop`
#### Subcommands
| Subcommand | Aliases | Description |
|------------|---------|-------------|
| `up` | `start` | Start services (default) |
| `down` | `stop` | Stop services |
| `clean` | `reset` | Stop services and remove volumes/data |
| `configure` | `config` | Configure local code services |
#### Examples
##### Start local development
```bash
railway dev
```
Starts image-based services (databases, etc.) via Docker Compose and prompts you to configure code-based services.
##### Start with verbose output
```bash
railway dev --verbose
```
##### Stop services
```bash
railway dev down
```
##### Clean up (remove data)
```bash
railway dev clean
```
##### Configure Code services
```bash
railway dev configure
```
Interactively configure how your code services run locally (command, directory, port).
#### Options for `up`
| Flag | Description |
|------|-------------|
| `-e, --environment ` | Environment to use |
| `-o, --output ` | Output path for docker-compose.yml |
| `--dry-run` | Generate docker-compose.yml without starting |
| `--no-https` | Disable HTTPS and pretty URLs |
| `-v, --verbose` | Show verbose domain replacement info |
| `--no-tui` | Disable TUI, stream logs to stdout |
#### Options for `configure`
| Flag | Description |
|------|-------------|
| `--service ` | Specific service to configure (by name) |
| `--remove [SERVICE]` | Remove configuration for a service (optionally specify service name) |
##### Configure examples
Configure a specific service:
```bash
railway dev configure --service backend
```
Remove configuration for all services:
```bash
railway dev configure --remove
```
Remove configuration for a specific service:
```bash
railway dev configure --remove backend
```
#### Requirements
- [Docker](https://docs.docker.com/get-docker/) with Docker Compose
- [mkcert](https://github.com/FiloSottile/mkcert) (optional, for HTTPS support)
#### How it works
1. Fetches environment configuration from Railway
2. Generates a `docker-compose.yml` for image-based services (databases, etc.)
3. Starts containers with proper environment variables
4. Optionally runs code services locally with injected environment variables
5. Sets up a Caddy reverse proxy for HTTPS (if mkcert is available)
#### Related
- [railway run](/cli/run)
- [railway shell](/cli/shell)
### docs
Source: https://docs.railway.com/cli/docs.md
Open Railway Documentation in the browser.
Open the Railway documentation website in your default browser.
#### Usage
```bash
railway docs
```
#### Examples
```bash
railway docs
```
Opens [docs.railway.com](https://docs.railway.com) in your default browser.
#### Related
- [railway open](/cli/open)
### domain
Source: https://docs.railway.com/cli/domain.md
Add, list, inspect, update, or delete domains for a service.
Add, list, inspect, update, or delete domains for a service.
Running `railway domain` without a subcommand preserves the create behavior:
it generates a Railway-provided service domain when you don't pass `DOMAIN`, or
creates a custom domain when you do.
#### Usage
```bash
railway domain [OPTIONS] [DOMAIN] [COMMAND]
```
#### Subcommands
| Subcommand | Aliases | Description |
|------------|---------|-------------|
| `list` | `ls` | List domains for a service |
| `status` | | Show status and DNS details for a domain |
| `delete` | `remove`, `rm` | Delete a custom or service domain |
| `update` | `edit` | Update a domain |
| `certificate retry` | | Retry certificate issuance for a custom domain |
#### Options
| Flag | Description |
|------|-------------|
| `-p, --port ` | Port to connect to the domain when creating a domain |
| `-s, --service ` | Service to manage domains for |
| `-e, --environment ` | Environment to use |
| `--project ` | Project ID to use |
| `--json` | Output in JSON format |
#### Examples
##### Generate a Railway domain
```bash
railway domain
```
Creates a free `*.up.railway.app` domain for your service.
##### Add a custom domain
```bash
railway domain example.com
```
Returns the required DNS records to configure.
##### Add domain with specific port
```bash
railway domain example.com --port 8080
```
##### Add domain to specific service
```bash
railway domain example.com --service api
```
##### List service domains
```bash
railway domain list --service api
```
Lists Railway-provided and custom domains for the selected service and
environment.
##### Show domain status
```bash
railway domain status example.com
```
Shows domain status and DNS details. The identifier can be a domain name, URL,
or domain ID.
##### Update domain target port
```bash
railway domain update example.com --port 8080
```
Updates the target port that HTTP traffic routes to for the selected domain.
##### Rename a Railway-provided domain
```bash
railway domain update old-name.up.railway.app --domain new-name
```
Renames a Railway-provided service domain. The `--domain` value can be a full
service domain or a host label.
##### Retry certificate issuance
```bash
railway domain certificate retry example.com
```
Retries certificate issuance for a custom domain after you fix DNS or
certificate validation issues.
##### Delete a domain
```bash
railway domain delete example.com --yes
```
Deletes a custom or service domain. Omit `--yes` to confirm interactively.
#### Options for `update`
Use `railway domain update` with at least one setting flag.
| Flag | Description |
|------|-------------|
| `--port ` | Target port to route HTTP traffic to |
| `--domain ` | Rename a Railway-provided service domain |
#### Arguments for `status`, `delete`, `update`, and `certificate retry`
| Argument | Description |
|----------|-------------|
| `` | Domain name, URL, or domain ID |
#### Options for `delete`
| Flag | Description |
|------|-------------|
| `-y, --yes` | Skip confirmation |
#### Custom domain setup
When adding a custom domain, the CLI displays the required DNS records: a
`CNAME` record and a `TXT` record. Both are required. The `CNAME` routes
traffic, and the `TXT` verifies domain ownership. Add both to your DNS provider
exactly as shown in the CLI output.
Requests to the domain will return a `404` until the `TXT` record is in place and Railway has verified ownership.
DNS changes can take up to 72 hours to propagate worldwide.
#### Limits
- One Railway-provided domain per service
- Multiple custom domains can be added per service
#### Related
- [Domains](/networking/domains)
- [Public networking](/networking/public-networking)
- [railway service](/cli/service)
### down
Source: https://docs.railway.com/cli/down.md
Remove the most recent deployment.
Delete the most recent successful deployment of a service.
#### Usage
```bash
railway down [OPTIONS]
```
#### Options
| Flag | Description |
|------|-------------|
| `-s, --service ` | Service to remove deployment from (defaults to linked service) |
| `-e, --environment ` | Environment to remove deployment from (defaults to linked environment) |
| `-y, --yes` | Skip confirmation dialog |
#### Examples
##### Remove latest deployment
```bash
railway down
```
##### Remove from specific service
```bash
railway down --service backend
```
##### Skip confirmation
```bash
railway down --yes
```
#### Behavior
This command removes only the latest successful deployment. The service itself is not deleted, and you can deploy again with `railway up`.
#### Related
- [railway up](/cli/up)
- [railway redeploy](/cli/redeploy)
### environment
Source: https://docs.railway.com/cli/environment.md
Manage environments.
Create, delete, edit, or link an environment.
#### Usage
```bash
railway environment [ENVIRONMENT] [COMMAND]
```
#### Aliases
- `railway env`
#### Subcommands
| Subcommand | Aliases | Description |
|------------|---------|-------------|
| `list` | `ls` | List all environments in the project |
| `link` | | Link an environment to the current project |
| `new` | `create`, `add` | Create a new environment |
| `delete` | `rm`, `remove` | Delete an environment |
| `edit` | `update` | Edit an environment's configuration |
| `config` | `show`, `info` | Show environment configuration |
#### Examples
##### Link an environment (interactive)
```bash
railway environment
```
##### Link a specific environment
```bash
railway environment staging
```
##### Create a new environment
```bash
railway environment new staging
```
##### Duplicate an environment
```bash
railway environment new staging --duplicate production
```
Or using the alias:
```bash
railway environment new staging --copy production
```
##### Delete an environment
```bash
railway environment delete staging
```
##### Edit environment configuration
```bash
railway environment edit --service-config backend variables.API_KEY.value "secret"
```
##### Show environment configuration
```bash
railway environment config
```
#### Options for `new`
| Flag | Description |
|------|-------------|
| `-d, --duplicate ` | Environment to duplicate (alias: `--copy`) |
| `--json` | Output in JSON format |
#### Options for `delete`
| Flag | Description |
|------|-------------|
| `-y, --yes` | Skip confirmation dialog |
| `--2fa-code ` | 2FA code for verification |
| `--json` | Output in JSON format |
#### Options for `edit`
| Flag | Description |
|------|-------------|
| `-e, --environment ` | Environment to edit |
| `-s, --service-config ` | Configure a service using dot-path notation |
| `-m, --message ` | Commit message for the changes |
| `--stage` | Stage changes without committing |
| `--json` | Output in JSON format |
##### Dot-path notation for `--service-config`
The `--service-config` flag uses dot-path notation to specify nested configuration values:
```bash
# Set a variable value
railway environment edit --service-config backend variables.API_KEY.value "secret"
# Set a service configuration
railway environment edit --service-config api buildCommand "npm run build"
```
The format is: `--service-config `
#### Options for `config`
| Flag | Description |
|------|-------------|
| `-e, --environment ` | Environment to show configuration for (defaults to linked environment) |
| `--json` | Output in JSON format |
##### Config examples
Show configuration for the current environment:
```bash
railway environment config
```
Show configuration for a specific environment:
```bash
railway environment config --environment staging
```
Output as JSON:
```bash
railway environment config --json
```
#### Related
- [railway link](/cli/link)
- [Environments](/environments)
### flag
Source: https://docs.railway.com/cli/flag.md
Manage feature flags from the command line.
Create, inspect, and target [feature flags](/feature-flags) for a project.
The `flag` command manages [feature flags](/feature-flags), which are available through Priority Boarding. It's under active development, and its commands and flags may change in breaking ways.
#### Usage
```bash
railway flag [OPTIONS]
```
#### Subcommands
| Subcommand | Aliases | Description |
|------------|---------|-------------|
| `list` | `ls` | List feature flags for a project |
| `set` | | Set a flag's default value, or attach a targeting rule with `--when` |
| `unset` | | Remove a targeting rule from a flag |
| `delete` | `rm`, `remove` | Delete a feature flag |
#### Target a project
Create a [project token](/integrations/api#project-token) from the tokens page in your project settings, then set it as `RAILWAY_TOKEN`:
```bash
export RAILWAY_TOKEN=
railway flag list
```
The CLI automatically uses the project that owns the token. You don't need to run `railway link`, set `RAILWAY_PROJECT_ID`, or pass `--scope`.
When you authenticate through `railway login` instead, run `railway link` once. The CLI uses the linked project for subsequent `railway flag` commands.
With user authentication, pass `--scope project:` only to override the locally linked project. You can also set the override with `RAILWAY_FLAGS_SCOPE=project:`. A project token remains limited to the project that owns it.
#### Examples
##### List flags
```bash
railway flag list
```
Add `--full` to show rule IDs and empty rule sections.
##### Set a flag's default
The type is inferred from the value: `true` or `false` becomes `bool`, a number becomes `number`, valid JSON becomes `json`, and anything else becomes `string`.
```bash
railway flag set checkout.v2 true
railway flag set theme "blue"
railway flag set api-rate-limit 100
railway flag set model-config '{"name":"small","temperature":0.2}'
```
Pass `--type` to set the type explicitly. Changing an existing flag's type clears its rules and requires `--force --type `.
##### Attach a targeting rule
`--when` adds a rule that serves the value when its condition matches, instead of changing the default. The flag must already exist.
```bash
railway flag set checkout.v2 true --when 'plan == "enterprise"'
railway flag set checkout.v2 true --when "bucket(key) < 0.25"
```
Rules are keyed by `--rule-id`. Reuse an ID to replace a rule. Omit it and the CLI derives a stable ID from the name and expression.
##### Roll out to a percentage of a segment
Combine conditions with `&&` and `||` in a single rule. This serves `true` to 25% of enterprise users:
```bash
railway flag set checkout.v2 true \
--when 'plan == "enterprise" && bucket(key) < 0.25'
```
##### Remove a rule
```bash
railway flag unset checkout.v2 --rule-id enterprise-on
```
##### Delete a flag
```bash
railway flag delete checkout.v2
```
#### Targeting expressions
`--when` takes a CEL-style expression or raw JSON.
| Form | Example |
|------|---------|
| Comparison | `plan == "enterprise"`, `region == "us-west"` |
| List membership | `plan in ["enterprise", "pro"]` |
| Percentage rollout | `bucket(key) < 0.25` |
| Boolean logic | `plan == "enterprise" && bucket(key) < 0.25`, `!(plan == "free")` |
Comparison operators are `==`, `!=`, `<`, `<=`, `>`, `>=`, `contains`, and `matches`. Bucket thresholds are between 0 and 1, so `< 0.25` is 25%. Target rules on the attributes your app passes in the [evaluation context](/feature-flags#read-a-flag), like `plan` or `region`. The bucket attribute is the stable key each subject is hashed on, typically the `key` in that context.
#### Options
##### Global options
| Flag | Description |
|------|-------------|
| `--scope ` | Override the linked project in the format `project:` |
| `--json` | Output in JSON format |
##### Options for `set`
| Argument or flag | Description |
|------------------|-------------|
| `` | Flag name. Letters, numbers, dots, dashes, and underscores. Required |
| `` | Default value, or the rule's value when `--when` is passed. Required |
| `--when ` | Attach a targeting rule with this condition instead of changing the default |
| `--rule-id ` | Stable rule ID for `--when`. Defaults to a hash of the name and expression |
| `--type ` | Flag type: `bool`, `string`, `number`, or `json`. Inferred from the value when omitted |
| `--force` | Allow replacing an existing flag's type, which clears its rules |
##### Options for `list`
| Flag | Description |
|------|-------------|
| `--full` | Show rule IDs and empty rule sections |
##### Options for `unset`
| Argument or flag | Description |
|------------------|-------------|
| `` | Flag name. Required |
| `--rule-id ` | Rule ID to remove. Required |
##### Options for `delete`
| Argument or flag | Description |
|------------------|-------------|
| `` | Flag name to delete. Required |
#### Related
- [Feature flags](/feature-flags)
- [railway setup](/cli/setup)
### functions
Source: https://docs.railway.com/cli/functions.md
Manage project functions.
Manage serverless functions in your Railway project.
#### Usage
```bash
railway functions [OPTIONS]
```
#### Aliases
- `railway function`
- `railway func`
- `railway fn`
- `railway funcs`
- `railway fns`
#### Subcommands
| Subcommand | Aliases | Description |
|------------|---------|-------------|
| `list` | `ls` | List functions |
| `new` | `create`, `add` | Add a new function |
| `delete` | `remove`, `rm` | Delete a function |
| `push` | `up`, `deploy` | Push changes to a function |
| `pull` | | Pull changes from a linked function |
| `link` | | Link a function manually |
#### Examples
##### List functions
```bash
railway functions list
```
##### Create a new function
```bash
railway functions new --path ./my-function.ts --name my-function
```
##### Create an HTTP function
```bash
railway functions new --path ./api.ts --name api --http
```
##### Create a cron function
```bash
railway functions new --path ./job.ts --name cleanup --cron "0 * * * *"
```
##### Push changes
```bash
railway functions push
```
##### Push with watch mode
```bash
railway functions push --watch
```
##### Pull remote changes
```bash
railway functions pull
```
##### Delete a function
```bash
railway functions delete --function my-function
```
##### Link a function
```bash
railway functions link --function my-function --path ./local-function.ts
```
#### Options for `new`
| Flag | Description |
|------|-------------|
| `-p, --path ` | Path to the function file |
| `-n, --name ` | Name of the function |
| `-c, --cron ` | Cron schedule for the function |
| `--http` | Generate a domain for HTTP access |
| `-s, --serverless` | Enable serverless mode (sleeping) |
| `-w, --watch` | Watch for changes and deploy on save |
#### Options for `push`
| Flag | Description |
|------|-------------|
| `-p, --path ` | Path to the function |
| `-w, --watch` | Watch for changes and deploy on save |
#### Options for `delete`
| Flag | Description |
|------|-------------|
| `-f, --function ` | ID or name of the function to delete |
| `-y, --yes` | Skip confirmation dialog |
#### Common options
| Flag | Description |
|------|-------------|
| `-e, --environment ` | Environment ID or name |
#### Related
- [Functions](/functions)
### init
Source: https://docs.railway.com/cli/init.md
Create a new project.
Create a new Railway project and link it to the current directory.
#### Usage
```bash
railway init [OPTIONS]
```
#### Aliases
- `railway new`
#### Options
| Flag | Description |
|------|-------------|
| `-n, --name ` | Project name (randomly generated if not provided) |
| `-w, --workspace ` | Workspace to create the project in |
| `--json` | Output in JSON format |
#### Examples
##### Interactive project creation
```bash
railway init
```
Prompts you to select a workspace and enter a project name.
##### Create with specific name
```bash
railway init --name my-api
```
##### Create in specific workspace
```bash
railway init --name my-api --workspace "My Team"
```
##### Non-interactive (CI/CD)
```bash
railway init --name my-api --workspace my-team-id --json
```
#### Output
After creation, the project is automatically linked to your current directory. You can start deploying with `railway up`.
#### Related
- [railway link](/cli/link)
- [railway up](/cli/up)
- [railway project](/cli/project)
### link
Source: https://docs.railway.com/cli/link.md
Associate an existing project with the current directory.
Link an existing Railway project to the current directory. Once linked, commands like `railway up` and `railway logs` will target this project.
#### Usage
```bash
railway link [OPTIONS]
```
#### Options
| Flag | Description |
|------|-------------|
| `-p, --project ` | Project to link to |
| `-e, --environment ` | Environment to link to |
| `-s, --service ` | Service to link to |
| `-w, --workspace ` | Workspace to link to |
| `-t, --team ` | Team to link to (deprecated, use `--workspace`) |
| `--json` | Output in JSON format |
#### Examples
##### Interactive linking
```bash
railway link
```
Prompts you to select a workspace, project, environment, and optionally a service.
##### Link to specific project
```bash
railway link --project my-api
```
##### Link to specific environment
```bash
railway link --project my-api --environment staging
```
##### Link to specific service
```bash
railway link --project my-api --service backend
```
##### Non-interactive (CI/CD)
```bash
railway link --project abc123 --environment def456 --json
```
#### How it works
Railway stores the link configuration in a `.railway` directory in your project root. This file is typically added to `.gitignore`.
The link includes:
- Project ID
- Environment ID
- Service ID (optional)
#### Related
- [railway unlink](/cli/unlink)
- [railway init](/cli/init)
- [railway status](/cli/status)
### list
Source: https://docs.railway.com/cli/list.md
List all projects in your Railway account.
List all projects across all workspaces in your Railway account.
#### Usage
```bash
railway list [OPTIONS]
```
#### Aliases
- `railway ls`
#### Options
| Flag | Description |
|------|-------------|
| `--json` | Output in JSON format |
#### Examples
##### List all projects
```bash
railway list
```
Output:
```
My Team
my-api
frontend-app
Personal
side-project
```
The currently linked project is highlighted in purple.
##### JSON output
```bash
railway list --json
```
Returns an array of all projects with their workspace information.
#### Related
- [railway link](/cli/link)
- [railway init](/cli/init)
- [railway project](/cli/project)
### login
Source: https://docs.railway.com/cli/login.md
Login to your Railway account.
Login to your Railway account to authenticate the CLI.
Sign-in and sign-up are the same flow: if you don't have a Railway account yet, `railway login` creates one on the fly — there is no separate signup command. New users accept the Terms of Service and Fair Use Policy as part of authorizing the CLI.
**Tip:** if your goal is to deploy, you can skip this step entirely — [`railway up`](/cli/up) signs you in (or up) as part of the deploy.
#### Usage
```bash
railway login [OPTIONS]
```
#### Options
| Flag | Description |
|------|-------------|
| `-b, --browserless` | Login without opening a browser (uses pairing code) |
#### Examples
##### Browser login (default)
Opens your default browser to authenticate:
```bash
railway login
```
If no local browser can open — over SSH, in a container, or with no display — the CLI automatically falls back to the browserless device-code flow. `railway login` also works from non-interactive shells (such as an agent's terminal): it prints the sign-in URL and waits for you to finish in the browser.
##### Browserless login
Use this in environments without a browser (e.g., SSH sessions):
```bash
railway login --browserless
```
This displays a pairing code and URL. Visit the URL and enter the code on any device to authenticate.
#### Environment variables
The CLI supports two environment variables for non-interactive authentication (e.g., CI/CD pipelines):
| Variable | Scope | Use case |
|----------|-------|----------|
| `RAILWAY_TOKEN` | Project-scoped | Deploying, managing variables, and other operations within a single project. Generated per-project in the dashboard. |
| `RAILWAY_API_TOKEN` | Account/workspace-scoped | Account-level operations like creating environments, managing multiple projects, or any action that requires broader access. Generated in Account Settings > Tokens. |
When either variable is set, the CLI skips interactive login and authenticates automatically. Only one may be set at a time — setting both will result in an error.
```bash
# Project-scoped: deploy within a linked project
RAILWAY_TOKEN=xxx railway up
# Account-scoped: manage environments across projects
RAILWAY_API_TOKEN=xxx railway environment new staging
```
See [Tokens](/cli#tokens) for how to generate each token type.
#### Related
- [railway up](/cli/up) — deploy and sign up/in in one step
- [railway logout](/cli/logout)
- [railway whoami](/cli/whoami)
- [Global Options](/cli/global-options)
### logout
Source: https://docs.railway.com/cli/logout.md
Logout of your Railway account.
Logout of your Railway account and clear stored credentials.
#### Usage
```bash
railway logout
```
#### Examples
```bash
railway logout
```
This clears your stored authentication token. You'll need to run `railway login` again to use authenticated commands.
#### Related
- [railway login](/cli/login)
- [railway whoami](/cli/whoami)
### logs
Source: https://docs.railway.com/cli/logs.md
View build, deploy, HTTP, or network flow logs.
View build, deploy, HTTP, or network flow logs for a service. `railway logs` streams logs in real time by default, or fetches historical logs when you pass `--lines`, `--since`, or `--until`.
#### Usage
```bash
railway logs [DEPLOYMENT_ID] [OPTIONS]
```
With no log type flag, the command shows deploy logs from the most recent successful deployment. Pass `--build`, `--http`, or `--network` to view a different log type. These flags are mutually exclusive. For deploy, build, and HTTP logs, you can pass a `DEPLOYMENT_ID` to target a specific deployment.
#### Options
These options apply to every log type:
| Flag | Description |
|------|-------------|
| `-s, --service ` | Service to view logs from (defaults to linked service) |
| `-e, --environment ` | Environment to view logs from (defaults to linked environment) |
| `-p, --project ` | Project to use (defaults to linked project) |
| `-n, --lines ` | Number of log lines to fetch (disables streaming) |
| `-f, --filter ` | Filter logs using Railway's query syntax |
| `-S, --since
 ```
##### Examples
Here are some example templates from the template marketplace in button form:
|Icon|Template|Button|
|:--:|:------:|:----:|
|
```
##### Examples
Here are some example templates from the template marketplace in button form:
|Icon|Template|Button|
|:--:|:------:|:----:|
| |Node|[](https://railway.com/new/template/ZweBXA?utm_medium=integration&utm_source=button&utm_campaign=node)|
|
|Node|[](https://railway.com/new/template/ZweBXA?utm_medium=integration&utm_source=button&utm_campaign=node)|
| |Deno|[](https://railway.com/new/template/LsaSsU?utm_medium=integration&utm_source=button&utm_campaign=deno)|
|
|Deno|[](https://railway.com/new/template/LsaSsU?utm_medium=integration&utm_source=button&utm_campaign=deno)|
| |Bun|[](https://railway.com/new/template/gxxk5g?utm_medium=integration&utm_source=button&utm_campaign=bun)|
|
|Bun|[](https://railway.com/new/template/gxxk5g?utm_medium=integration&utm_source=button&utm_campaign=bun)|
| |Gin|[](https://railway.com/new/template/dTvvSf?utm_medium=integration&utm_source=button&utm_campaign=gin)|
|
|Gin|[](https://railway.com/new/template/dTvvSf?utm_medium=integration&utm_source=button&utm_campaign=gin)|
| |Flask|[](https://railway.com/new/template/zUcpux?utm_medium=integration&utm_source=button&utm_campaign=flask)|
#### Kickback program
If your published template is deployed into other users' projects, you are eligible for kickbacks based on your support engagement. Learn more about the [kickback program](/templates/kickbacks).
#### Template verification
Templates are verified when the creator and maintainer of the technology becomes a partner and reviews the template.
If you are or have a relationship with the creator, please reach out to us by submitting the form on the [partners page](https://railway.com/partners).
---
### Kickbacks
Source: https://docs.railway.com/templates/kickbacks.md
Earn revenue from your templates through Railway's kickback program.
If you publish a template, and it is deployed into other users' projects, you are eligible for a kickback of the usage cost incurred. You can receive kickback earnings in Railway Credits or with Cash Withdrawal.
Read more about the kickback program [here](https://railway.com/open-source-kickback).
#### Eligibility requirements
To be eligible for template kickbacks, your template must meet the following requirements:
- **Marketplace**: Your template must be published to the [template marketplace](https://railway.com/templates). Private and unpublished templates are not eligible.
- **Terms of Service**: Your project must abide by Railway's [Fair Use Policy](https://railway.com/legal/fair-use) and [Terms of Service](https://railway.com/legal/terms). Templates that violate Railway's Terms of Service may be removed and kickback payments deemed ineligible.
#### Kickback rates
- Templates receive a **15%** kickback of the usage costs incurred by users deploying your template.
- Support Bonus: Additional **10% (25% total)** when actively supporting users via your [Template Queue](https://station.railway.com/my-template-queue)
#### How earnings are calculated
Kickbacks are calculated based on the proportional resource usage cost of your template services.
For example, if a user pays $20 in platform fees, then incurs $200 of usage from your template, you are eligible for up to a $50 kickback (25% of $200 for an open source template with active support).
**Minimum Payout:** The minimum kickback payout is $0.01. Any kickback amount below this threshold will not be processed.
#### Supporting your template users
When users have questions about your template, they'll appear in your [Template Queue](https://station.railway.com/my-template-queue) in Central Station. You'll get an email when new questions come in, plus occasional reminders if questions are waiting.
Answering these questions earns you the additional 10% support bonus and helps users deploy your template successfully.
Manage notification preferences in your [account settings](https://railway.com/account/notifications) under "Template Queue Emails".
|Flask|[](https://railway.com/new/template/zUcpux?utm_medium=integration&utm_source=button&utm_campaign=flask)|
#### Kickback program
If your published template is deployed into other users' projects, you are eligible for kickbacks based on your support engagement. Learn more about the [kickback program](/templates/kickbacks).
#### Template verification
Templates are verified when the creator and maintainer of the technology becomes a partner and reviews the template.
If you are or have a relationship with the creator, please reach out to us by submitting the form on the [partners page](https://railway.com/partners).
---
### Kickbacks
Source: https://docs.railway.com/templates/kickbacks.md
Earn revenue from your templates through Railway's kickback program.
If you publish a template, and it is deployed into other users' projects, you are eligible for a kickback of the usage cost incurred. You can receive kickback earnings in Railway Credits or with Cash Withdrawal.
Read more about the kickback program [here](https://railway.com/open-source-kickback).
#### Eligibility requirements
To be eligible for template kickbacks, your template must meet the following requirements:
- **Marketplace**: Your template must be published to the [template marketplace](https://railway.com/templates). Private and unpublished templates are not eligible.
- **Terms of Service**: Your project must abide by Railway's [Fair Use Policy](https://railway.com/legal/fair-use) and [Terms of Service](https://railway.com/legal/terms). Templates that violate Railway's Terms of Service may be removed and kickback payments deemed ineligible.
#### Kickback rates
- Templates receive a **15%** kickback of the usage costs incurred by users deploying your template.
- Support Bonus: Additional **10% (25% total)** when actively supporting users via your [Template Queue](https://station.railway.com/my-template-queue)
#### How earnings are calculated
Kickbacks are calculated based on the proportional resource usage cost of your template services.
For example, if a user pays $20 in platform fees, then incurs $200 of usage from your template, you are eligible for up to a $50 kickback (25% of $200 for an open source template with active support).
**Minimum Payout:** The minimum kickback payout is $0.01. Any kickback amount below this threshold will not be processed.
#### Supporting your template users
When users have questions about your template, they'll appear in your [Template Queue](https://station.railway.com/my-template-queue) in Central Station. You'll get an email when new questions come in, plus occasional reminders if questions are waiting.
Answering these questions earns you the additional 10% support bonus and helps users deploy your template successfully.
Manage notification preferences in your [account settings](https://railway.com/account/notifications) under "Template Queue Emails".